EMBARK ON YOUR CLOUD JOURNEY - A GUIDE TO CREATING A NEW AMAZON EC2 INSTANCES
In the realm of cloud computing, the Amazon Elastic Compute Cloud (EC2) service stands as a cornerstone of innovation, offering the power to deploy virtual servers with unparalleled flexibility and scalability. Whether you are an experienced cloud architect or just setting foot in the world of AWS, understanding how to create an EC2 instance is the first step towards harnessing the full potential of cloud-based computing.
In this comprehensive guide, we will walk you through the intricacies of creating an EC2 instance, demystifying the process from start to finish.
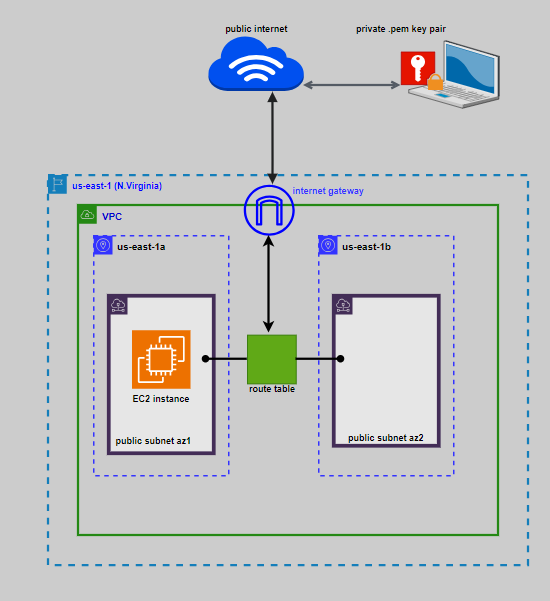
We will use the following reference architecture to accomplish our project.
Amazon Elastic Compute Cloud (Amazon EC2) is a virtual server within Amazon Web Services (AWS) that provides on-demand, scalable computing capacity in the Amazon Web Services (AWS) Cloud. It allows users to run applications, host websites, and perform various computing tasks in a scalable and flexible manner.
Some key advantages of EC2 is that it reduces hardware costs so you can develop and deploy applications faster. You can use Amazon EC2 to launch as many or as few virtual servers as you need, configure security and networking, and manage storage. You can add capacity (scale up) to handle compute-heavy tasks, such as monthly or yearly processes, or spikes in website traffic. When usage decreases, you can reduce capacity (scale down) again. This is where the name Elastic comes from.
According to our reference architecture, we will launch this ec2 instance in the Northern Virginia region us-east-1.
Our reference architecture has not specified the VPC CIDR and subnet CIDR blocks so we will assume the default VPC.
Remember when you first created an AWS account, a default VPC is always created for you.
A Virtual Private Cloud (VPC) is a network infrastructure service provided by Amazon Web Services (AWS) that allows users to create and manage isolated, secure, and customizable network environments within the AWS cloud.
Our reference architecture contains two data centers (availability zones) for high availability and fault-tolerance.
To create an EC2 instance we need key pairs.
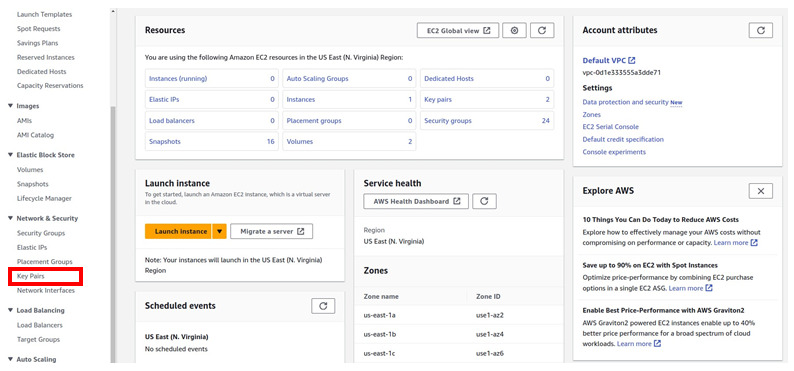
To create a key pair in the EC2 dashboard under network and security click key pairs
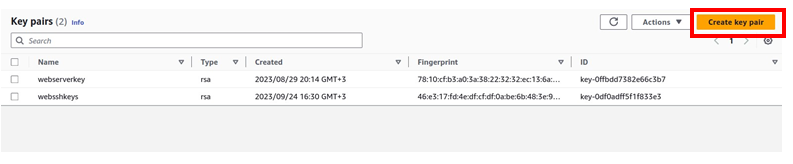
Then in the key pair dashboard click create key pairs.
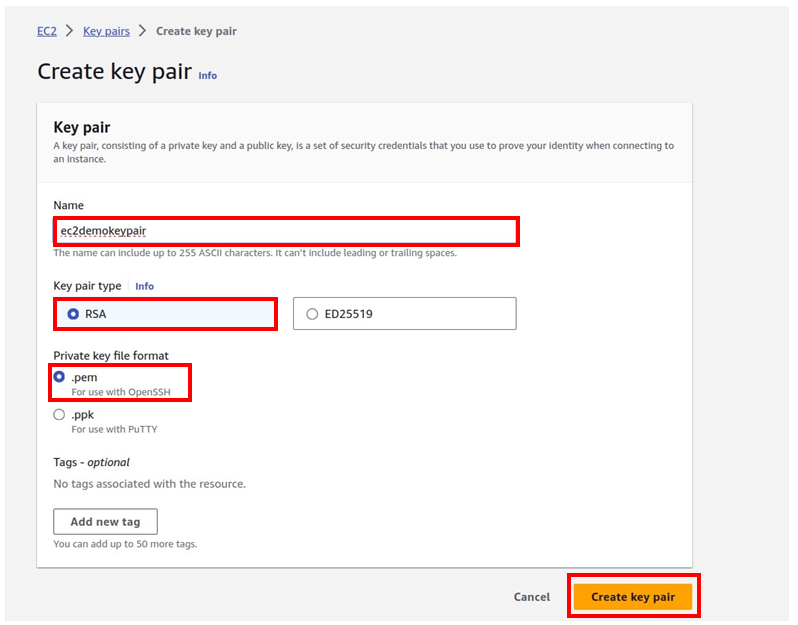
We will give our key pair a aname and I will call it ec2demokeypair. Key pair type will be RSA, and private key file formart will be .pem
Then click create key pair.
Succesfully created our key pairs. Take note of the directory where your private key is downloaded.
After creating our key pair we will now proceed and create our EC2 instance.
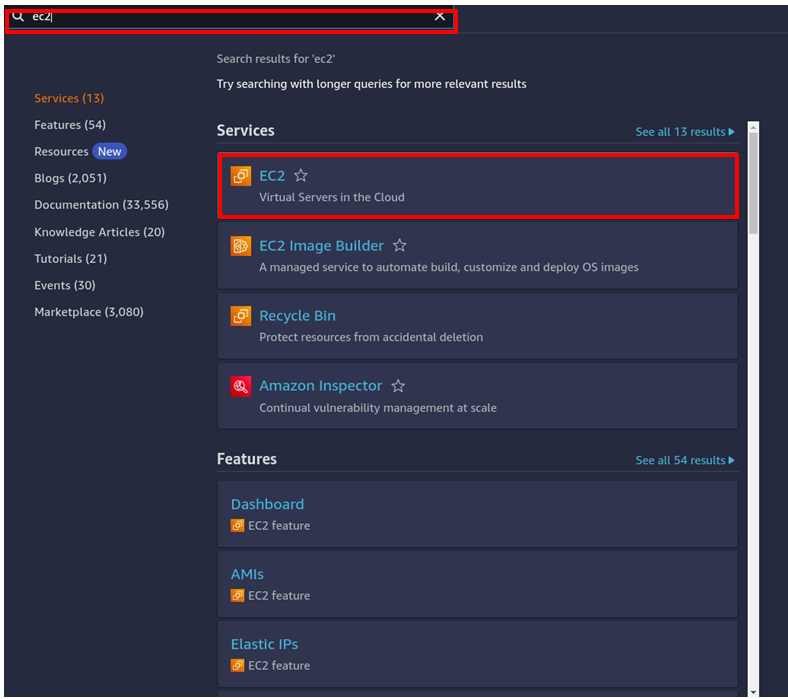
So in the search box, type EC2 then select EC2 under services.
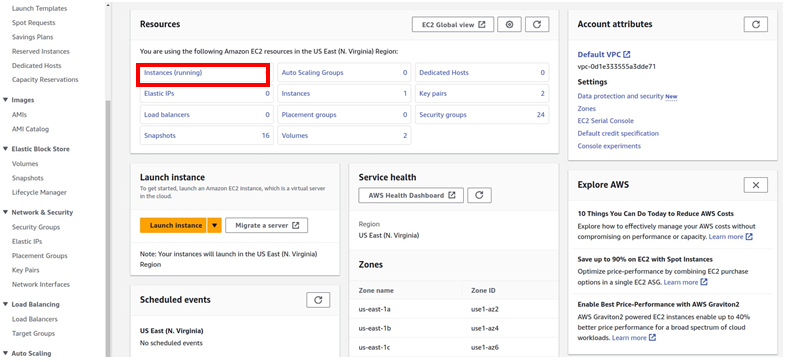
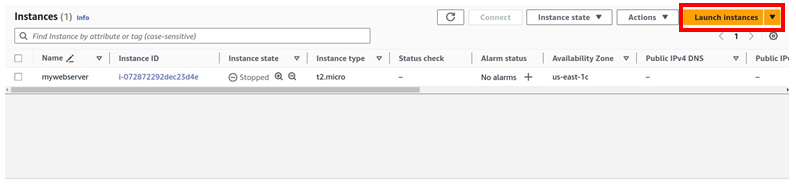
In the EC2 dashboard select instances then select launch instances.
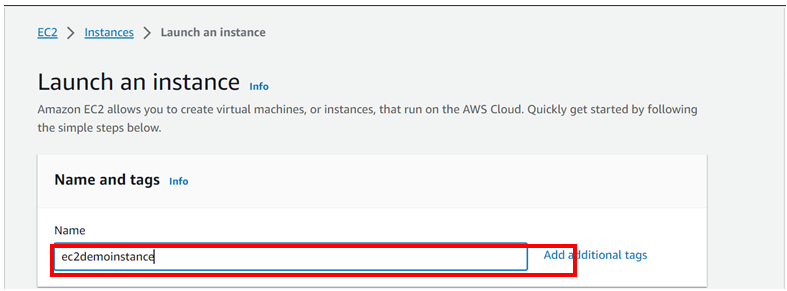
In the launch instance dashboard under name and tags, give your instance a name, and I will call it ec2demoinstance.
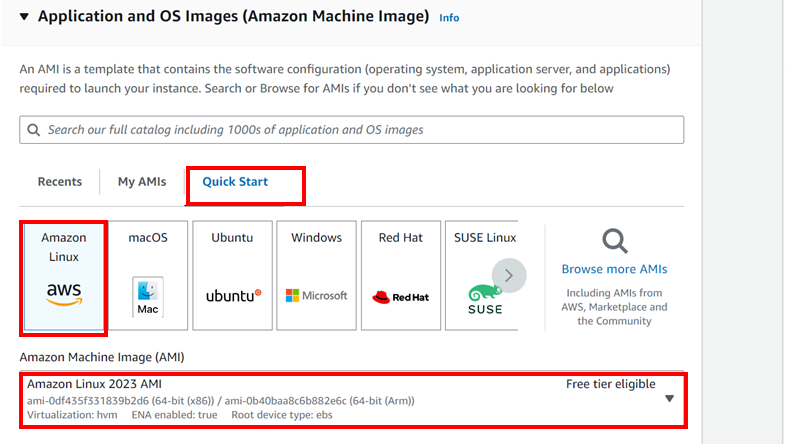
Then under application and OS Images, select the quickstart tab then select Amazon Linux.
Under Amazon machine Images, choose your machine image, I will leave it at Amazon Linux 2023 AMI this is free tier eligible.
Scroll down.
Under instance type, select the drop down and select t2.Micro, this is also free tier eligible then under key pair name select the drop down and select ec2demokey key pair you just created previously.
Scroll down, then click the edit button under networking.
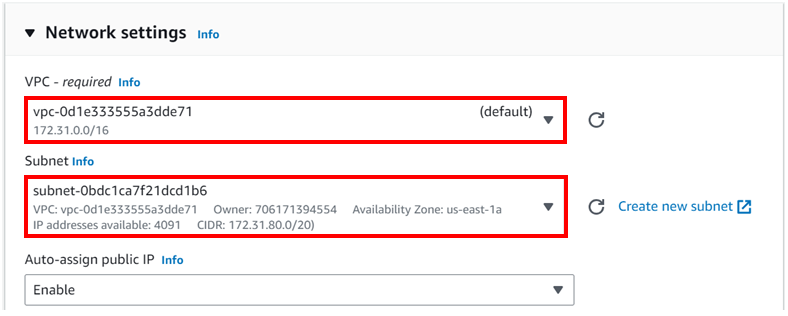
Under VPC, we will leave it at our default VPC as you can see its already selected. When you first create an AWS account, a VPC is always created for you.
Then under subnet let’s put this instance in the us-east-1a this is according to our reference architecture, select the drop down and select it.
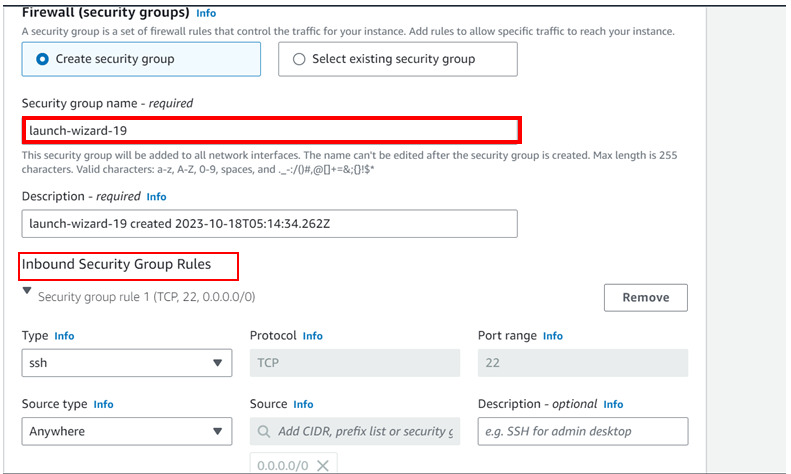
Then under firewall and security we will move with the launch wizard and if we can see its inbound rules security details description it allows SSH on port 22 and source is anywhere from the internet. This will enable us SSH into our instance
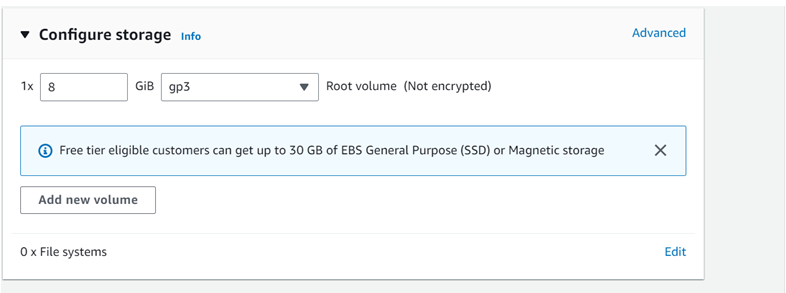
We will leave storage as default:
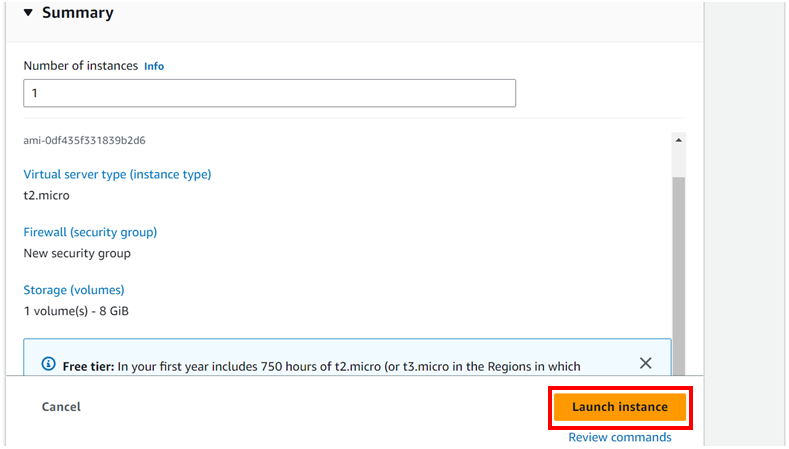
We will also not use advance details so we will leave it. Move under review summery, take a review and then click launch instance:
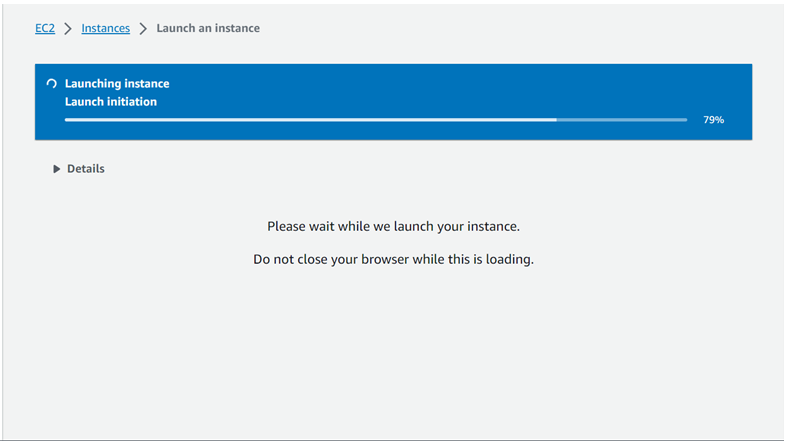
There we go, our instance is launching:
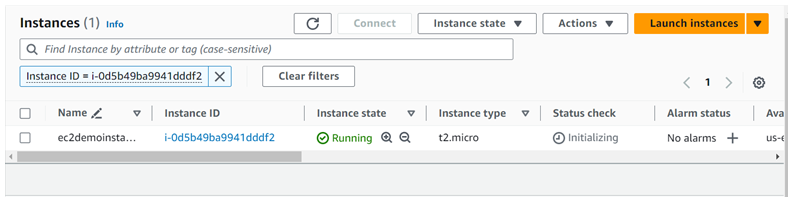
Then success, our instance has successfully launched click your instance ID to view it.
We can see our instance is up and running and the status cheque is initializing wait for it to pass the status cheque, meanwhile you can click the refresh button.
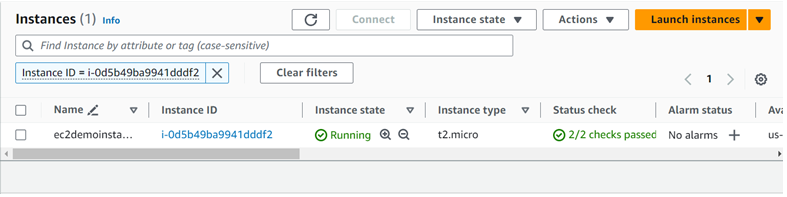
After waiting for a couple of seconds our instance has initialized and passed status cheque. You can now start performing your operations on your instance.
This is all we need to do for this project.
Clean up resources to avoid surprise bills. Stay tuned for more thank you for your time.
Feel free to reach out to us for any questions concerning this blog at sales@accendnetworks.com.


Your point of view caught my eye and was very interesting. Thanks. I have a question for you.
Thank you for your sharing. I am worried that I lack creative ideas. It is your article that makes me full of hope. Thank you. But, I have a question, can you help me?
Your point of view caught my eye and was very interesting. Thanks. I have a question for you.
Can you be more specific about the content of your article? After reading it, I still have some doubts. Hope you can help me.
Thanks for sharing. I read many of your blog posts, cool, your blog is very good.
Your point of view caught my eye and was very interesting. Thanks. I have a question for you. binance
Thank you for your sharing. I am worried that I lack creative ideas. It is your article that makes me full of hope. Thank you. But, I have a question, can you help me? https://www.binance.info/en-IN/register?ref=UM6SMJM3
Your article helped me a lot, is there any more related content? Thanks!
Your article helped me a lot, is there any more related content? Thanks!
Your point of view caught my eye and was very interesting. Thanks. I have a question for you.
Can you be more specific about the content of your article? After reading it, I still have some doubts. Hope you can help me.
Thank you for your sharing. I am worried that I lack creative ideas. It is your article that makes me full of hope. Thank you. But, I have a question, can you help me? https://www.binance.info/en-IN/register?ref=UM6SMJM3
I don’t think the title of your article matches the content lol. Just kidding, mainly because I had some doubts after reading the article.
Thanks for sharing. I read many of your blog posts, cool, your blog is very good.
Thank you for your sharing. I am worried that I lack creative ideas. It is your article that makes me full of hope. Thank you. But, I have a question, can you help me? https://accounts.binance.com/en/register-person?ref=JHQQKNKN