Configuring IP Cisco Secure Firepower Threat Defense (FTD) & Adding a Secure Firepower Management Center (FMC)
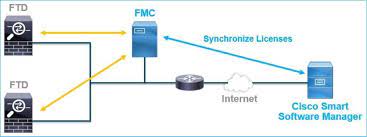
Cisco Secure Firepower Threat Defense (FTD) is a comprehensive security solution that combines firewall, intrusion prevention, and advanced threat protection capabilities. To effectively deploy and manage a Cisco FTD device, configuring the IP address is a critical step. This article provides a step-by-step guide on how to configure IP addresses in a Cisco Secure FTD device and its management interface, the Cisco Secure Firepower Management Center (FMC).
Step 1: Configuring IP on a Cisco FTD Device:
- Power on the FTD Device:
- Connect the power cable to the FTD device.
- Plug the power cable into a power outlet.
- Turn on the power switch on the FTD device.
- Connect to the FTD Device:
Step 2: Connect a console cable to the FTD device and your computer:
- Launch a terminal emulator program (e.g., PuTTY, SecureCRT).
- Configure the terminal emulator settings to match the appropriate serial port and communication parameters (e.g., baud rate, data bits, parity, stop bits).
- Access the FTD Device CLI:
Step 3: Open the terminal emulator program and select the appropriate serial port to which the console cable is connected.
- Set the communication parameters as configured in the previous step.
- Press Enter to display the FTD device login prompt.
- Log in to the FTD Device:
- At the login prompt, enter the default username "admin" and the default password "Admin123" (for newer versions) or "Admin123" (for older versions).
If prompted to change the default password, follow the instructions to set a new password.
Step 4: If prompted to change the default password, follow the instructions to set a new password.
configure network ipv4 manual
Replace `` with the desired IP address for the management interface and `` with the appropriate subnet mask.

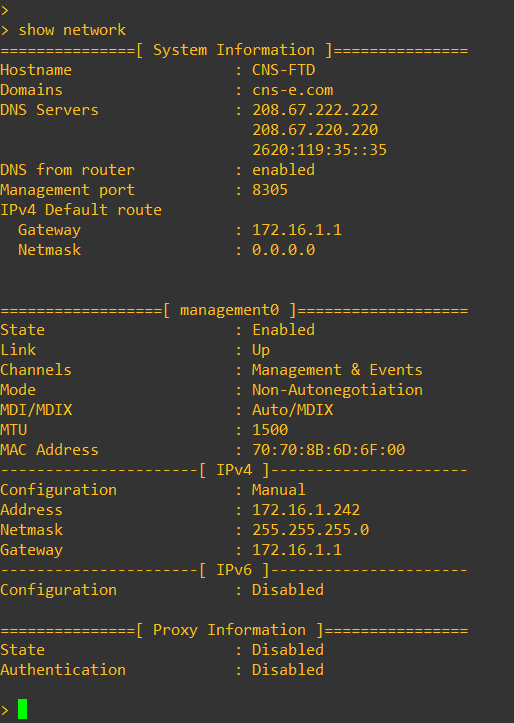
Step 4: Verify the configuration: Use the "show network" command to verify the IP address configuration for the management interface.

2. Configuring add manager on a FTD Device:
Step 1: Configure the FMC Manager:
Use the following command to add the FMC manager to the FTD device:
configure manager add <FMC_IP> <REGISTRATION_KEY>
Replace `<FMC_IP>` with the IP address of the FMC and `<REGISTRATION_KEY>` with the registration key provided by the FMC.
Step 2: Verify the FMC Manager Configuration:
To ensure that the FMC manager has been added successfully, enter the following command:
show managers
This command will display the FMC manager’s IP address and its status.

To add a Cisco Secure Firepower Threat Defense (FTD) device to a Secure Firepower Management Center (FMC) for centralized management and monitoring, follow these steps:
Step 1:Access the Firepower Management Center (FMC):
- Open a web browser on a computer connected to the same network as the FMC.
- Enter the IP address or hostname of the FMC in the browser's address bar.
- Log in to the FMC using valid administrator credentials.
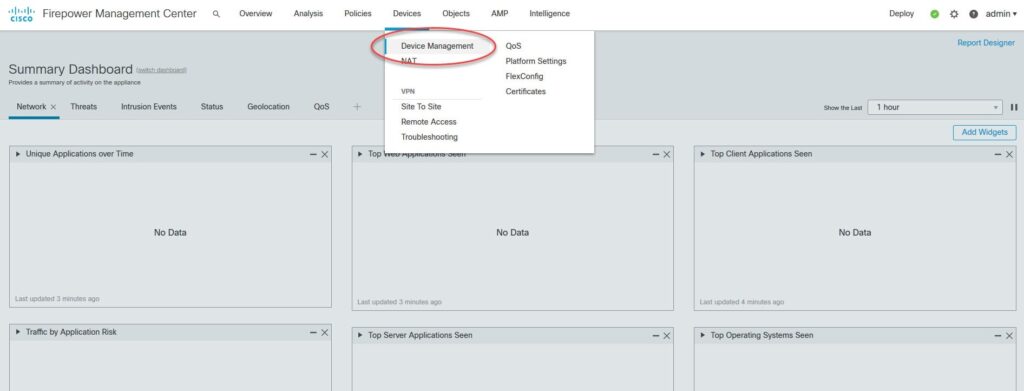
Step 2: Navigate to the Device Management Section:

Step 3: Add a New Device:
In the “Devices” section, click on the “Device Management” tab.Click on the “Add Device” button to initiate the process of adding a new device to the FMC.

Step 4: Enter Device Details:
- In the "Add Device" form, enter the necessary information for the FTD device:
- Device Name: Provide a descriptive name for the device.
- Device Hostname or IP Address: Enter the hostname or IP address of the FTD device.
- Device Type: Select "Firepower Threat Defense" as the device type.
- Registration Key: Enter the registration key for the FTD device. This key is obtained from the FTD device CLI.
- Access Policy: Select an appropriate access policy to apply to the device. If no access policies are available, create one beforehand.


Step 5: Verify Device Connection:
Step 6: Save and Apply Changes:
After verifying the device connection, click on the “Save” button to save the device configuration in the FMC.
The FMC will initiate the process of adding the FTD device to its managed devices list
Step 7: Monitor Device Registration:
Once the FMC has added the FTD device, it will start the registration process.
Monitor the “Devices” section or any notifications on the FMC for the registration status of the FTD device. The FMC will retrieve the device configurations and apply the assigned access policy to the FTD device.
Once the FTD device is successfully added to the FMC, it can be centrally managed and monitored through the FMC’s web interface. The FMC provides extensive security policy management, threat monitoring, and reporting capabilities, enabling administrators to effectively manage their network security using the FTD devices.
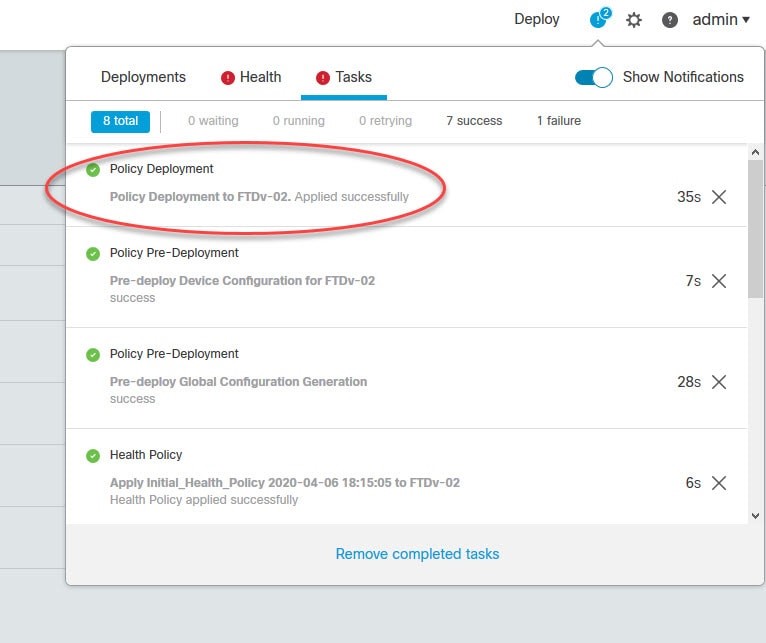
The FMC would take a few minutes before completing the FTD registration. You can check the status by going to the Notifications > Tasks menu on the top right side:

