A Comprehensive Guide to Creating and Managing Security Groups for Your Amazon EC2 Instances
In the ever-evolving landscape of cloud computing, Amazon Elastic Compute Cloud (EC2) has emerged as a cornerstone for hosting web applications, running virtual servers, and managing various workloads in a scalable and cost-effective manner. As EC2 instances play a pivotal role in your AWS infrastructure, it’s essential to ensure that they are not only readily available but also well-protected from unauthorized access. This is where Amazon EC2 Security Groups come into the picture. In this comprehensive guide, we will provide you with a step-by-step approach to creating and managing security groups effectively.
Understanding Amazon EC2 Security Groups
Security Groups in AWS are essentially virtual firewalls that allow you to define inbound and outbound traffic rules for your EC2 instances. With security groups, you can establish fine-grained control over your EC2 instances’ network traffic, ensuring they are protected and compliant with your organization’s security policies
Let’s dive into the process of creating your first security group for an EC2 instance:
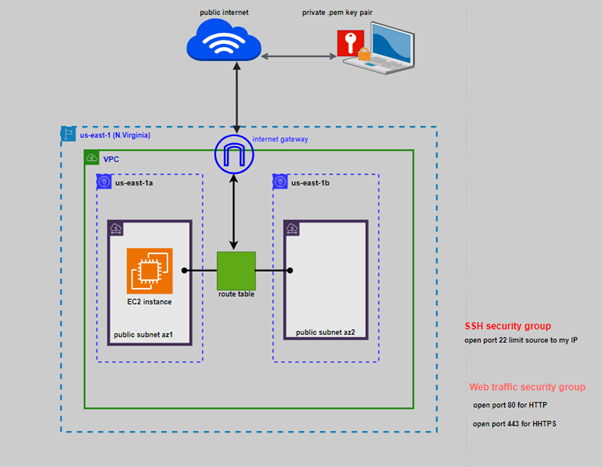
In the previous article on creating a new EC2 instance, we created our EC2 instance using the launch wizard security group that opened port 22 and source was from anywhere from the internet.
We will now configure the security group for our EC2 instance.
We will modify our SSH security group and only limit the source traffic to my IP address.
Again, we will open port 80 for HTTP and source is going to come from anywhere from the internet. we will also open port 443 for HTTPS and the source of this web traffic is also going to come from anywhere from the internet.
We will then go to our EC2 instance already launched and add these security group.
Log in to your AWS Management Console
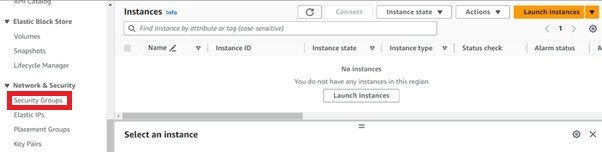
Navigate to the EC2 Dashboard.
In the EC2 dashboard on the left side of the navigation pane under Network and security select security groups. Then click create security group
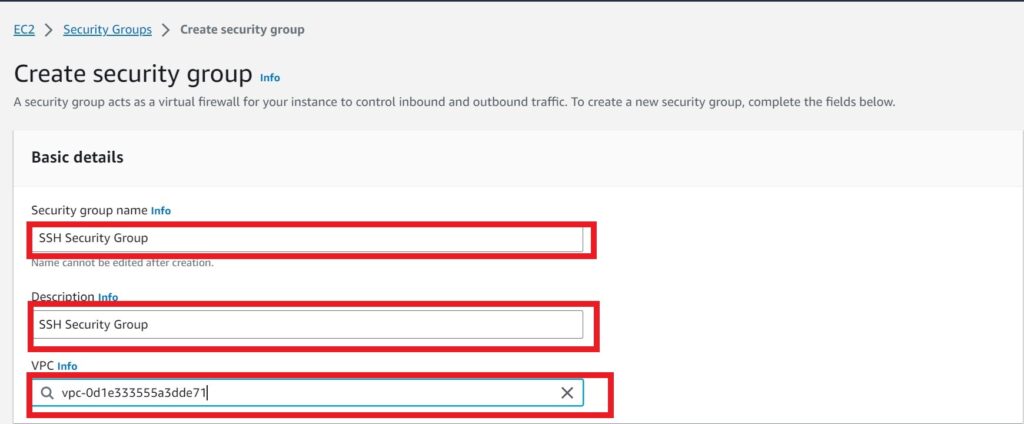
In the security group dashboard, give your security group a name, call it SSH security Group.
Use the same name as the description.
Under VPC, select your VPC click in the search box and select the default VPC.
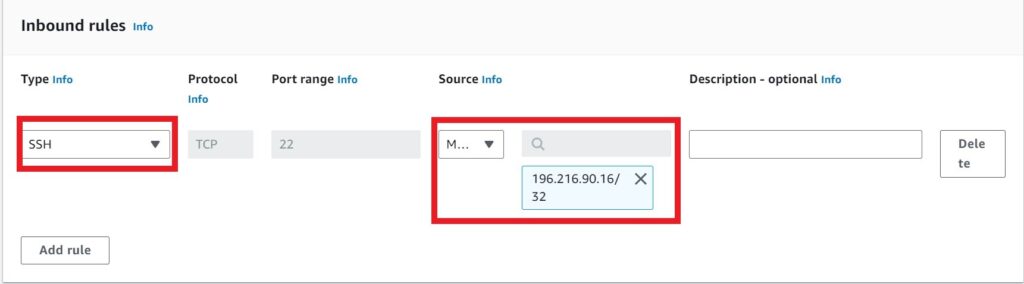
Under inbound rule click add rule.
Under type select the drop down and look for SSH, then select it. Under source select the drop down and select my IP, this will select the IP address of your local machine.
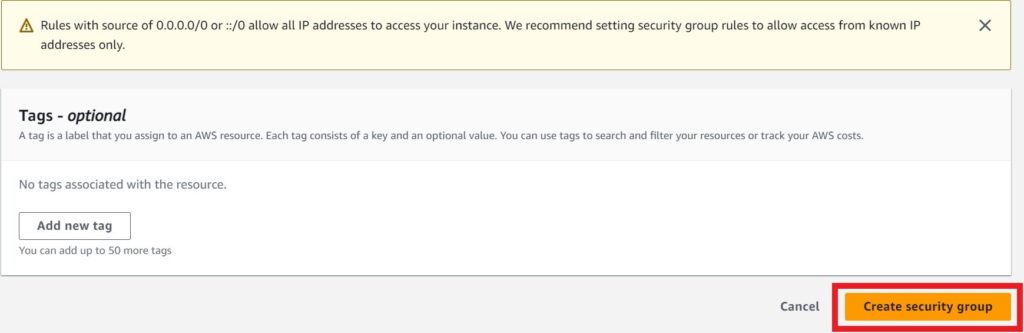
Scroll down and click create security group.
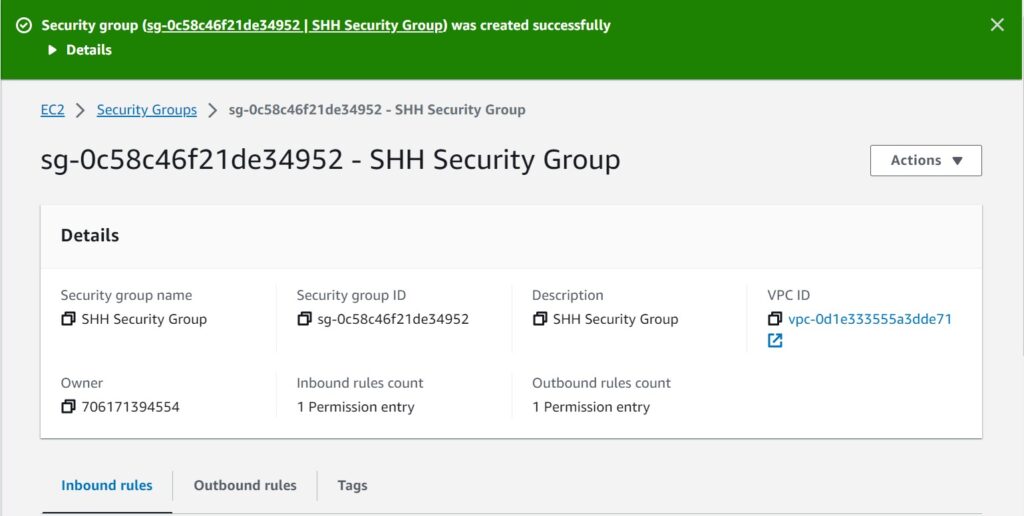
We have successfully created the SSH security group, and limited the source of traffic to our IP address. This is always a security best practice. This means that its only my IP address that can SSH into my EC2 instance through port 22.
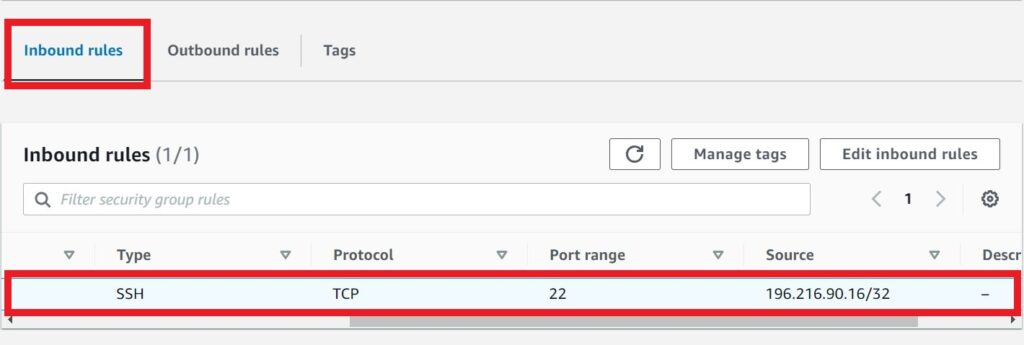
if you look at inbound rules tab under type, its SSH and under protocol is TCP, port range is 22 and source we can see my IP address 196.216.90.16/32
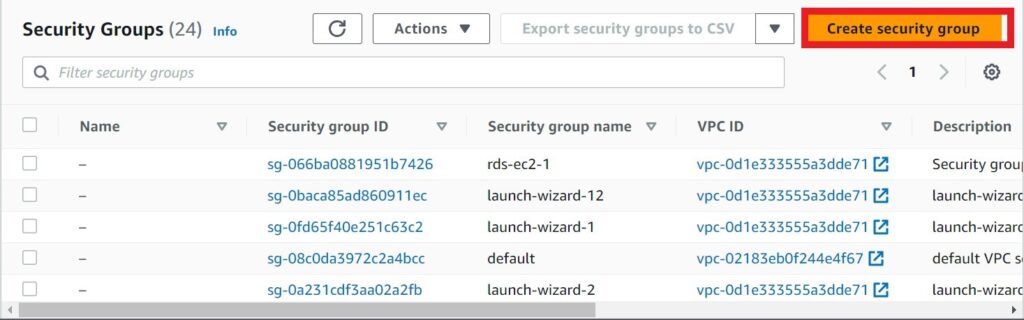
Next we will proceed and create our Web traffic security group, so click create security group a gain.
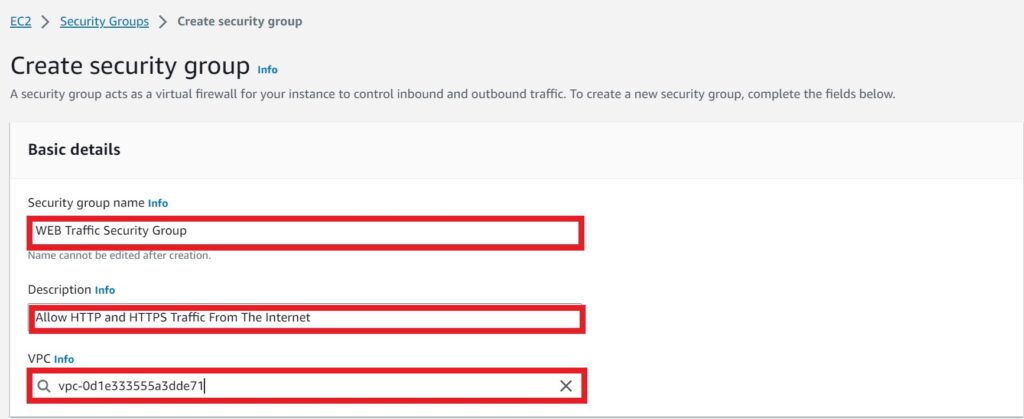
Under basic details, give your security group a name, call it web traffic security group. Under description I will give it a description. Type in allow HTTP and HTTPS traffic from the internet. Under VPC, select the default one.
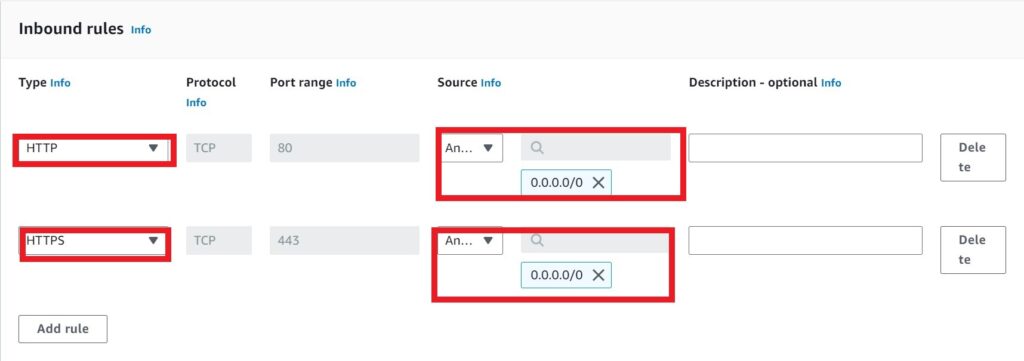
Scroll down, under inbound rule, click add rule.
Under type, select the drop down look for HTTP then select it. Under destination, click the drop and select anywhere for IPv4 addresses.
This will open port 80 for HTTP traffic if you look under port range, you will see the value 80.
Click add rule again then under source select the drop down and look for HTTPS then select it. Under destination, click the drop and select anywhere for IPV4 addresses.
Again, this will open port 443 for HTTPS traffic if you look under port range, you will see the value 443.
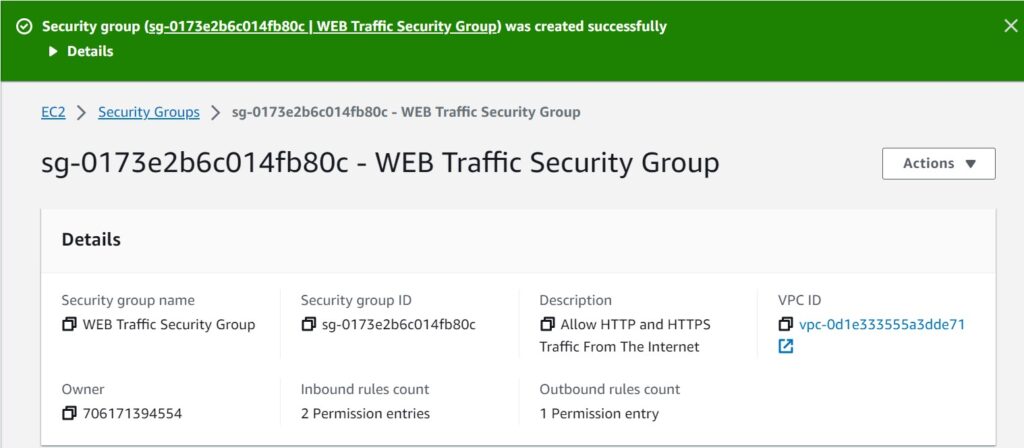
Scroll down and click create security group.
There we go; we have successfully created the web traffic security group and opened port 80 for HTTP and port 443 for HTTPS and our destination is anywhere in the internet.
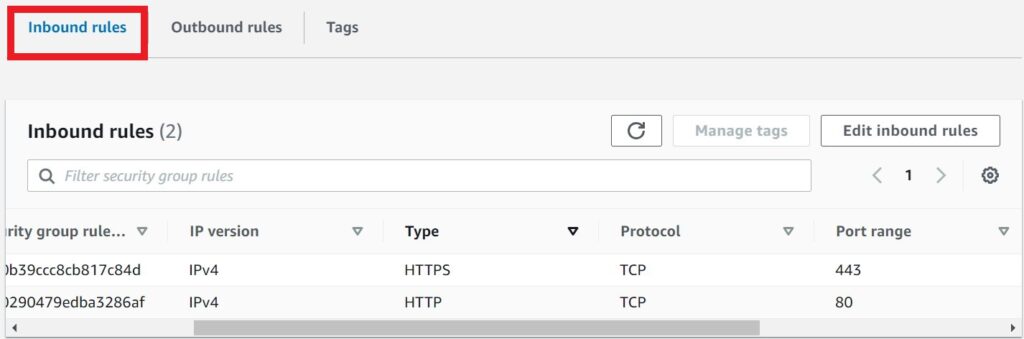
If you look under inbound rules tab, we can see our IP version is IPv4, type is HTTPS and HTTP and port range is 80 and 443.
Next, we will now associate our security groups we’ve created to our EC2 instance.
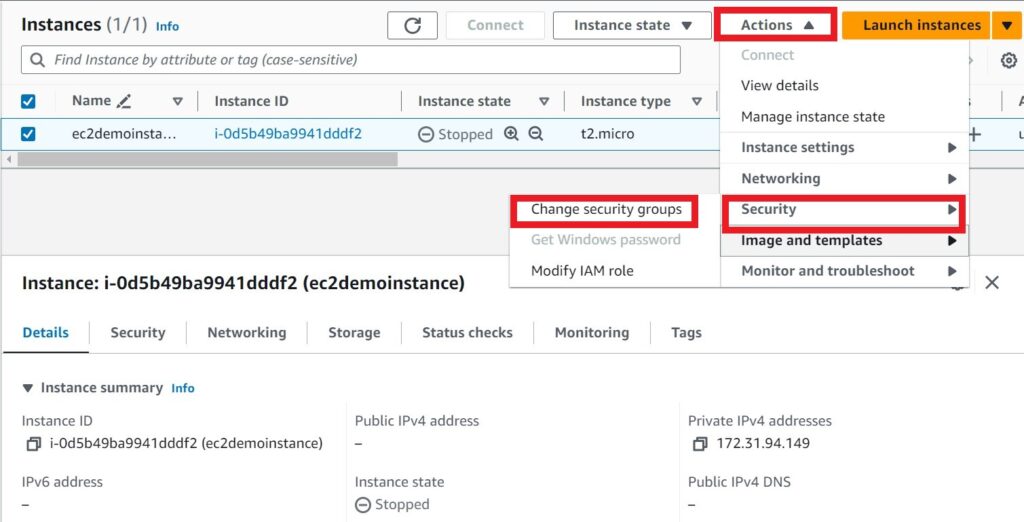
Select your instance, click action drop down button, select security tab then click change security groups.
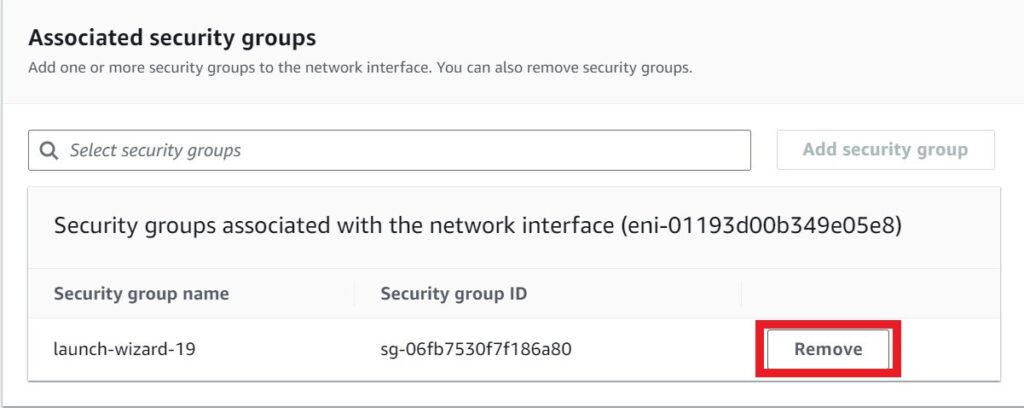
In the change security group tab, under associated security groups, click remove launch wizard security group.
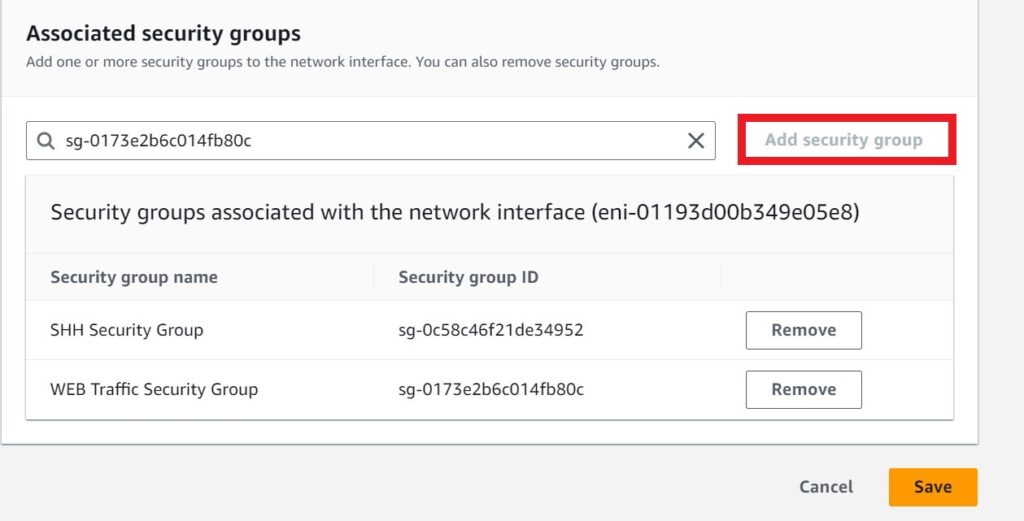
Click add security group then click the search box for add security group, select the two security groups we’ve just created. The SSH and the web traffic security groups then click save.
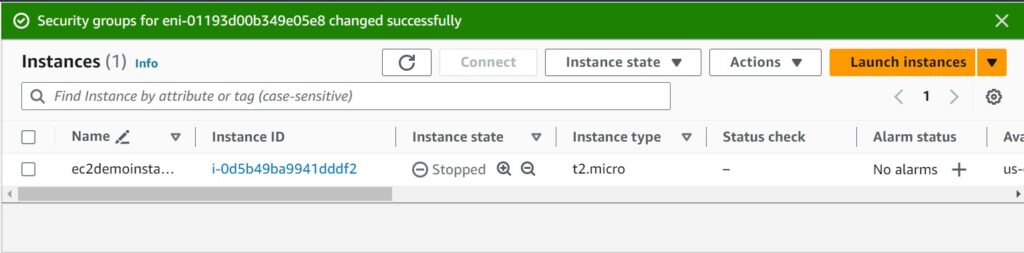
We have successfully changed the security group settings for our EC2 instance.
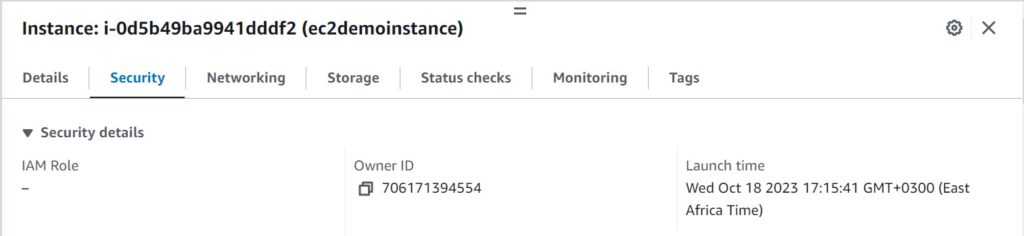
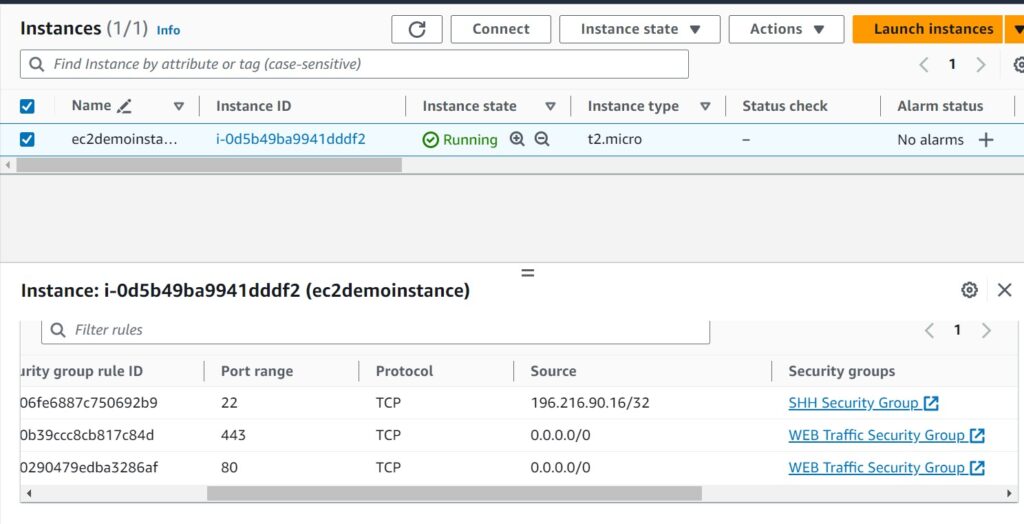
Click instance ID, then navigate to the security tab, you will see the three security groups, one on port 22, port 80 and port 443.
This brings us to the end of this blog. Thanks for your time.
Pull everything down to avoid surprise bills.
Please leave us a comment or any questions if you have concerning this article below. Thank you!


Thank you for your sharing. I am worried that I lack creative ideas. It is your article that makes me full of hope. Thank you. But, I have a question, can you help me? https://www.binance.com/ph/register?ref=IU36GZC4
Your article helped me a lot, is there any more related content? Thanks! https://www.binance.bh/register?ref=IHJUI7TF
I don’t think the title of your article matches the content lol. Just kidding, mainly because I had some doubts after reading the article.
I believe this could be a great addition to your article and help provide even more value to your readers. It aligns well with your topic and offers extra insights that your audience might appreciate. Let me know what you think—I’d really love to hear your thoughts!
Your point of view caught my eye and was very interesting. Thanks. I have a question for you.
Your article helped me a lot, is there any more related content? Thanks! https://www.binance.com/register?ref=IXBIAFVY
Your article helped me a lot, is there any more related content? Thanks!
Can you be more specific about the content of your article? After reading it, I still have some doubts. Hope you can help me.
Thanks for sharing. I read many of your blog posts, cool, your blog is very good. https://www.binance.com/hu/register?ref=IQY5TET4
Your article helped me a lot, is there any more related content? Thanks!
Your point of view caught my eye and was very interesting. Thanks. I have a question for you.
Thanks for sharing. I read many of your blog posts, cool, your blog is very good. https://accounts.binance.info/es-AR/register-person?ref=UT2YTZSU
Can you be more specific about the content of your article? After reading it, I still have some doubts. Hope you can help me.
Reading your article helped me a lot and I agree with you. But I still have some doubts, can you clarify for me? I’ll keep an eye out for your answers.
Your article helped me a lot, is there any more related content? Thanks!
I don’t think the title of your article matches the content lol. Just kidding, mainly because I had some doubts after reading the article.
Thank you, your article surprised me, there is such an excellent point of view. Thank you for sharing, I learned a lot.
Your article helped me a lot, is there any more related content? Thanks!
Thanks for sharing. I read many of your blog posts, cool, your blog is very good.
Thank you for your sharing. I am worried that I lack creative ideas. It is your article that makes me full of hope. Thank you. But, I have a question, can you help me?
Can you be more specific about the content of your article? After reading it, I still have some doubts. Hope you can help me.
Your point of view caught my eye and was very interesting. Thanks. I have a question for you.
Thank you for your sharing. I am worried that I lack creative ideas. It is your article that makes me full of hope. Thank you. But, I have a question, can you help me?