Understanding AWS ACL (Access Control Lists): Controlling Subnet Traffic
Network traffic flow in AWS
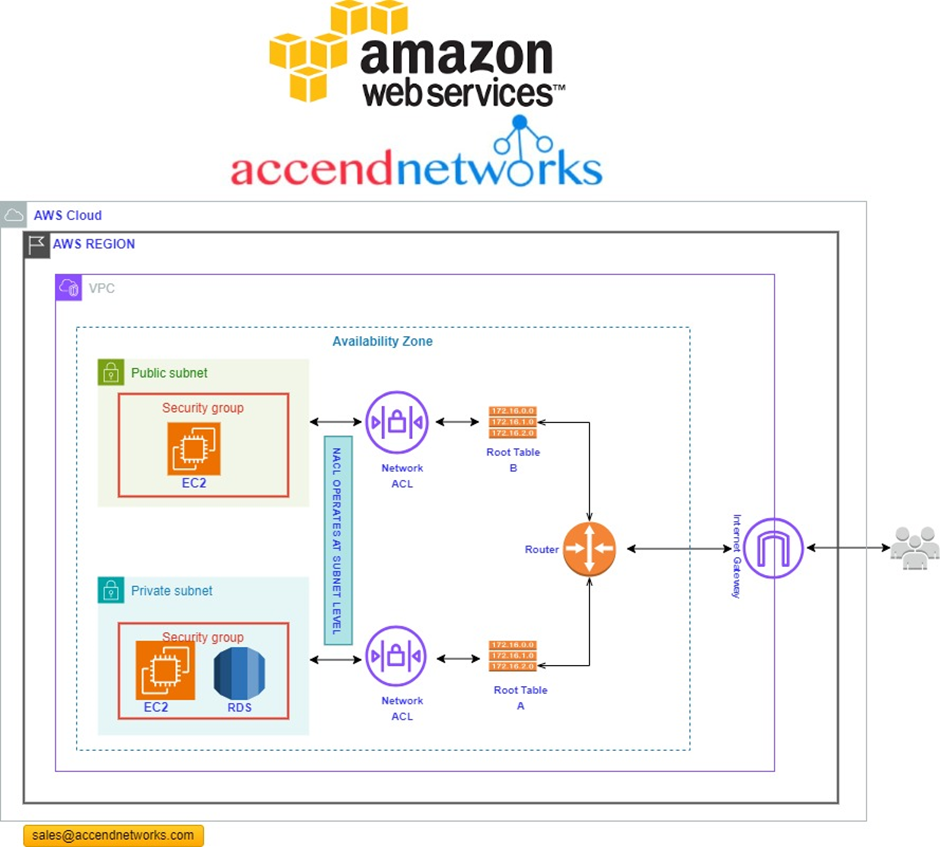
Before starting, let’s see how network traffics move among the resources. Traffics come from the internet to the internet gateway and then, according to the routes defined in the route tables, are directed to the virtual private cloud (VPC) subnets based on the rules defined through AWS ACL (Access Control Lists).
What is an AWS ACL?
In Amazon Web Services (AWS), NACL stands for Network Access Control List. An AWS ACL (Access Control Lists) is a stateless, rule-based system that acts as a virtual firewall for controlling inbound and outbound traffic at the subnet level in a Virtual Private Cloud (VPC). An AWS ACL (Access Control Lists) allow or deny specific inbound or outbound traffic at the subnet level while the security group controls the qualified traffic to reach and leave the resources.
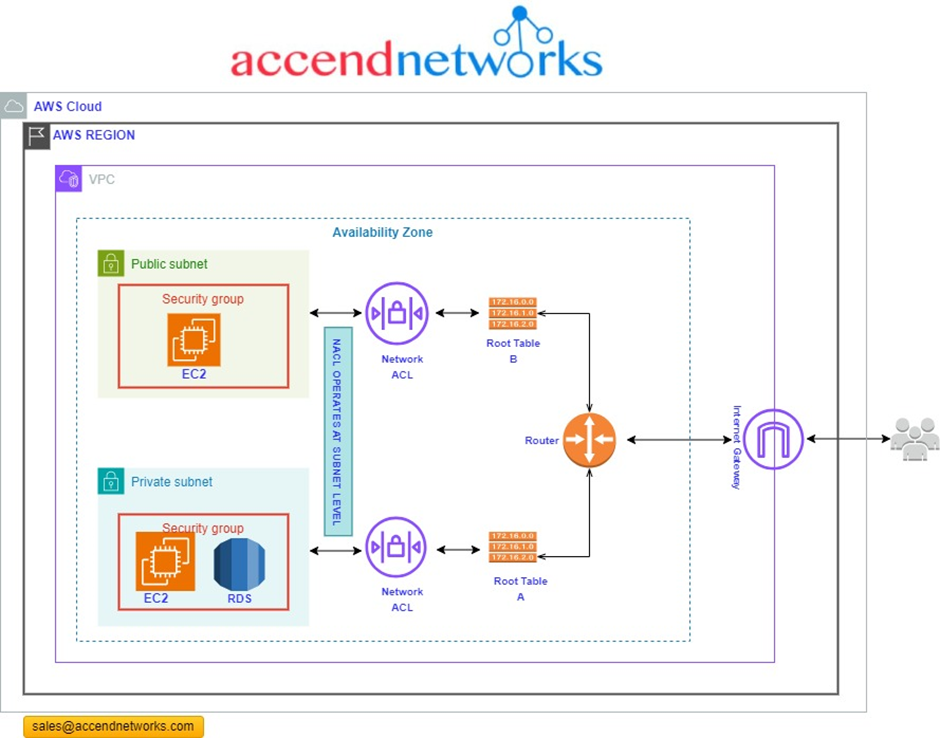
The ACL resides in front of the VPC subnets, and the security Groups protect the AWS resources, such as EC2 instances. It is one of the most critical differences between Network ACL and Security Group.
Network Access Control lists (NACL’s) are used to manage traffic at the network layer. Hence the name Network access control list. Picture it as the first line of defence for your cloud infrastructure, filtering traffic based on rules you set. ACLs are stateless and filter traffic based on rules defined for inbound and outbound traffic at the subnet level.
When you create a Virtual Private Cloud (VPC), it automatically associates a default NACL that permits all inbound and outbound traffic.
NACL’s are a powerful tool that can be used to improve the security of your AWS VPC. However, it is important to note that NACL’s are just one component of a comprehensive security strategy. To protect your AWS resources, you should also use other security features, such as security groups, IAM roles, and WAF rules.
Components of Network Access Control List (NACL)
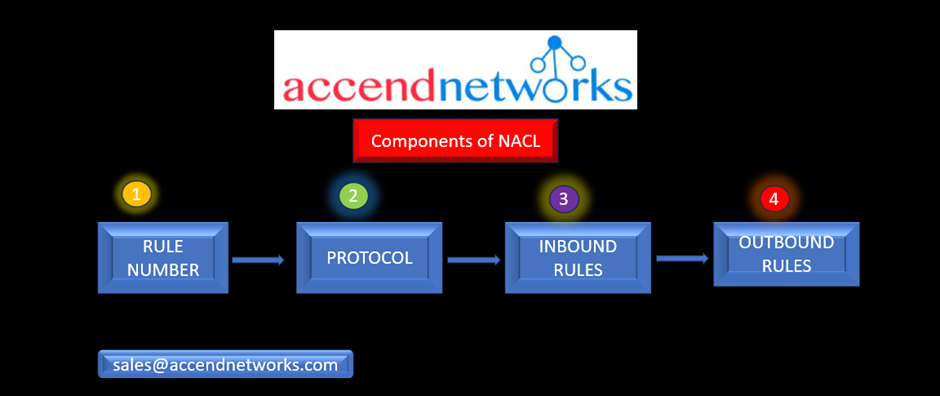
Rule Number: Each rule is assigned a unique number, and they are evaluated in ascending order. Once a rule matches incoming or outgoing traffic, it is immediately applied, even if higher-numbered rules contradict it.
Protocol: You have the flexibility to define any standard protocol, such as HTTP, HTTPS, ICMP, SSH, etc. when configuring rules for the ACL.
Inbound Rules: Inbound rules determine the source of incoming traffic and the destination port it is allowed to reach.
Outbound Rules: Outbound rules specify the destination for outgoing traffic and the destination port it can access.
Types of Network ACL
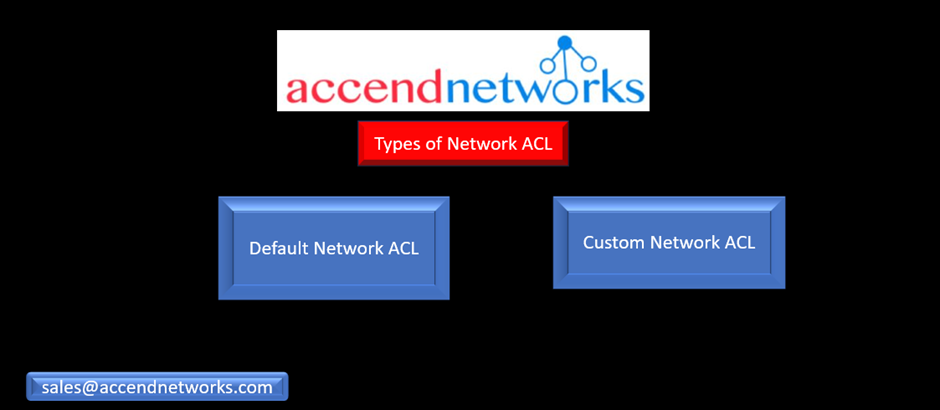
Default Network ACL
The default network ACL permits unrestricted traffic to enter or exit the associated subnet. Additionally, every network ACL includes a rule marked with an asterisk rule number, responsible for denying traffic that doesn’t match any numbered rules. This particular rule is immutable and cannot be altered or deleted.
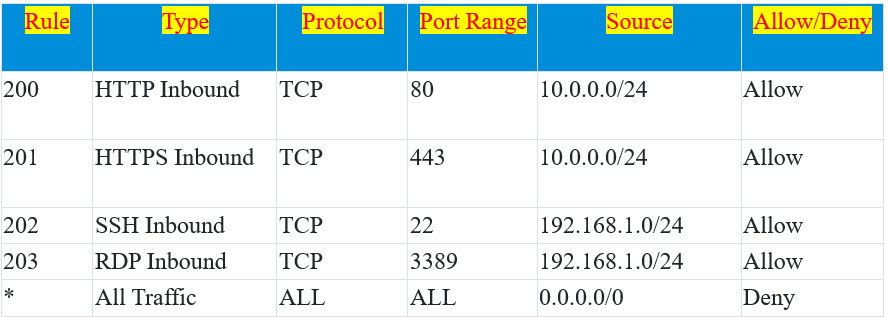
In this example, the above table is a default Network ACL table, which is associated with a subnet.
Rule 200 allows incoming HTTP traffic (port 80) from the source IP range 10.0.0.0/24.
Rule 201 allows incoming HTTPS traffic (port 443) from the same source IP range 10.0.0.0/24.
Rule 202 permits SSH traffic (port 22) from the source IP range 192.168.1.0/24.
Rule 203 allows RDP traffic (port 3389) from the same source IP range 192.168.1.0/24.
The wildcard rule (*) at the bottom denies all other incoming and outgoing traffic, providing a default security posture that allows only specific types of traffic from specified source IP ranges while denying all other traffic.
Custom Network ACL
This user-defined access control list lets you customize your network security policies.
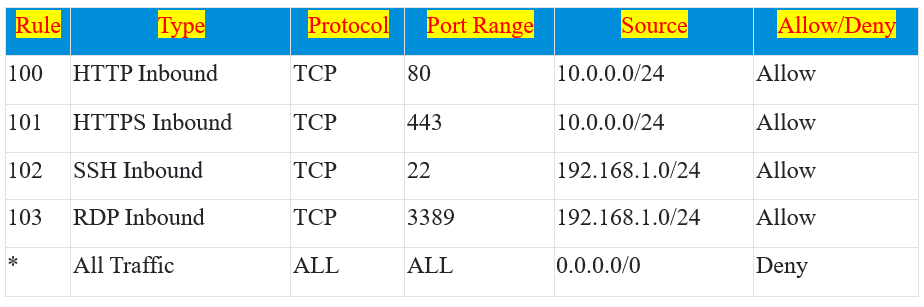
In this example:
Rule 100 allows incoming HTTP traffic (port 80) from the source IP range 10.0.0.0/24.
Rule 101 permits incoming HTTPS traffic (port 443) from the same source IP range 10.0.0.0/24.
Rule 102 allows SSH traffic (port 22) from the source IP range 192.168.1.0/24.
Rule 103 permits RDP traffic (port 3389) from the same source IP range 192.168.1.0/24.
The wildcard rule (*) at the end serves as a catch-all, denying all incoming and outgoing traffic, and providing a default security posture that allows only specific types of traffic from specified source IP ranges while blocking everything else. This custom Network ACL offers fine-grained control over traffic, allowing or denying access based on defined rules.
Hands-on demo Creating a Network ACL
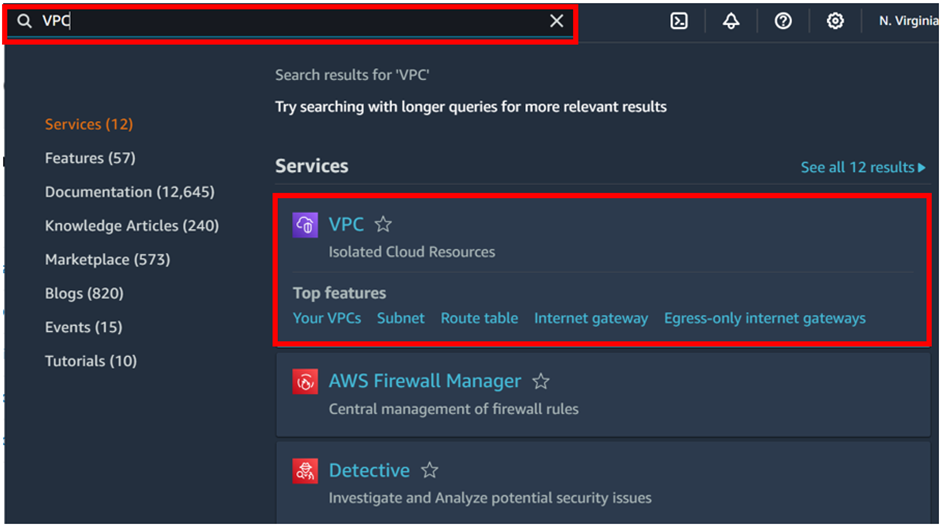
Log in to the AWS Management Console. Then in the search box, type VPC, then select VPC under services.
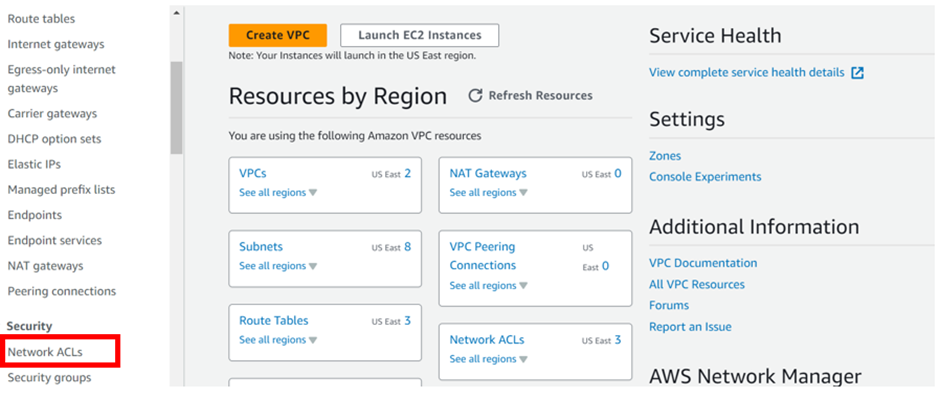
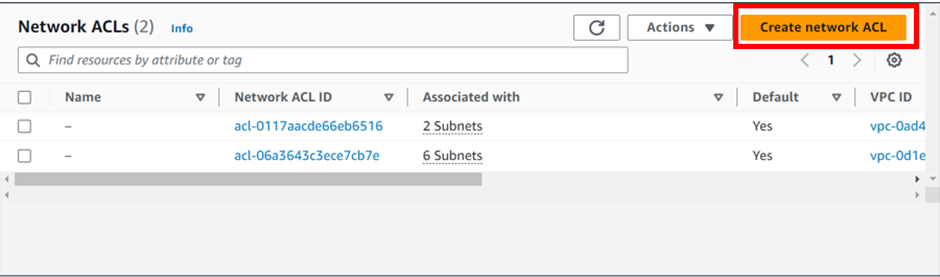
In the VPC dashboard on the left side of the navigation pane under security, select “Network ACLs.” Then click “Create Network ACL.”
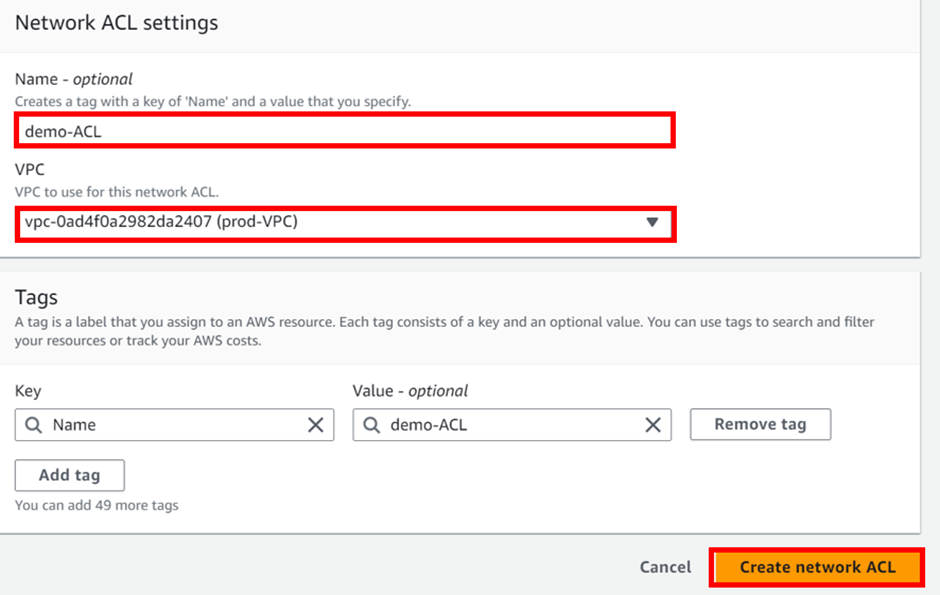
In the Create Network Access Control list dashboard, Provide the necessary information to create a Network ACL. Under the name, provide a name, for my case I will call it demo-ACL
Then under VPC, select the drop-down button and select your VPC, I created the prod-VPC so I will select it.
These are the only necessary settings to create NACL, leave tags as optional then scroll down and click create network ACL.
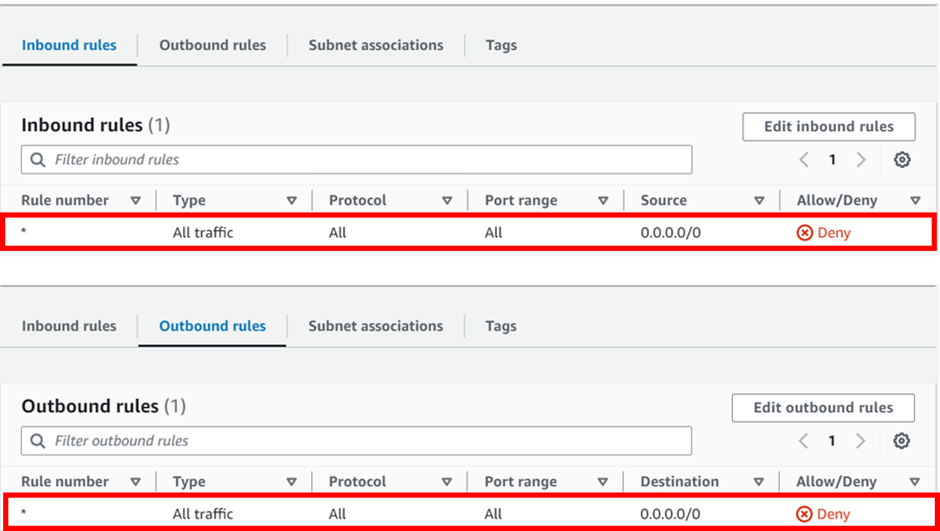
Success our NACL has been successfully created.

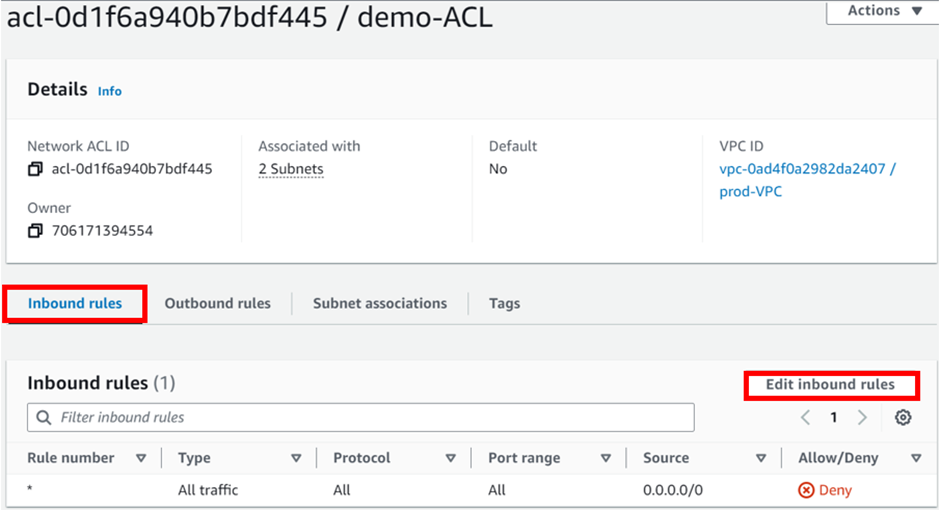
Note: By default, all inbound and outbound rules deny all traffic for newly created Network ACL as shown below.
Associate Subnet to Network ACL
Note: You can associate a network ACL with multiple subnets. but a subnet can be associated with only one network ACL at a time.
To associate subnets, move to the subnet association tab, then click Edit subnet associations.
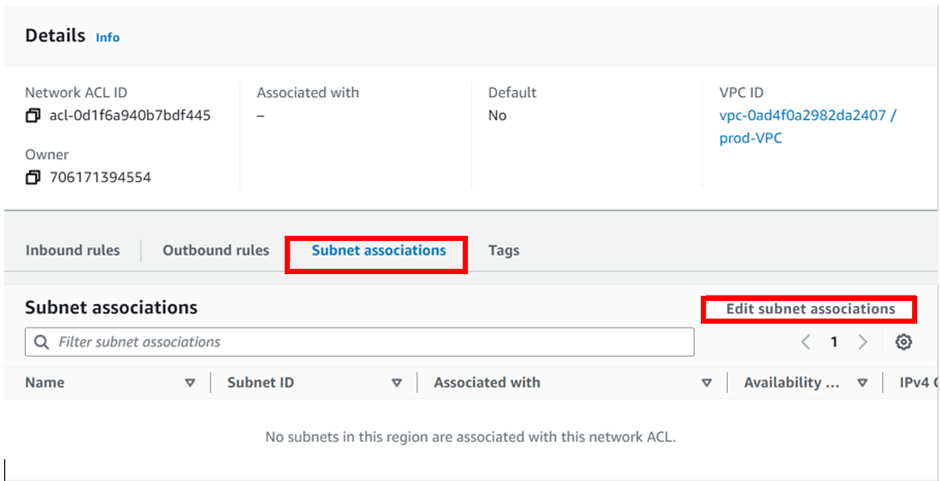
In the edit subnet association dashboard, select your subnets by ticking the boxes, under the name, then click save changes.

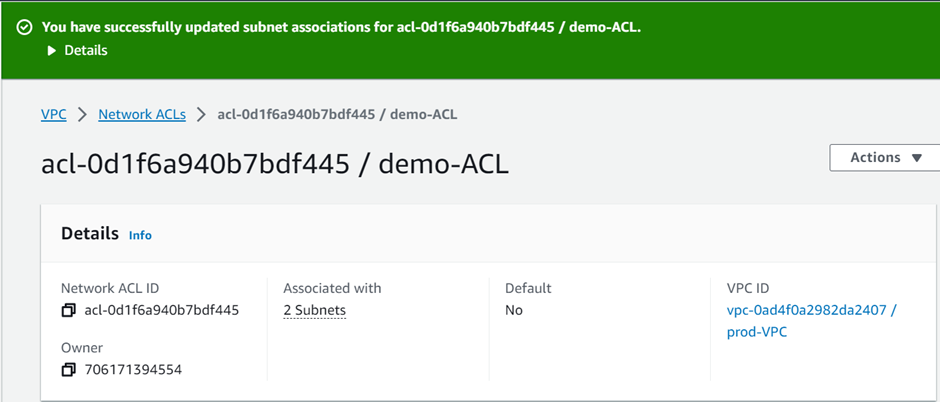
We have successfully associated our subnets with the created NACL.
Configure Inbound and Outbound rules:
First, launch an instance in the subnets associated with the NACL, then try to access your Public/Application server. It should not be accessible, due to no inbound and outbound rules configured yet. Now, Edit and add a new inbound and outbound rule.
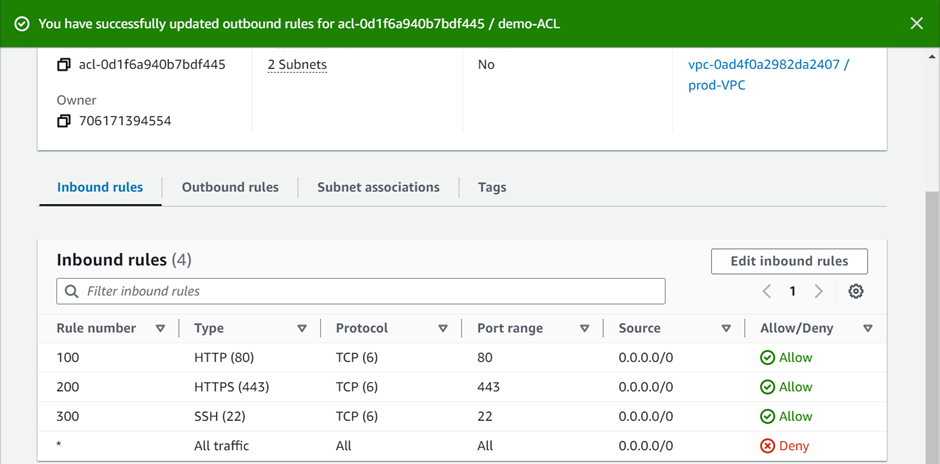
Select the NACL ID then click it, in the ACL dashboard, move to the Inbound rules tab then select Edit Inbound rules
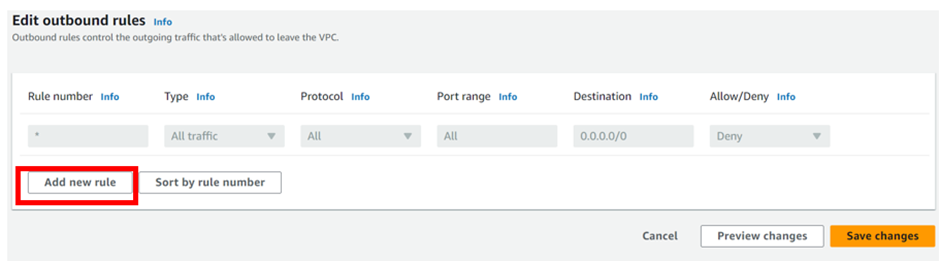
In the edit inbound rule dashboard, click Add new rule.
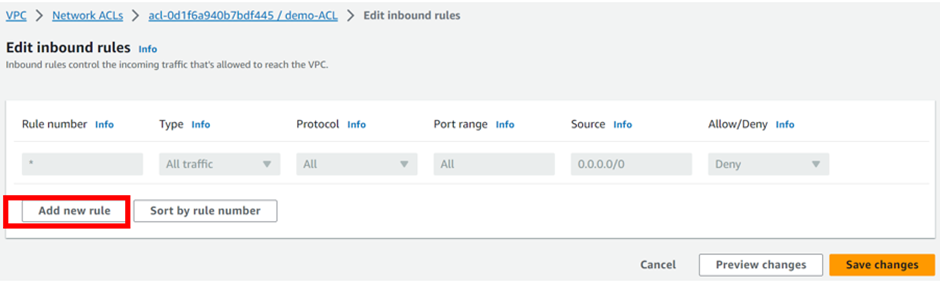
Remember the rules are added in ascending numbers.
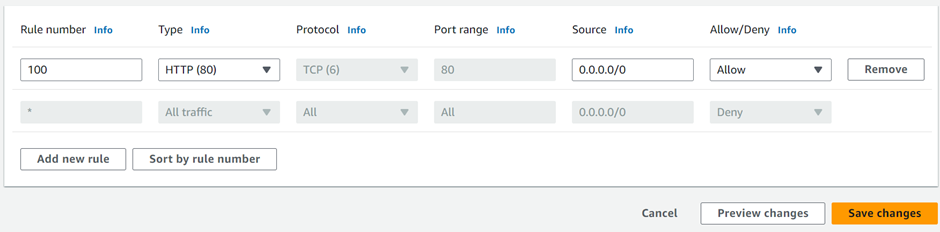
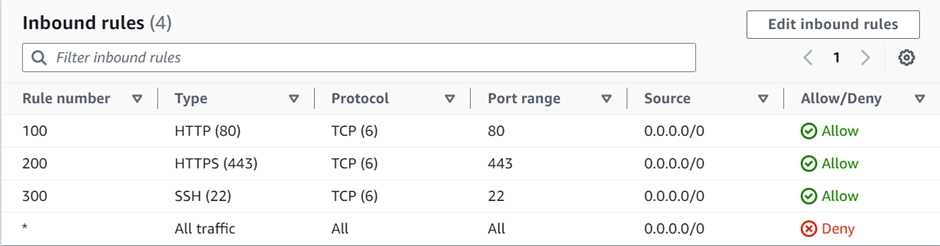
The first rule we will add is HTTP port 80, under rule number enter 100, then under custom TCP select the drop-down and select HTTP. Repeat the same process for HTTPS, and SSH then click save changes.
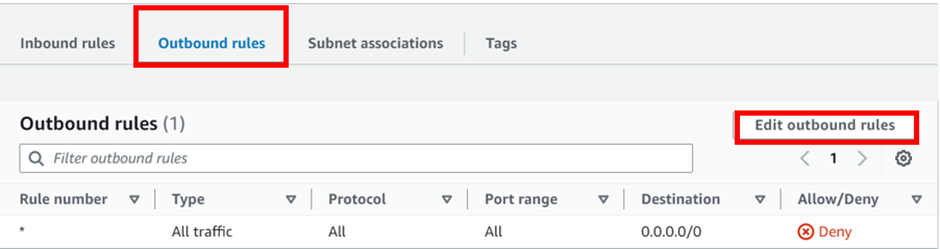
Then move to the outbound rules tab then, click edit outbound rules.
Add the first rule number. we will add rule 100, then under custom TCP select HTTP port 80, repeat the same, and add rule numbers 200, and 300 for HTTPS and SSH respectively then click save changes.
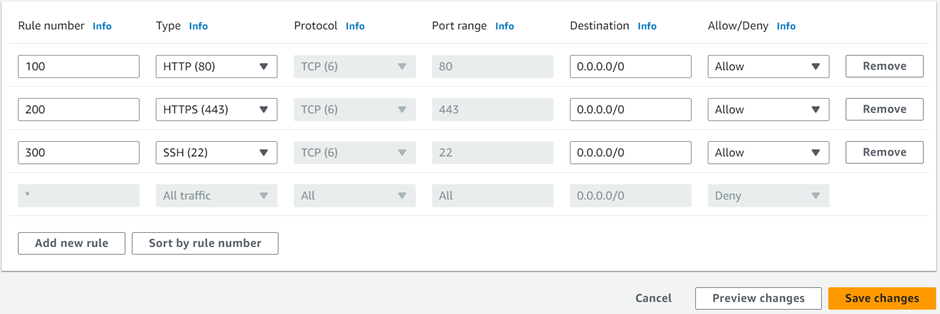
We have successfully added outbound rules.
Note: Rules are evaluated starting with the lowest numbered rule. As soon as a rule matches traffic, it gets executed regardless of any higher-numbered rule that might contradict it. For example, if rule 100 allows port 80, and rule 90 denies port 80, finally, port 80 will be denied as rule 90 is evaluated before 100.
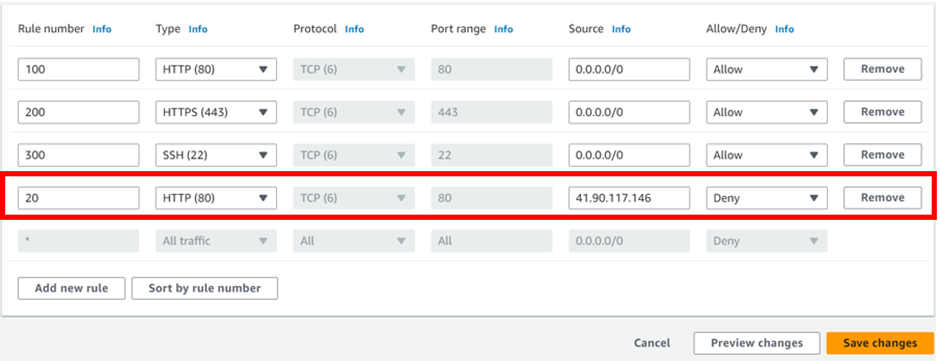
Block IP address
Block IP address: Edit the inbound rule and try to block your own IP, after that, you should not be able to access your public/Application server.
This brings us to the end of this demo; always ensure you clean up resources.
Conclusion
NACL’s are important for AWS network security. They work with security groups, which handle different security aspects. NACL’s control traffic at the subnet level, using IP addresses and rules. Security groups manage access at the instance level, based on group memberships. These tools work together to defend against cyber threats.
Thanks for your attention and stay tuned for more.
If you have any questions concerning this article or have an AWS project that requires our assistance, please reach out to us by leaving a comment below or email us at. sales@accendnetworks.com
Thank you!
Your point of view caught my eye and was very interesting. Thanks. I have a question for you.
I don’t think the title of your article matches the content lol. Just kidding, mainly because I had some doubts after reading the article.
Thanks for sharing. I read many of your blog posts, cool, your blog is very good.
Your article helped me a lot, is there any more related content? Thanks!
Thanks for sharing. I read many of your blog posts, cool, your blog is very good.
Can you be more specific about the content of your article? After reading it, I still have some doubts. Hope you can help me. https://accounts.binance.com/en-NG/register-person?ref=YY80CKRN
Thanks for sharing. I read many of your blog posts, cool, your blog is very good.
Can you be more specific about the content of your article? After reading it, I still have some doubts. Hope you can help me.
Can you be more specific about the content of your article? After reading it, I still have some doubts. Hope you can help me.
Thank you for your sharing. I am worried that I lack creative ideas. It is your article that makes me full of hope. Thank you. But, I have a question, can you help me?
I don’t think the title of your article matches the content lol. Just kidding, mainly because I had some doubts after reading the article. https://accounts.binance.info/ph/register?ref=IU36GZC4
Your article helped me a lot, is there any more related content? Thanks!
I don’t think the title of your article matches the content lol. Just kidding, mainly because I had some doubts after reading the article. https://accounts.binance.info/register-person?ref=IHJUI7TF
Your point of view caught my eye and was very interesting. Thanks. I have a question for you. https://accounts.binance.info/vi/register-person?ref=MFN0EVO1
Thank you for your sharing. I am worried that I lack creative ideas. It is your article that makes me full of hope. Thank you. But, I have a question, can you help me? https://www.binance.info/fr-AF/register?ref=JHQQKNKN
Thank you for your sharing. I am worried that I lack creative ideas. It is your article that makes me full of hope. Thank you. But, I have a question, can you help me?
I don’t think the title of your article matches the content lol. Just kidding, mainly because I had some doubts after reading the article.
Your article helped me a lot, is there any more related content? Thanks! https://www.gate.com/share/XwNAUwgM
Thanks for sharing. I read many of your blog posts, cool, your blog is very good.
Your article helped me a lot, is there any more related content? Thanks!
Can you be more specific about the content of your article? After reading it, I still have some doubts. Hope you can help me.
Thank you for your sharing. I am worried that I lack creative ideas. It is your article that makes me full of hope. Thank you. But, I have a question, can you help me?
Your point of view caught my eye and was very interesting. Thanks. I have a question for you.
Thanks for sharing. I read many of your blog posts, cool, your blog is very good.
Your article helped me a lot, is there any more related content? Thanks!