HOW TO CONFIGURE A DUAL-NAT GATEWAY IN TWO DIFFERENT AVAILABILITY ZONES.
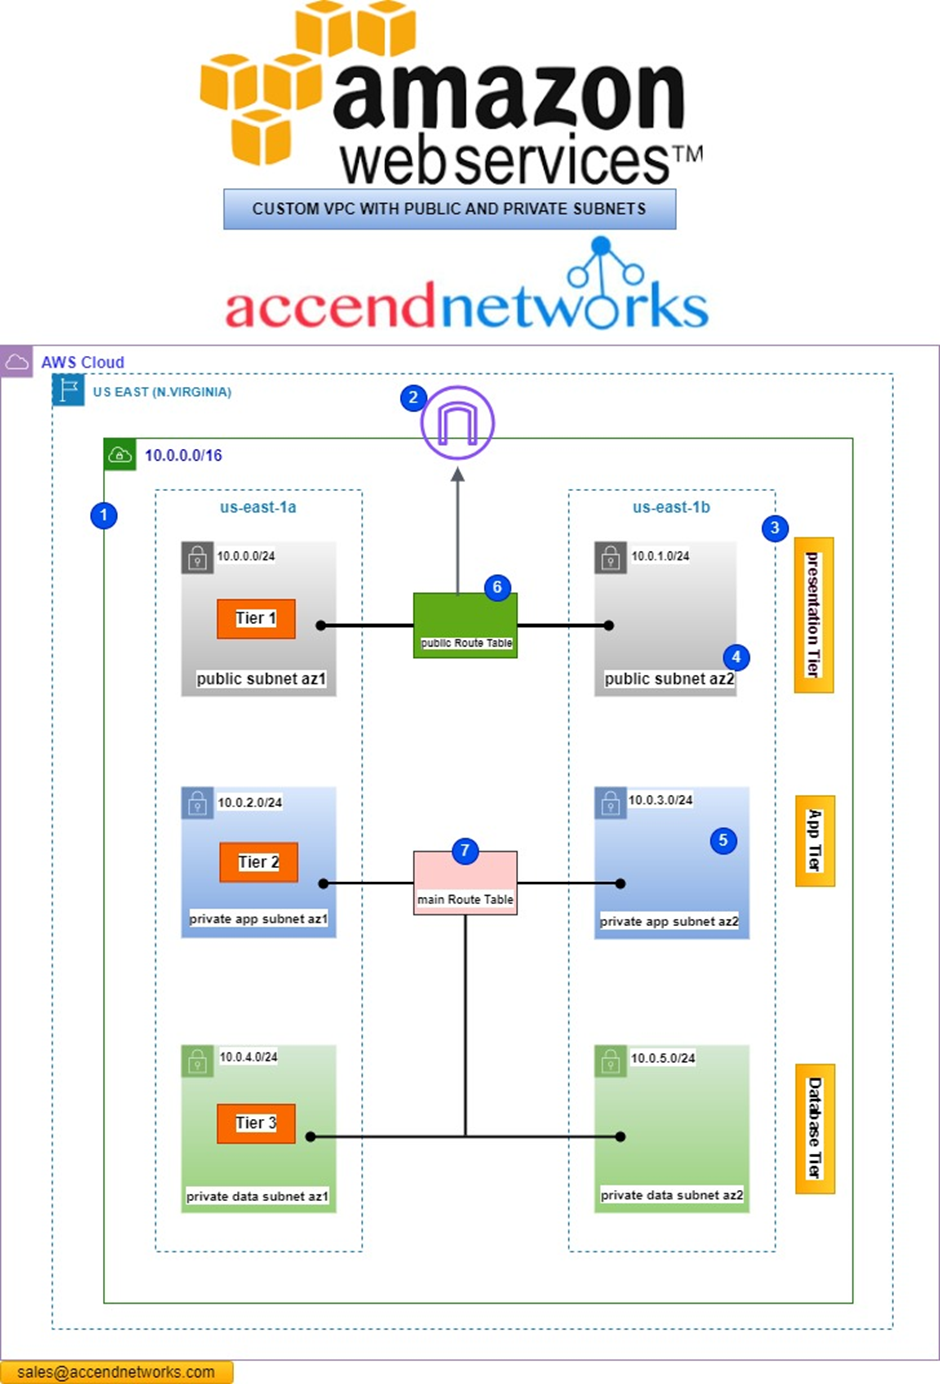
In this comprehensive guide, we will take you through configuring a dual-NAT gateway in two different availability zones, paired with route tables, enabling your private subnets to access the internet securely.
According to our reference architecture, we will create a Nat gateway in the public subnet az1, we will create a route table that we call private route table az1. We will then add a route to that route table to route traffic to the internet through the Nat gateway. We will then associate that route table with the private app subnet az1, and private data subnet az1.
Again, for the second availability zone:
We will create another Nat gateway in the public subnet az2. We will then create another route table called private route table az2, we will add traffic to this route table to route traffic to the internet through the Nat gateway in the public subnet az2. We will then associate this route table with the private app subnet az2 and private data subnet az2.
Let’s start.
Refer to our previous post on creating a Custom 3 tier-VPC. We will use that VPC project to accomplish this project.
To create the Nat gateway first make sure you are in the region where you created the VPC.
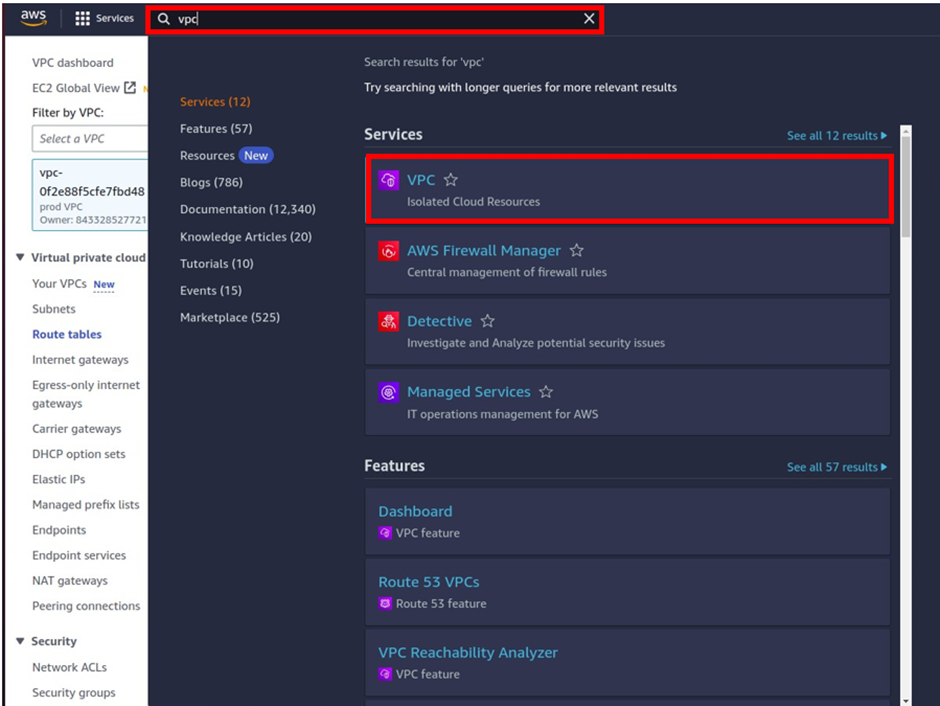
Then in the search box, type VPC and select VPC under services.
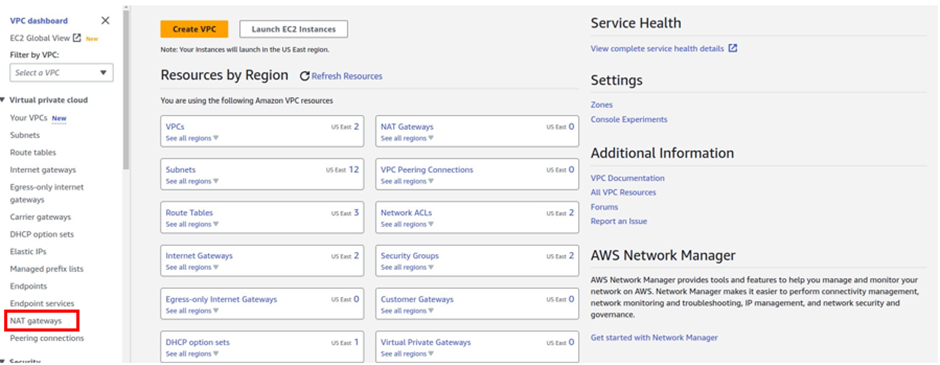
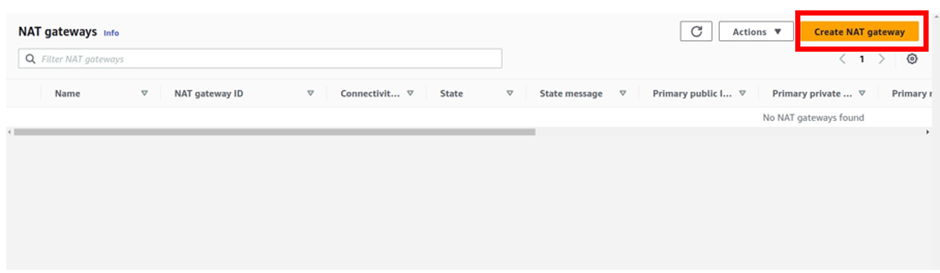
On the VPC dashboard on the left side of the navigation pane select Nat gateway, then click Create Nat gateway.
We will create the first Nat gateway in the public subnet az1.
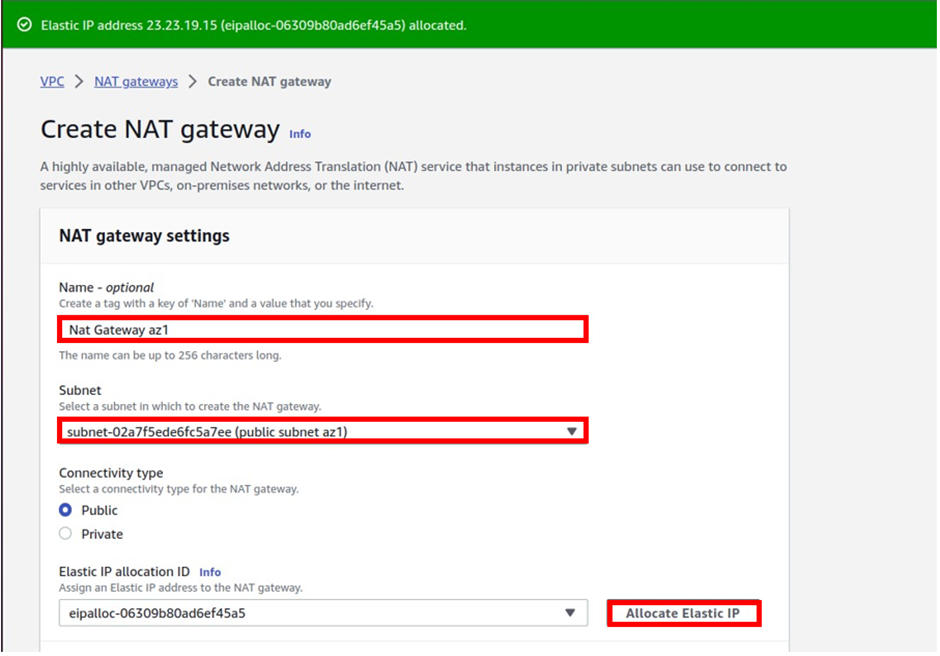
In the create Nat gateway dashboard under name give your Nat gateway name, call it Nat gateway az1. Once you’ve given your Nat gateway a name, select the subnet where you want to put your Nat gateway. so under subnet, select the drop-down and look for public subnet az1 then select it. Then for connectivity type leave it on the default public, because we are creating a public Nat gateway.
Scroll down, under elastic allocation ID click allocate an elastic IP and that is going to allocate an elastic IP for you.
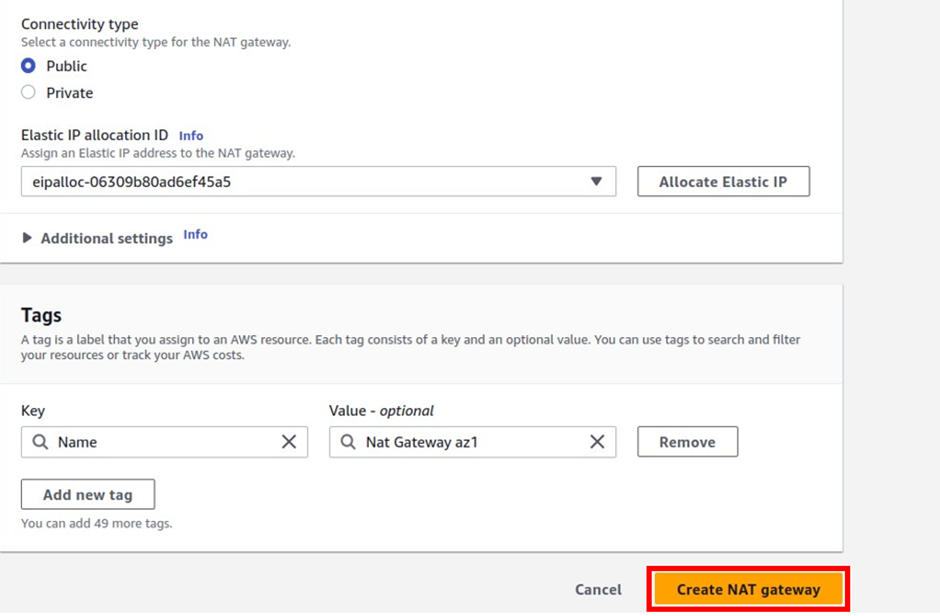
These are the only settings we need to create a Nat gateway, scroll down and click Create Nat gateway.
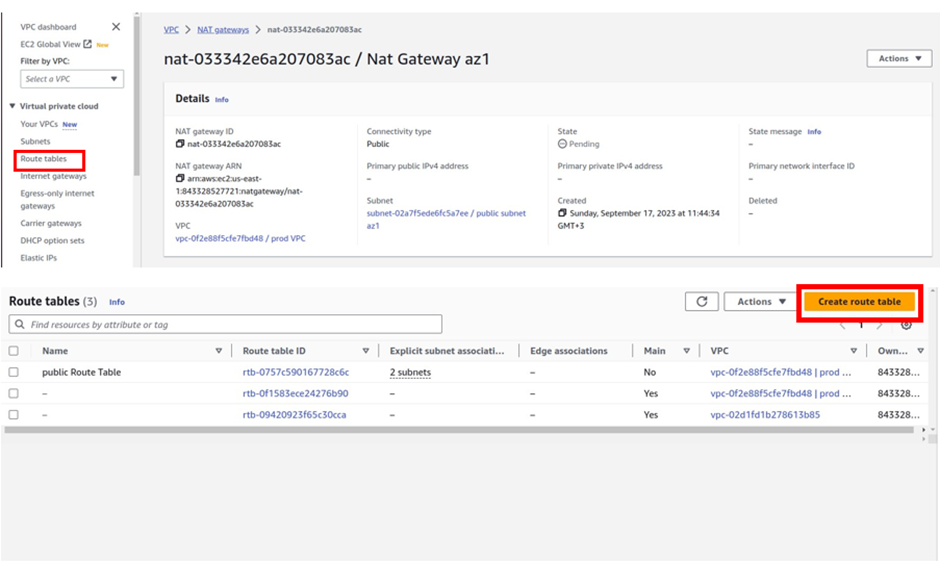
Success, we have created our first Nat gateway in the public subnet az1
Next, we will create a route table and call that route table, private route table az1.
On the left side of your screen, select route tables then click create route table.
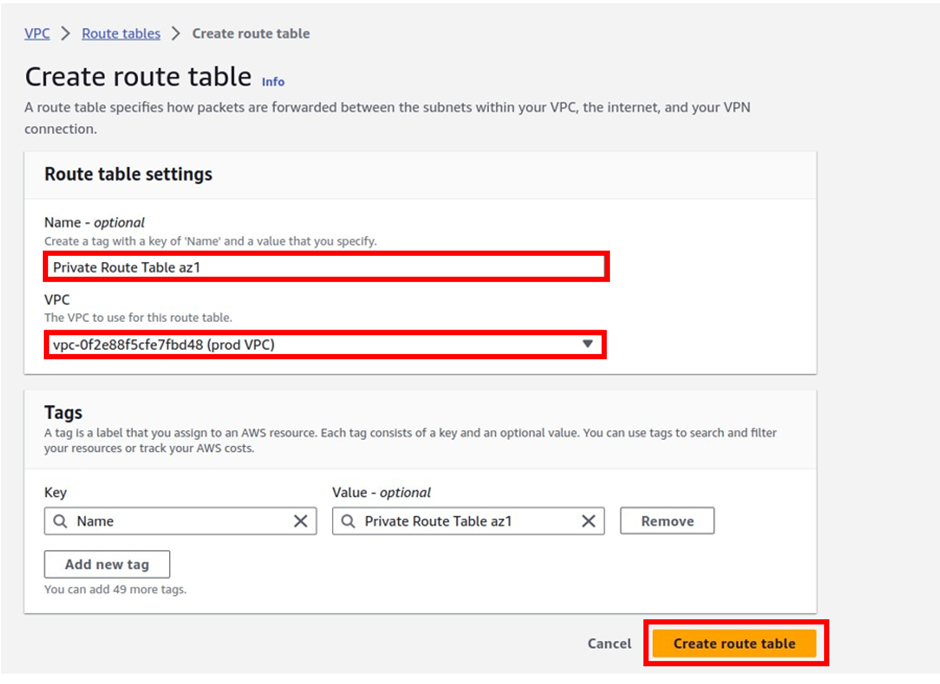
In the create route table dashboard under name, give your route table a name, and call it private route table az1. Once you’ve given the route table a name, select the VPC you want to create this route table in, so under VPC, select the drop-down and select your prod- VPC.
These are the only settings we need to create a route table now click create route table.
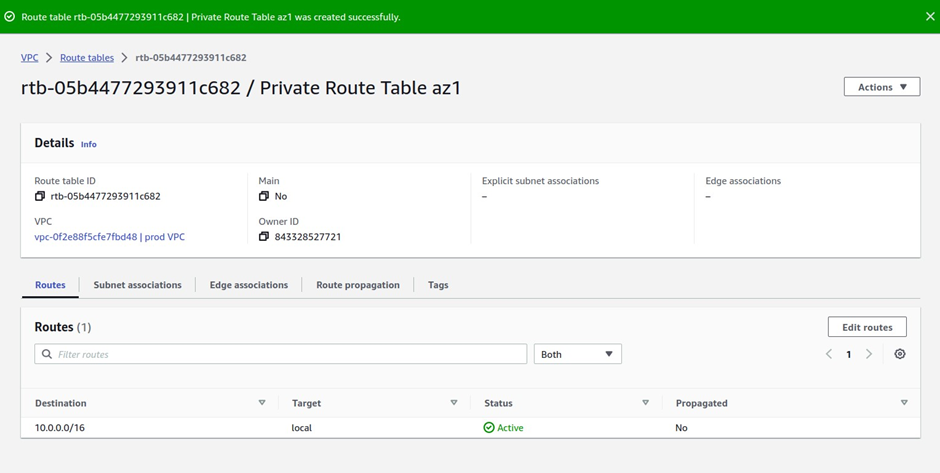
Success, we have successfully created our first private route table in private subnet az1.
Next, we will add a route to the private route table az1 to route traffic to the internet through the Nat gateway in the public subnet az1.
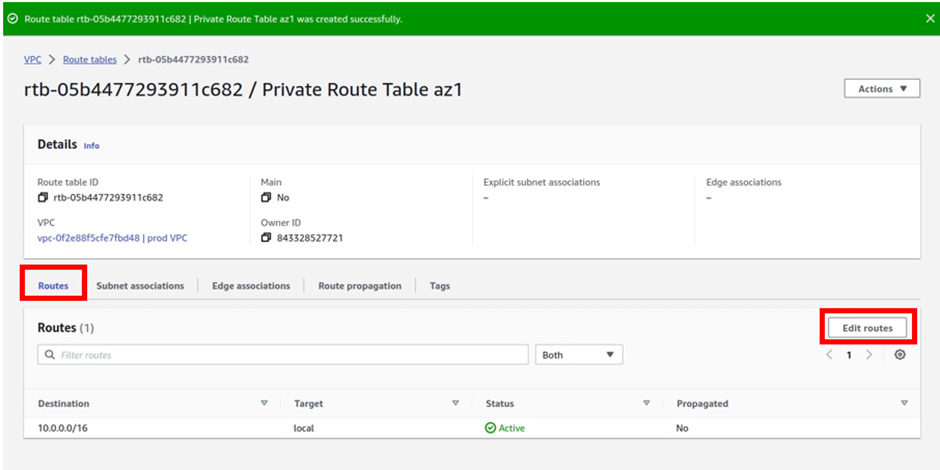
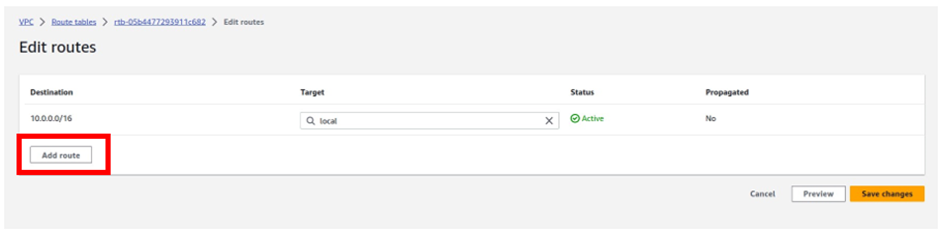
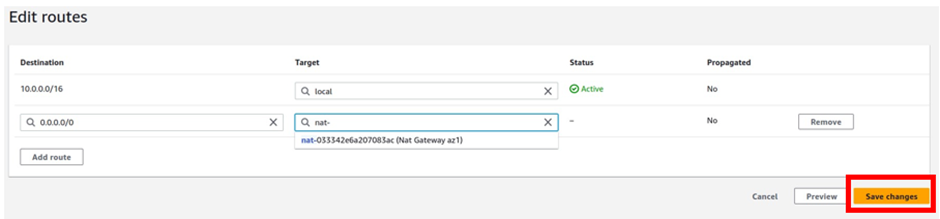
To add a route to this route table, navigate to the routes tab, select edit routes then click Add route
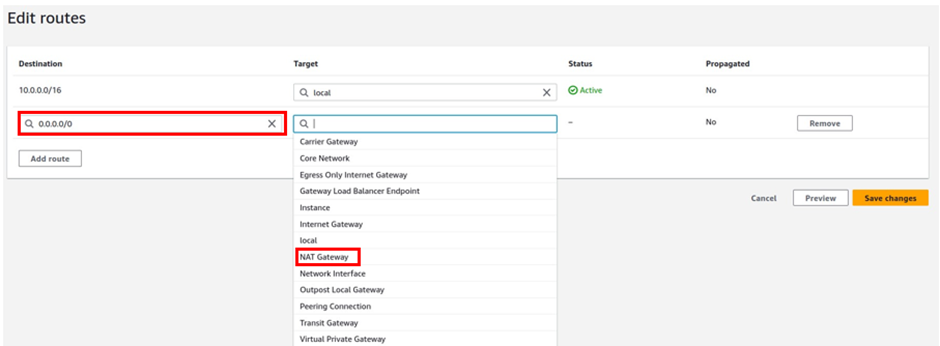
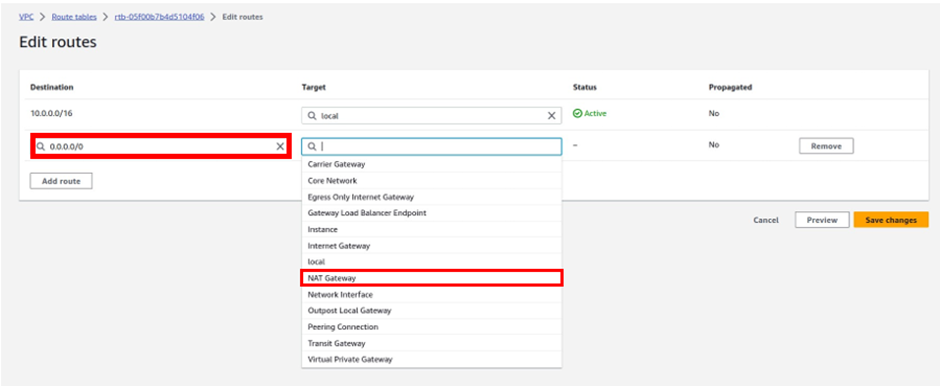
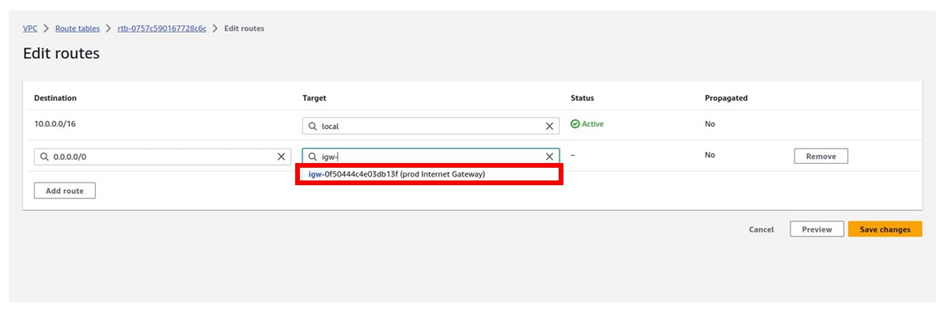
For the destination remember internet traffic is always 0.0.0.0/0 so under destination type in this value.
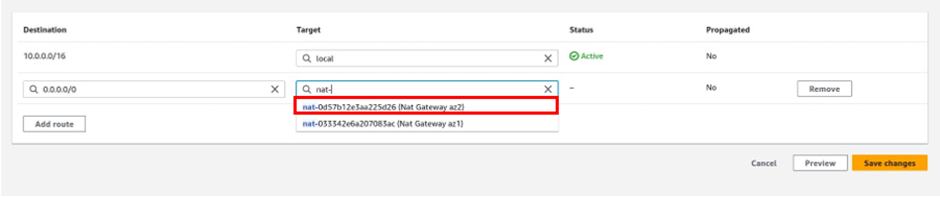
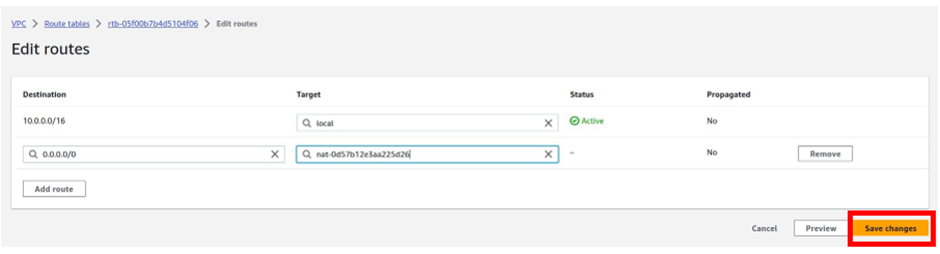
Then under target, the target is going to be our Nat gateway in the public subnet az1, so click in the search box, then select Nat gateway. Make sure you select Nat Gateway and not Internet Gateway. You should see the Nat gateway in the public subnet az1, it is the Nat gateway we call Nat gateway az1. Select it then click Save Changes.
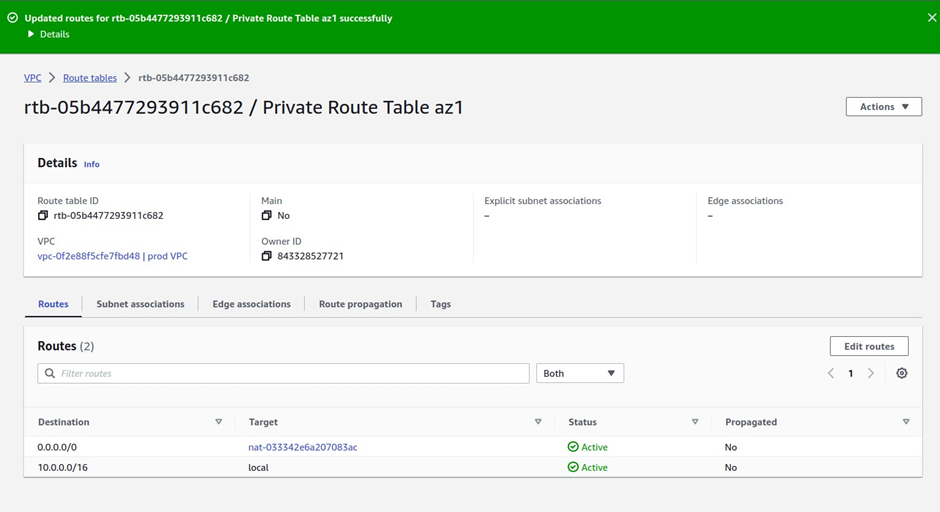
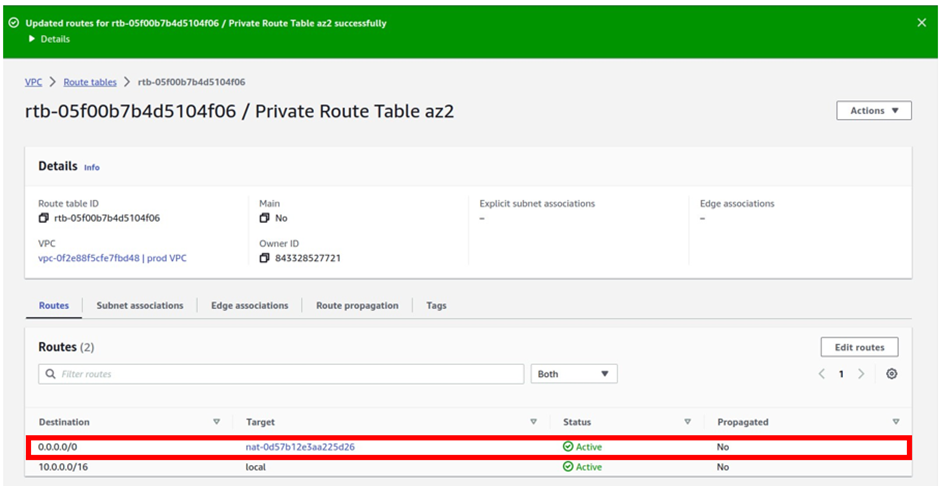
Successfully, we have added a route to the route table to route traffic to the internet through the Nat gateway in the public subnet az1.
When you scroll down, you can see the routes here.
Next, we will associate this route table with private app subnet az1 and private data subnet az1.
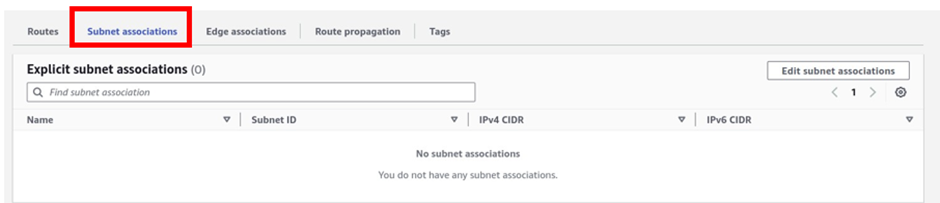
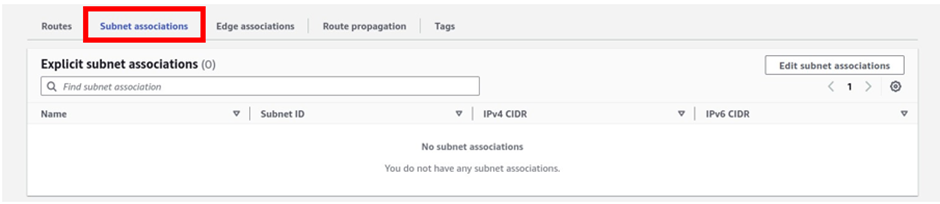
To associate this route table with our subnets, click subnet associations, then click edit subnet associations.
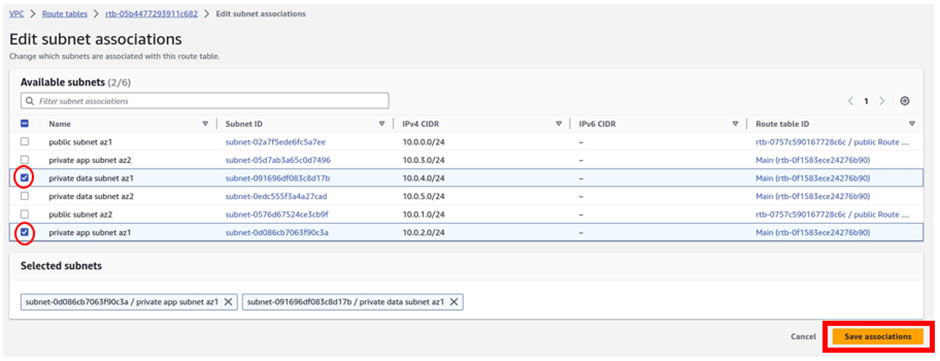
In the edit subnet associations dashboard, under the available subnets, select private app subnet az1, and private data subnet az1. Once you’ve selected the two subnets, click Save Associations.
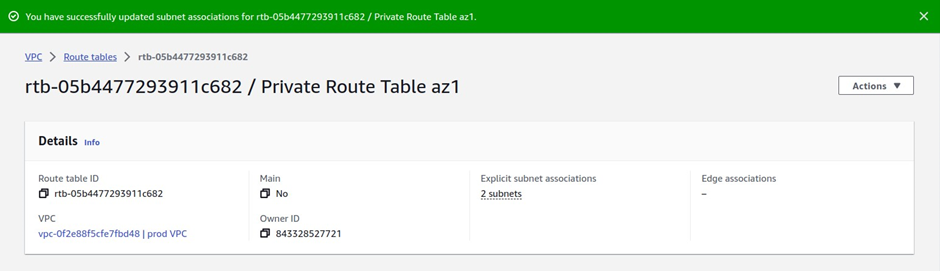
We have successfully associated our private app subnet az1 and private data subnet az1 to this route table.
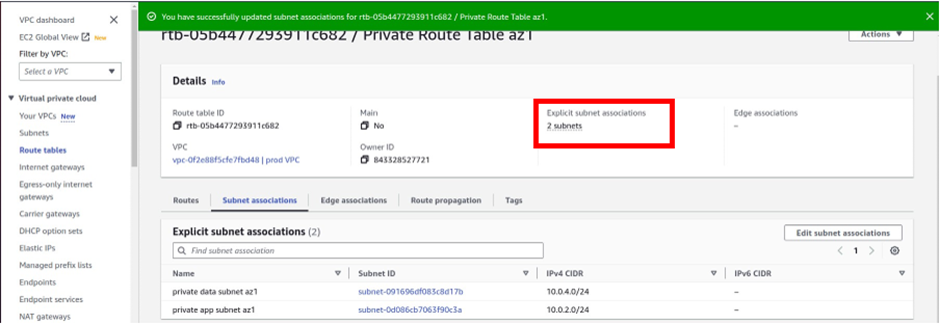
And you can see that information, under explicit subnet associations, we have two subnets there.
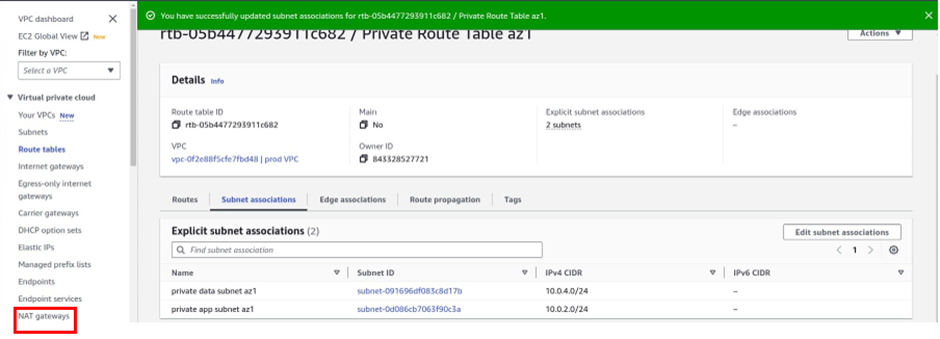
If you click on the subnet’s association tab a gain, you will see that the private app subnet az1 and private data subnet az1 are associated with the route table.
Next, we will create the second Nat gateway in the public subnet az2. On the left side of the VPC dashboard select Nat gateway. then click Create Nat gateway.
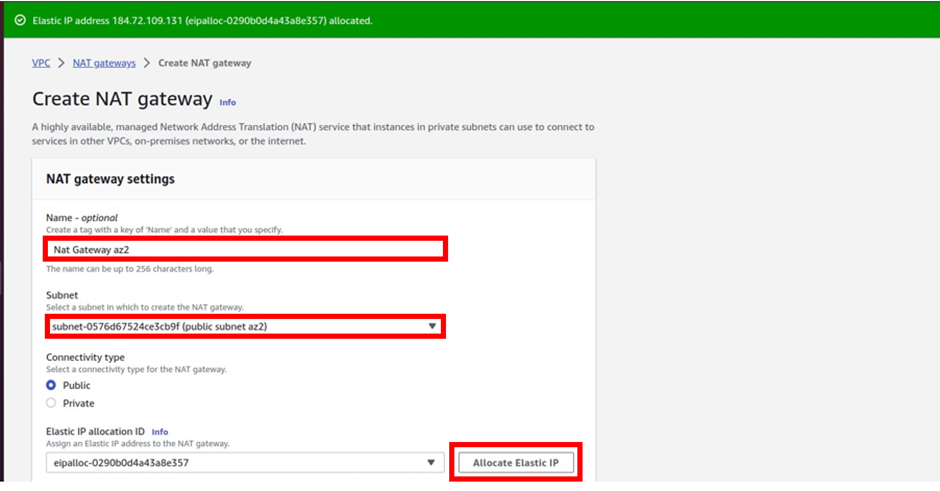
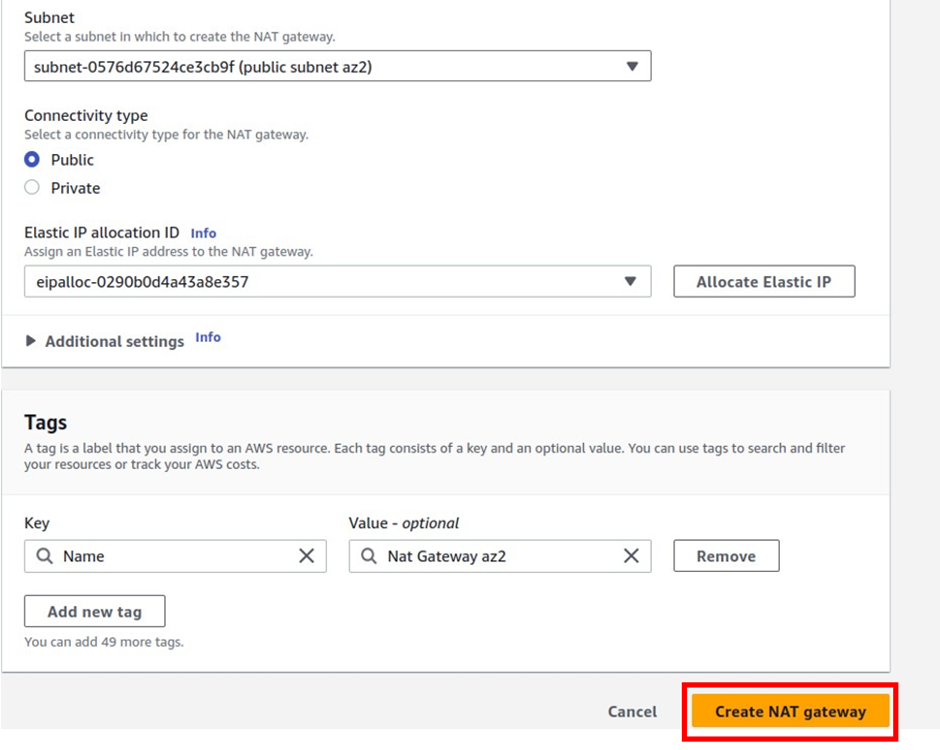
Under Nat gateway settings give the Nat gateway a name, call it Nat gateway az2. Then select the subnet you want to put the NAT gateway in. Under subnets, select the drop-down and select public subnet az2. For connectivity type leave it on the default public because we are creating a public Nat gateway. Under elastic IP allocation ID, click the allocate elastic IP button, this will allocate an elastic IP for you.
Scroll down and click Create Nat gateway.
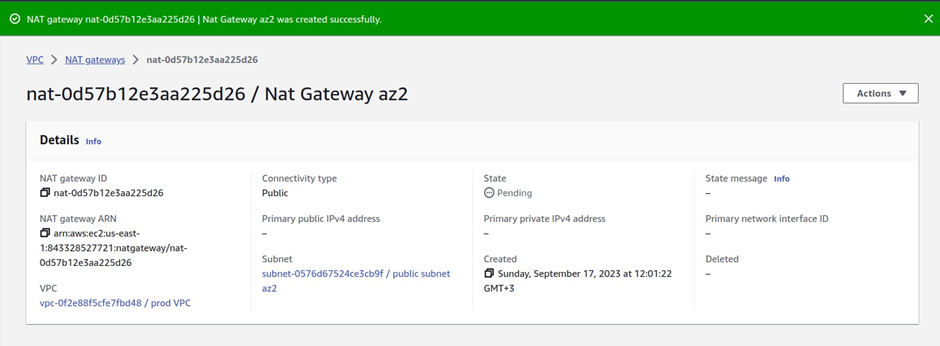
We have successfully created the Nat gateway.
The next thing we will do is to create another route table and call it private route table az2.
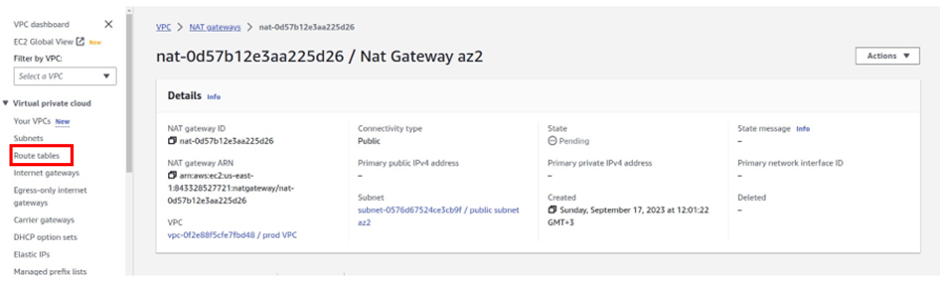
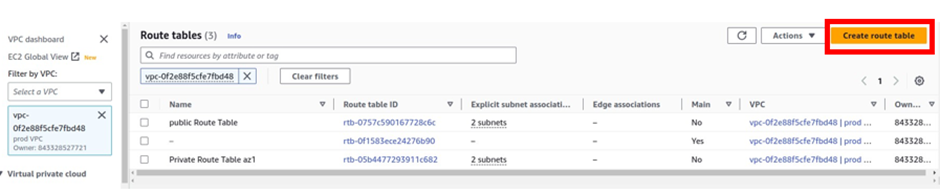
On the left side, select the route table. then click Create Route Table.
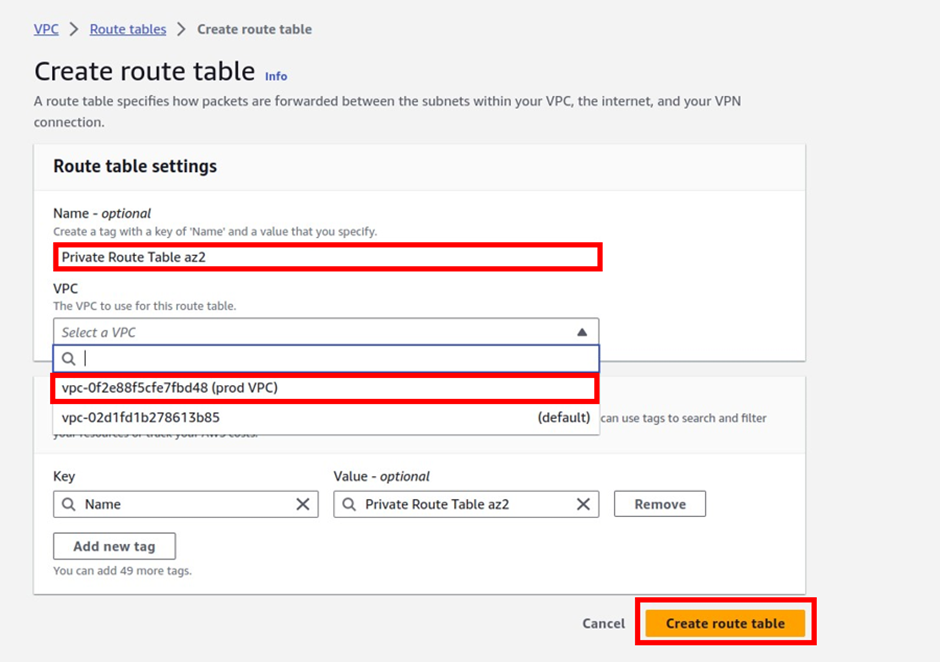
Under name give your route table a name, call it private route table az2. Once you’ve given your route table a name then, select the VPC you want to put your route table in, so under VPC, select the drop-down and select your prod VPC. These are the only settings we need to create this route table, click create route table.
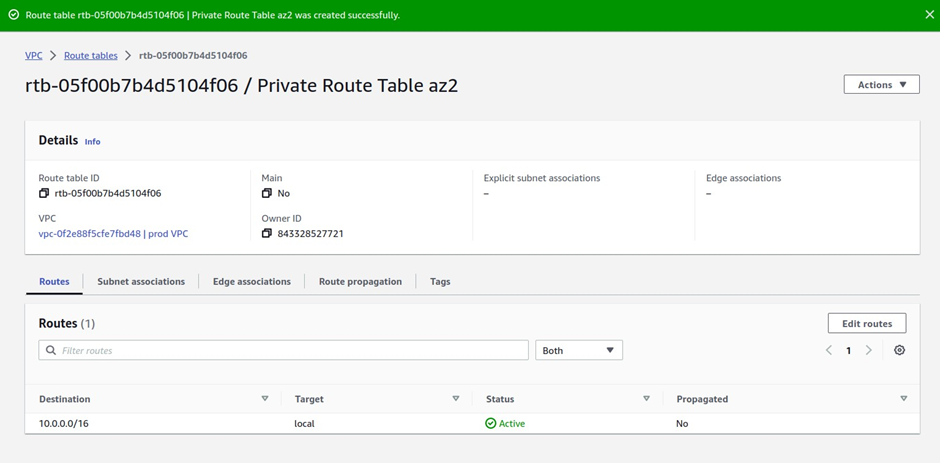
We have successfully created a private route table az2.
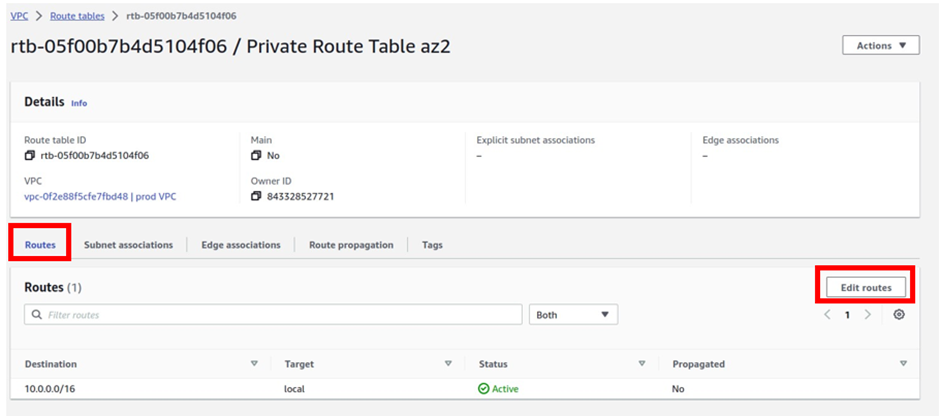
Now that we have successfully created the private route table az2, we will add a route to this route table to route traffic to the internet through the Nat gateway in the public subnet az2. To add a route to this route table, select the routes tab then click edit routes.
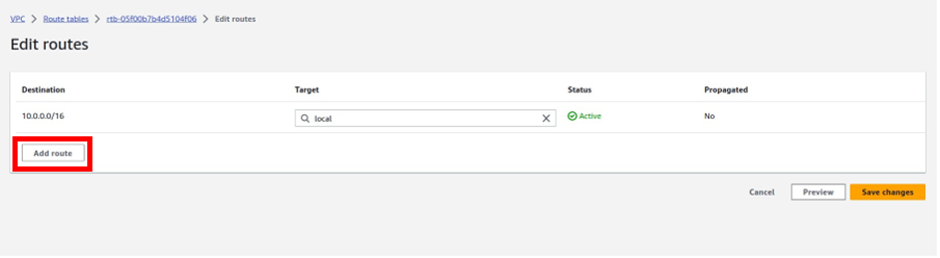
In the edit routes dashboard click Add route
Under destination remember traffic going to the internet is always 0.0.0.0/0 so type it in there and select it.
Then under targets, we will select our Nat gateway, so select the search box, and select Nat gateway.
And this time make sure you select Nat gateway az2. Then click save changes.
We have successfully added a route to this route table to route traffic to the internet through the Nat gateway in the public subnet az2.
To see that route scroll down and you will see it there.
The last thing we will do is associate this route table with private app subnet az2, and private data subnet az2
To associate this route table with our subnets, go to the subnets associations tab, select it then click edit subnet associations.
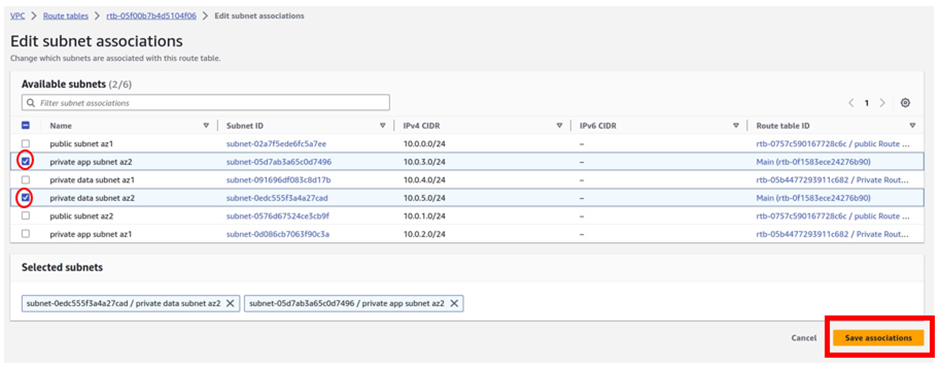
Under available subnets, we will select the private app subnet az2 and private data subnet az2. Once you’ve selected the subnets, click Save Associations.
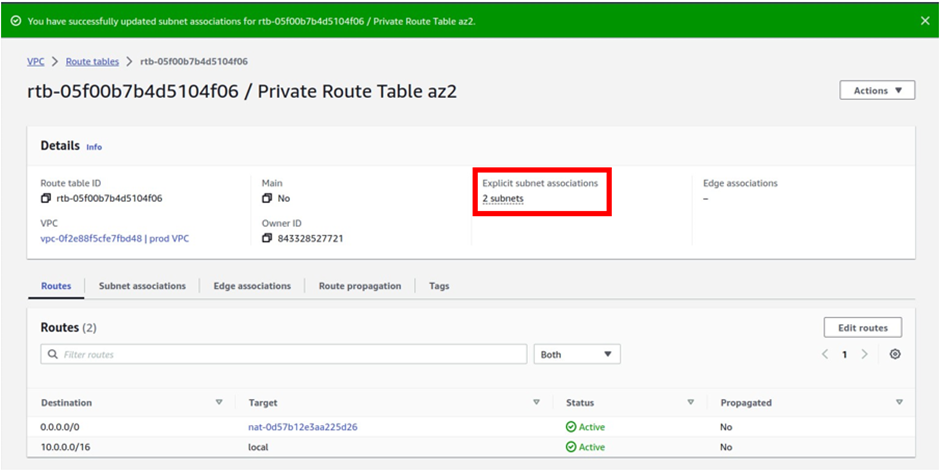
We have successfully associated our private app subnet az2, and private data subnet az2 with the private route table az2.
To see that, we can see that we have two subnets under explicit subnet associations.
and if you click on the subnet’s associations tab, you will see that our private app subnet az2, and private data subnet az2 are associated with this route table.
This is how we create Nat gateway to allow resources in our private subnet, to have access to the internet.
Delete The AWS NAT Gateway
After completion of your practice on the NAT Gateway you have to delete it to avoid incurring charges. Remember when you provision a NAT gateway, you are charged for each hour that your NAT gateway is available and each gigabyte of data that it processes.
Deleting a NAT gateway disassociates its Elastic IP address, but does not release the address from your account. So again, make sure you release the elastic IP address from your account.
Stay tuned for more.
If you have any questions concerning this article or have an AWS project that requires our assistance, please reach out to us by leaving a comment below or email us at
sales@accendnetworks.com
Thank you!


Thank you for your sharing. I am worried that I lack creative ideas. It is your article that makes me full of hope. Thank you. But, I have a question, can you help me? https://www.binance.bh/register?ref=IXBIAFVY
Your article helped me a lot, is there any more related content? Thanks!
Thanks for sharing. I read many of your blog posts, cool, your blog is very good.
Your point of view caught my eye and was very interesting. Thanks. I have a question for you.
Your point of view caught my eye and was very interesting. Thanks. I have a question for you.
Your point of view caught my eye and was very interesting. Thanks. I have a question for you. https://accounts.binance.info/id/register-person?ref=UM6SMJM3
Thanks for sharing. I read many of your blog posts, cool, your blog is very good.
Thank you for your sharing. I am worried that I lack creative ideas. It is your article that makes me full of hope. Thank you. But, I have a question, can you help me?
I don’t think the title of your article matches the content lol. Just kidding, mainly because I had some doubts after reading the article.
Can you be more specific about the content of your article? After reading it, I still have some doubts. Hope you can help me.
I don’t think the title of your article matches the content lol. Just kidding, mainly because I had some doubts after reading the article.
Thank you for your sharing. I am worried that I lack creative ideas. It is your article that makes me full of hope. Thank you. But, I have a question, can you help me?
Thank you for your sharing. I am worried that I lack creative ideas. It is your article that makes me full of hope. Thank you. But, I have a question, can you help me?
I don’t think the title of your article matches the content lol. Just kidding, mainly because I had some doubts after reading the article.
Thank you, your article surprised me, there is such an excellent point of view. Thank you for sharing, I learned a lot.
Thanks for sharing. I read many of your blog posts, cool, your blog is very good.