How To Configure Application Load Balancers in AWS
What is an Application Load Balancer?
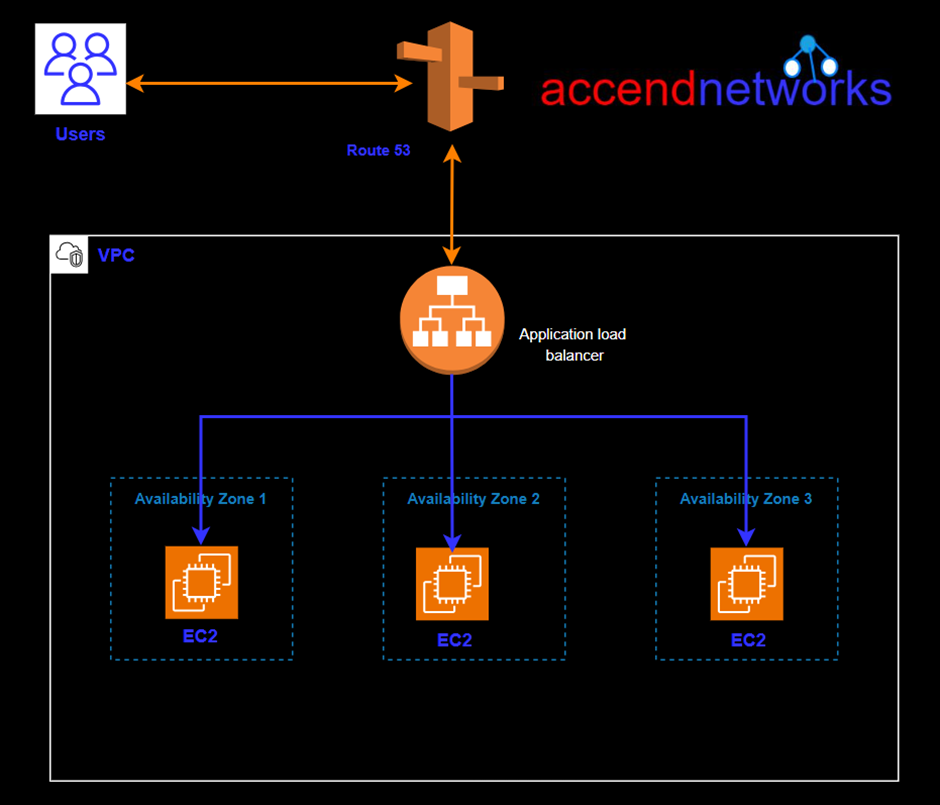
The Application Load Balancer is a feature of Elastic Load Balancing. Elastic Load Balancing automatically distributes your incoming traffic across multiple targets, such as EC2 instances, containers, and IP addresses, in one or more Availability Zones.
It monitors the health of its registered targets, and routes traffic only to the healthy targets.
Key Features and Benefits.
High Availability: A load balancer distributes incoming application traffic across multiple targets, such as EC2 instances, in multiple Availability Zones. If one server fails or becomes overloaded, the load balancer redirects traffic to healthy servers, preventing service interruptions.
A listener checks for client connection requests, using the protocol and port you configure. The rules that you define for a listener determine how the load balancer routes requests to its registered targets.
SSL Termination: Application Load balancer can handle SSL/TLS termination, offloading the decryption process from the backend servers. This not only reduces the compute burden on servers but also simplifies certificate management.
Health Checks:Application Load Balancers continuously monitor the health of backend servers through health checks. If a server fails a health check, the load balancer automatically redirects traffic to healthy servers, ensuring optimal performance and reliability.
Content-Based Routing: Application Load balancer can route traffic based on the content of the requests. This feature is valuable for applications with multiple services or microservices, allowing for granular control over how traffic is distributed.
Let’s do a little bit of hands-on.
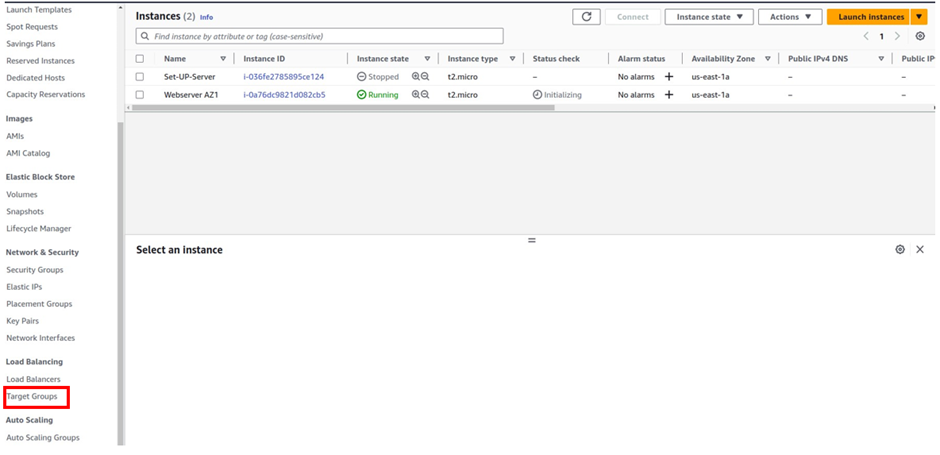
To create a target group, log into the management console
aws.amazon.com. on the left side of the navigation pane, scroll down and
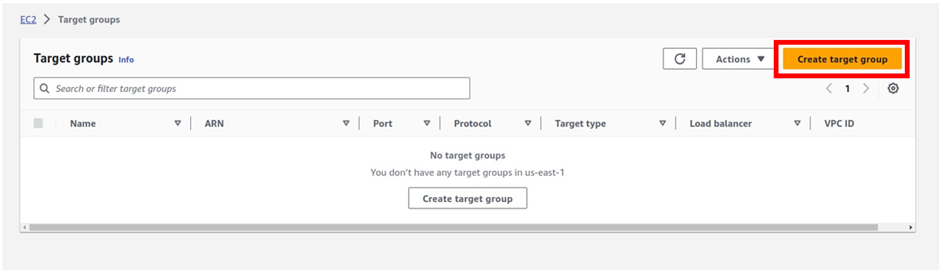
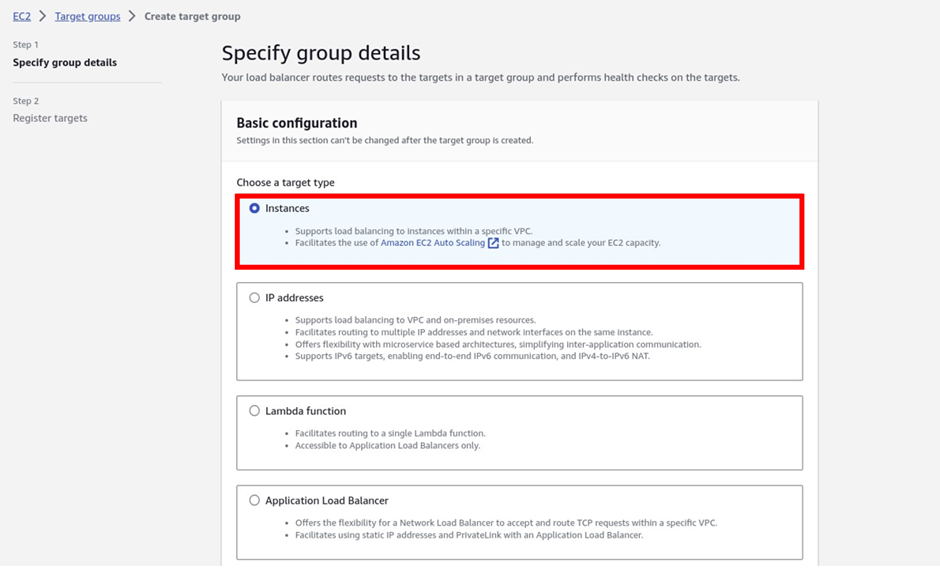
under load balancers, click target group then click create target group.
Under basic configuration choose the target, we will move with instances, then scroll down.
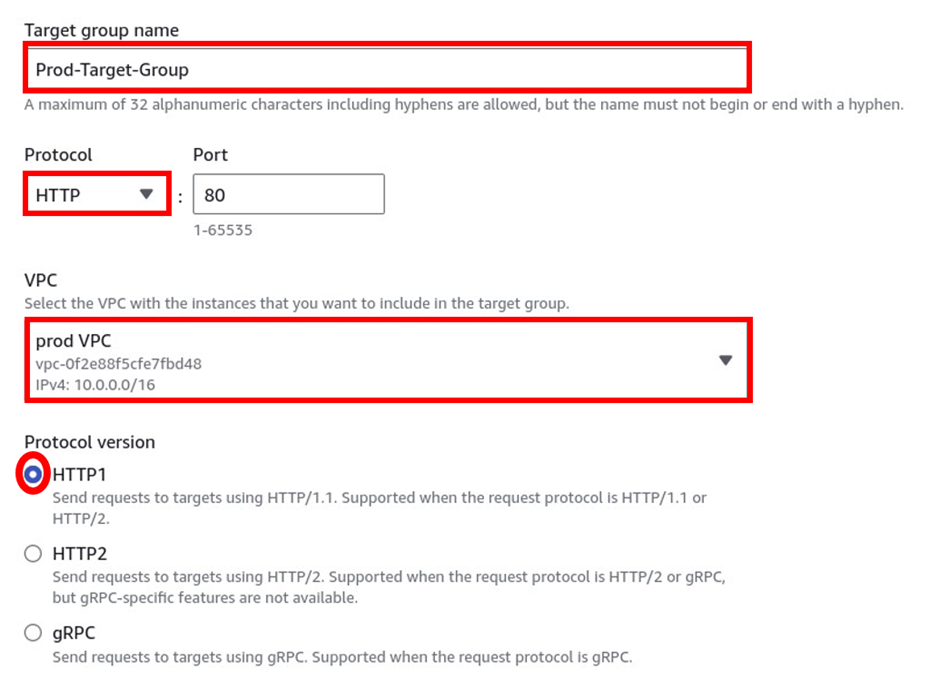
Under the target group name, give it a name, and call it the prod-target group. For protocol, it is going to be HTTP, port 80, and under VPC, select the drop-down and make sure you select your VPC, I had created a custom VPC, called prod-VPC, so I will select it. Then protocol version, leave it on HTTP1 then scroll down.
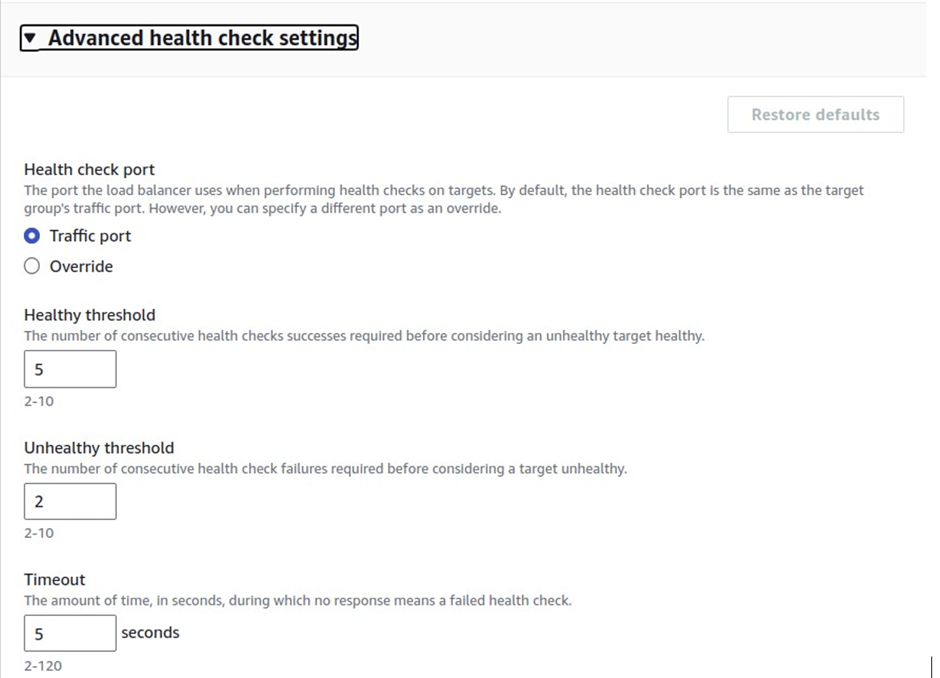
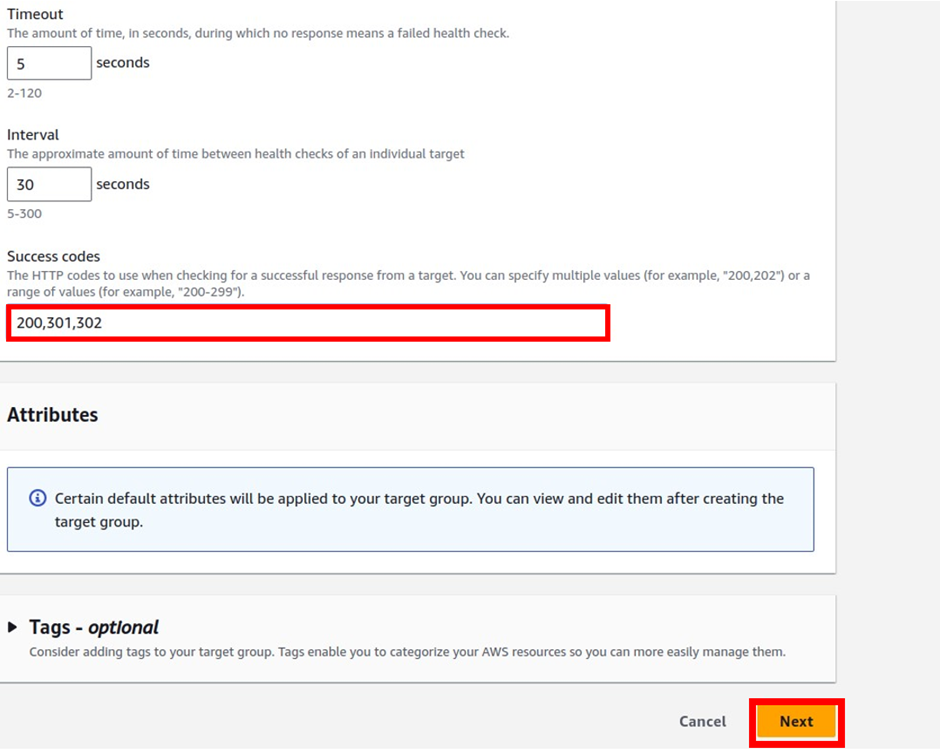
Under health-cheques, click the advance, dropdown, and scroll down, Under the success status code, add 301, and 302, We need this status code for when we need to redirect traffic from HTTP to HTTPS. Scroll down and click next.
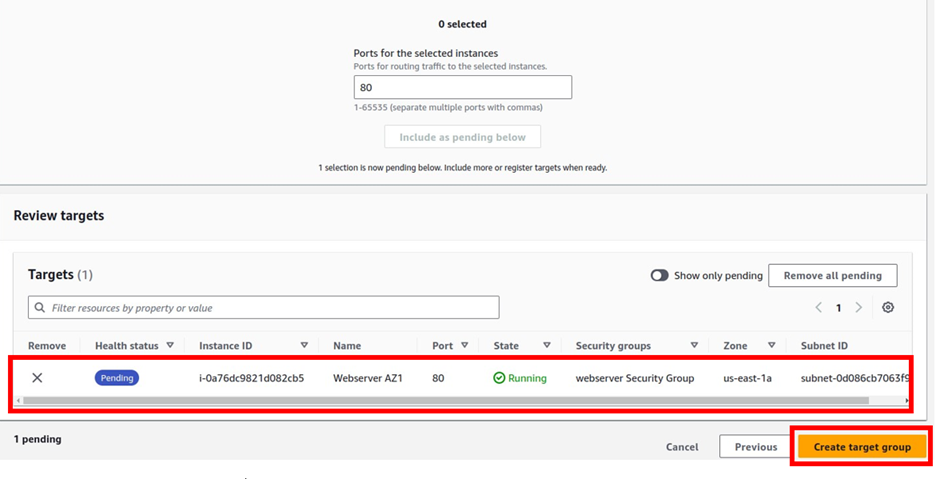
we will add our instance to the target group, I have one instance running in my account called webserverAZ1 and we can see it under available instances. To add an Instance to the target group, select it then click include as pending below.
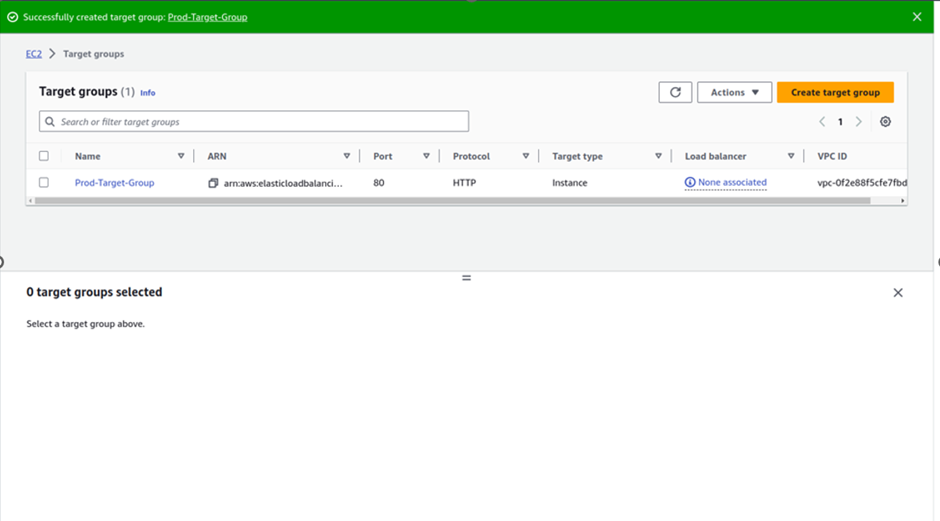
When you click include as pending, it will add it to the target, and you will see it. once you see your EC2 instance here as pending, click Create Target group.
Next, we will create an application load balancer to route internet traffic to this target group.
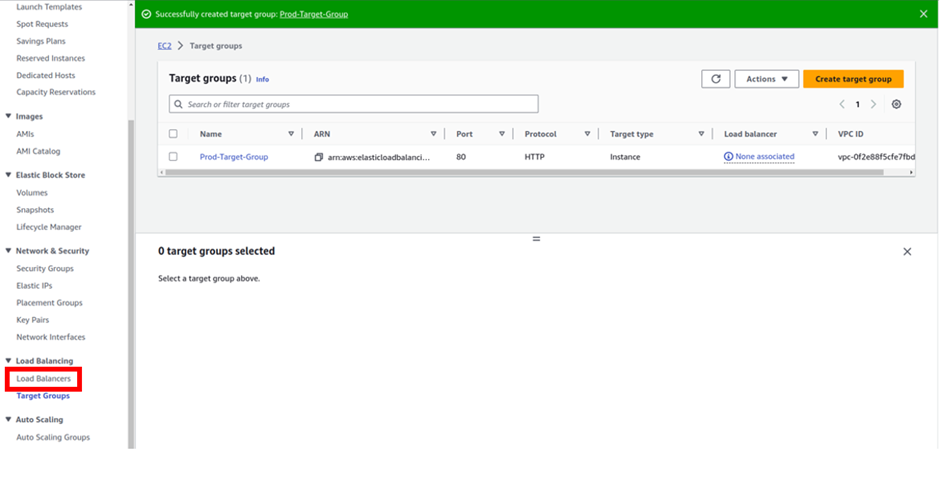
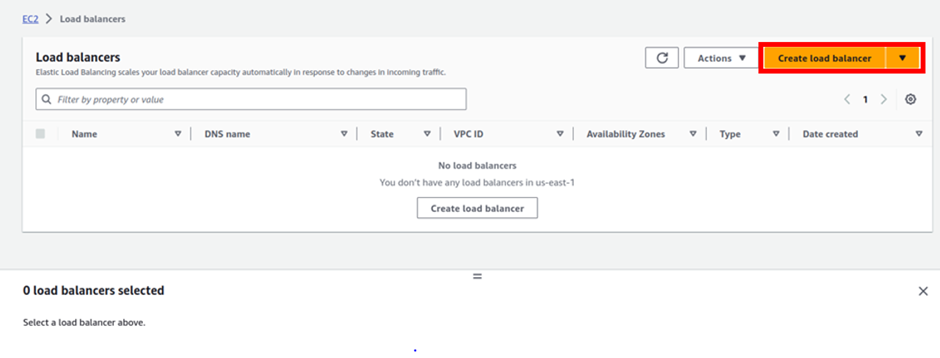
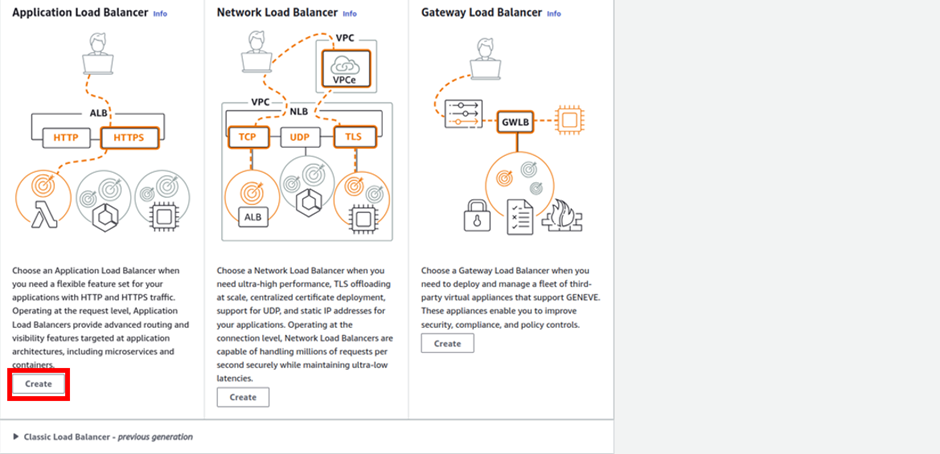
To create an application load balancer on the left side of the navigation pane, scroll down, and under load balancing, select load balancers, then click Create load balancers.
On this page scroll down, remember we are creating an application load balancer. Under application, load balancer click create.
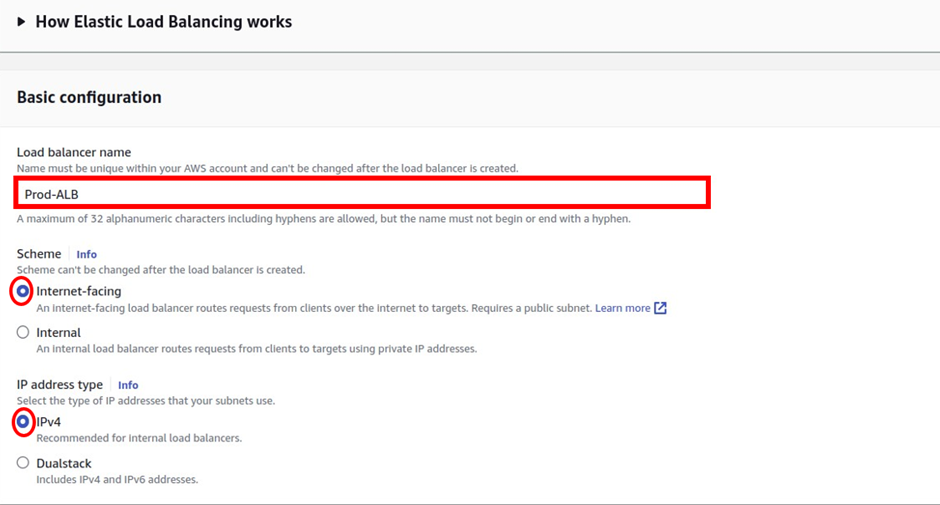
Under basic configuration, give your load-balancer a name, call it prod-application load balancer. Scroll down, the application load balancer is going to be internet-facing so select the radio button next to internet-facing. Again select the radio button under IPv4.
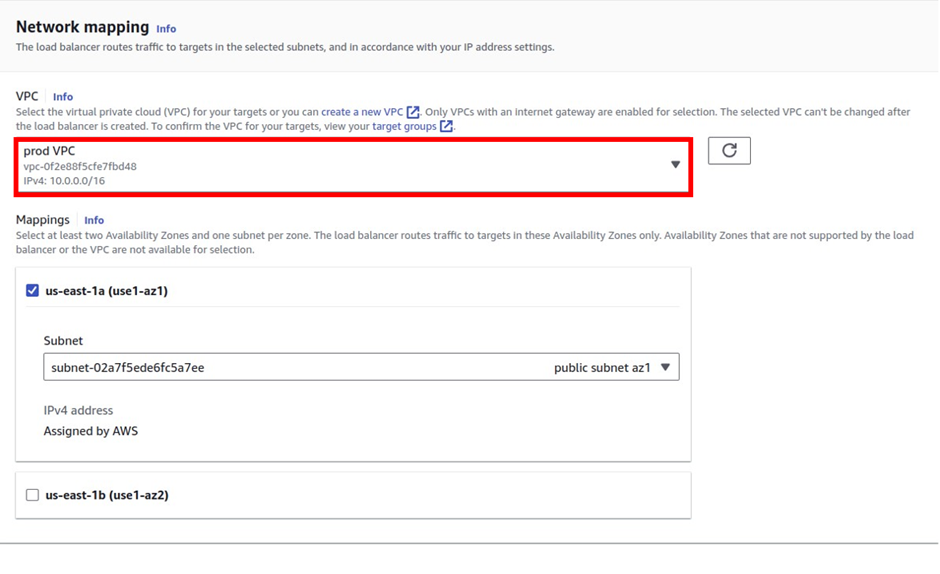
Scroll down, under Network mapping in the VPC section. select the drop-down and select your VPC.
Under mappings, we will select the us-east-1a availability zone, and in us-east-1a, we want to make sure that the application load balancer has a reach to the public subnet az1.
So in us-east-1a, make sure you’ve selected public subnet az1.
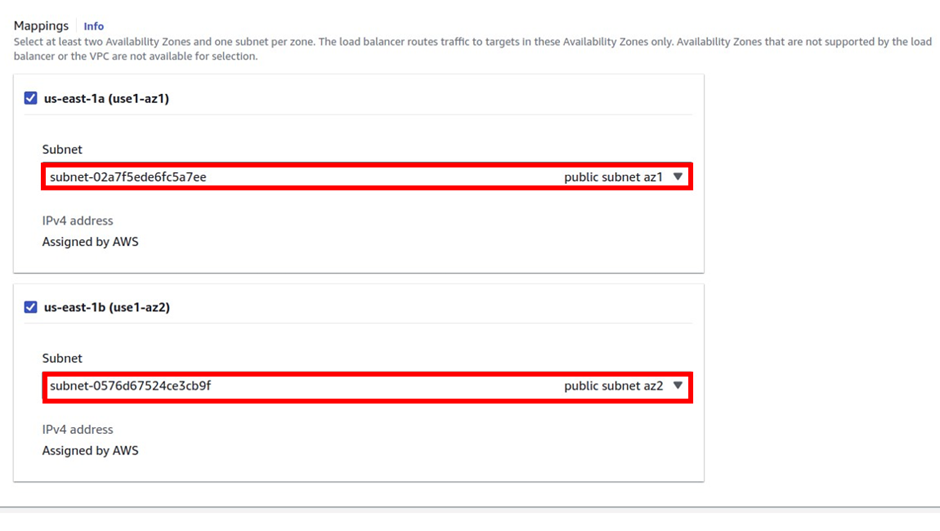
Then scroll down a gain and in us-east-1b, make sure you have a gain selected public subnet az2. Remember the application load-balancer always works in the public subnet.
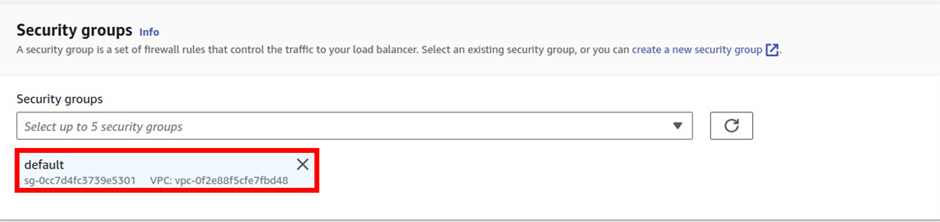
scroll down under the security group, remove the default security group, select the drop-down, and select your security group. I created a security group that allows traffic on ports 80, and 443 (HTTP and HTTPS) and called it an application load balancer security group. Will select it.
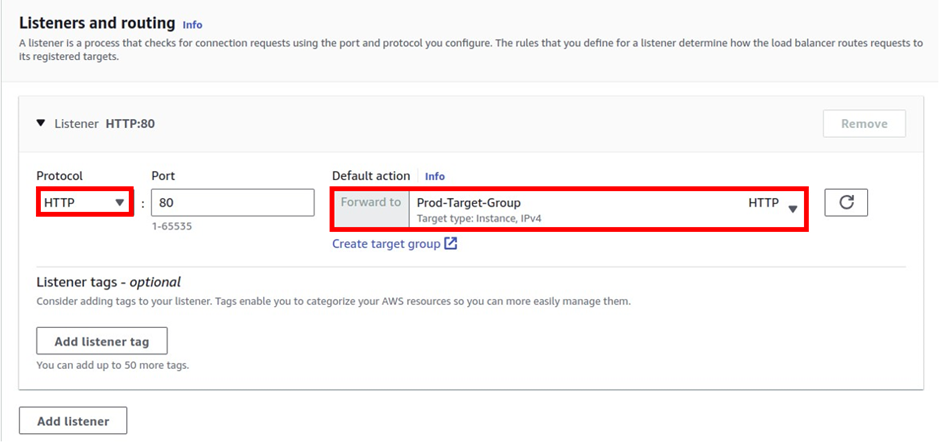
Then scroll down, under listeners and routing, the first listener we will create is on port 80, the protocol is HTTP, and the port is 80, then under default action, select the drop-down and select the target group.
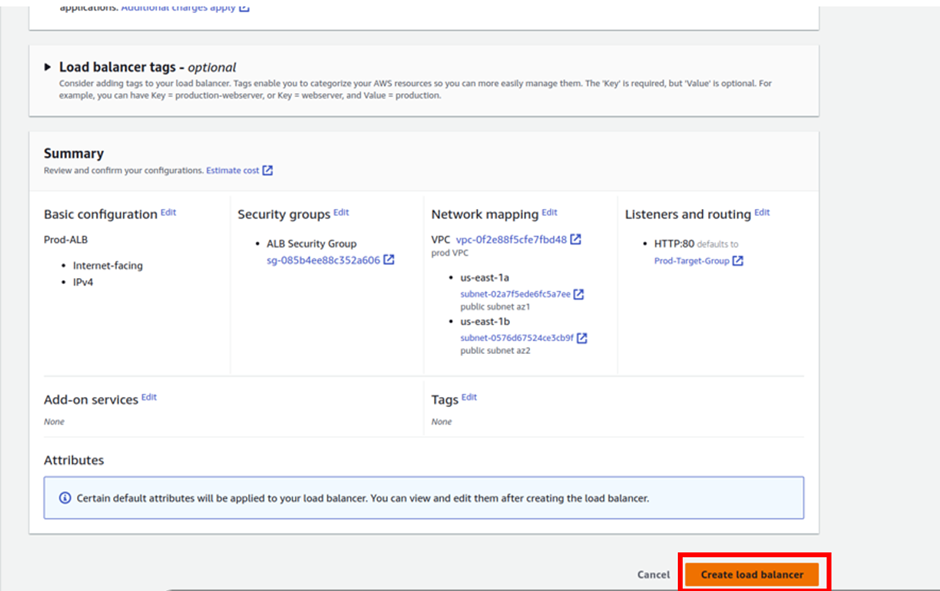
scroll down, we will leave all the other options as default then click Create Application load-balancer.
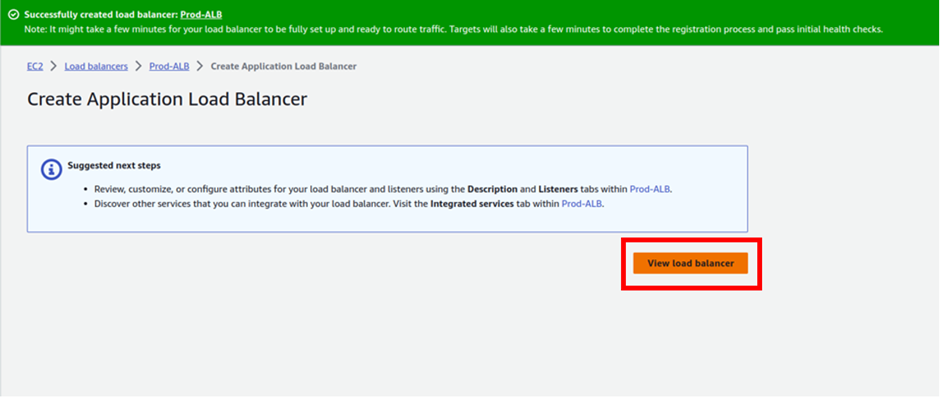
We have successfully created, the application load balancer, click view load balancer.
This brings us to the end of this blog. Pull down and stay tuned for more.
If you have any questions concerning this article or have an AWS project that requires our assistance, please reach out to us by leaving a comment below or email us at sales@accendnetworks.com.
Thank you!


I don’t think the title of your article matches the content lol. Just kidding, mainly because I had some doubts after reading the article.
Your point of view caught my eye and was very interesting. Thanks. I have a question for you.
Thanks for sharing. I read many of your blog posts, cool, your blog is very good.
Can you be more specific about the content of your article? After reading it, I still have some doubts. Hope you can help me.
Can you be more specific about the content of your article? After reading it, I still have some doubts. Hope you can help me. https://accounts.binance.info/register/person?ref=JW3W4Y3A
Thank you for your sharing. I am worried that I lack creative ideas. It is your article that makes me full of hope. Thank you. But, I have a question, can you help me?
Thanks for sharing. I read many of your blog posts, cool, your blog is very good.
I don’t think the title of your article matches the content lol. Just kidding, mainly because I had some doubts after reading the article.
Your point of view caught my eye and was very interesting. Thanks. I have a question for you. https://accounts.binance.com/hu/register?ref=IQY5TET4
Your article helped me a lot, is there any more related content? Thanks!
Can you be more specific about the content of your article? After reading it, I still have some doubts. Hope you can help me. bezmaksas binance konts
Thank you for your sharing. I am worried that I lack creative ideas. It is your article that makes me full of hope. Thank you. But, I have a question, can you help me? https://www.binance.info/ur/register-person?ref=WTOZ531Y
Thank you for your sharing. I am worried that I lack creative ideas. It is your article that makes me full of hope. Thank you. But, I have a question, can you help me?
I don’t think the title of your article matches the content lol. Just kidding, mainly because I had some doubts after reading the article.
Your point of view caught my eye and was very interesting. Thanks. I have a question for you. https://www.binance.com/en-IN/register?ref=UM6SMJM3