Leveraging AWS IAM Roles for Secure and Efficient Cloud Resource Management.
With millions of active users accessing AWS, the AWS Identity and Access Management (IAM) service acts as the helm of the security by governing who is authenticated (signed in) and who is authorized (has permissions) to use the AWS resources.
What are AWS IAM Roles?
IAM roles are entities that provide access to different AWS services based on the level of permissions they have, which makes them similar to AWS users. Roles do not have passwords or access keys associated with them. Instead, roles provide temporary security credentials to whomever has the ability to assume that role.
Roles eliminate the overhead of managing users and their long-lived credentials by generating temporary credentials whenever required.
Any of these entities can assume a role to use its permissions:
- AWS user from the same account
- AWS user from a different account
- AWS service
- Federated identity
Structure of an IAM role
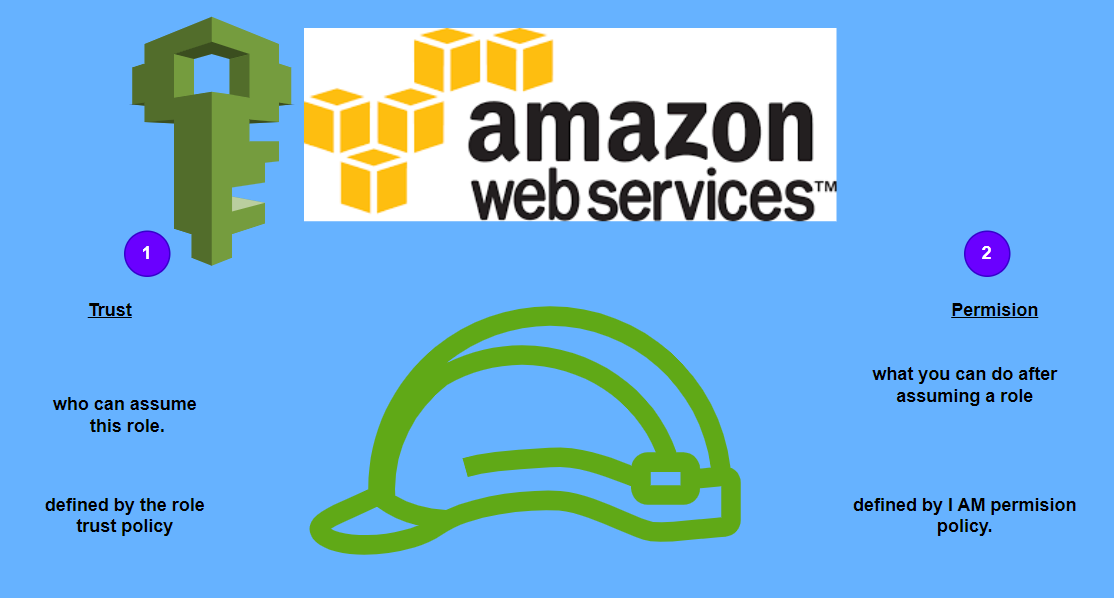
There are two essential aspects to an IAM role:
- Trust policy: Who can assume the IAM role
- Permission policy: What does the role allow once you assume it.
Trust policy
These are policies that define and control which principals can assume the role based on the specified conditions. Trust policies are used to prevent the misuse of IAM roles by unauthorized or unintended entities.
Permission policy
These policies define what the principals who assume the role are allowed to do once they assume it.
Creating IAM Role
Pre-requisite: An AWS account with an IAM admin user.
In this tutorial, we will create a custom IAM role with the trusted entity as the AWS user and the permission policy to allow admin access to AWS EC2.
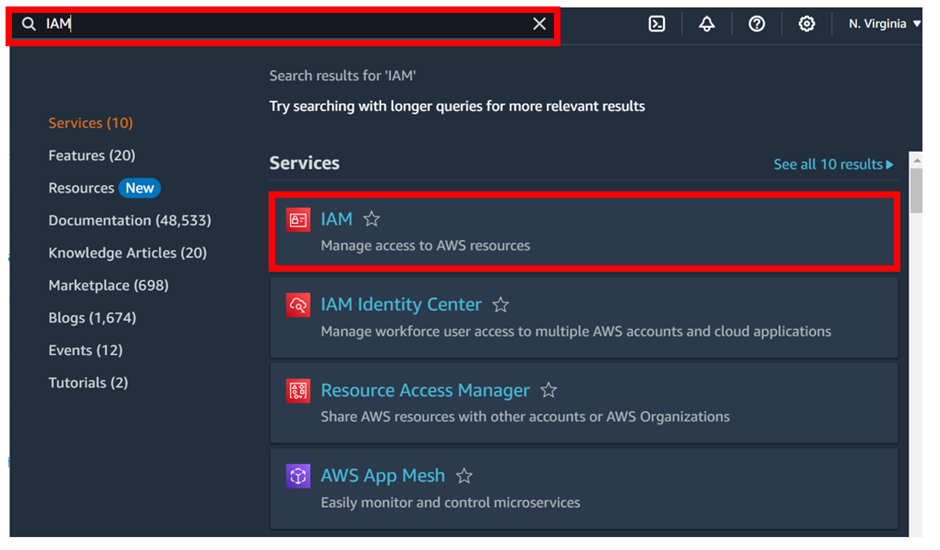
Log into the Management console and type I AM in the search box, then select I AM under services.
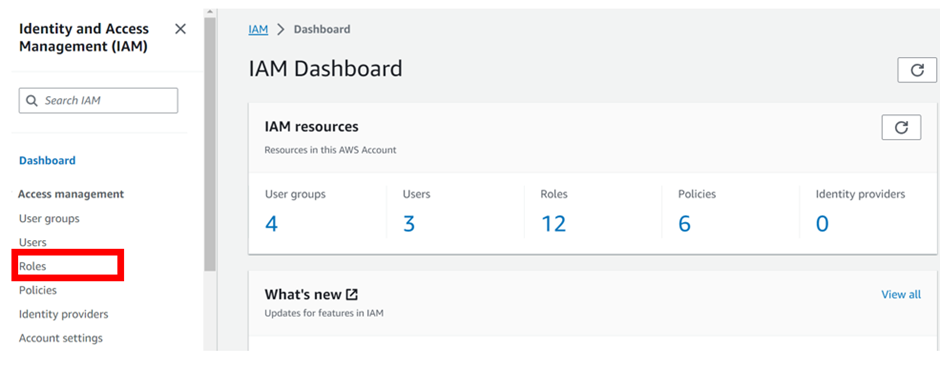
In the I AM dashboard, on the left side of the navigation pane under Access Management, select roles.
You might notice some pre-created roles in your account on the roles panel Ignore them.
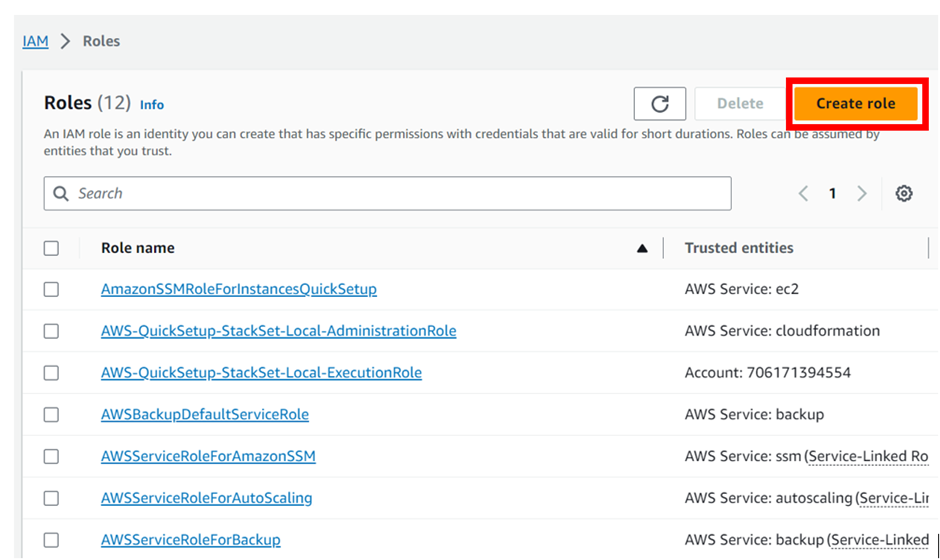
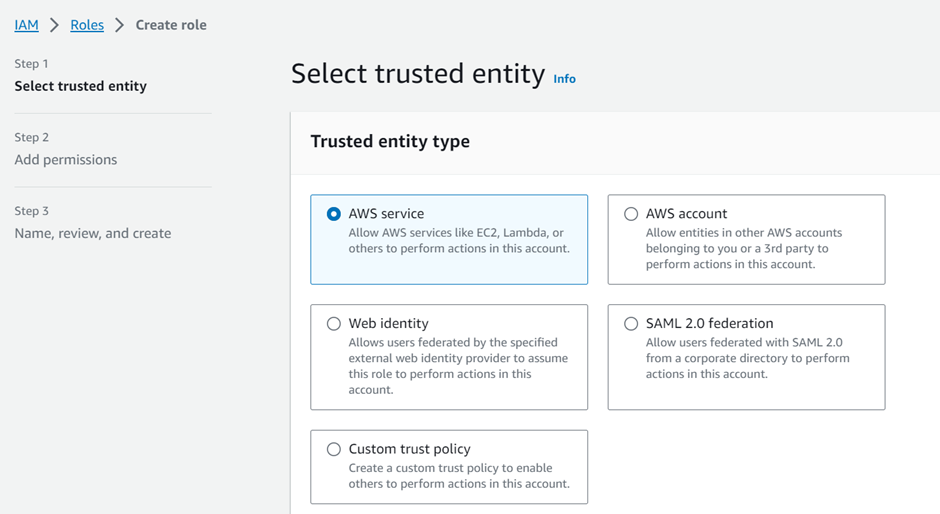
To create a new role, click on the “Create role” button.
As previously stated, a role has two core aspects, the trust policy and the permission policy. So, the first thing that we have to specify is who can assume this role.
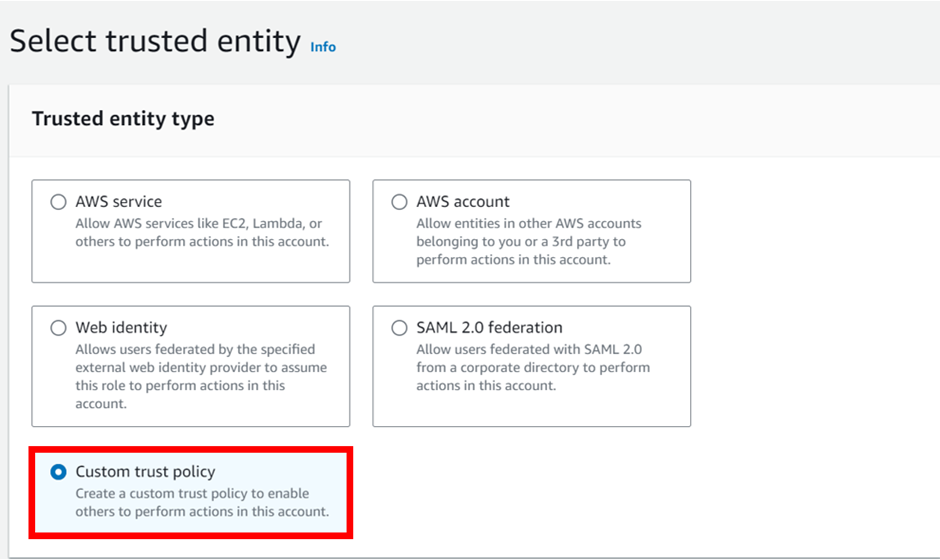
We will begin by selecting the “Custom trust policy”
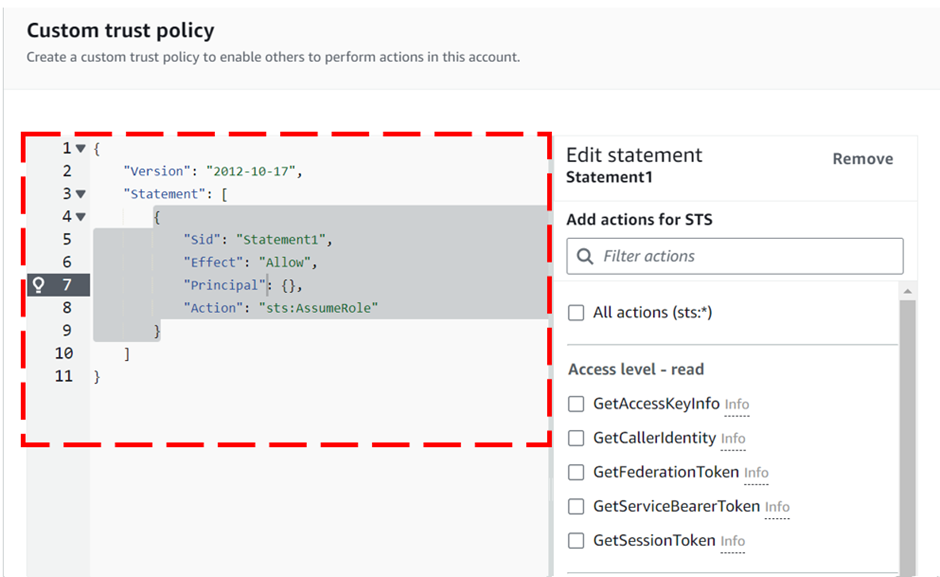
Upon selection of the “Custom trust policy”, AWS automatically generates a JSON policy with an empty principal field. The principal field specifies who can assume this role. If we keep it empty then this policy cannot be assumed by any principal.
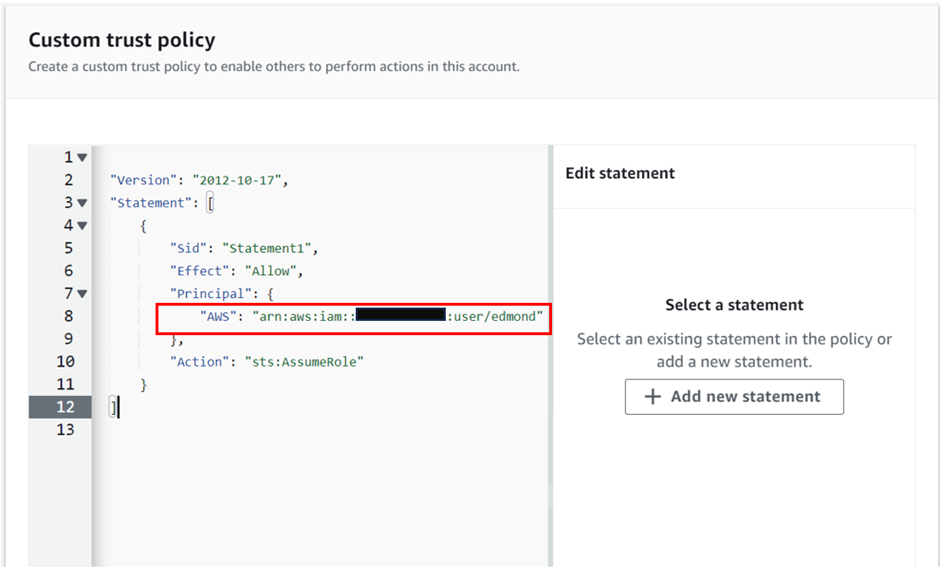
We will add the Amazon Resource Name (ARN) of the AWS IAM user who should be allowed to assume this role. The ARN can be obtained from the user details page in the IAM dashboard.
Copy the ARN and paste it as a key-value pair, with the key being “AWS” as shown below.
Once you have reviewed the trust policy, click on the next button to move on to the next page.
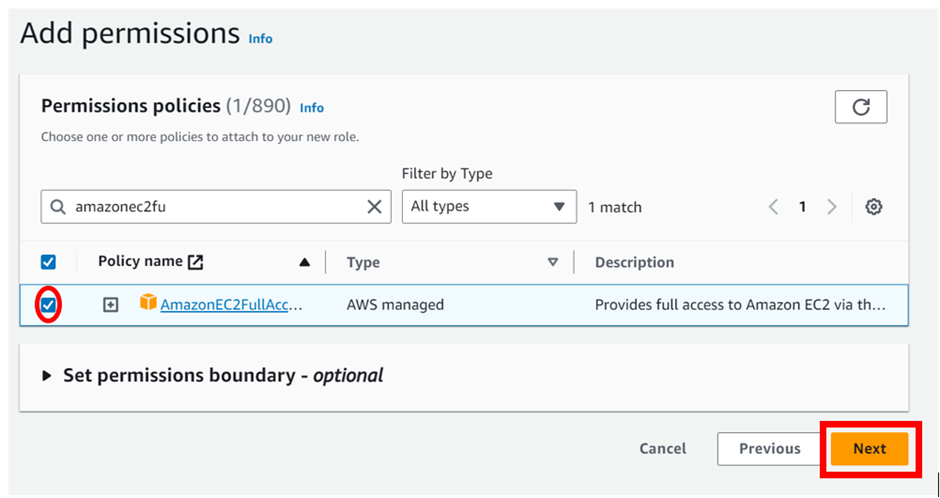
The next step is to choose a permission policy for this role. We can either use an existing policy or create a new one. We will choose an existing managed policy by the name AmazonEC2FullAccess to grant our role full access to the AWS EC2 service.
Remember that AWS denies everything by default. We are only granting the EC2 access to this role by attaching this policy. Leave all the other settings unchanged and click on next.
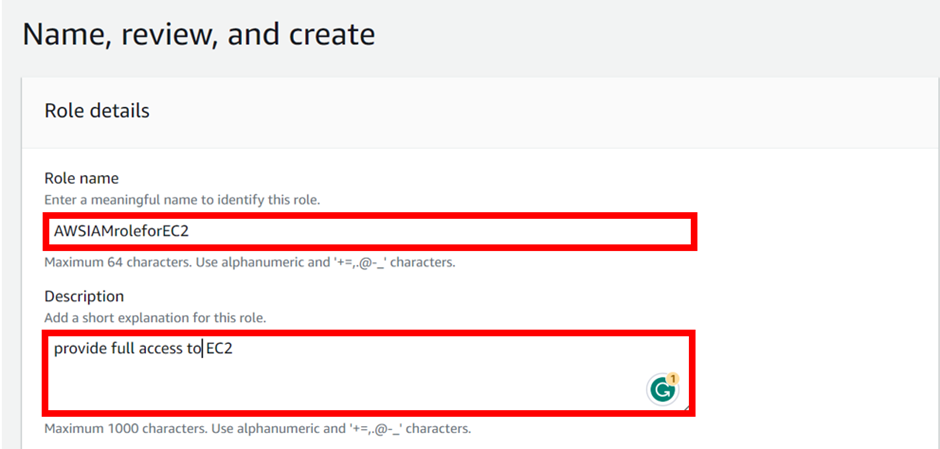
We have already taken care of the two essential aspects of a role. All that is left is to give the role a name and a description.
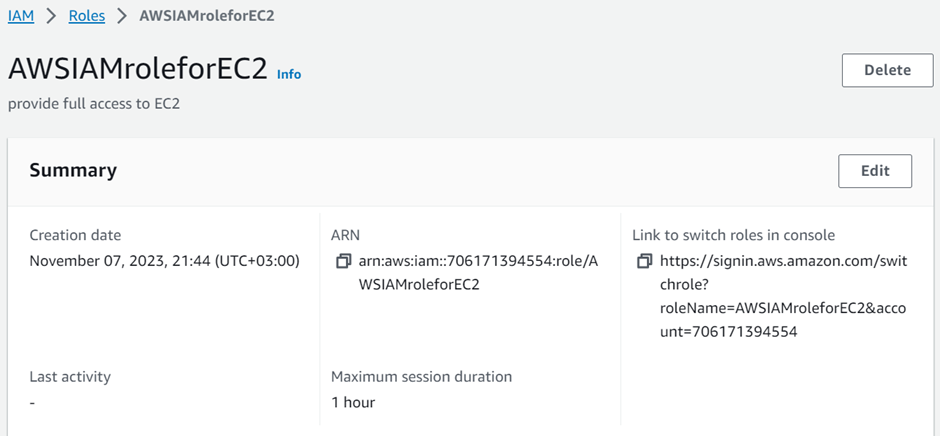
In the role details under the name, give your role a name. call it AWSIAMroleforEC2.
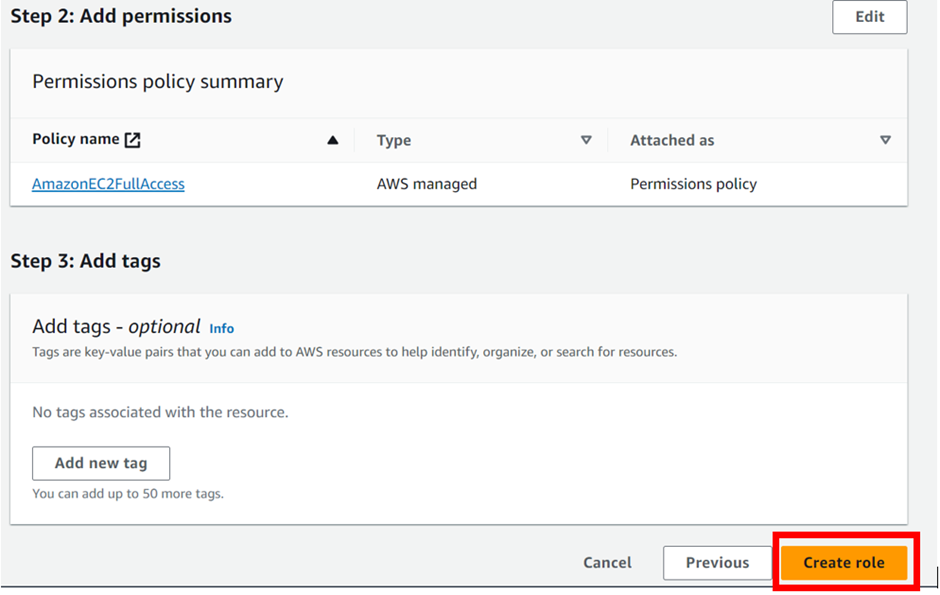
Then describe it as provide full access to EC2 under the description. Then Review all the details and click on the Create role button.
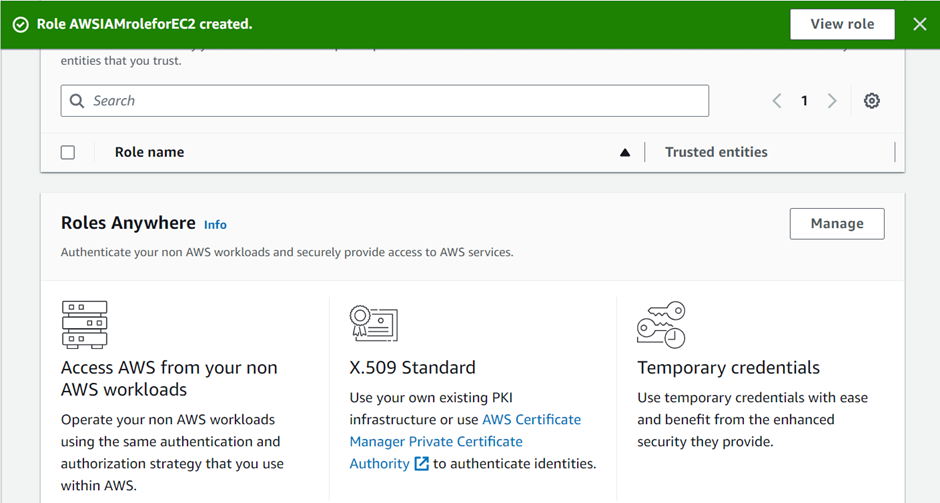
Congratulations! You have successfully created your first role. Click on view role.
Security learning: The user ARN in the trust policy is transformed into a unique principal ID when the policy is saved to prevent escalation of privilege by removing and recreating a different user with the same name. As a result, if we delete and recreate a user, the new user’s unique ID is different, rendering the trust policy ineffective.
Assuming IAM Roles
There are multiple ways to assume IAM roles. We can assume a role using the console, the CLI, or even the SDK.
Switching to a role through the console
Log in as an IAM user allowed to assume that role.
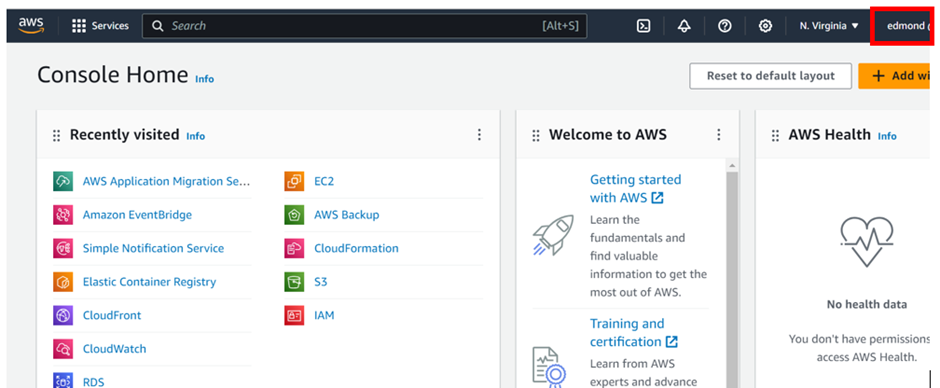
Already logged in as user Edmond.
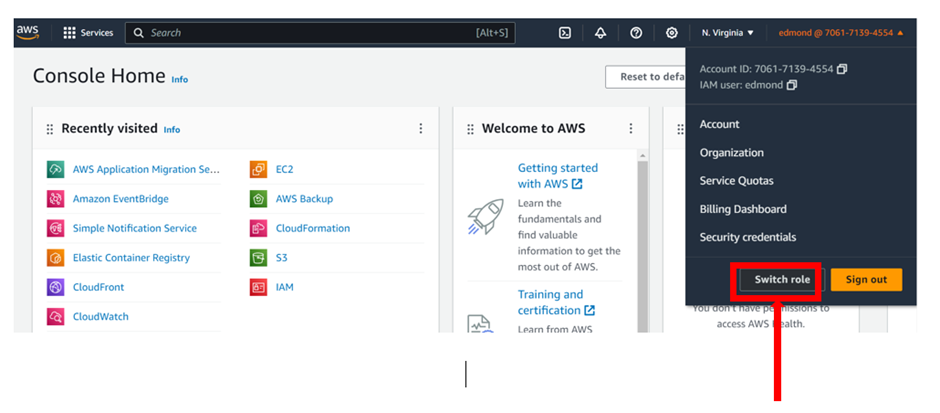
To switch on a different role, select the drop-down user information panel in the top right corner. When we click on it, the “Switch role” button appears next to the “Sign out” button.
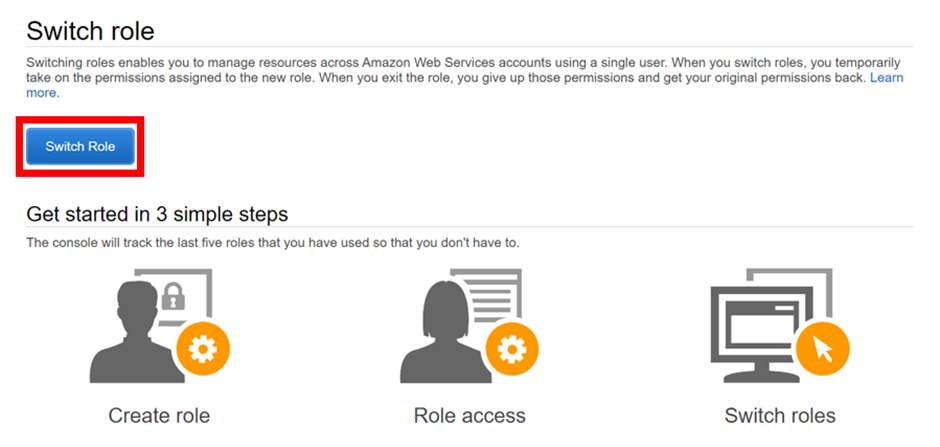
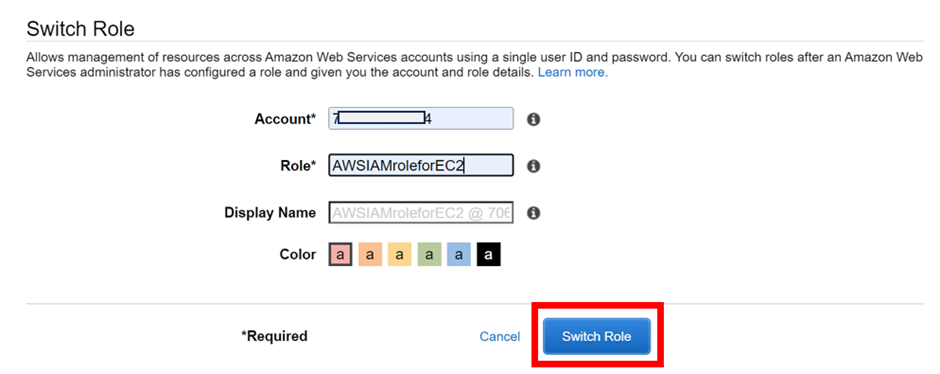
Upon clicking on the “Switch role” button, we are greeted by a form requesting information about the role we wish to switch to.
If you are switching your role for the first time you would be greeted by a different screen explaining the details about switching a role. Click on the “Switch role” button.
Fill in the role details with the role we created in the previous tutorial and click on the “Switch role” button.
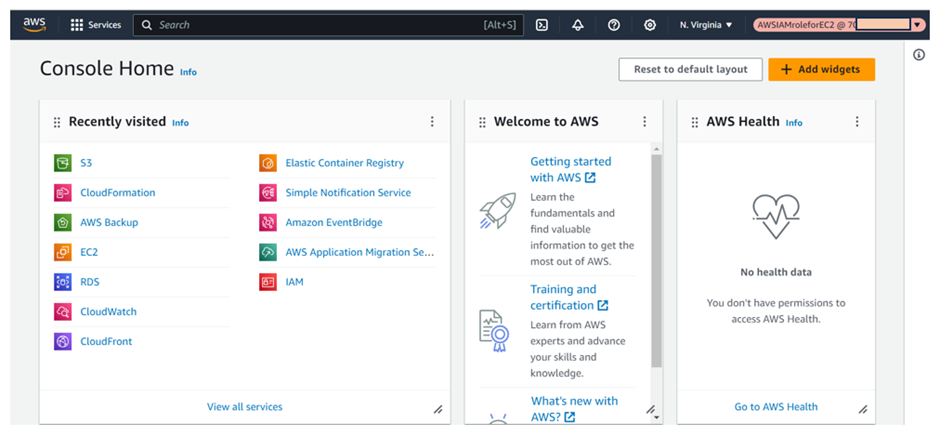
Upon switching to the IAM role, we arrive at the IAM dashboard again with the principal as the AWSIAMRoleforEC2@123456777
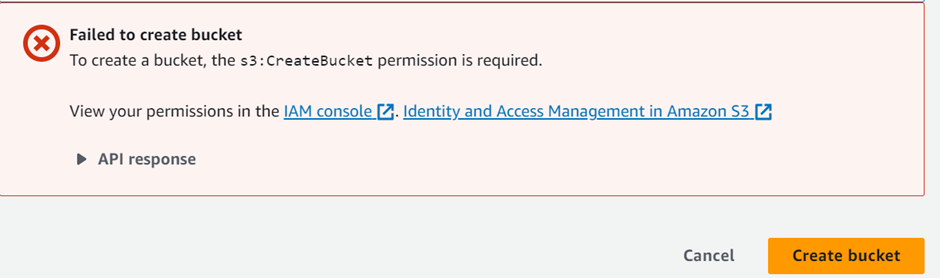
Because this role is only for EC2, if we try creating an s3 bucket, we will get access denied.
Congratulations! You have successfully assumed a role.
Pull down and stay tuned for more.
If you have any questions concerning this article or have an AWS project that requires our assistance, please reach out to us by leaving a comment below or email us at. sales@accendnetworks.com
Thank you!


I don’t think the title of your article matches the content lol. Just kidding, mainly because I had some doubts after reading the article. https://accounts.binance.com/register/person?ref=QCGZMHR6
Your point of view caught my eye and was very interesting. Thanks. I have a question for you.
I don’t think the title of your article matches the content lol. Just kidding, mainly because I had some doubts after reading the article.
Thank you for your sharing. I am worried that I lack creative ideas. It is your article that makes me full of hope. Thank you. But, I have a question, can you help me?
Thank you for your sharing. I am worried that I lack creative ideas. It is your article that makes me full of hope. Thank you. But, I have a question, can you help me?
Thanks for sharing. I read many of your blog posts, cool, your blog is very good.
Thanks for sharing. I read many of your blog posts, cool, your blog is very good.
Thank you for your sharing. I am worried that I lack creative ideas. It is your article that makes me full of hope. Thank you. But, I have a question, can you help me?
I don’t think the title of your article matches the content lol. Just kidding, mainly because I had some doubts after reading the article.
I don’t think the title of your article matches the content lol. Just kidding, mainly because I had some doubts after reading the article.
I don’t think the title of your article matches the content lol. Just kidding, mainly because I had some doubts after reading the article. https://accounts.binance.com/register?ref=P9L9FQKY
Can you be more specific about the content of your article? After reading it, I still have some doubts. Hope you can help me.
Thank you for your sharing. I am worried that I lack creative ideas. It is your article that makes me full of hope. Thank you. But, I have a question, can you help me?
I don’t think the title of your article matches the content lol. Just kidding, mainly because I had some doubts after reading the article.
Your article helped me a lot, is there any more related content? Thanks!
Your article helped me a lot, is there any more related content? Thanks! https://www.binance.com/en-IN/register?ref=UM6SMJM3
Thanks for sharing. I read many of your blog posts, cool, your blog is very good.
Thank you for your sharing. I am worried that I lack creative ideas. It is your article that makes me full of hope. Thank you. But, I have a question, can you help me?