Accend Networks San Francisco Bay Area Full Service IT Consulting Company

Categories
Blogs

AWS Placement

AWS Placement Group Hands-On Demo

AWS Placement Groups are a useful tool for improving EC2 instance performance, especially when you need fast communication (low latency) or the ability to handle a lot of data (high throughput). They help you arrange your instances in a way that makes them work better and more reliably. In this demo, we’ll show you how to create and use a Placement Group step-by-step.

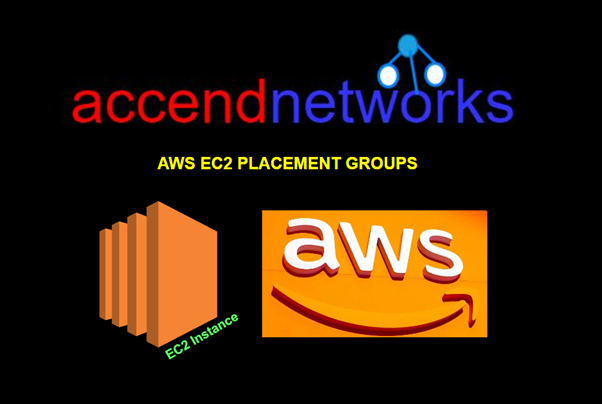
What is a Placement Group?

Optimizes low latency and high throughput for EC2 instances by grouping them in the same Availability Zone.

Types of Placement Groups

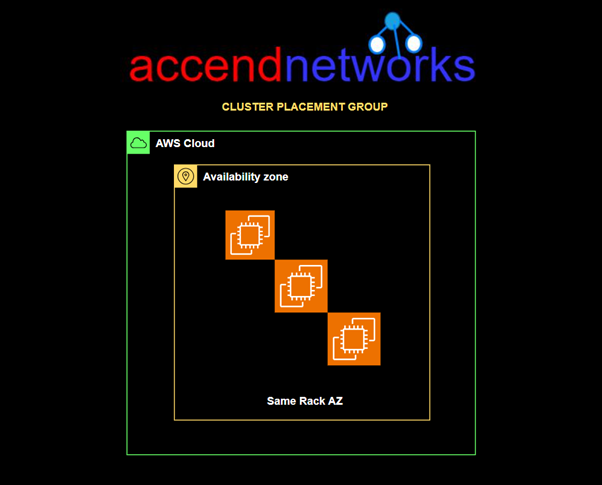
Cluster Placement Group: Packs instances close together inside an Availability Zone. This strategy enables workloads to achieve the low-latency network performance necessary for tightly coupled node-to-node communication that is typical of HPC applications.

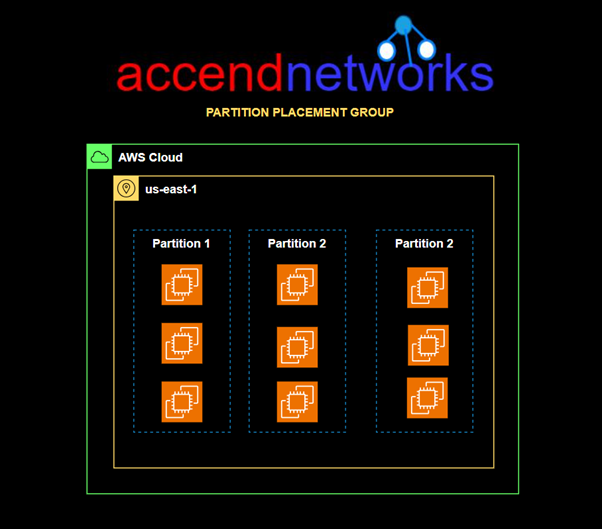
Partition Placement Group: Spread your instances across logical partitions such that groups of the cases in one partition do not share the underlying hardware with groups of instances in different partitions. This strategy is typically used by large distributed and replicated workloads, such as Hadoop, Cassandra, and Kafka.

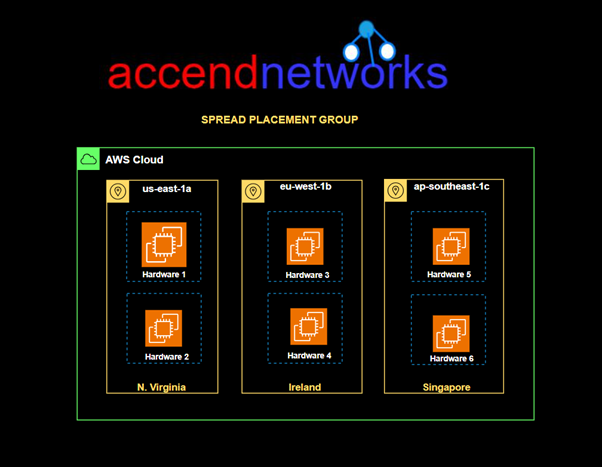
Spread Placement Group: Strictly places a small group of instances across distinct underlying hardware to reduce correlated failures.

A spread placement group is a group of instances that are each placed on distinct racks, with each rack having its own network and power source.

Why use Placement Group?

Placement groups help us to launch a bunch of EC2 instances close to each other.

This can work well for applications exchanging a lot of data and can provide high performance with collocation.

All nodes within the placement group can talk to all other nodes within the placement group at the full line rate of 10 Gbps single traffic flow without any slowing due to over-subscription.

Let’s dive into the hands-on lab.

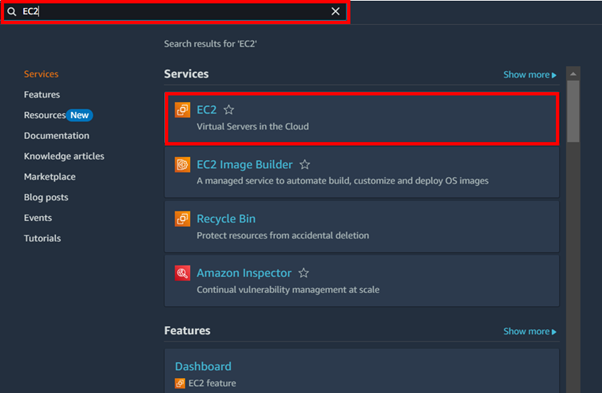
Step 1: Sign in to AWS Management Console

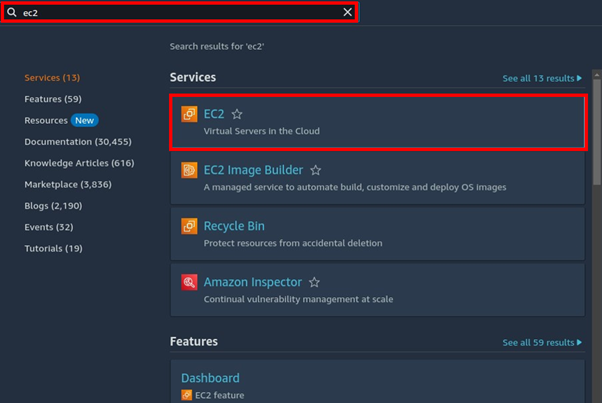
Login to your AWS account from the AWS console, in the search bar, type EC2 then select EC2 Under services.

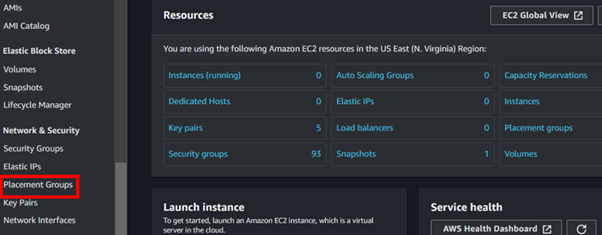
Step 2: Create EC2 Placement Groups as desired.

Navigate to the left side of EC2 then select placement group.

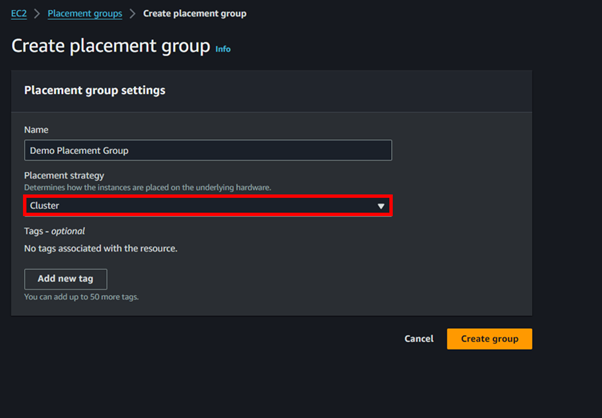
Click Create Placement Group

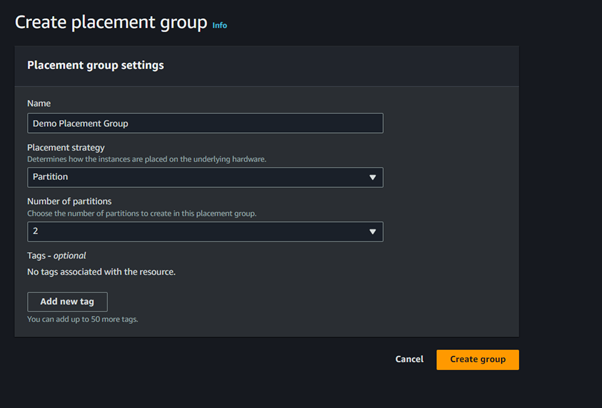
On the Create Placement Group dashboard, enter the name and select a placement strategy to determine how the instances are to be placed on the underlying hardware.

  1. a) For the Cluster placement group, in the placement strategy dropdown, select the cluster option.

b) For Spread Placement Group, in the placement strategy dropdown, select the option as spread and select Spread Level as either Host or Rack.

c) For Partition Placement Group, in the placement strategy dropdown, select the option as Partition and in the Number of Partitions dropdown select several partitions that you want to create in this placement group.

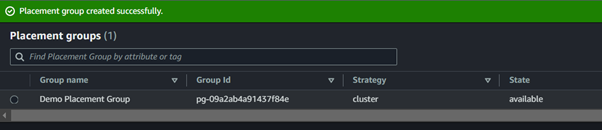
I settled on a Cluster placement Group, and my placement Group has been successfully created.

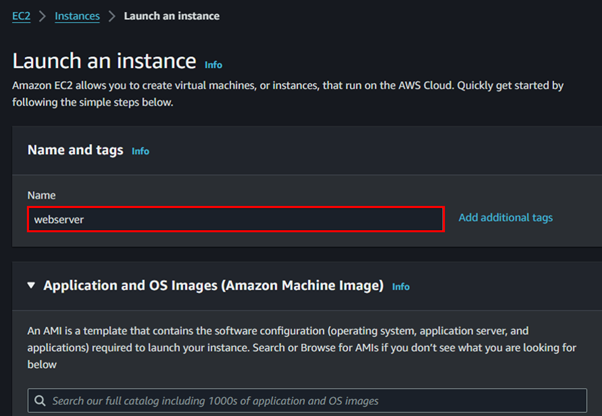
Step 3: Create EC2 instance and assign placement group to it.

We will now go ahead and launch an EC2 Instance and add the Instance to our placement Group.

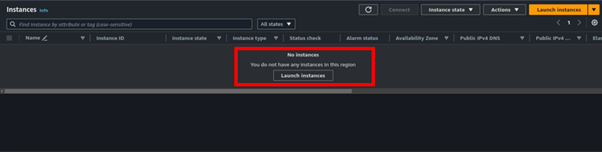
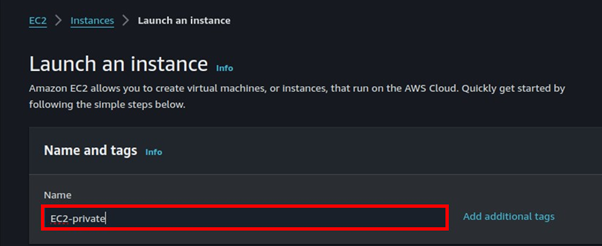
Select instances in the EC2 dashboard then click Launch Instance, In the launch Instance dashboard, provide your Instance details.

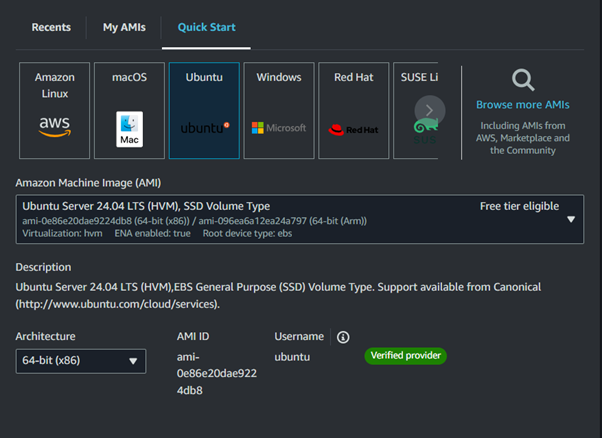
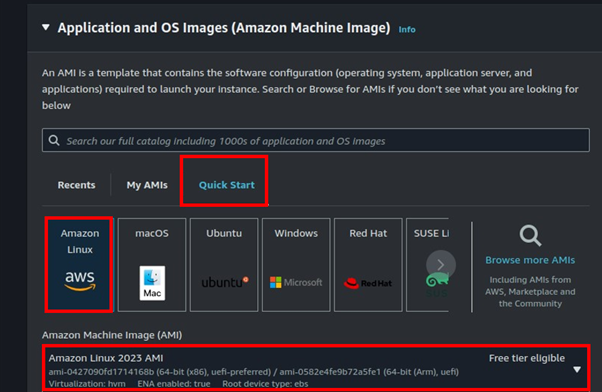
Select your preferred OS and Machine Image.

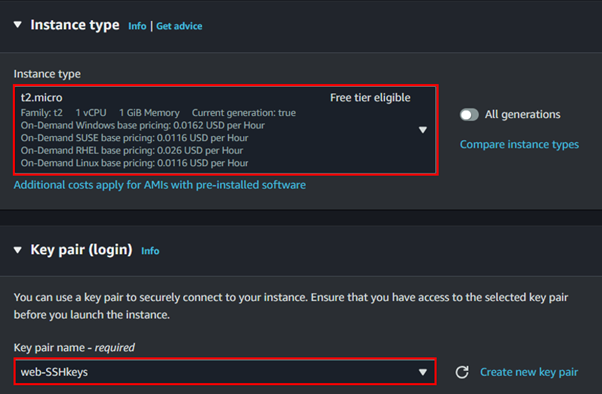
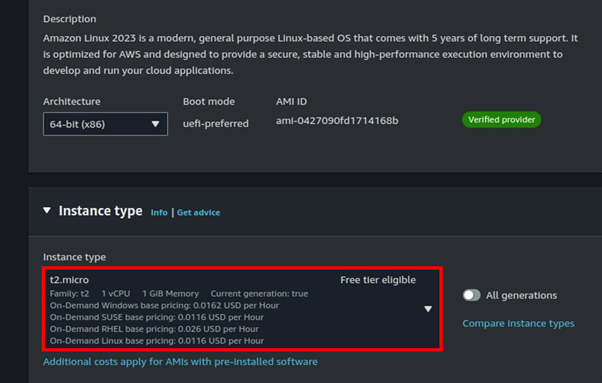
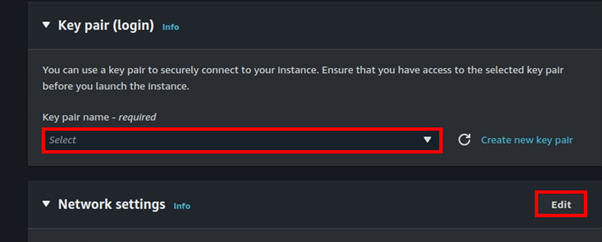
Move with the free tier eligible Instance, then select your key pairs.

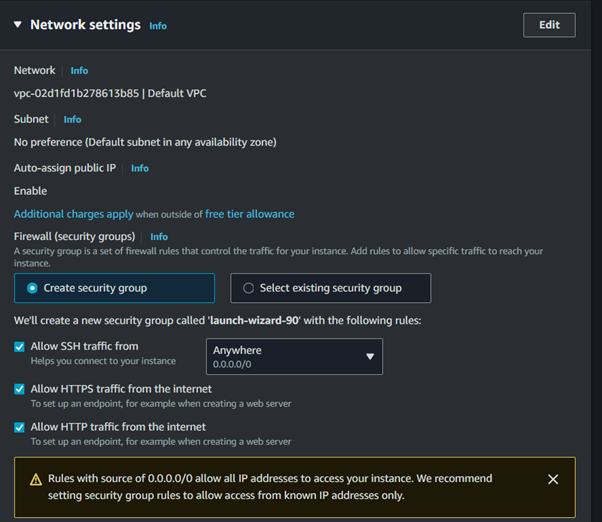
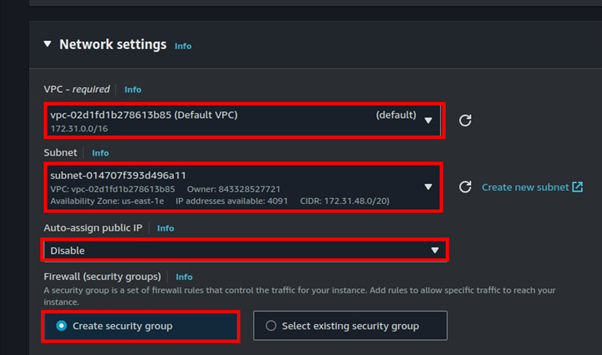
Leave networking as default, and select your security groups.

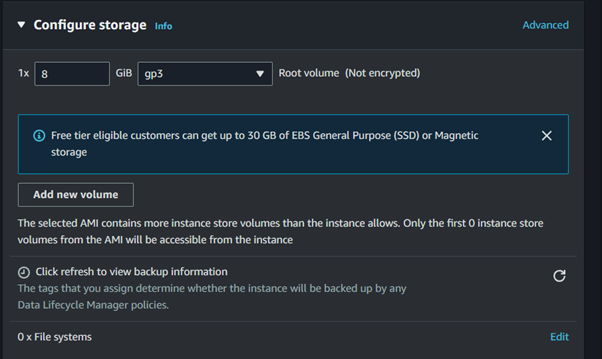
Leave storage as default, scroll down.

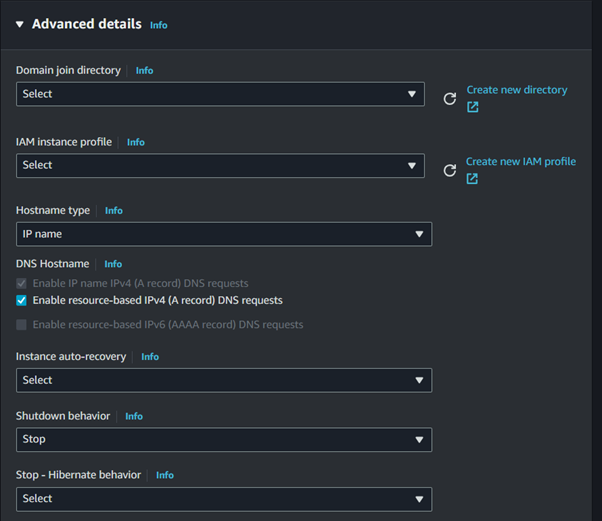
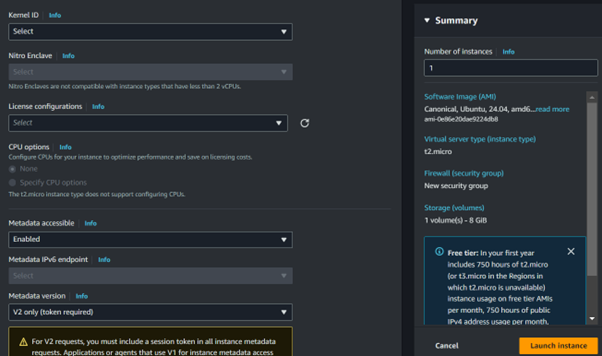
In the advanced section, expand and then scroll all the way down,

In the advanced section, expand and then scroll down, 

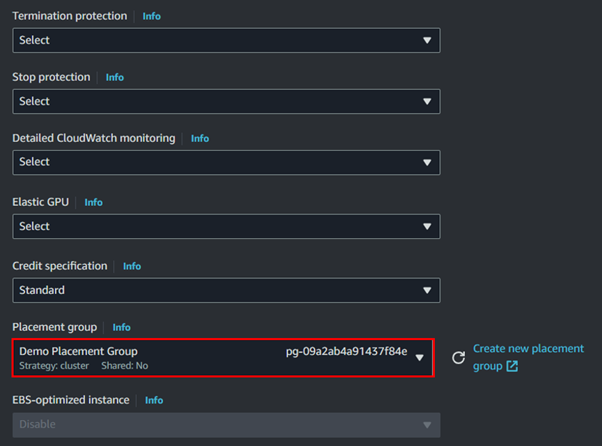
In the placement group section, select the placement group you have just created.

Since t2. Micro is not supported for the Cluster placement group; I will not click Launch.

That’s it, from this demo, I hope you now Know how to create a placement group.

Make sure to delete the placement group, as it is always a good practice to clean up resources.

Since t2. Micro is not supported for the Cluster placement group; I will not click Launch.

That’s it, from this demo, I hope you now Know how to create a placement group.

Make sure to delete the placement group, as it is always a good practice to clean up resources.

If you have any questions concerning this article or have an AWS project that requires our assistance, please reach out to us by leaving a comment below or email us at [email protected].


Thank you!

Categories
Blogs

EC2 Instance Connect Endpoint

EC2 Instance Connect Endpoint: Secure Access to Private Subnet Instances Without Internet

Amazon Web Services offers EC2 Instance Connect Endpoint. This powerful feature enables secure SSH access to private EC2 instances with private IP addresses without the need for managing SSH keys or bastion hosts. With EC2 Instance Connect Endpoint, we can establish SSH and RDP connectivity to our EC2 instances without relying on public IP addresses. This means we can have remote connectivity to instances in private subnets without the need for public IPv4 addresses.

What is an EC2 instance connect endpoint?

EC2 Instance Connect Endpoint allows you to connect to an instance without requiring the instance to have a public IPv4 address. You can connect to any instances that support TCP.

EC2 Instance Connect Endpoint combines AWS Identity and Access Management (IAM) based access controls with network-based controls such as Security Group rules. This combination allows you to restrict access to trusted principals and provides an audit trail of all connections through AWS CloudTrail.

Traditional way of accessing EC2 instance in the private subnet

In the past, customers had to create Bastion Hosts to tunnel SSH/RDP connections to instances with private IP addresses. However, this approach required additional operational overhead for patching, managing, and auditing the Bastion Hosts, as well as incurring extra costs. EC2 Instance Connect Endpoint eliminates these costs and operational burdens associated with maintaining bastion hosts.

Additionally, the service facilitates detailed auditing and logging of connection requests, providing administrators with a comprehensive overview of who is accessing resources and when. This feature is invaluable for security and compliance monitoring, enabling a proactive approach to managing and mitigating potential security risks.

How it works

First, we create an EC2 Instance Connect Endpoint in a subnet in our VPC then, when you want to connect to an instance, you specify the ID of the instance. You can optionally provide the EC2 Instance Connect Endpoint. The endpoint acts as a private tunnel to the instance.

Once you create an EC2 Instance Connect Endpoint in a subnet, you can use the endpoint to connect to any instance in any subnet in your VPC provided our VPC is configured to allow subnets to communicate.

Let’s now dive into the hands-on, we will start by creating an EC2 instance.

Log in to the AWS console as a user with admin user privileges, or make sure you have the necessary permissions.

In the search bar, type EC2 then select EC2 under services to go to the EC2 console.

On the left side of EC2 UI, select instances then click launch instances.

Fill in your instance details. select the QuickStart tab then select Amazon Linux AMI. Scroll down.

Select t2. Micro, free tier eligible. Under key pairs, we will not need them so select the drop-down button then select move without key pair.

Move to the networking tab then click edit.

We will leverage the default VPC. Select your preferred subnet then under Auto-assign public IP, select the drop-down button and select disable. You create a security group or select one with SSH port 22 open.

Scroll down and select Create instance.

While our instance is launching let’s move to the VPC dashboard.

On the left side of the VPC UI, select endpoints.

Select Create Endpoint.

Provide the name of your endpoint. Under the service category, select the radio button for the EC2 Instance connect endpoint.

For VPC, select the drop-down button and select your VPC. Again, for subnets select the subnet where you launched the Instance. These are the only required settings. Click Create Endpoint.

After successful creation, it will take a couple of minutes in the pending state and then become available.

After waiting for a few minutes, our endpoint is now available.

Go back to the EC2 instance dashboard, select the instance you created then select Connect. You will be brought to the connect instance dashboard.

Select the radio button on connect using EC2 Instance connect Endpoint. Fill in the required details. select the endpoint you created. The user name for amazon Linux user is ec2 -user. Click connect.

Success we are in our EC2 instance, and we can see the IP address is the private one.

We have managed to connect to an EC2 instance in the private subnet with a private IP address. Objective achieved.

We can also use the below command to connect to the instance in our terminal. Make sure you have AWS CLI installed and configured.

This brings to the end of this blog, bring everything down.

Conclusion

EC2 Instance Connect Endpoint provides a secure solution to connect to your instances via SSH or RDP in private subnets without Internet Gateways, public IPs, agents, and bastion hosts.

Thanks for reading and stay tuned for more.

If you have any questions concerning this article or have an AWS project that requires our assistance, please reach out to us by leaving a comment below or email us at [email protected].


Thank you!