Unlocking the Power of AWS Key Management Service (KMS) Part Two

In today’s digital landscape, robust security solutions are essential as organizations migrate to the cloud. Encryption is crucial for protecting sensitive data in transit and at rest. Amazon Web Services (AWS) provides a comprehensive encryption solution with its Key Management Service (KMS). This article explores what AWS KMS is and how it can enhance your security posture. Additionally, we will demonstrate how to create KMS customer-managed keys and encrypt simple plain text data stay tuned.
What is KMS
AWS Key Management Service (KMS) is a managed service that makes it easy to create, manage, and control cryptographic keys used to encrypt your data. It provides centralized control over the encryption keys used to protect your data across a wide range of AWS services and in your applications. AWS KMS is designed to simplify key management and maintain a high level of security and compliance.
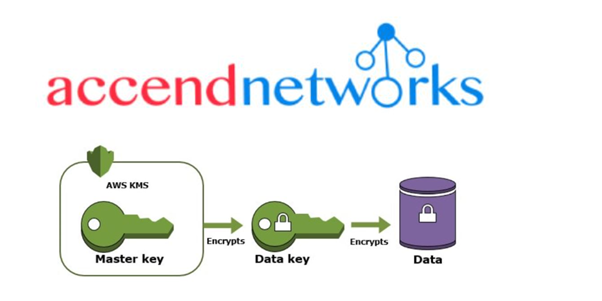
Key features of AWS KMS include:
Centralized Key Management: Manage encryption keys centrally, controlling their lifecycle from creation to deletion.
Integration with AWS Services: Seamlessly integrate with various AWS services like Amazon S3, Amazon EBS, and Amazon RDS to facilitate encryption.
Scalability: Handle a vast number of keys efficiently, scaling with your needs.
Access Control and Policies: Utilize AWS Identity and Access Management (IAM) policies and KMS-specific key policies for fine-grained access control.
Audit and Compliance: Leverage AWS CloudTrail to log all key usage and management activities, aiding in compliance and visibility.
Encryption Using the CMK
Create CMK on AWS. This will be the key that will be used to encrypt your data.
Encode your message with Base64. This common step in most encryption procedures ensures that binary data can be transported over channels without modification.
Encrypt your message using the CMK by calling the AWS KMS encrypt command.
let’s proceed as follows.
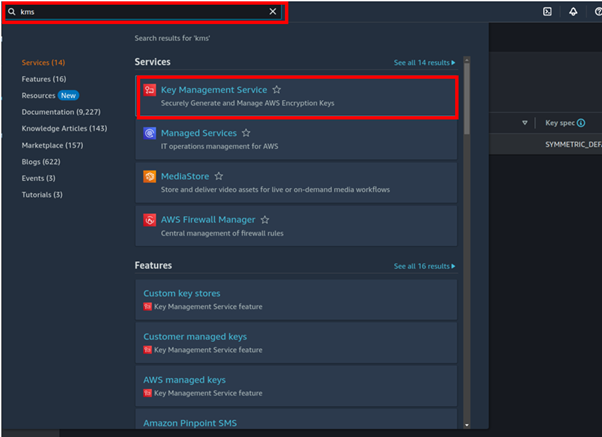
Log in to the management console and in the search box, type KMS then select key management service under services.
In the KMS dashboard on the left side of the navigation pane, click customer managed keys.
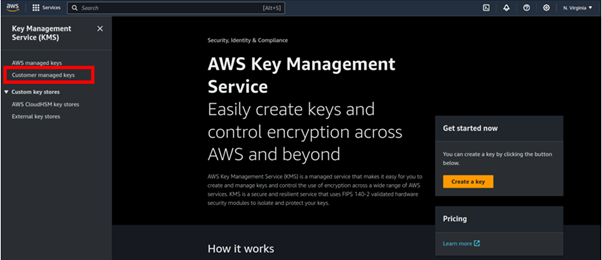
Then in the customer-managed keys dashboard, click Create key.

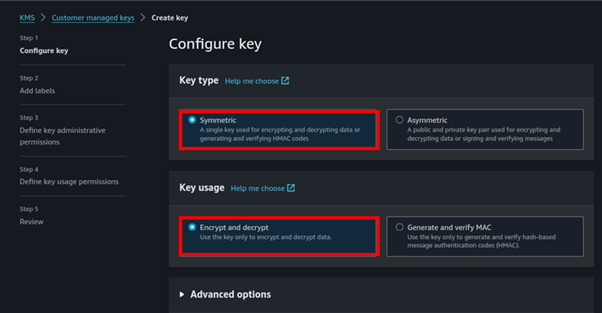
We will create a symmetric key and key usage will be encrypt and decrypt. Make sure these options are selected then click the advanced options dropdown button.
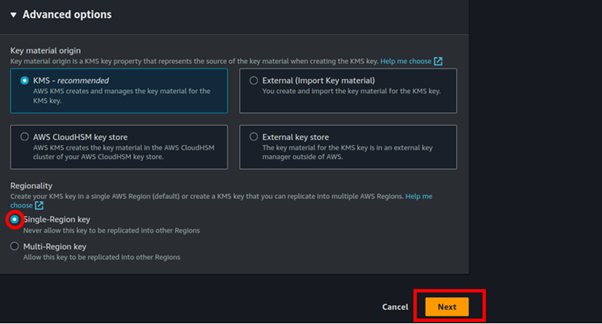
in the advanced option, we have an option of selecting single region and multi-region keys. For this demo, we will move with the single region keys. But in case you want to use your key for multi-region, you can select that option and then click next.
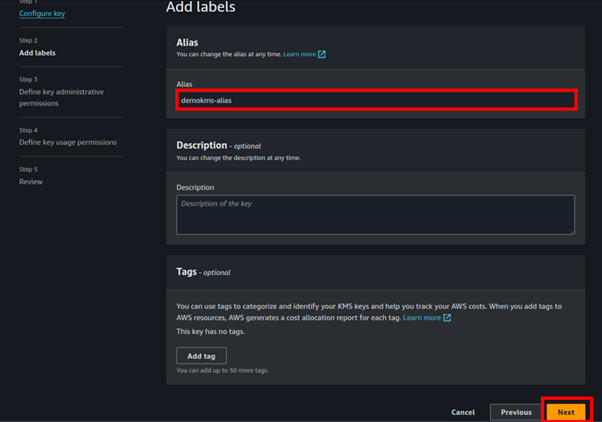
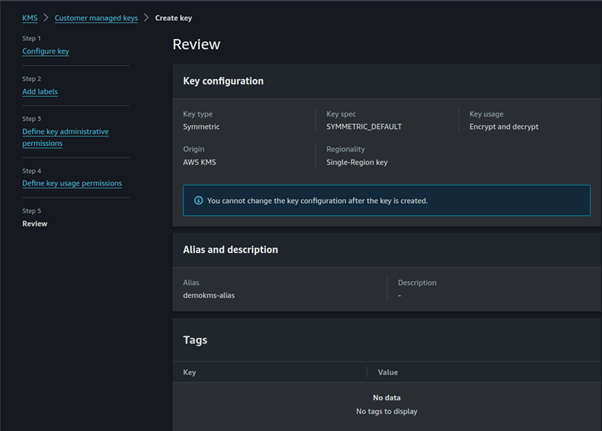
An alias is a friendly name you can give your key, so under an alias, I will call my key demokms-alias. We will use this alias in the API call for encrypting and decrypting our data. Click next.
Next, we will define a key administrator, I will select one of the I AM users and make him admin for this KMS key we are creating. Make sure the box on allow key administrators to delete this key is checked.
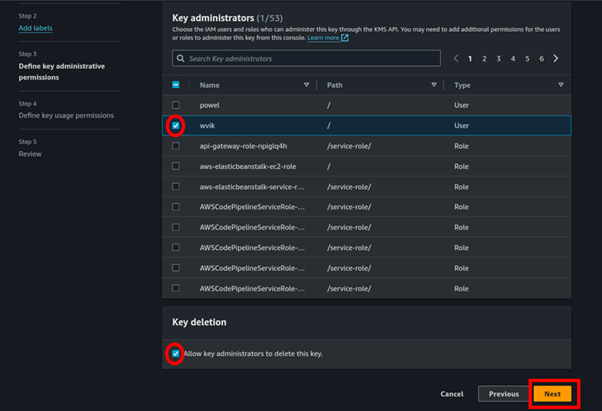
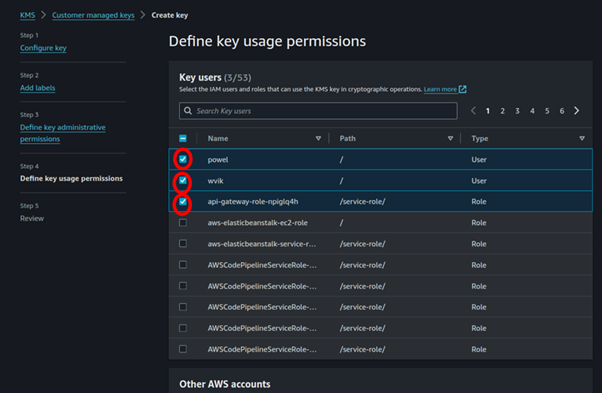
Next, we will define key usage permission so here we select I AM users and AWS services we want to use this KMS key. You do this by just ticking the boxes and then click next.

Review your key creation.
In the review section, we can see a key policy was generated for us depending on the boxes we ticked.
Click Finish to finish creating your key.
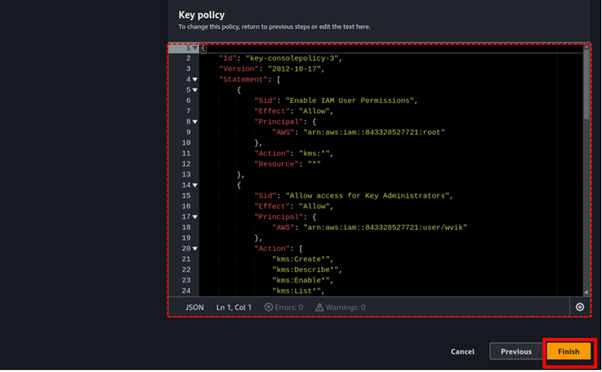
Congratulations, we have successfully created our KMS key.

We will now use this created KMS key to encrypt plain text data.
We will leverage cloud shell to achieve this, so open cloud shell environment. When your cloud shell is ready, then you can echo some text documents as shown.
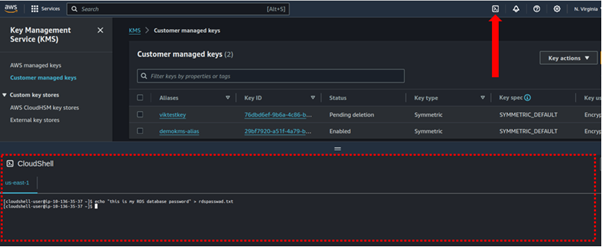
When we list the contents of our terminal we can see the text file.
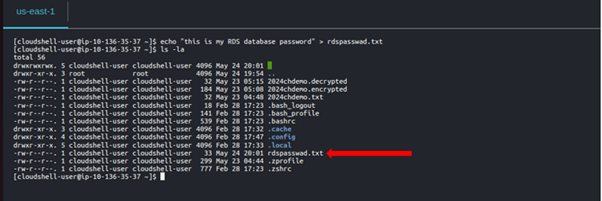
Then to encrypt our data we will run the below command.

Listing contents of our we can see our rdspaswwad.txt. encrypted.

When we cat the contents of the encrypted file, we can now not see the plain text.
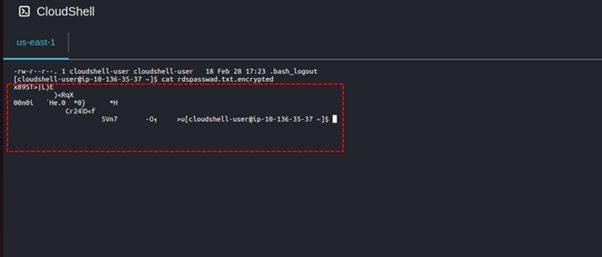
Run this command to decrypt your encrypted file.

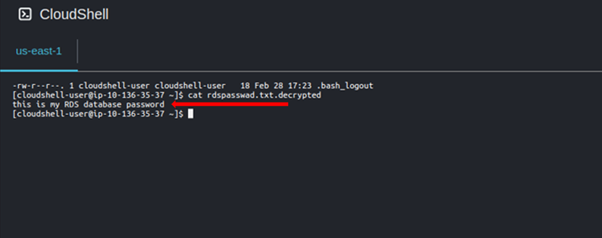
Listing contents a gain we can see our decrypted data.
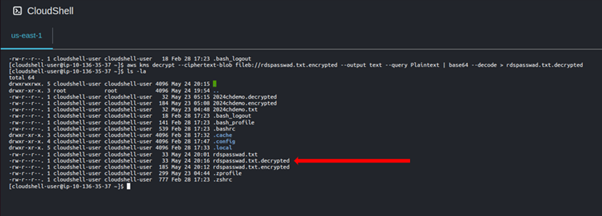
When we cat the contents of our encrypted file, we can now again read our plain text since it has been decrypted.
Thats it. To now delete our KMS key, remember you cannot immediately delete a KMS key but only schedule the key deletion period.
This is to avoid accidentally deleting keys that are in use.
So, select your kms key click the key action drop-down button then select schedule key deletion.

For the key deletion period, select 7 days then check the confirmation box that you want to schedule key deletion. Then select schedule key deletion.
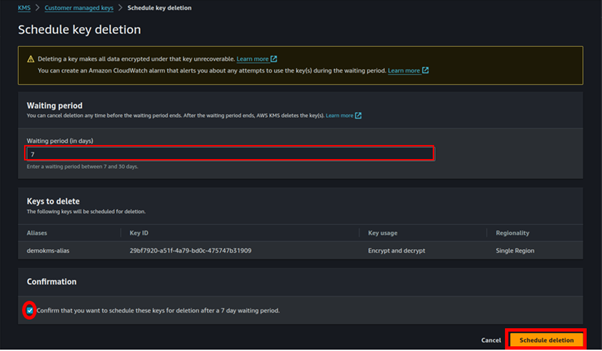
And that’s it we have successfully scheduled our key for deletion.

Conclusion
AWS KMS provides a secure manageable solution for handling cryptographic keys in the cloud. It simplifies encryption, enhances data protection, and ensures efficient key management aiding in security and compliance.
This brings us to the end of this blog, thanks for reading, and stay tuned for more.
If you have any questions concerning this article or have an AWS project that requires our assistance, please reach out to us by leaving a comment below or email us at [email protected].
Thank you!

