How To Use Amazon Inspector: an automated and continual vulnerability management at scale.
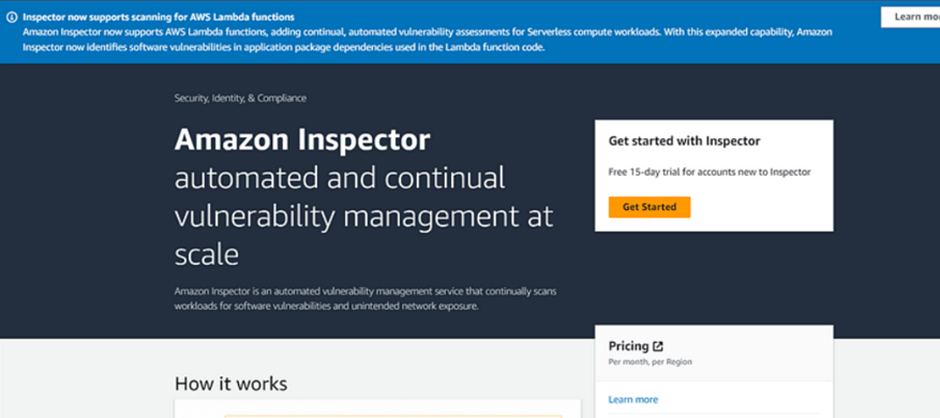
What is Amazon Inspector?
Amazon Inspector automatically discovers workloads, such as Amazon EC2 instances, containers, and Lambda functions, and scans them for software vulnerabilities and unintended network exposure.
How it works.
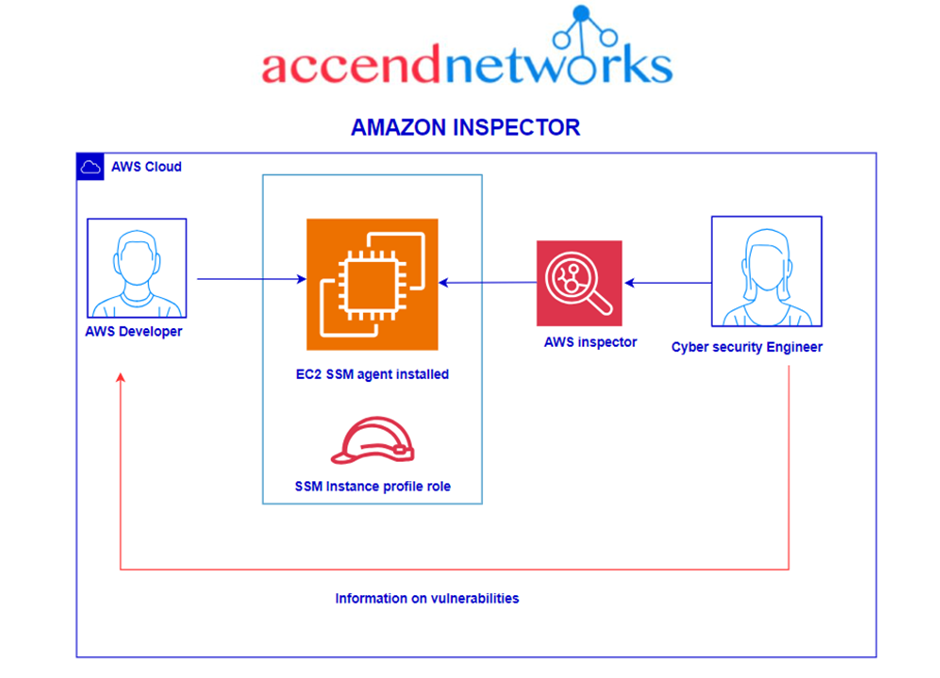
Amazon Inspector is an automated vulnerability management service that scans AWS workloads for software vulnerabilities and unintended network exposure. At a high level, AWS Inspector is dependent on an SSM agent to be installed in the EC2 instance that will be used to scan and report the security findings. Additionally, the EC2 will need a role that grants SSM to the EC2 instance. AWS Inspector uses the SSM agent to connect to the instance. Note that as of November of 2023, there is a new agentless scan option that is in preview.
AWS Inspector can be supported at the organizational level and scan all accounts in the organization; however, the scope of this blog will be a single account.
In this use case, we will see how Amazon Inspector helps to identify the network vulnerability by performing an accessibility check.
Let’s proceed as follows.
Login to your AWS account using your admin account or an account with admin privileges.
Creation of a new IAM role for the EC2 use case
Remember, the AWS Inspector is dependent on an SSM role or a role with SSM permissions to be able to communicate with the SSM agent inside the EC2. Let’s create this role.
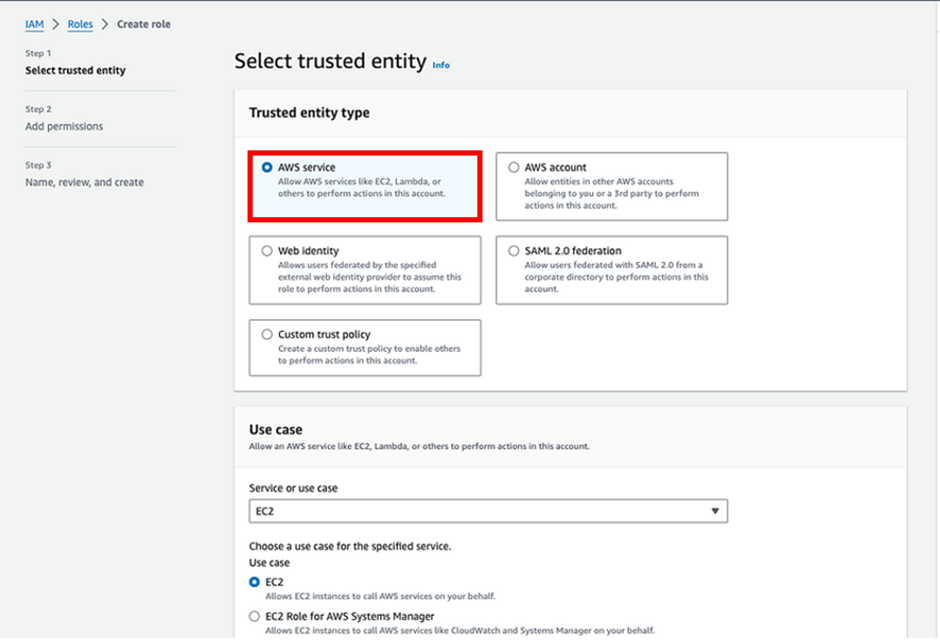
Navigate to IAM, click on Roles then click on the Create role button. You will be prompted to select an entity type, in our case select “AWS service”, and for service select EC2. This will create a trust policy that will allow EC2 to assume it. Click Next.
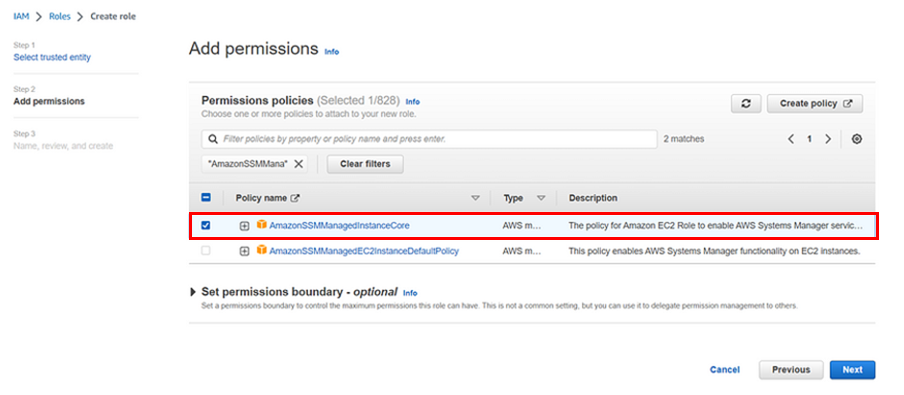
Now we must add permissions to the role that the EC2 will assume. Under the Add permissions config screen, search for AmazonSSMManagedInstanceCore, select it, and click Next.
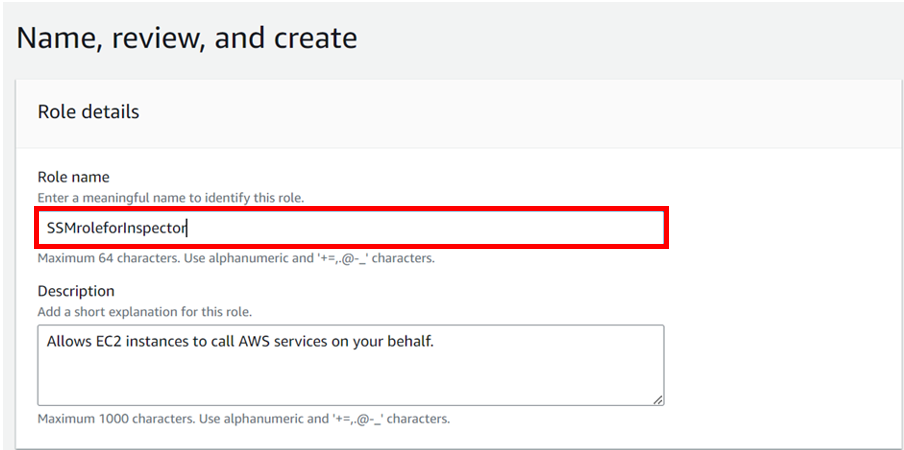
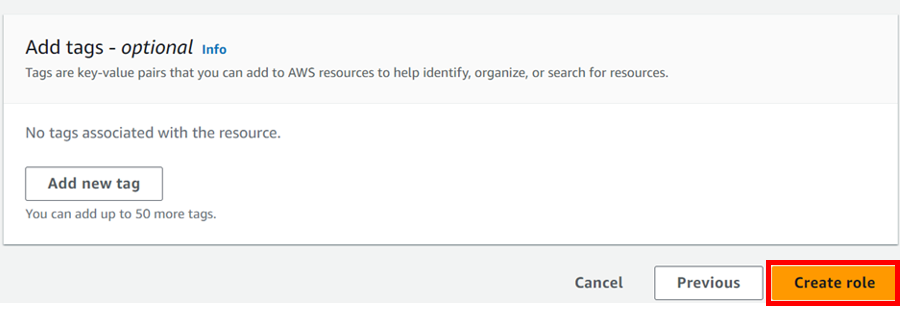
In the next window, give the role a name (SSMRoleForInspector) and click Create role.
Creation of EC2 Instance
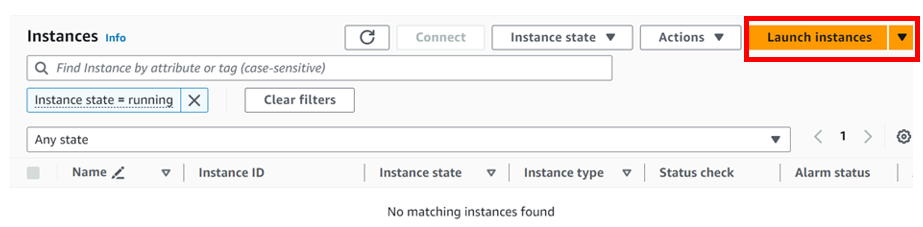
Go to the AWS Management Console, select instances in the EC2 console, then click Launch instances in the instances dashboard shown below.
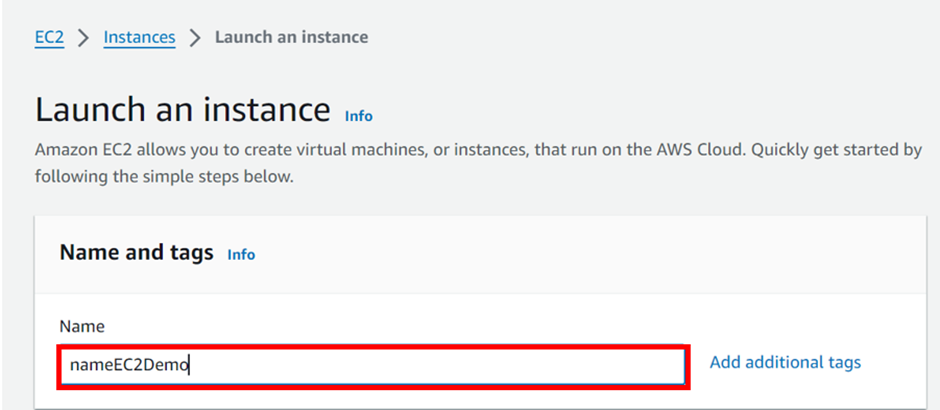
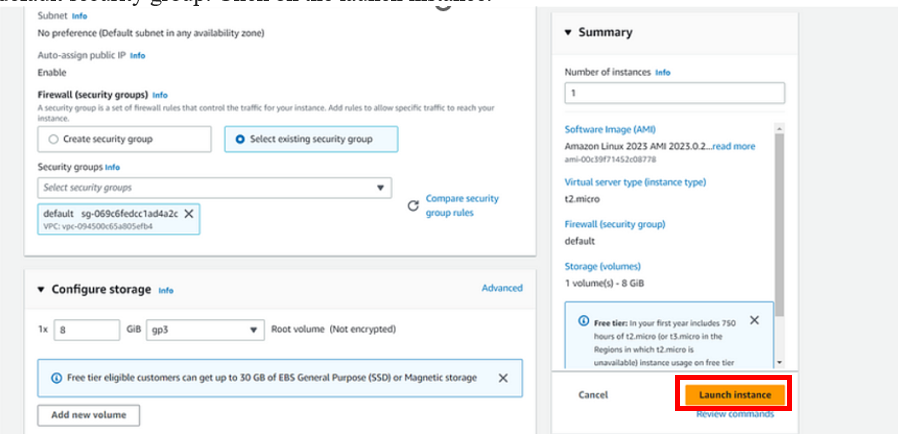
Add the Name as nameEC2Demo, and under instance type, select t2. Micro which is free tier eligible. Scroll down.
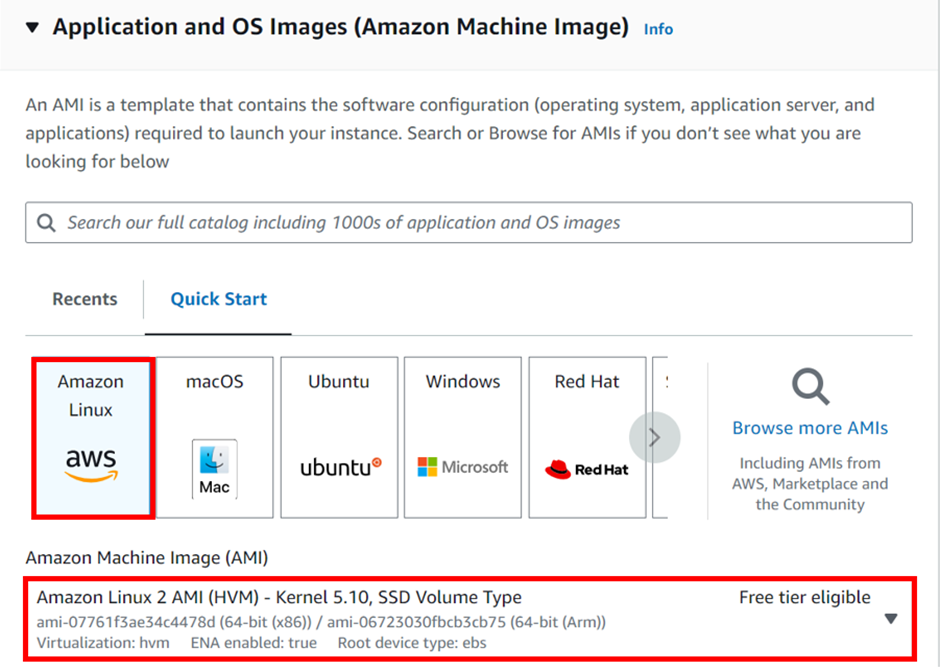
Under application and OS, select the QuickStart tab then select Amazon Linux. Under AMI select Linux 2 AMI this is also free tier eligible.
Scroll down to the firewall and security section, Select the existing security group then choose the default security group. Click on the launch instance.
Attach the SSM agent role to the EC2 instance.
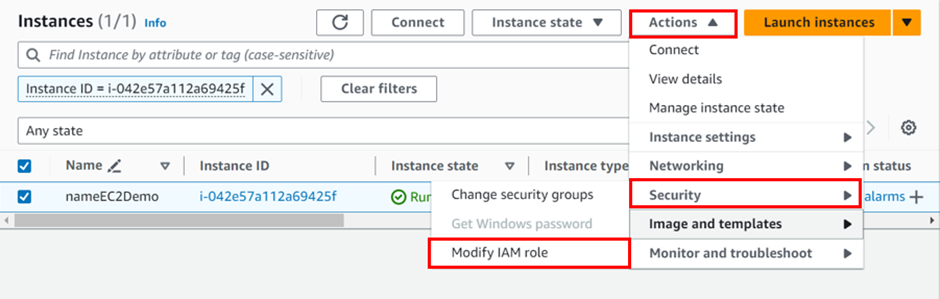
Select your instance, click on Actions, then click Security, and then click on Modify IAM role.
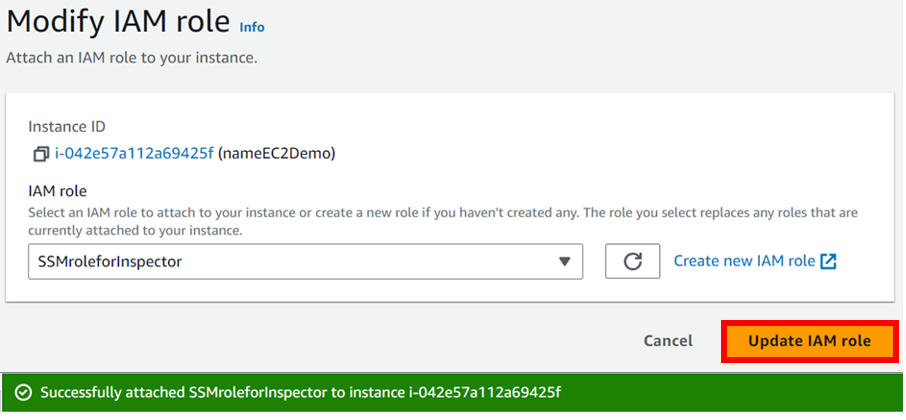
Within the Modify IAM role screen, select the role you created earlier. In my case, I am selecting SSMRoleForInspector Click on Update IAM role.
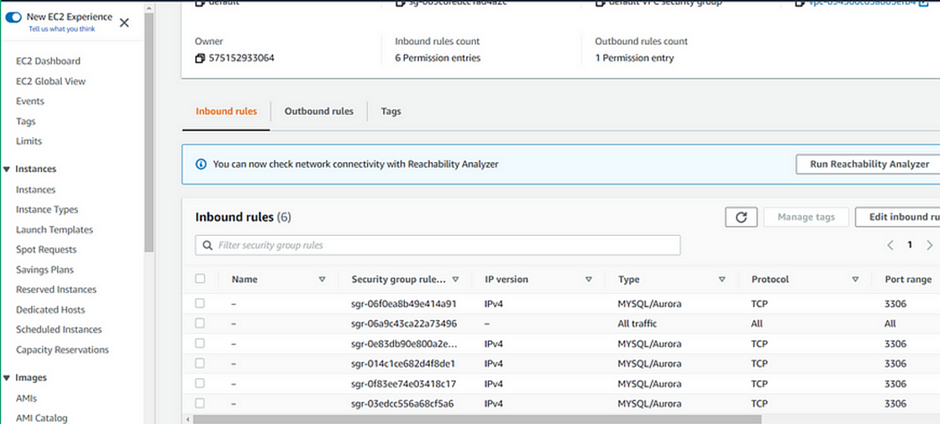
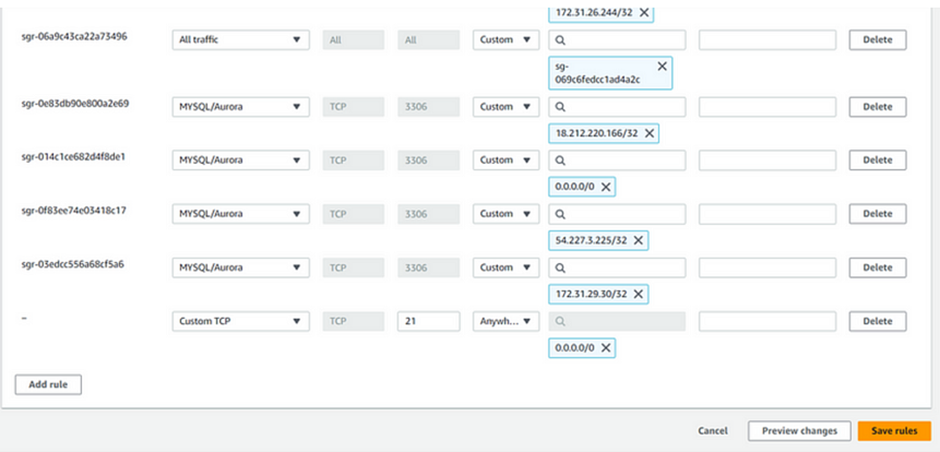
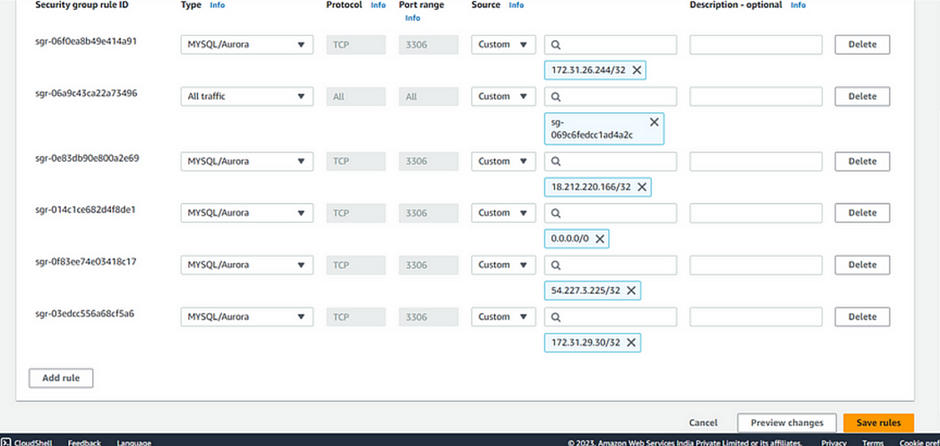
Select your instance then move to the security tab, Select the default security group. Then click edit the inbound rule.
Click Add a new rule and open the port21 to anywhere from the internet then click Save rule.
Note: Port 21 is not recommended to keep open on our instances. We are inducing a security thread here.
Running an Amazon Inspector -To Discover the security vulnerabilities.
Go to the management console under services and select Amazon Inspector. Then click Get Started.
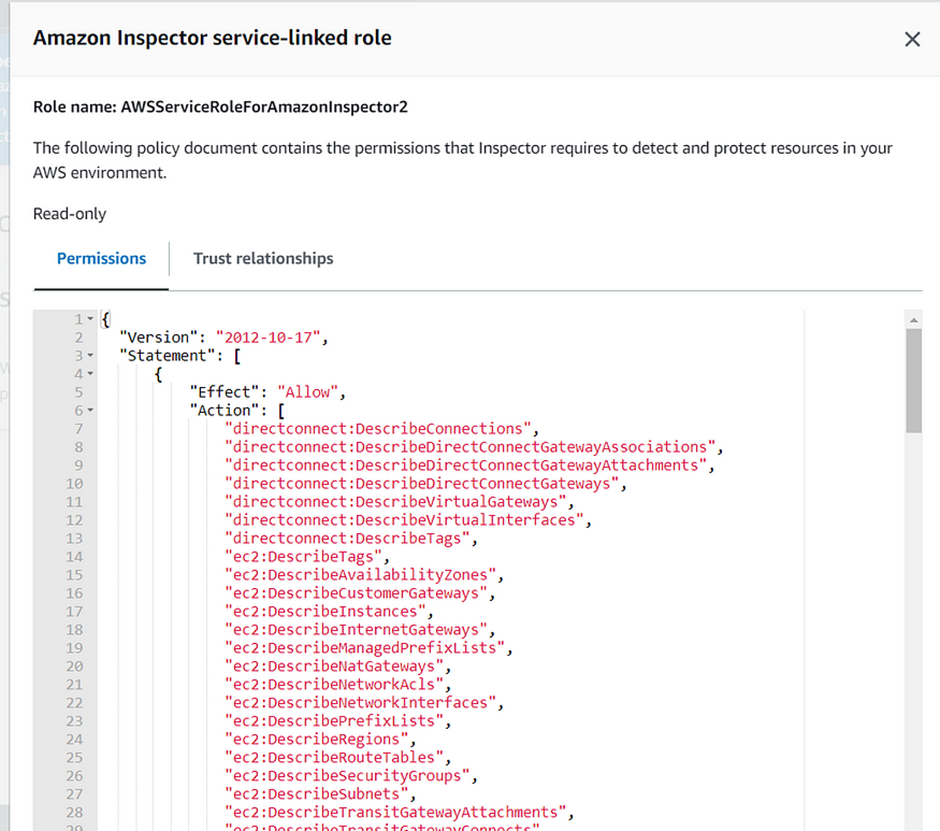
Activate Inspector and view your permissions.
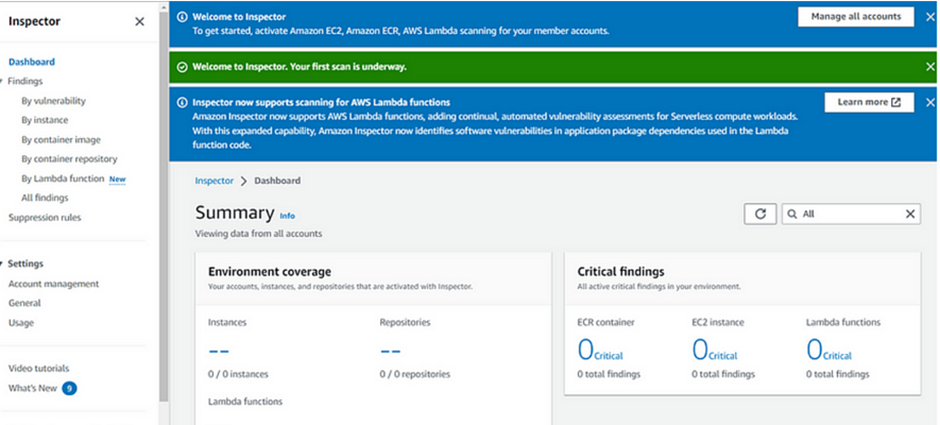
Once Inspector is activated, we will get a green banner as our first scan is underway.
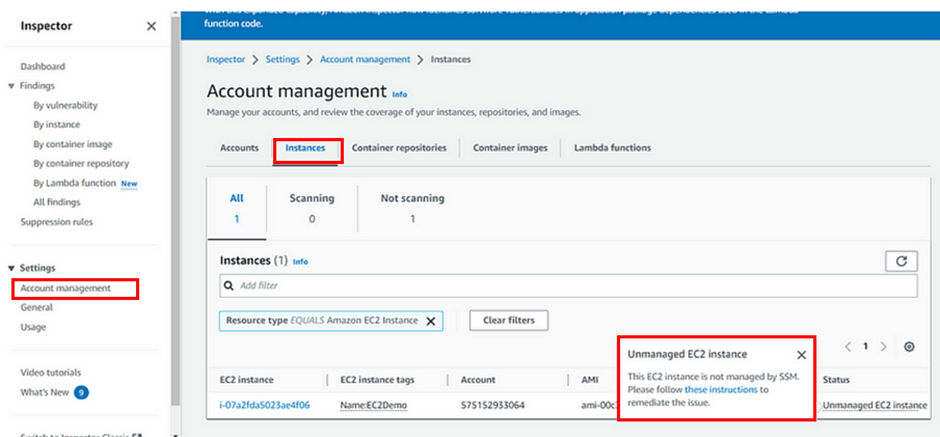
Go to Account Management, then move to the Instances tab and select unmanaged instances. You will see the below message.
This means this instance is not managed by SSM. Please click on the instructions hyperlink to remediate the issue.
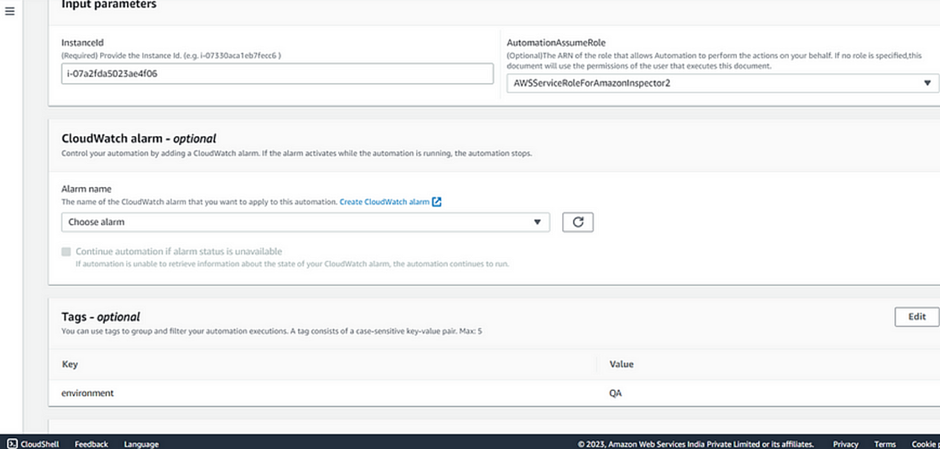
Eventually, it will redirect to AWS Systems Manager, in input parameters, choose the instance ID and Click Execute.
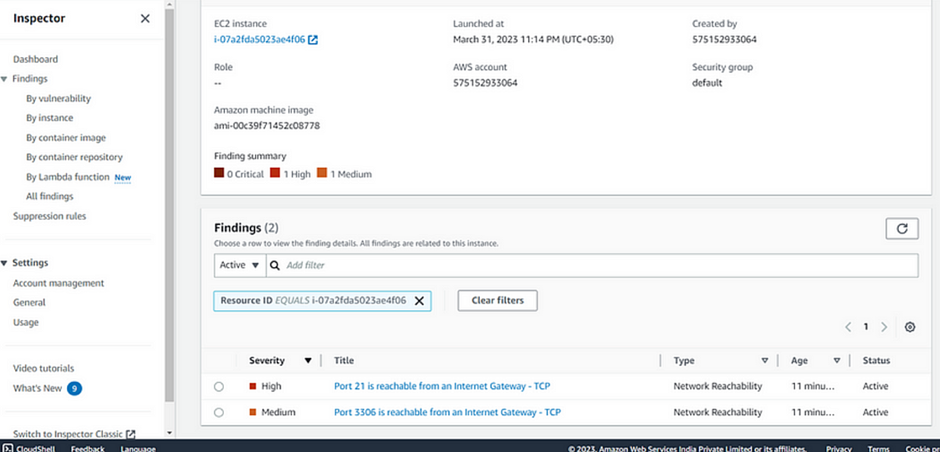
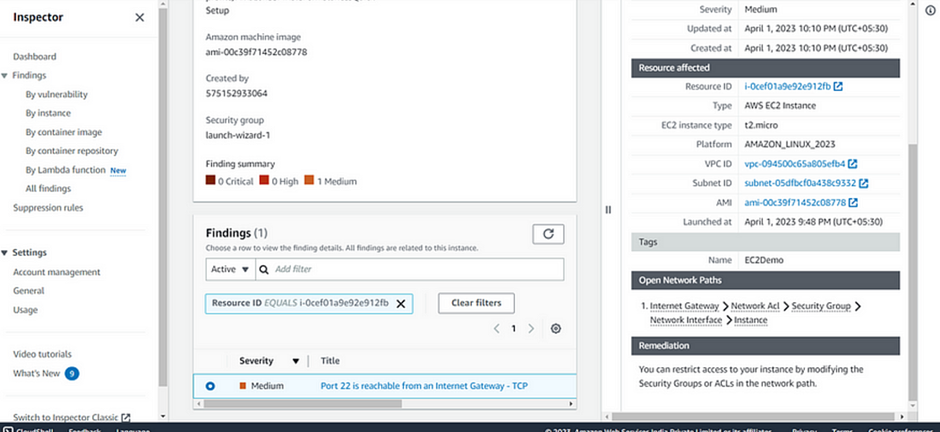
Once execution is completed, Go to Amazon Inspector and select the instance findings.
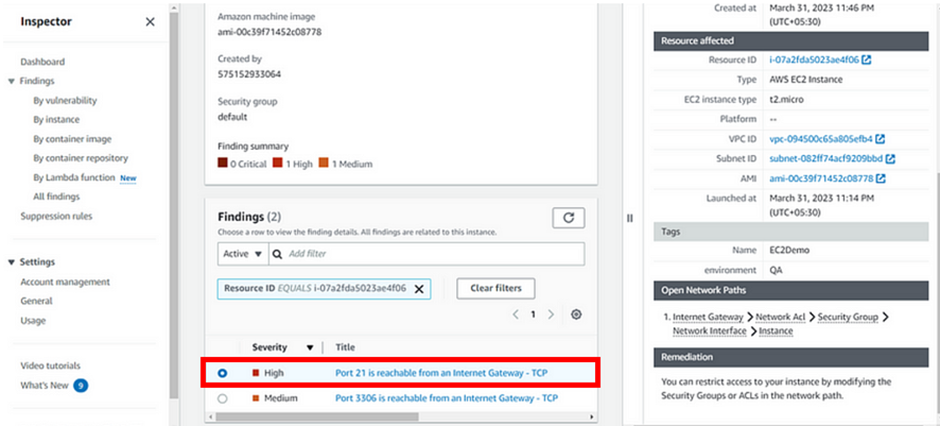
Go to findings, where you will see the induced security thread as high.
Go to EC2 Instances, Inbound security group, and delete the induced port21. Click Save rules.
To review the findings again, Go to Account Management, Instances, and select unmanaged instances. Follow the instructions like giving out instance ID etc. Click execute.
With this, we have seen now how Amazon Inspector helps to find the Network Reachability vulnerability.
To avoid billing, terminate the instances that you had created and make sure you deactivate the Amazon inspector for all instances.
This brings us to the end of this demo. Stay tuned for more.
If you have any questions concerning this article or have an AWS project that requires our assistance, please reach out to us by leaving a comment below or email us at sales@accendnetworks.com.
Thank you!
Thanks for sharing. I read many of your blog posts, cool, your blog is very good. https://www.binance.com/futures/ref?code=W49FLGDN
Your article helped me a lot, is there any more related content? Thanks!
The variety of games here is impressive. I especially love how fast the payouts are processed. It feels very secure and user friendly. Highly recommend clggbetcasino to anyone who loves slots.
I love how intuitive the layout is. No confusing menus, just straight to the action. I have already recommended this to my friends. Visit brtoday777
Finally found a site that actually pays out on time. The customer support is also very helpful. Highly recommend vn22hello88
Your article helped me a lot, is there any more related content? Thanks! https://www.binance.bh/register?ref=GGYHGRE
FC178casino, eh? Alright, let’s see what you’ve got. The game selection looks promising. Gonna try my hand at a few slots. Worth a shot fc178casino.
Yo, crazywinmaya, you got my attention! The interface is slick and easy to navigate. Let’s see if I can snag a win or two. Give it a go crazywinmaya.
Alright, blue100novibet, just gave you a whirl. Site’s snappy and the games are pretty sweet. Hope my luck holds out! Check it out blue100novibet.
Can you be more specific about the content of your article? After reading it, I still have some doubts. Hope you can help me.
Thanks for sharing. I read many of your blog posts, cool, your blog is very good. https://www.binance.com/register?ref=IXBIAFVY
NE88 has some interesting games that I haven’t seen anywhere else. Keeps things fresh and exciting. Good option if you are looking for something different. ne88
Heard about x7777game from a friend and I’m glad I tried it. Nice selection of games, especially their slots. Give it a spin and see if you get lucky like I did! x7777game
Alright folks, just tried out gold365green and gotta say, it’s pretty decent. Easy to navigate and the games are actually fun. Been looking for something new and this might just be it. Check it out here gold365green!
Heard MB6668 has great promotions, gotta check them out. Maybe I’ll finally hit that jackpot! Feeling lucky today So exiting mb6668!
Anyone got the 82 lottery gift code for today? I need that extra boost! Hoping for a win! Anyone know where to find it 82 lottery gift code today?
Checking out ph222casino tonight! Heard good things. Hope they have my favorite slots. Let’s roll! See what’s up ph222casino
vui123vip这个平台我玩了一段时间了,感觉还不错,游戏种类挺多的,而且客服也挺给力,有问题都能及时解决。想体验下就点vui123vip
Just signed up for 789win1vip. The VIP treatment sounds pretty sweet, fingers crossed it lives up to the hype. Lots of games to play so far! Take a look at 789win1vip!
Alright fellas, heard good things about mv9bet. Anyone tried them out yet? Thinking about putting some bets down. Fingers crossed it’s legit! Check it out here: mv9bet
Gameteenpattigold is fun to play. The gold makes it feel more legit haha. Take a look gameteenpattigold.
Thanks for sharing. I read many of your blog posts, cool, your blog is very good.
Your article helped me a lot, is there any more related content? Thanks!
I don’t think the title of your article matches the content lol. Just kidding, mainly because I had some doubts after reading the article.
Your point of view caught my eye and was very interesting. Thanks. I have a question for you.
Thank you for your sharing. I am worried that I lack creative ideas. It is your article that makes me full of hope. Thank you. But, I have a question, can you help me?
Your article helped me a lot, is there any more related content? Thanks!
Your point of view caught my eye and was very interesting. Thanks. I have a question for you.
Your article helped me a lot, is there any more related content? Thanks!
Can you be more specific about the content of your article? After reading it, I still have some doubts. Hope you can help me.
Thank you for your sharing. I am worried that I lack creative ideas. It is your article that makes me full of hope. Thank you. But, I have a question, can you help me?