Go Bastion-less: Unleashing the power of SSM Session Manager
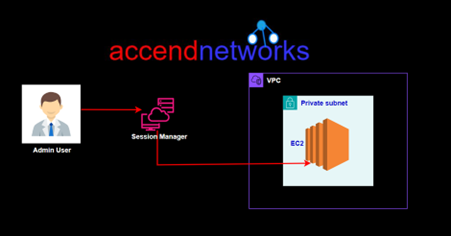
In the sphere of cloud infrastructure management, the move towards a Bastion-less environment has emerged as a transformative strategy. Central to this paradigm shift is the Systems Manager Session Manager, a tool that revolutionizes remote access, security, and operational efficiency.
Understanding Bastion-less Architecture
Traditionally, a Bastion Host stands as an intermediary gateway for accessing and managing resources within a private subnet in a VPC. While Bastion Host (jump server) provided a layer of security, it also introduced complexity, management overhead, and additional costs.
On the contrary, a Baston-less, architecture eliminates the need for a dedicated Bastion Host. Instead, access to instances in the private subnets is managed by secure tools like SSM Session Manager streamlining remote access workflows and bolstering security workflow.
In this blog article, we’ll showcase a streamlined approach to accessing your EC2 instance in a private subnet without the need for a key pair or Bastion Host, all thanks to AWS Systems Manager’s Session Manager. You’ll discover how to leverage a new browser-based interactive shell alongside the command-line interface (CLI) for efficient management of both Windows and Linux instances. With the Session Manager options offered by AWS System Manager, this can be achieved through a simplified configuration, making remote access and management a simple task.
Configuration with Bastion Host
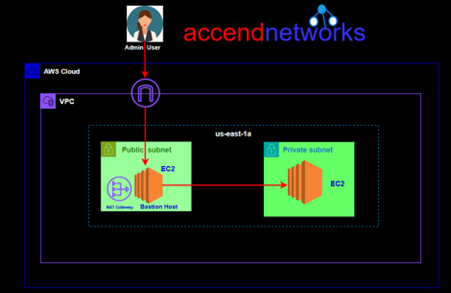
Drawbacks of Bastion Host and Key-pair
Security: It requires SSH access firstly to reach itself and then to reach other instances. This is not secure as if someone has opened unauthorized access, it can lead to destruction depending on the level of access a user gains.
Access: To access the Bastion Host and other instances using the key-pair method, you require a sensitive file that should have limited access. However, securely storing and sharing this file, especially within a team, poses a security challenge.
Cost: It’s an additional machine that incurs extra costs.
Manageability: Securing key pairs and maintaining regular bastion patching requires additional management overhead.
Now all the above issues are mostly eliminated with the session manager approach and hence you get the following for a good reason:
Security: Session Manager communicates securely with instances through the SSM Agent using an encrypted tunnel that originates from the instance. eliminating the need for a bastion host. This means you don’t have to manually configure SSH keys or open inbound ports.
Controlled Access: You use IAM policies and users to control access to your instances and don’t need to distribute SSH keys.
Auditability: Command and response logs can be directed to Amazon CloudWatch and an S3 bucket. Additionally, you can configure SNS notifications to alert you when a new session begins.
Session Manager in Action
To allow Session Manager access to our instance will need to attach the following IAM role: AmazonSSMManagedInstanceCore. This policy grants instances the permissions needed for core Systems Manager functionality.
Session Manager in Action
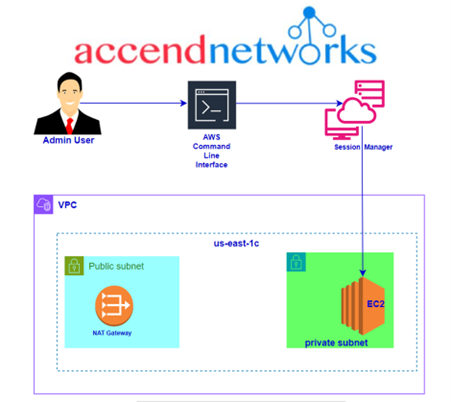
For demo purpose, we will launch an EC2 instance without a key pair. For the security group, we will not open port 22 for SSH. Let’s proceed as follows.
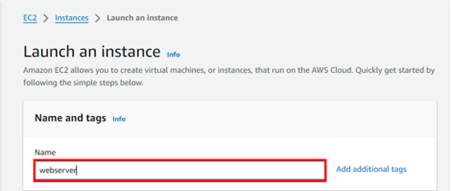
Log in to the management console navigate to the EC2 console then click Launch Instance and under name give your Instance a name.
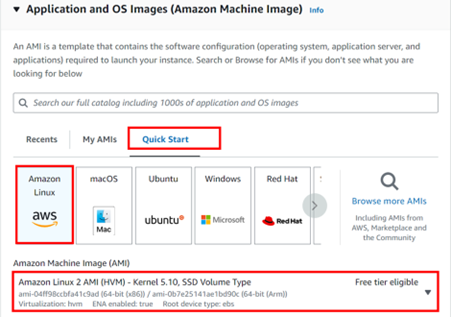
For application and OS images, select the QuickStart tab then select Amazon Linux2 AMI since it comes with the SSM agent already installed. Scroll down.
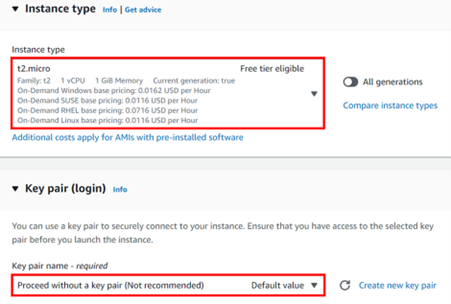
For instance, move within the free tier by selecting t2. Micro. For key-pair, select the drop-down button and select move without key pair. Remember we don’t need a key pair since we will be using a session manager.
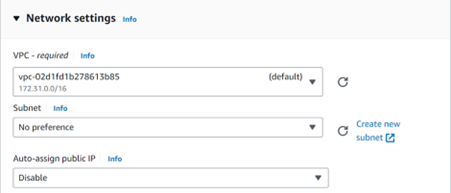
Under Networking, select edit. Move with the default VPC then for Auto-assign-Public IP, select the drop-down button then select disable. We will not assign a public IP address to this Instance. Scroll down.
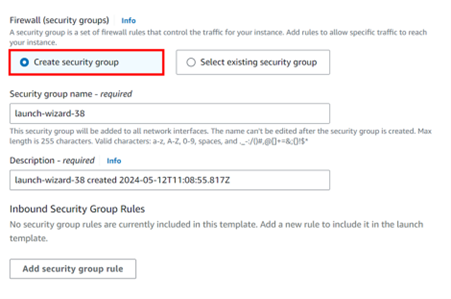
Under the firewall and security group, we will not open port 22. So, click create security group then uncheck port 22. Scroll down to Advanced settings then expand.
Under advanced settings, under the I AM instance profile, click Create New IAM profile.
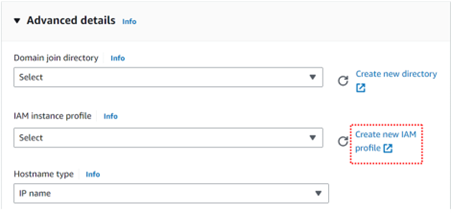
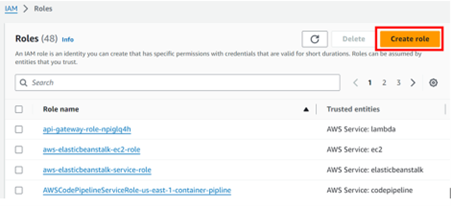
You will be brought to the I AM console then click Create Role.
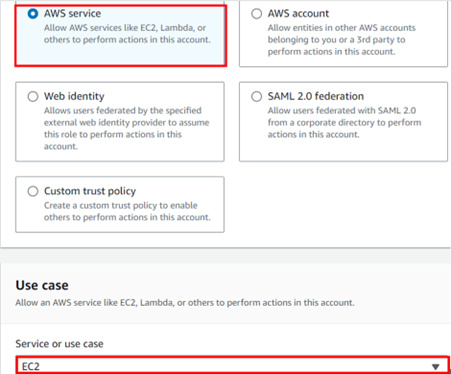
Select AWS service then EC2. Click next.
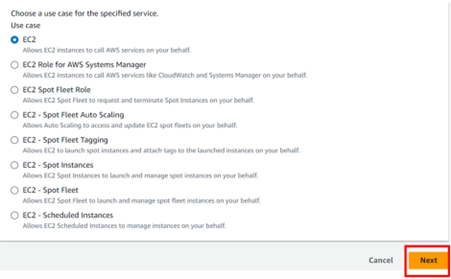
Select amazonssmManageginstancecore then click next.
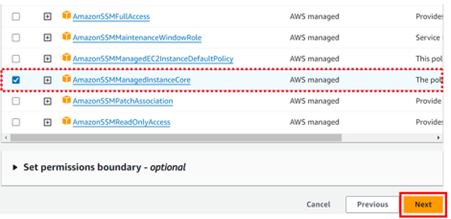
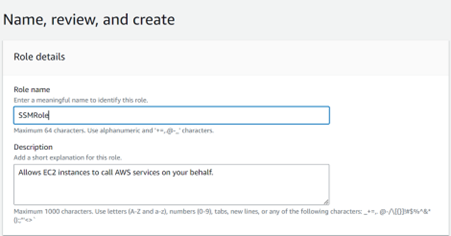
Give your role a name, then review and click Create.
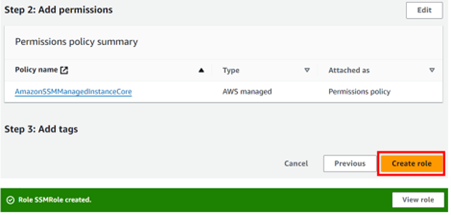
This role has been created, go back to the EC2 console and select it.
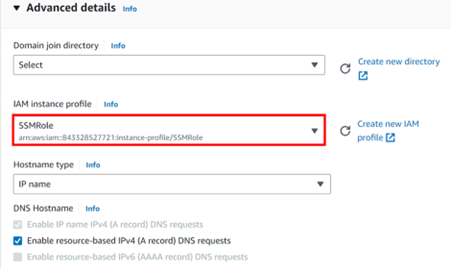
These are the only settings we need, scroll down and click Launch instance.
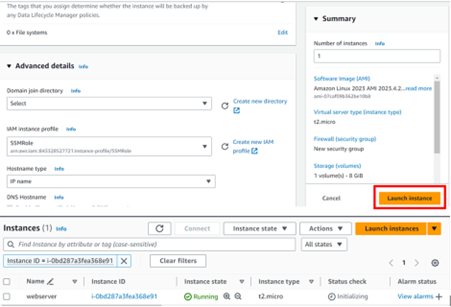
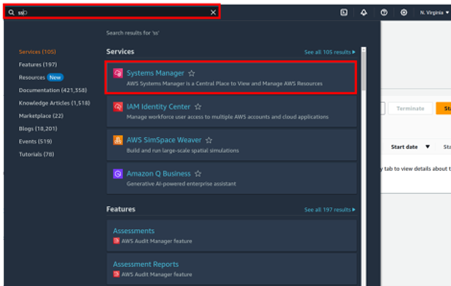
Once the instance has been launched, go to the Systems Manager console by typing SSM in the search box then select Systems Manager.
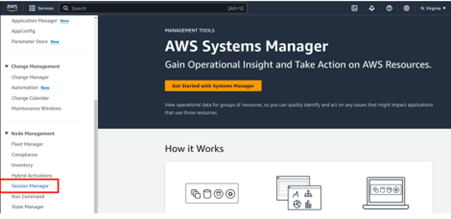
In the Systems Manager console on the left side of the panel select Session Manager then click Start Session.
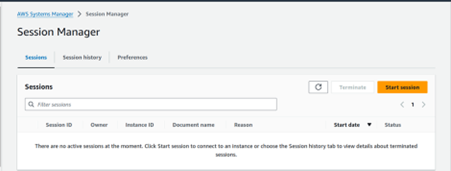
Give your session a name, then under Target instances, your instance will appear. Select it then select next.
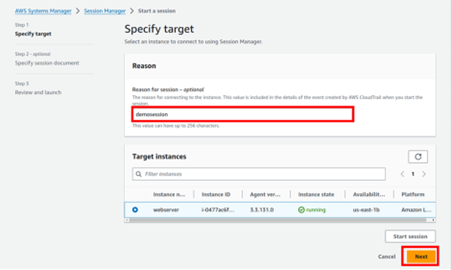
Leave all default settings and click start session.
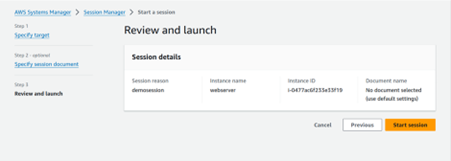
There we go, we have logged into our instance.

Remember we didn’t open port 22 and did not allocate any key pair to our Instance.
This brings us to the end of this blog, thanks for reading, and stay tuned for more.
If you have any questions concerning this article or have an AWS project that requires our assistance, please reach out to us by leaving a comment below or email us at sales@accendnetworks.com.
Thank you!

Thanks for sharing. I read many of your blog posts, cool, your blog is very good.
Your point of view caught my eye and was very interesting. Thanks. I have a question for you.
Your article helped me a lot, is there any more related content? Thanks!
Your point of view caught my eye and was very interesting. Thanks. I have a question for you.