Enhancing Data Integrity in Amazon S3 with Additional Checksums
In the security world, cryptography uses something called “hashing” to confirm that a file is unchanged. Usually, when a file is hashed, the hash result is published. Next, when a user downloads the file and applies the same hash method, the hash results, or checksums (a string of output that is a set size) are compared. This means if indeed the checksum of the downloaded file and the original file are the same, the two files are identical, confirming that there have been no unexpected changes — for example, file corruption, man-in-the-middle (MITM) attacks, etc. Since hashing is a one-way process, the hashed result cannot be reversed to expose the original data.
Verify the integrity of an object uploaded to Amazon S3
We can use Amazon S3 features to upload an object with the checksum flag “On” with the checksum algorithm that is used to validate the data during upload (or download) — in this example, as SHA-256. Optionally, you may also specify the checksum value of the object. When Amazon S3 receives an object, it calculates the checksum by leveraging the algorithm that you specified. Now, if the two checksum values do not match, Amazon S3 will generate an error.
Types of Additional Checksums
Various checksum algorithms can be used for verifying data integrity. Some common ones include:
MD5: A widely used algorithm, but less secure against collision attacks.
SHA-256: Provides a higher level of security and is more resistant to collisions.
CRC32: A cyclic redundancy check that is fast but not suitable for cryptographic purposes.
Implementing Additional Checksums
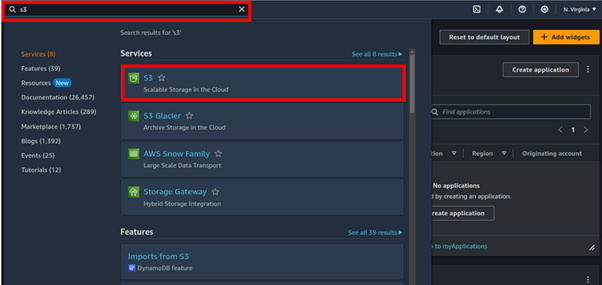
Sign in to the Amazon S3 console. From the AWS console services search bar, enter S3. Under the services search results section, select S3.
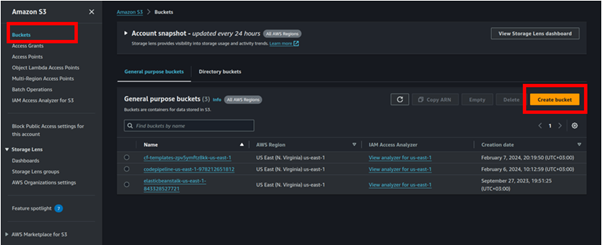
Choose Buckets from the Amazon S3 menu on the left and then choose the Create Bucket button.
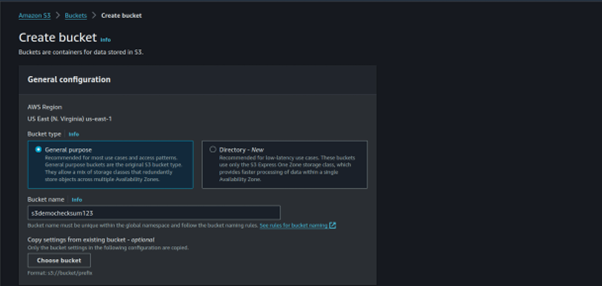
Enter a descriptive globally unique name for your bucket. The default Block Public Access setting is appropriate, so leave this section as is.
You can leave the remaining options as defaults, navigate to the bottom of the page, and choose Create Bucket.
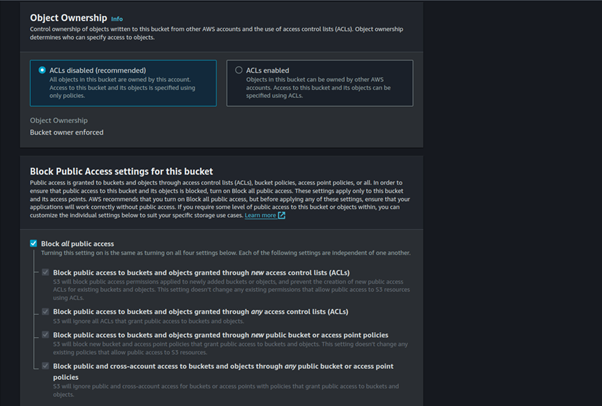
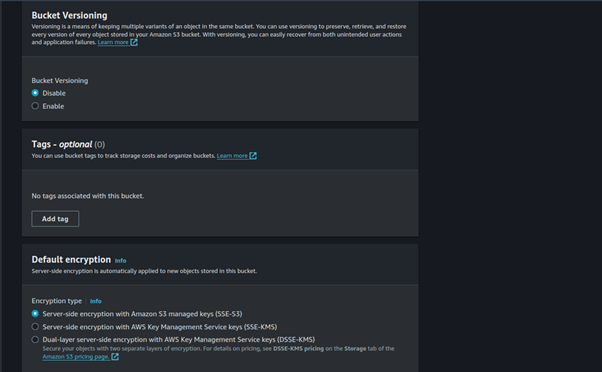
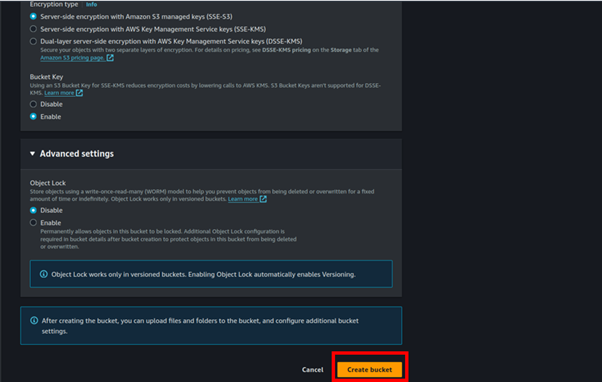
Our bucket has been successfully created.
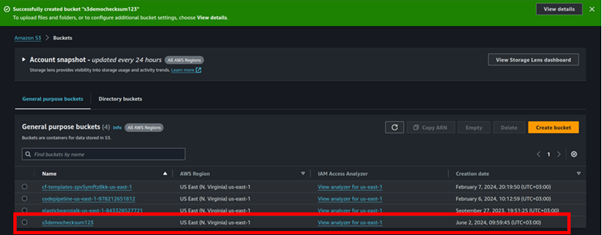
Upload a file and specify the checksum algorithm
Navigate to the S3 console and select the Buckets menu option. From the list of available buckets, select the bucket name of the bucket you just created.
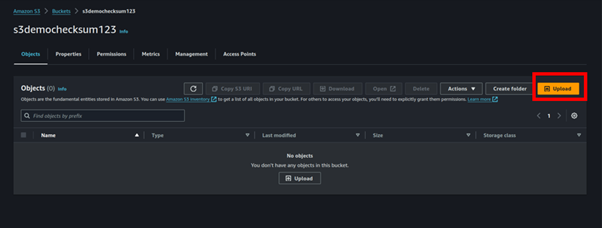
Next, select the Objects tab. Then, from within the Objects section, choose the Upload button.
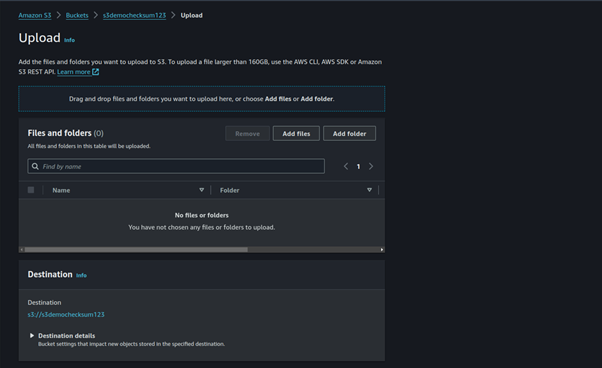
Choose the Add Files button and then select the file you would like to upload from your file browser.
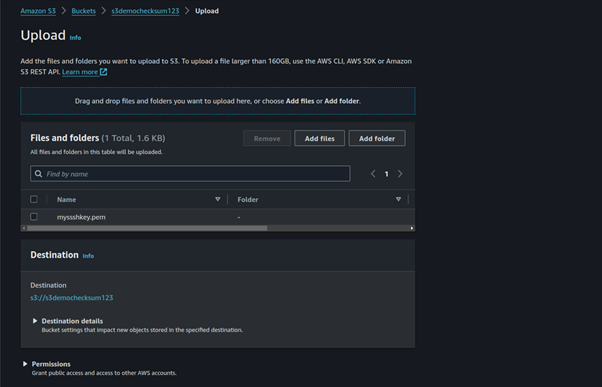
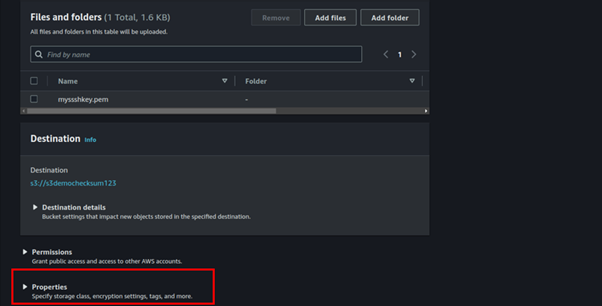
Navigate down the page to find the Properties section. Then, select Properties and expand the section.
Under Additional checksums select the on option and choose SHA-256.
If your object is less than 16 MB and you have already calculated the SHA-256 checksum (base64 encoded), you can provide it in the Precalculated value input box. To use this functionality for objects larger than 16 MB, you can use the CLI or SDK. When Amazon S3 receives the object, it calculates the checksum by using the algorithm specified. If the checksum values do not match, Amazon S3 generates an error and rejects the upload, but this is optional.
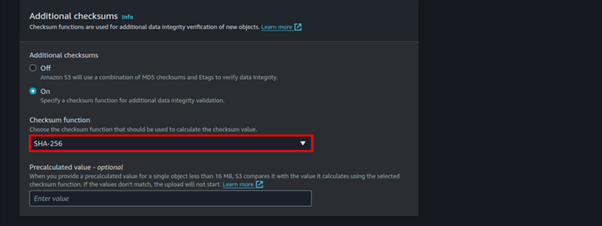
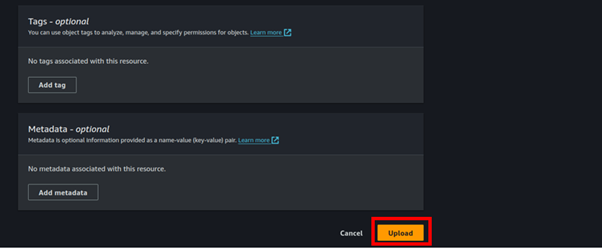
Navigate down the page and choose the Upload button.
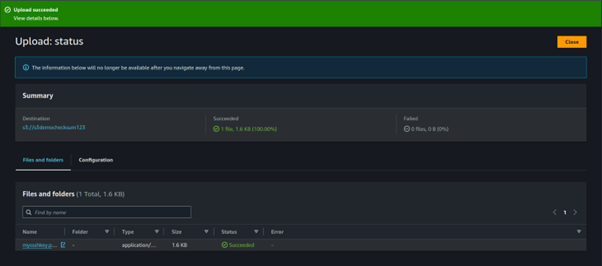
After your upload completes, choose the Close button.
Checksum Verification
Select the uploaded file by selecting the filename. This will take you to the Properties page.
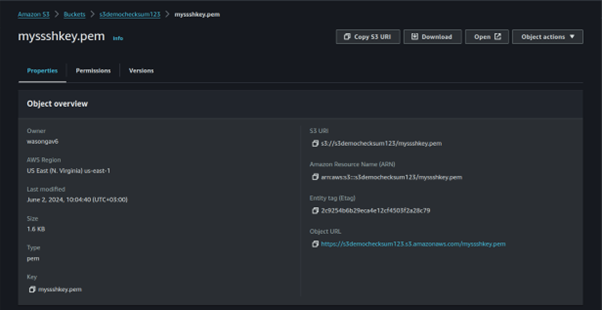
Locate the checksum value: Navigate down the properties page and you will find the Additional checksums section.
This section displays the base64 encoded checksum that Amazon S3 calculated and verified at the time of upload.

Compare
To compare the object in your local computer, open a terminal window and navigate to where your file is.
Use a utility like Shasum to calculate the file. The following command performs a sha256 calculation on the same file and converts the hex output to base64: shasum -a 256 image.jpg | cut -f1 -d\ | xxd -r -p | base64
When comparing this value, it should match the value in the Amazon S3 console.
Run this code by replacing it with your image.

Congratulations! You have learned how to upload a file to Amazon S3, calculate additional checksums, and compare the checksum on Amazon S3 and your local file to verify data integrity.
This brings us to the end of this blog, thanks for reading, and stay tuned for more.
If you have any questions concerning this article or have an AWS project that requires our assistance, please reach out to us by leaving a comment below or email us at sales@accendnetworks.com.
Thank you!

Thanks for sharing. I read many of your blog posts, cool, your blog is very good.
Can you be more specific about the content of your article? After reading it, I still have some doubts. Hope you can help me.
Can you be more specific about the content of your article? After reading it, I still have some doubts. Hope you can help me.
Thank you for your sharing. I am worried that I lack creative ideas. It is your article that makes me full of hope. Thank you. But, I have a question, can you help me?