How to Deploy a WordPress Site on Amazon LightSail: A Step-by-Step Guide
If you want to quickly and easily set up a WordPress website with budget-friendly hosting, Amazon LightSail is a good option. This service from AWS makes it simple to create virtual private servers, which helps make WordPress deployment easier, even for beginners. In this blog post, we will show you how to deploy a WordPress site on Amazon LightSail, from starting your server to accessing your new website.
Why Choose AWS LightSail for WordPress Hosting?
AWS LightSail provides an easy-to-use platform for WordPress hosting, combining scalability, cost-efficiency, and AWS’s trusted infrastructure. LightSail is ideal for beginners or small business owners who need a quick WordPress deployment solution without diving into complex configurations.
Key benefits of using AWS LightSail for WordPress deployment include:
Affordable pricing: You can start with a low-cost plan and scale as your website grows.
Ease of use: LightSail offers pre-configured WordPress images, which simplifies installation.
Scalability: You can easily upgrade your instance, add storage, or integrate with other AWS services as needed.
Hands-on lab: Step-by-Step Guide to Deploying WordPress on Amazon LightSail
Let’s get started with a detailed guide on how to set up a WordPress site using AWS LightSail.
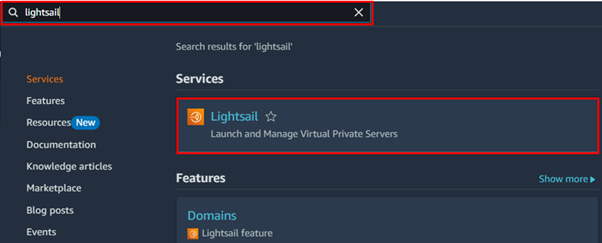
Step 1: Sign Up for AWS and Navigate to LightSail
Sign in to the AWS management console, in the search bar type LightSail then select LightSail under services.
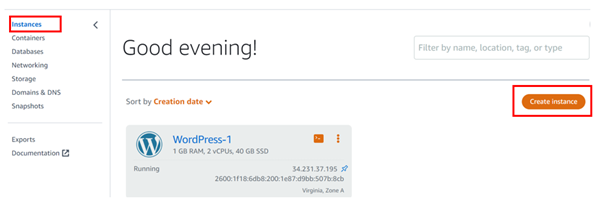
Step 2: Create a New Instance
In the LightSail console, on the left side of the navigation pane, select instances then click Create instance.
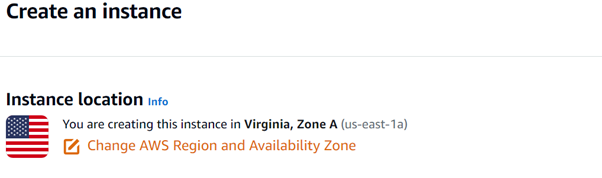
In the create instance UI, choose your Instance location (AWS region). It’s essential to choose the region closest to your target audience for optimal performance.
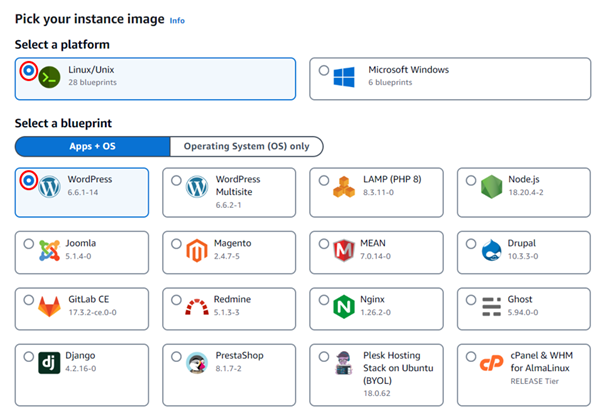
Choose your instance image: Select Linux/Unixas the platform and then choose WordPress as the application.
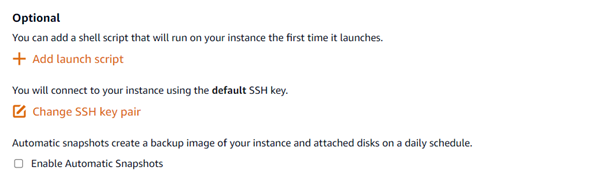
Optionally, you can add a shell script to run at launch and also change SSH key pairs but we will move with the default options for now. Scroll down.
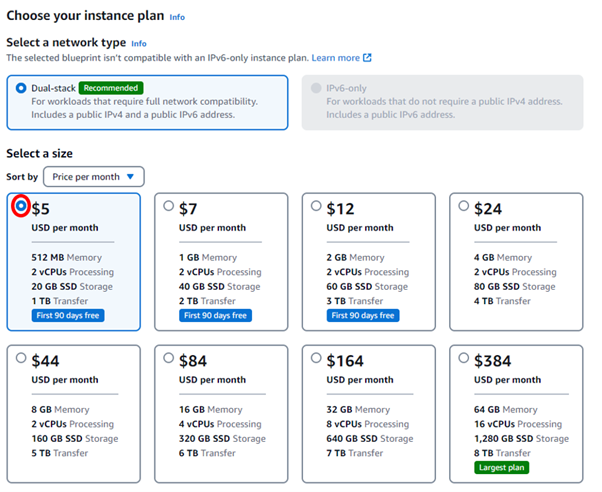
Select your instance plan based on your needs. For a small blog or a personal website, the lower-cost plans are often sufficient. For this demo, I will choose 5 USD, and scroll down.
Step 3: Configure Your Instance
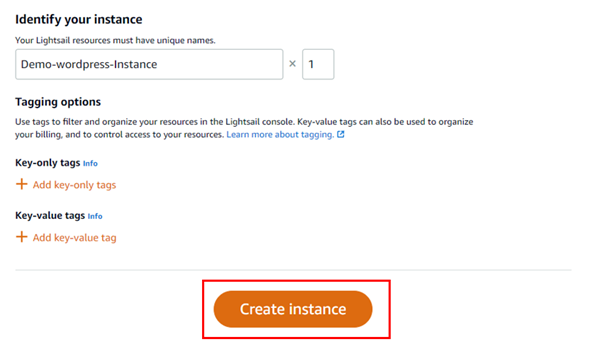
Name your instance—this could be something relevant to your site or simply “Demo-instance.”
Optionally add tags to organize your resources if needed. Click Create Instance. LightSail will begin the process of deploying your WordPress site on the instance.
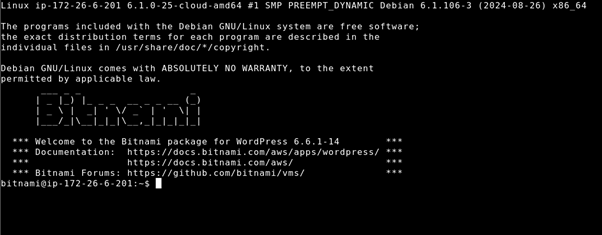
Step 4: Accessing Your WordPress Site
Once the instance is up and running (it usually takes a few minutes), you can access your WordPress site:
Go to the LightSail instances page and access the newly created instance.

Under the Connect tab, you’ll find the Public IP of your instance. This is the IP address you’ll use to access your WordPress site. Enter the IP in a browser, and you’ll see your new WordPress site live.
Step 5: Logging Into Your WordPress Admin Panel
To access the WordPress admin dashboard:
Add /wp-admin to the IP address in your browser. Example: http://<your-instance-ip>/wp-admin.
The default credentials (username and password) for your WordPress admin dashboard can be retrieved from the instance management page:
Under the Connect tab, click on SSH to open a terminal window.
Run the following command to retrieve the password:
cat bitnami_application_password
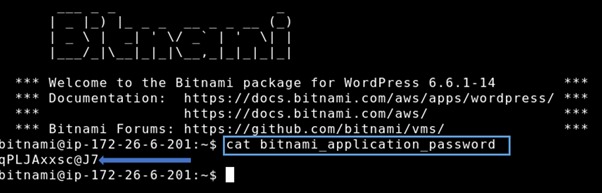
Use the retrieved password and username (user) to log in.
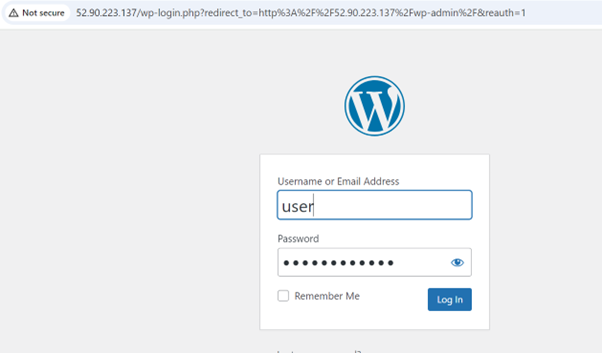
You are already logged into the admin dashboard.

Step 6: Add a static IP address to your WordPress Instance.
On the left side of WordPress UI, select Networking, then click Create Static IP.
Under attach to an instance, select the instance you just created. Then scroll down and click on Create.
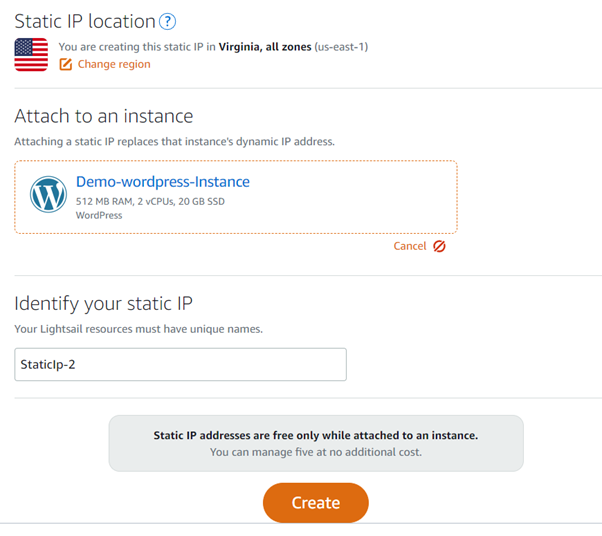
That’s it, with a static IP address whether you restart your instance, it will remain unchanged.
This brings us to the end of this hands-on exercise.
Final Thoughts
Using AWS LightSail for WordPress hosting offers a quick, easy, and cost-effective solution for both beginners and professionals. With its pre-configured WordPress images and seamless integration with other AWS services, setting up WordPress has been simplified.
Thanks for reading and stay tuned for more. Make sure you clean resources by deleting your Instance and releasing your static IP address.
This guide is excellent for beginners! When scaling any high-traffic platform-whether it’s a corporate blog or a dynamic service like phkkk slot-the key is robust load management. Focusing on auto-scaling groups early on, rather than just initial setup, ensures uptime and a seamless user experience. Great read!
Alright, so 12betlink is my go-to spot now. Easy to navigate, got all the sports I’m into and some sweet casino action too. Worth a look fam. 12betlink
7Slots, eh? Simple, but effective. Slap bang in the middle of playing, I hear. Check ’em out here 7slots for a bit of a fun go!
Opa! Baixei o app do wc7777download e curti poder jogar direto no celular. Pra quem tá sempre na correria, é super prático. Recomendo testar! wc7777download
Sup! I just signed up on luckbetcasin, and I have to say, the mobile experience is pretty on point. Super easy to play on the go, which is a huge plus for me. Check it out if you are always on the move. luckbetcasin
Jilipark app is the way to go! So convenient and easy to use. Gotta love playing on the go. Get the jilipark app now!
79ok, yeah, it’s alright. Functional site, easy to get started and place a bet. Nothing super fancy, but gets the job done! Give it a try: 79ok
Yo, Jilipark16 is pretty slick! Slots are fire, and I had a decent run last night. Could use a few more table games, but overall, I’m digging it. Check it out at jilipark16.
03oe3nMUXpB
sy1tQZb3W75