Accend Networks San Francisco Bay Area Full Service IT Consulting Company

Categories
Blogs

Automate Your EBS Backups

Automate Your EBS Backups: A Comprehensive Guide to Scheduled Snapshots and Effortless Restores.

Automate EBS Backups

Ensuring the safety and availability of your data is a critical element of managing any infrastructure in the cloud. Automating EBS backups can save time, lessen the risk of data loss, and ensure short recovery in the event of a failure. This guide will stroll you through the procedure of setting up automated EBS snapshots and how to restore them effortlessly.

AWS Backup

AWS Backup is a fully managed service that makes it easy to centralize and automate data protection across AWS services, in the cloud, and on-premises.

It simplifies the process of centralizing and automating backups using just a few clicks for data across various AWS services.


Now let’s jump into the hands-on.

Step 1: Set Up AWS Backup Service

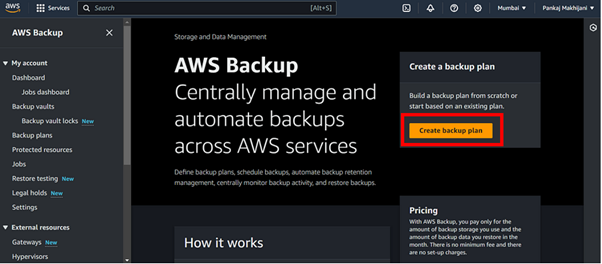
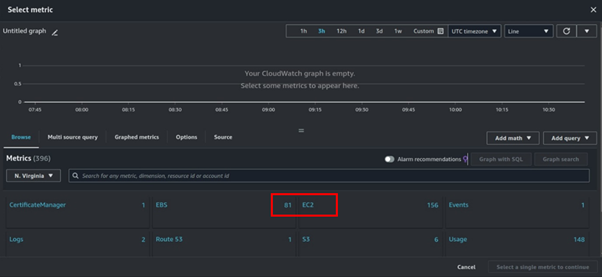
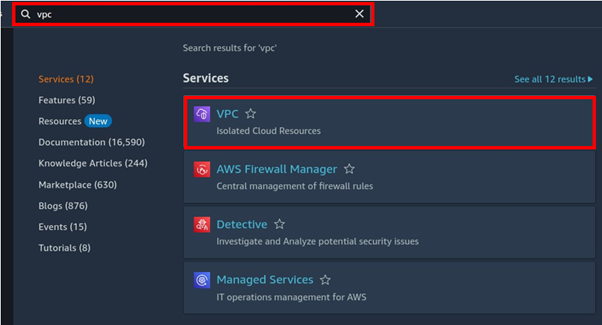
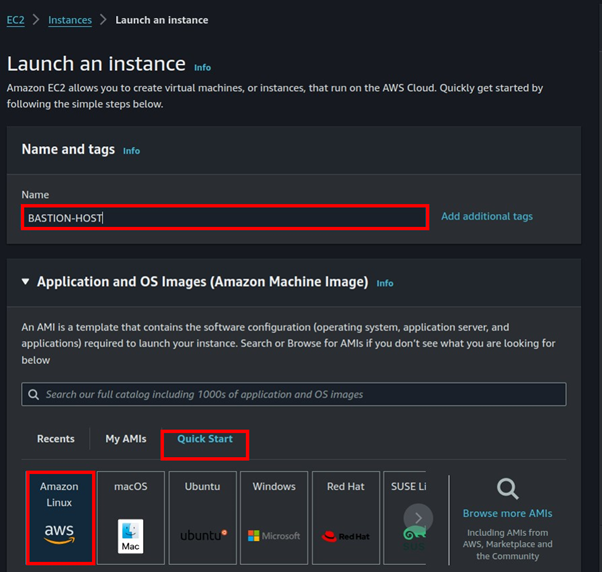
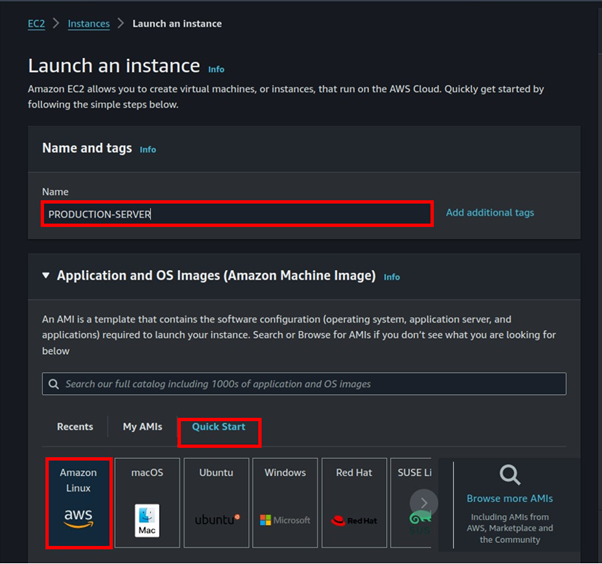
Sign in to your AWS Management Console and navigate to the AWS backup service.

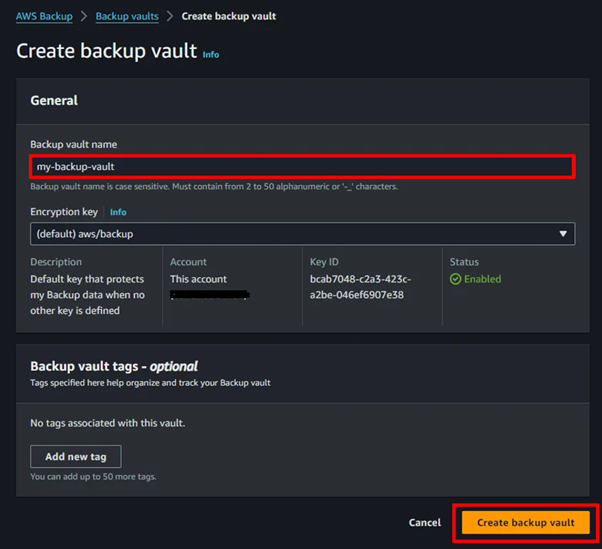
Click on “Create backup vault” to begin the process of creating a new backup vault, where all of your backups will be securely stored.

Provide a name, encryption keys, and tags for your backup vault. Finally, click on “Create backup vault”.

With our backup vault set up, it’s now ready to store backups of our resources.

Step 2: Create a Backup Plan

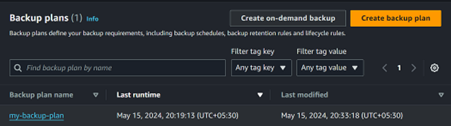
Navigate to the left-hand navigation pane and select “Backup plans” We notice that there are currently no backup plans available. To create one, simply click on “Create backup plan”.

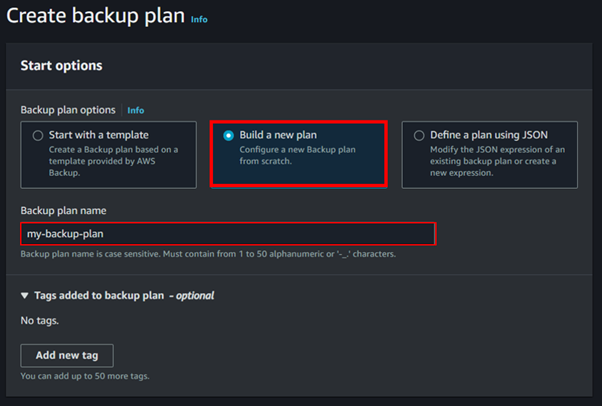
You’ll find three startup options for backup plans: you can choose from predefined templates, or if you prefer, you can define a plan using JSON. For this demo, I will choose to build a new plan.

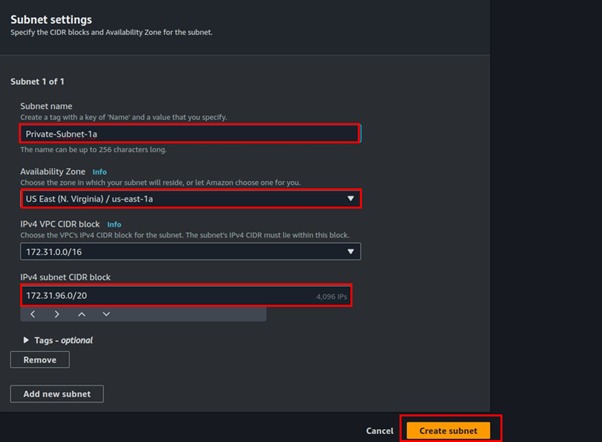
Provide a suitable name for your backup plan tags are optional.

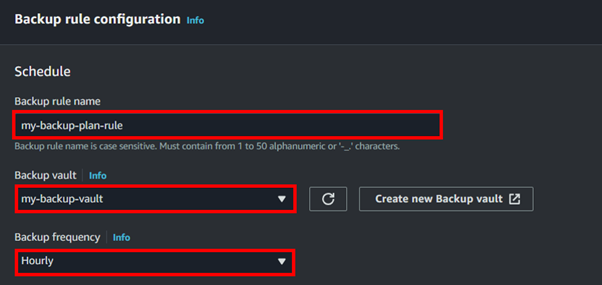
Under backup rule configurations, assign a name to your backup rule. Choose the backup vault created in the previous step as the destination for your backups. Select your desired backup frequency.

For this demo, the frequency has been set to every 1 hour, meaning backups of your AWS resources will be taken and stored in the designated backup vault every hour.

Under the backup window, select the timeframe according to your business requirements for when you need to take backups. It’s crucial to set the backup window during low traffic times or off-business hours to minimize disruption.

Choose a time frame that aligns with your organization’s operational needs while ensuring minimal impact on regular activities.

Enable the Point-in-time recovery in case you want to restore your backups at a specific point-in-time.

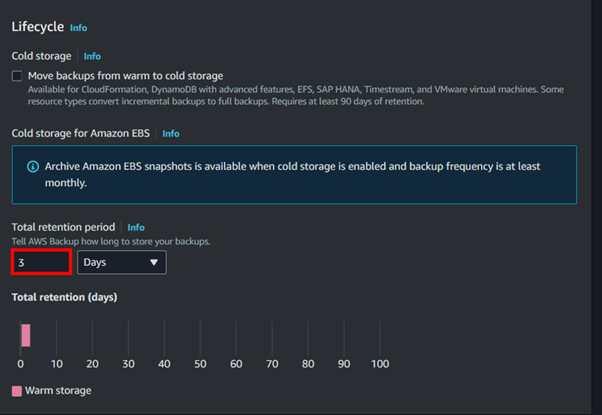
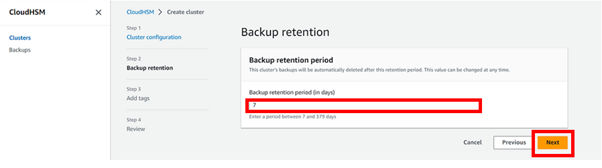
For the backup lifecycle, Select the retention period for the backups.

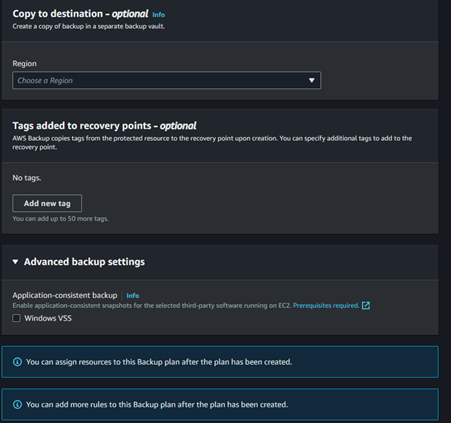
For compliance and regulations, you can define the region to copy backups into a different region.

Optionally, provide tags to recovery points and enable Windows VSS if you want application-consistent backups.

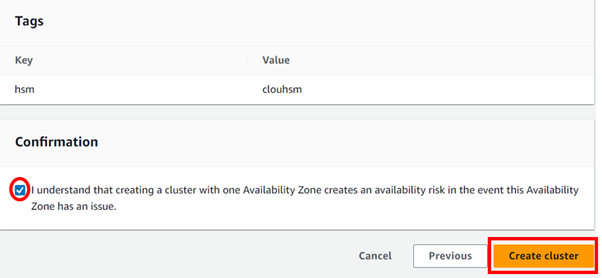
Once the backup configuration is completed, click on “Create plan”.

Step 3: Assign Resources to Backup Plan

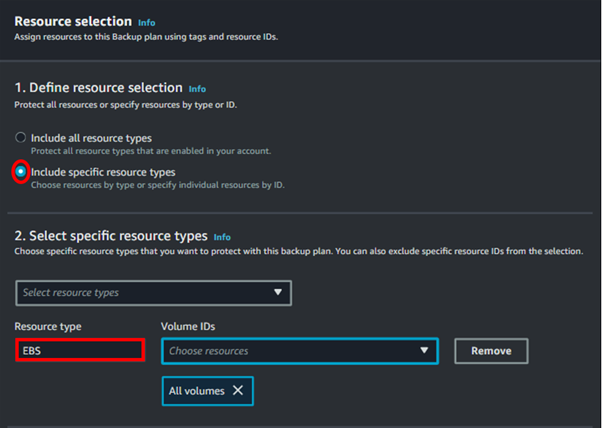
After creating the backup plan, click on “Assign resources” next to the plan you created. Provide a resource assignment name and select the IAM role.

Then, select the desired EBS volumes or any other resources to which you want to apply this backup plan, and click “Assign resources”.

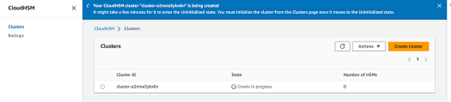
A backup plan was successfully created and resources were assigned to it.

Now, let’s ensure that the backup jobs are executing successfully according to our schedule.

Step 4: Monitor Backup Execution

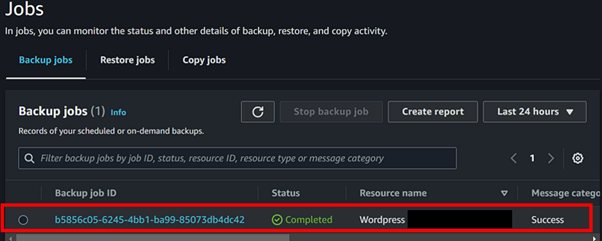
Select “Backup jobs” from the left-hand navigation pane to view the executed backup jobs according to your desired timeframe.

After a while, you will observe that your backup jobs have been executed successfully.

The AWS Backup service also provides the capability to generate a report for our backup jobs, which can be stored in CSV or JSON format in an S3 bucket.

Now that our backup jobs are successfully executed as per the defined timeframe of our backup plan, let’s proceed to explore how to restore our data from the created backup.

Step 5: Test Backup Restoration

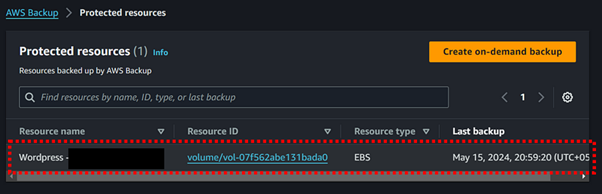
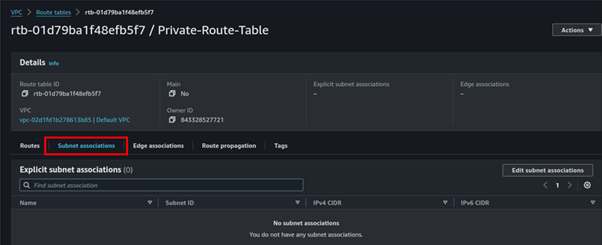
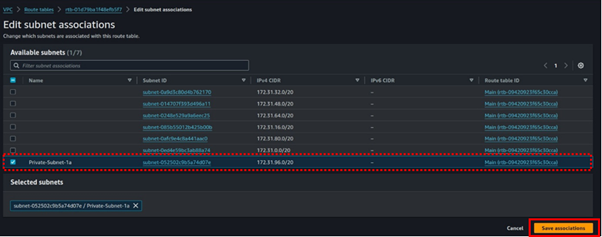
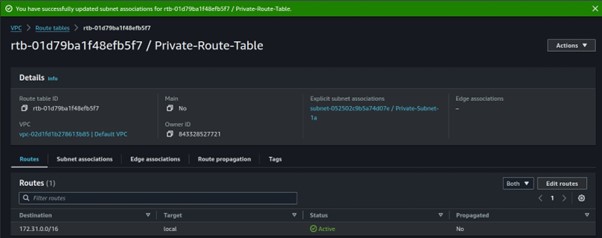
Navigate to “Protected resources” from the left-hand navigation pane. Here, you can choose the specific resource (such as an EBS volume) that you wish to restore from the backup.

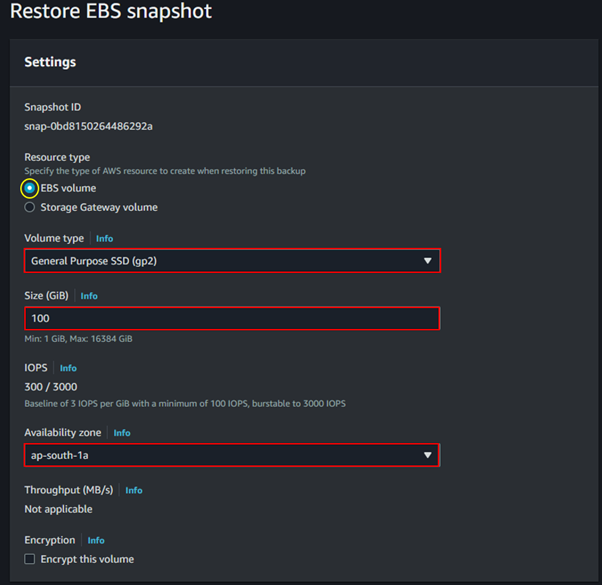
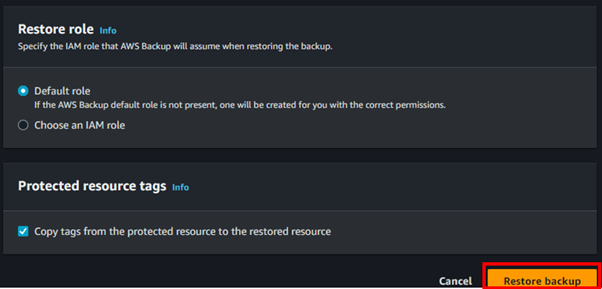
Click on the EBS resource ID and select the recovery point (snapshot) from which you want to restore. Then, proceed to fill out the required details for the volume to be restored.

Restore EBS backup

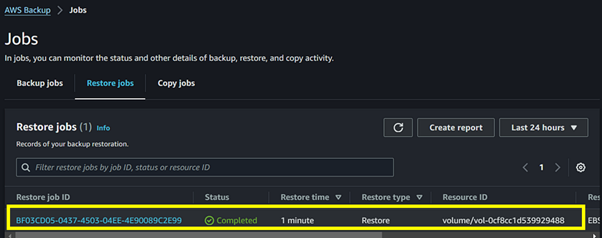
Initiate the restoration process and monitor its progress closely.

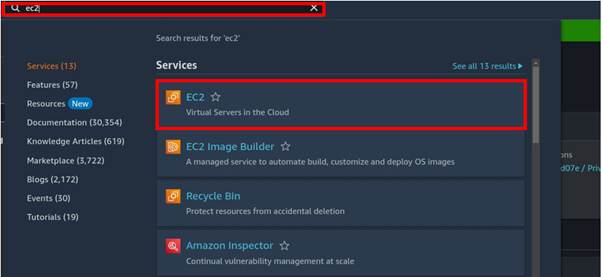
Once the status shows completed, you’re now ready to attach it to your EC2 instances and get your application back up and running, that’s it.

Thanks for reading, and stay tuned for more.

If you have any questions concerning this article or have an AWS project that requires our assistance, please reach out to us by leaving a comment below or email us at sales@accendnetworks.com.

Thank you!

Categories
Blogs

Introduction to Azure Blob Storage

Introduction to Azure Blob Storage

Azure Blob Storage is part of the Azure Storage services, which include Azure Files, Azure Queues, and Azure Tables. Blob stands for Binary Large Object, and Azure Blob Storage is designed to handle large files and datasets, making it ideal for a variety of use cases such as serving documents or media directly to browsers, storing data for backup and restore, disaster recovery, and archiving.

Mastering Azure Blob Storage Encryption: A Detailed Guide to Secure Your Data

In today’s digital age, data security is paramount. With increasing cyber threats, securing sensitive information stored in the cloud has become a critical task for organizations. Azure Blob Storage, a popular choice for scalable object storage, offers robust encryption features to protect your data. This article provides a detailed guide on how to implement encryption in Azure Blob Storage, ensuring your data remains secure and compliant with industry standards.

Understanding Blob Storage Encryption

Encryption at Rest

Encryption at rest refers to the encryption of data stored in the cloud to prevent unauthorized access. Azure Blob Storage automatically encrypts data at rest using Azure Storage Service Encryption (SSE). Key features include:

  • Automatic Encryption: All data written to Azure Blob Storage is encrypted by default. This includes block blobs, append blobs, and page blobs. The encryption process is transparent to the user, requiring no additional code or configuration.
  • 256-bit AES Encryption: Azure uses Advanced Encryption Standard (AES) with 256-bit keys, one of the strongest encryption standards available. This ensures that data is highly secure against brute-force attacks.
  • Key Management: Azure manages encryption keys through Azure Key Vault or allows users to manage their own keys using Customer-Managed Keys (CMK). This provides flexibility and control over the encryption process.
Azure Blob Storage

Encryption in Transit

Encryption in transit ensures that data is protected while being transferred between the client and the Azure Blob Storage service. Key features include:

  • HTTPS: Data is encrypted using HTTPS, which ensures that data cannot be intercepted or tampered with during transmission. Azure Blob Storage requires HTTPS for secure data transfer.
  • Client-Side Encryption: Azure Blob Storage also supports client-side encryption, where data is encrypted by the client before being sent to Azure. This allows for end-to-end encryption, ensuring that data remains encrypted throughout its journey.

Benefits of Encrypting Azure Blob Storage

  1. Data Security: Protects sensitive data from unauthorized access.
  2. Compliance: Helps meet regulatory and industry standards.
  3. Managed Keys: Offers options to manage encryption keys.
  4. Performance: Minimal impact on storage performance.

Step-by-Step Guide to Implementing Encryption in Azure Blob Storage

Step 1: Create an Azure Storage Account

  1. Sign in to the Azure Portal: Open Azure Portal and sign in with your credentials.
  2. Create a Storage Account:
  • Navigate to “Create a resource”“Storage”“Storage account – blob, file, table, queue”.
  • Fill in the required details such as Subscription, Resource group, Storage account name, and Region.
  • Click “Review + create” and then “Create”.

Step 2: Enable Encryption at Rest

  1. Navigate to the Storage Account:
  • Go to “Storage accounts” ➔ Select your storage account.
  1. Encryption Settings:
  • Under “Settings”, click on “Encryption”.
  • Ensure “Blob service” is selected.
  • By default, Microsoft-managed keys are used for encryption. To use your own keys, select “Customer-managed keys (CMK)”.

Step 3: Configure Customer-Managed Keys (Optional)

  1. Set Up Azure Key Vault:
  • If you choose to use customer-managed keys, you need an Azure Key Vault.
  • Navigate to “Create a resource”“Security + Identity”“Key Vault”.
  • Fill in the required details and click “Create”.
  1. Generate or Import Keys:
  • In the Key Vault, navigate to “Keys”“Generate/Import”.
  • Create a new key or import an existing key.
  1. Assign Key to Storage Account:
  • Go back to the storage account’s “Encryption”
  • Select “Customer-managed keys”“Select a key vault and key”.
  • Choose the Key Vault and the key you created.

Step 4: Verify Encryption

  1. Check Encryption Status:
  • In the storage account’s “Encryption” settings, verify that the encryption is enabled.
  • Ensure the correct key is being used if you opted for customer-managed keys.

Step 5: Monitor and Manage Encryption

Best Practices for Azure Blob Storage Encryption

  1. Use Customer-Managed Keys for Greater Control: While Microsoft-managed keys are convenient, customer-managed keys offer more control over encryption processes.
  2. Regularly Rotate Keys: Regular key rotation reduces the risk of key compromise.
  3. Implement Access Controls: Use Azure’s role-based access control (RBAC) to restrict access to the storage account and key vault.
  4. Enable Logging and Monitoring: Use Azure’s monitoring tools to keep track of access and changes to your storage account.

Conclusion

Implementing encryption in Azure Blob Storage is a vital step in safeguarding your data against unauthorized access and ensuring compliance with industry standards. By following this detailed guide, you can master the encryption features of Azure Blob Storage, providing robust protection for your valuable data. Take advantage of Azure’s powerful tools and best practices to maintain the highest level of data security while being mindful of associated costs.

Stay tuned for more valuable insights.

If you have any questions concerning this article or have an AWS project that requires our assistance, please reach out to us by leaving a comment below or email us at sales@accendnetworks.com.


Thank you!

Categories
Blogs

Slash AWS Expenses

Slash AWS Expenses: Automate EC2 Idle Instance Shutdown with CloudWatch Alarms.

Slash AWS

Introduction

Effective management of cloud resources is important for anyone who uses cloud services, especially when it comes to managing costs. A common issue is that you forget to stop using EC2 instances for purposes such as development, testing, and temporary work, which can lead to unexpectedly high costs.

There are several scenarios in which you might want to automatically stop or terminate your instance. For example, you might have instances dedicated to batch payroll processing jobs or scientific computing tasks that run for some time and then complete their work. Rather than letting those instances sit idle (and accrue charges), you can stop or terminate them, which helps you to save money.

Forgetting to stop an EC2 instance used for brief testing can lead to unnecessary charges. To solve this, create a CloudWatch alarm to automatically shut down the instance after 1 hour of inactivity, ensuring you only pay for what you use. In this article, I’ll share how to set up this solution using the AWS Management Console.

CloudWatch Alarm

Amazon CloudWatch is a monitoring service for AWS. It serves as a centralized repository for metrics and logs that can be collected from AWS services, custom applications, and on-premises applications. One of its important features is CloudWatch Alarms, which allows you to configure alarms based on the collected data.

A CloudWatch alarm checks the value of a single metric, either simple or composite, over some time you specify and launches the actions that you specify once the metric reaches a threshold that you define.

Key Components of CloudWatch Alarms

Metric: A metric is performance data that you monitor over time.


Threshold: This is the value against which the metric data is evaluated.


Period (in seconds): The period determines the frequency at which the value of the metric is collected.


Statistic: This specifies how the metric data is aggregated over each period. Common statistics include Average, Sum, Minimum, and Maximum.


Evaluation Periods: The number of recent periods that will be considered to evaluate the state of the alarm, based on the metric values during these periods.


Datapoints to Alarm: The number of evaluation periods during which the metric must breach the threshold to trigger the alarm.


Alarm Actions: Actions that are taken when the alarm state changes. These can include sending notifications via Amazon SNS, and stopping, terminating, or rebooting an EC2 instance.

Setting Up a CloudWatch Alarm to Automatically Stop Inactive Instances.

Solution with Console

Open the CloudWatch console, In the navigation pane, choose AlarmsAll alarms. Then choose Create alarm.

Choose Select Metric

for AWS namespaces, choose EC2

Choose Per-Instance Metrics

Select the check box in the row with the correct instance and the CPUUtilization metric, and select “select metric”.

For the statistic, choose Average. Choose a period (for example, 1 Hour).

For threshold type select static, then select lower/average. Select threshold value, and data points to alarm then select treat missing data as missing then click next.

The first action is to send a notification to an SNS topic with an email subscription. This ensures that you will be notified when the alarm stops the instance. You can create the SNS topic at this step, or you can reference an existing one if you have already created it. Had already created an SNS topic.

The second action will be to terminate the EC2 instance, under the alarm state trigger, select in alarm then select stop instance, and click next.

Provide a name for the alarm, and you can also add a description then click next.

Review a summary of all your configurations. If everything is correct, confirm the alarm creation.

The alarm was successfully created, and we can see the alarm state is ok.

You can either wait for the alarm state to be in alarm or you can use the below command to set the alarm to alarm state.

Our alarm has gone to an alarm state and if you check the state of the EC2 instance, we can see our objective has been achieved and our EC2 instance is already stopped.

Additionally, a notification has also been sent to my email via SNS.

This brings us to the end of this demo, clean up. Thanks for reading, and stay tuned for more.

Conclusion

Automating idle EC2 instance shutdown with CloudWatch Alarms cuts AWS costs and ensures efficient resource use, preventing unnecessary charges and optimizing cloud spending.

If you have any questions concerning this article or have an AWS project that requires our assistance, please reach out to us by leaving a comment below or email us at sales@accendnetworks.com.


Thank you!

Categories
Blogs

Bastion Host

Bastion Host: Secure Remote Access to Your Private Instances.

Bastion Host

Introduction

In the rapidly evolving landscape of cloud computing, security remains paramount. When managing an EC2 fleet within an Amazon Web Services (AWS) Virtual Private Cloud (VPC), ensuring secure remote access is supreme. This is where the AWS Bastion Host comes into play, providing a secure and controlled gateway to your instances. In this blog, we will explore the AWS Bastion Host, its benefits, and how to set it up.

What is an AWS Bastion Host?

An AWS Bastion Host, also known as a jump box, is a server specifically designed to allow secure SSH access to your instances within a VPC. It acts as an intermediary, providing a single point of access to instances that do not have public IP addresses, thereby enhancing the security of your VPC by limiting exposure to the internet.

Best Practices for Managing AWS Bastion Hosts

  • Update and Patch Regularly
  • Limit Access via IAM Roles
  • Rotate SSH Key Pairs Regularly
  • Implement Multi-Factor Authentication (MFA)

we will leverage the default VPC which already has a public subnet, route table correctly configured and an internet gateway attached additionally, we will create a private subnet with a route table which we will use to launch our private instance. We will then connect to the private instance by jumping from our instance in the public subnet to the private subnet. Let’s proceed as follows.

Log in to the management console with a user with admin privileges then in the search box, type VPC then select VPC under services.

We will use the default VPC subnet CIDR to create a private subnet in the default VPC. So, copy the default VPC subnet to your clipboard (this is to enable you know default VPC subnet CIDR range). Then click Create Subnet.

In the create subnet console fill in the required details. For VPC, select default then scroll down.

Subnet name call it Private-subnet-1a. AZ select the availability zone of your choice, will select us-east-1a. For IPV4 CIDR make sure it’s within the CIDR range of the default VPC, since we are launching this subnet in the default VPC. Those are the only settings we need. Click Create Subnet.

We have successfully created our private subnet leveraging the default VPC.

Under subnets, we can see our private subnet.

Next, we will create a private route table and associate it with our subnet. In the left UI of VPC select route table then click create route table.

In the create route table UI, name your route table, VPC select default then click create route table.

The route table has been successfully created and we can see its only routing traffic locally within the VPC.

Move to the subnet association tab then click edit subnet associations.

Available subnets will be listed, select private-subnet-1a then click save associations.

We have now created a private route table and associated it with our private subnet. Next, we will launch two EC2 instances. One in the public subnet which will be our Bastion Host, and one in the private subnet which will be our Production server. We will use the Bastion Host to jump into our Production server.

Log into the EC2 console by typing EC2 in the search box then select EC2 under services.

In the EC2 UI, select instances then click Launch Instances.

For name, call this instance Bastion Host. For application OS select the QuickStart tab then choose Amazon Linux. Scroll down.

For AMI move within the free-tier, instance type also select t2. micro which is also free-tier eligible, select your key-pair then scroll down.

Expand the networking tab, then select the default VPC with a public subnet of your choice. Then scroll down.

Under firewall select create new security group and make sure you select SSH on port 22. For source traffic for this demo, we will leave it open to anywhere but as a best practice always limit it to your IP address. Scroll down.

Review and click launch instance.

Successfully launched. We will now launch our production server in the private subnet. Click launch instances a gain.

Call it the production server additionally, let’s repeat the same process of launching Instances. For OS select Amazon Linux. Scroll down.

For AMI move within the free tier, instance type a gain and select t2. micro. select your key-pair then scroll down.

Expand the networking tab, select the default VPC, and for the subnet select the private subnet you launched. Scroll down.

Select Create Security Group and make sure port 22 is open.

Review then click launch instance.

Successfully launched the instance.

Now SSH into the Bastion host. By using the command seen below, replace the IP address with your Instance IP address.

Using an editor of your choice, paste your key pair into the Bastion Host. Then give it enough permission.


Then type this command to SSH into your private instance and that’s it we can see we are in our private EC2 instance and can confirm this by its private IP address.


This brings us to the end of this blog. Clean up.

If you have any questions concerning this article or have an AWS project that requires our assistance, please reach out to us by leaving a comment below or email us at sales@accendnetworks.com.

Thank you!

Categories
Blogs

AWS CloudHSM

AWS Hardware Security Module: Securing Your Keys in the Cloud

Cloud HSM

Introduction

As organizations increasingly move their operations to the cloud environment, the need for robust security measures becomes equally important. One critical aspect of this cloud security measure is the management and protection of cryptographic keys. This is where the AWS Hardware Security Module or AWS CloudHSM comes in handy. This article explores what CloudHSM is, its use case, and a demo of how to create one.

What is CloudHSM?

AWS CloudHSM is a cryptographic service for creating and maintaining AWS hardware security modules (HSMs) in your AWS environment. HSMs are computing devices that process cryptographic operations and provide secure storage for cryptographic keys. You can use AWS CloudHSM to offload SSL/TLS processing for web servers, protect private keys linked to an issuing certificate authority (CA), or enable Transparent Data Encryption (TDE) for Oracle databases.

When we have the KMS, AWS manages the software for encryption and the encryption keys. But with cloud HSM, AWS only provides us with the encryption hardware. The HSM device is tamper resistant and has FIPS 140-2 Level 3 compliance. CloudHSM supports both symmetric and Asymmetric encryption.

Using AWS CloudHSM you must use CloudHSM client software since there is no API call for this service.

Key Features of Cloud HSM

Hardware-based Security: Keys are stored in hardware, which is inherently more secure than software-based storage.

High Availability and Scalability: Cloud HSM services are typically offered with high availability and can scale to meet the demands of enterprise workloads.

Compliance: Cloud Hardware Security Module is often compliant with industry standards such as FIPS 140-2 Level 3, ensuring they meet regulatory requirements for data protection.

Integration: Cloud HSMs can integrate with various cloud services and on-premises applications, enabling seamless cryptographic operations across different environments.

CloudHSM Backups

Backups are stored in Amazon Simple Storage Service (Amazon S3) within the same Region as the cluster. You can view backups available for your cluster from the CloudHSM console. Backups can only be restored to a genuine HSM running in the AWS Cloud. The restored HSM retains all the configurations and policies you put in place on the original HSM.

Creating a backup CloudHSM triggers backups in the following scenarios:

  • CloudHSM automatically backs up your HSM clusters periodically.
  • When adding an HSM to a cluster, CloudHSM takes a backup from an active HSM in that cluster and restores it to the newly provisioned HSM.
  • When deleting an HSM from a cluster, CloudHSM takes a backup of the HSM before deleting it.

A backup is a unified encrypted object combining certificates, users, keys, and policies. It is created and encrypted as a single, tightly bound object. The individual components are not separable from each other. The key used to encrypt the backup is derived using a combination of persistent and ephemeral secret keys.

Backups are encrypted and decrypted within your HSM only, and can only be restored to a genuine HSM running within the AWS Cloud.

Let’s dive into the practical.

Login to the AWS Management Console then type CloudHSM in the search box then select it under services.

In the CloudHSM dashboard, click Create cluster.

In the create cluster dashboard, click the drop-down button and select your VPC, I will move with the default VPC.

For subnet, you can only select one subnet per AZ, because I selected default VPC, I will move with the default subnet.

We will create a new cluster, so select the radio button on Create a new cluster then click next.

Enter the backup retention period then click next.

We will tag our HSM.

Review page.

For confirmation, make sure to tick the check box, then hit on the Create cluster.

Wait until it gets created complete. And move the status to an uninitialized state.

Select the cluster from the actions drop-down button then select initialize.

We will now create an IAM user, cloudhsmuser with full access.

Take note of the password and download the .csv file

Create HSM in the cluster, select the Availability Zone, and hit on Create.

Wait until the process gets completed.

Download all 4 certificates then hit next.

Configure the HSM user on the EC2 machine using Mobastream.

Make sure Cluster is Active. As per the below screen, the Cluster is in an active state.

That’s it. Thumps up.

Conclusion

AWS Hardware Security Module or Cloud HSM provides a powerful solution for secure key management in the cloud. By leveraging hardware-based security, it offers enhanced protection for cryptographic keys, helping organizations meet stringent compliance requirements and protect sensitive data.

This brings us to the end of this blog.  Thanks for reading, and stay tuned for more. Make sure you clean resources.

If you have any questions concerning this article or have an AWS project that requires our assistance, please reach out to us by leaving a comment below or email us at sales@accendnetworks.com.


Thank you!