Understanding AWS Placement Groups: Maximizing Performance and Reliability in EC2 Deployments
AWS Placement Groups are a handy capability of Amazon Web Services (AWS) which allows users to enhance network optimization and fault tolerance of their EC2 instances. If you are running performance-intensive applications or controlling large distributed operating system domains, placement groups let you leverage how the EC2 instances are spread through the AWS deployment, allowing a better focus on networking, latency, and faults recovery.
What is a Placement Group?
A placement group is a way to control how your EC2 instances are placed on the underlying hardware in the AWS cloud. By influencing the physical location and network proximity of your instances,
All nodes within the placement group can talk to all other nodes within the placement group at a full line rate of 10 Gbps single traffic flow within the enclosure without any over-subscription-related delay.
Best Use Cases:
High-performance computing (HPC): Applications that require low latency, such as real-time data analytics or financial services.
Distributed machine learning: applications that need fast, low-latency communication between instances.
Benefits:
Low latency: The physical proximity of instances ensures minimal delay in communication.
High throughput: Instances can utilize high bandwidth for inter-instance data transfer.
Types of Placement Groups?
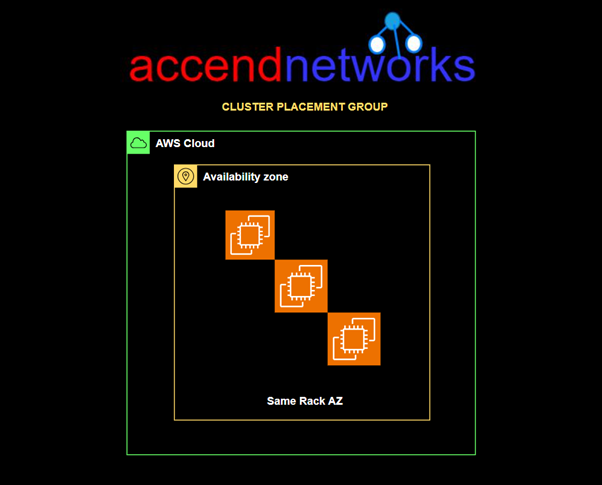
Cluster Placement Group
Packs instances close together inside an Availability Zone. This strategy enables workloads to achieve the low-latency network performance necessary for tightly coupled node-to-node communication that is typical of HPC applications.
A cluster placement group is a logical grouping of instances within a single Availability Zone. A cluster placement group can span peered VPCs in the same region. Instances in the same cluster placement group enjoy a higher per-flow throughput limit of up to 10 Gbps for TCP/IP traffic and are placed in the same high-bisection bandwidth segment of the network.
Cluster Placement Groups are great for applications that require low latency or high throughput. They work best when most of the network traffic occurs between the instances in the group, making them ideal for workloads that depend on quick data exchange. If your application falls into this category, using a Cluster Placement Group can help improve performance significantly!
Partition Placement Group
Spread your instances across logical partitions such that groups of the cases in one partition do not share the underlying hardware with groups of instances in different partitions. This strategy is typically used by large distributed and replicated workloads, such as Hadoop, Cassandra, and Kafka.
Partition placement groups help reduce the likelihood of correlated hardware failures for your application. When partition placement groups are used, Amazon EC2 divides each group into logical segments called partitions.
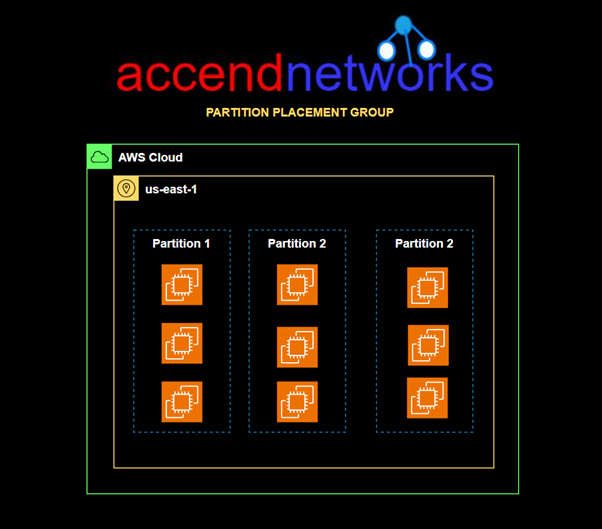
Amazon EC2 ensures that each partition within a placement group has its own racks. Each rack has its own network and power source. No two partitions within a placement group share the same racks, allowing you to isolate the impact of a hardware failure within your application.
Each partition comprises multiple instances. The instances in a partition do not share racks with the instances in the other partitions, allowing you to contain the impact of a single hardware failure to only the associated partition.
Partition placement groups can be used to deploy large distributed and replicated workloads, such as HDFS, HBase, and Cassandra, across distinct racks.
Spread Placement Group
Strictly places a small group of instances across distinct underlying hardware to reduce correlated failures.
A spread placement group is a group of instances that are each placed on distinct racks, with each rack having its own network and power source.
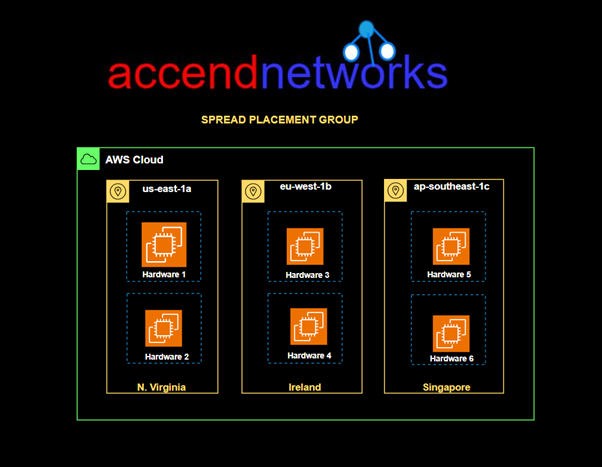
Spread placement groups are recommended for applications that have a small number of critical instances that should be kept separate from each other. Launching instances in a spread placement group reduces the risk of simultaneous failures that might occur when instances share the same racks.
Placement Group Rules and Limitations
General Rules and Limitations
- The name that you specify for a placement group must be unique within your AWS account for the Region.
- An instance can be launched in one placement group at a time; it cannot span multiple placement groups.
- You can’t merge placement groups.
- Instances with a tenancy of a host cannot be launched in placement groups.
- On-demand capacity Reservation and zonal Reserved Instances provide a capacity reservation for EC2 instances in a specific Availability Zone. The capacity reservation can be used by instances in a placement group. However, it is not possible to explicitly reserve capacity for a placement group.
Conclusion
AWS Placement Groups are a useful way to make your EC2 performance better, depending on what your application needs for networking and availability. By picking the right type of placement group, you can find the best mix of performance, cost, and reliability for your tasks.
Thanks for reading and stay tuned for more.
If you have any questions concerning this article or have an AWS project that requires our assistance, please reach out to us by leaving a comment below or email us at sales@accendnetworks.com.
Thank you!