Automate Your EBS Backups: A Comprehensive Guide to Scheduled Snapshots and Effortless Restores.

Ensuring the safety and availability of your data is a critical element of managing any infrastructure in the cloud. Automating EBS backups can save time, lessen the risk of data loss, and ensure short recovery in the event of a failure. This guide will stroll you through the procedure of setting up automated EBS snapshots and how to restore them effortlessly.
AWS Backup
AWS Backup is a fully managed service that makes it easy to centralize and automate data protection across AWS services, in the cloud, and on-premises.

It simplifies the process of centralizing and automating backups using just a few clicks for data across various AWS services.
Now let’s jump into the hands-on.
Step 1: Set Up AWS Backup Service
Sign in to your AWS Management Console and navigate to the AWS backup service.

Click on “Create backup vault” to begin the process of creating a new backup vault, where all of your backups will be securely stored.
Provide a name, encryption keys, and tags for your backup vault. Finally, click on “Create backup vault”.

With our backup vault set up, it’s now ready to store backups of our resources.
Step 2: Create a Backup Plan
Navigate to the left-hand navigation pane and select “Backup plans” We notice that there are currently no backup plans available. To create one, simply click on “Create backup plan”.

You’ll find three startup options for backup plans: you can choose from predefined templates, or if you prefer, you can define a plan using JSON. For this demo, I will choose to build a new plan.
Provide a suitable name for your backup plan tags are optional.

Under backup rule configurations, assign a name to your backup rule. Choose the backup vault created in the previous step as the destination for your backups. Select your desired backup frequency.
For this demo, the frequency has been set to every 1 hour, meaning backups of your AWS resources will be taken and stored in the designated backup vault every hour.

Under the backup window, select the timeframe according to your business requirements for when you need to take backups. It’s crucial to set the backup window during low traffic times or off-business hours to minimize disruption.
Choose a time frame that aligns with your organization’s operational needs while ensuring minimal impact on regular activities.

Enable the Point-in-time recovery in case you want to restore your backups at a specific point-in-time.

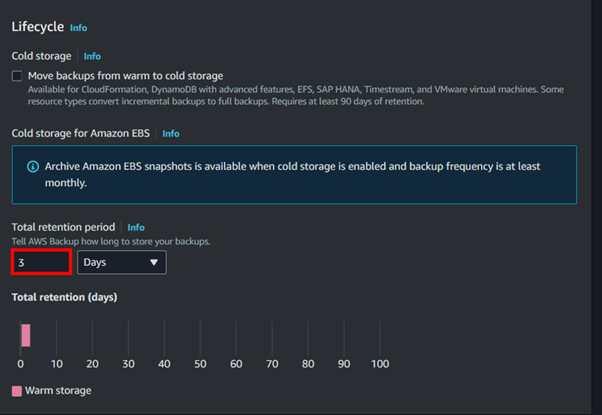
For the backup lifecycle, Select the retention period for the backups.
For compliance and regulations, you can define the region to copy backups into a different region.
Optionally, provide tags to recovery points and enable Windows VSS if you want application-consistent backups.
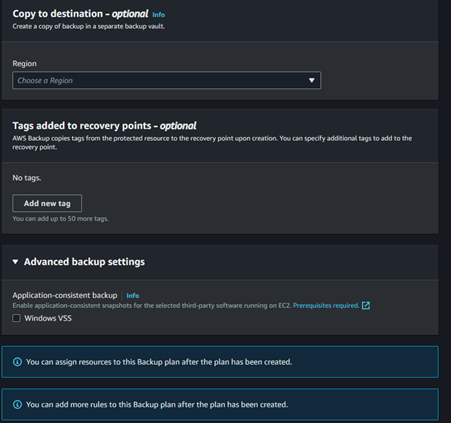
Once the backup configuration is completed, click on “Create plan”.
Step 3: Assign Resources to Backup Plan
After creating the backup plan, click on “Assign resources” next to the plan you created. Provide a resource assignment name and select the IAM role.
Then, select the desired EBS volumes or any other resources to which you want to apply this backup plan, and click “Assign resources”.
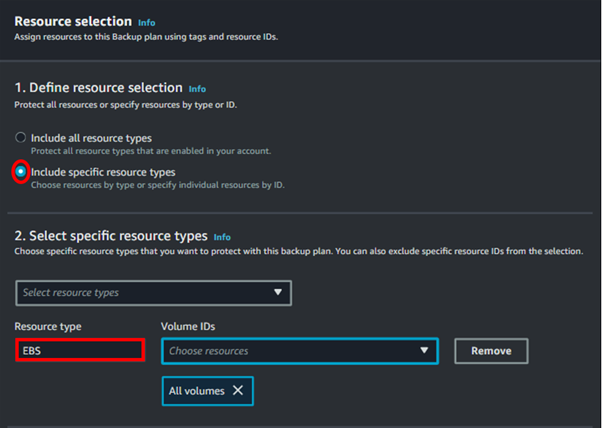
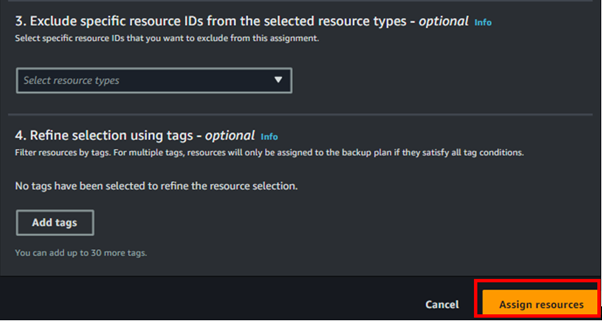
A backup plan was successfully created and resources were assigned to it.

Now, let’s ensure that the backup jobs are executing successfully according to our schedule.
Step 4: Monitor Backup Execution
Select “Backup jobs” from the left-hand navigation pane to view the executed backup jobs according to your desired timeframe.
After a while, you will observe that your backup jobs have been executed successfully.
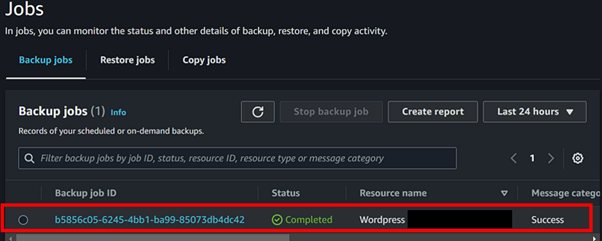
The AWS Backup service also provides the capability to generate a report for our backup jobs, which can be stored in CSV or JSON format in an S3 bucket.
Now that our backup jobs are successfully executed as per the defined timeframe of our backup plan, let’s proceed to explore how to restore our data from the created backup.
Step 5: Test Backup Restoration
Navigate to “Protected resources” from the left-hand navigation pane. Here, you can choose the specific resource (such as an EBS volume) that you wish to restore from the backup.

Click on the EBS resource ID and select the recovery point (snapshot) from which you want to restore. Then, proceed to fill out the required details for the volume to be restored.
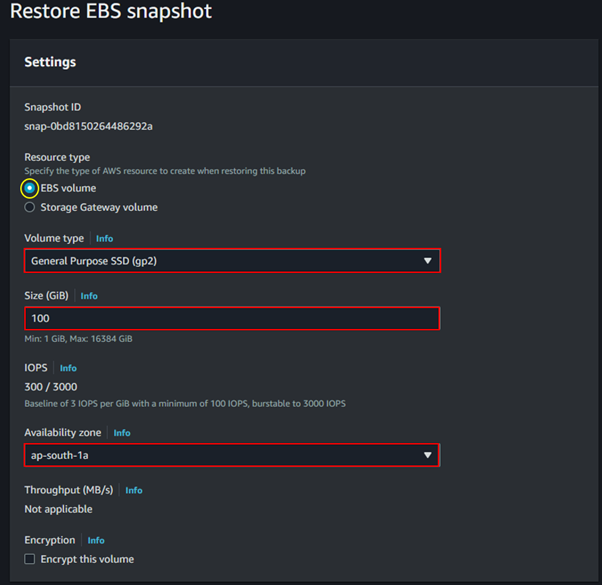
Restore EBS backup
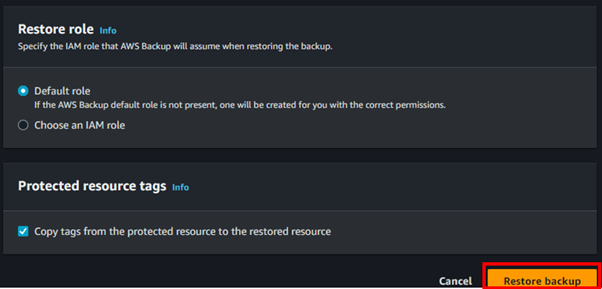
Initiate the restoration process and monitor its progress closely.
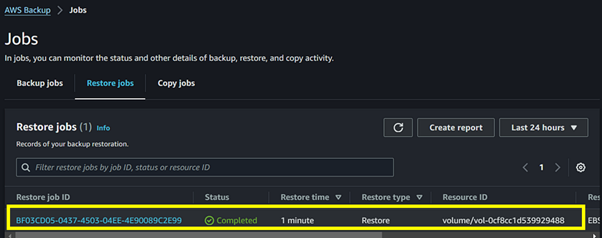
Once the status shows completed, you’re now ready to attach it to your EC2 instances and get your application back up and running, that’s it.
Thanks for reading, and stay tuned for more.
If you have any questions concerning this article or have an AWS project that requires our assistance, please reach out to us by leaving a comment below or email us at sales@accendnetworks.com.
Thank you!

Thank you for your sharing. I am worried that I lack creative ideas. It is your article that makes me full of hope. Thank you. But, I have a question, can you help me?
Thank you for your sharing. I am worried that I lack creative ideas. It is your article that makes me full of hope. Thank you. But, I have a question, can you help me?