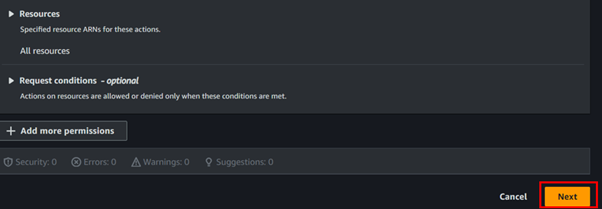
AWS charges customers based on usage, meaning that costs can vary depending on the services consumed and the way resources are used. Here’s a breakdown of key concepts in AWS billing:
- Pay-As-You-Go Model
AWS operates on a pay-as-you-go model, meaning that you only pay for what you use. This provides flexibility but can also lead to unpredictable costs if not properly managed. Billing is typically based on:
Compute: Charges for EC2 instances, Lambda executions, and other compute services.
Storage: Costs for services like S3, EBS (Elastic Block Store), and Glacier.
Data Transfer: Costs related to transferring data between AWS regions or out to the internet.
- Free Tier


AWS offers a Free Tier that allows new customers to explore AWS services without incurring costs. This includes limited usage for services like EC2, S3, and Lambda for 12 months, and certain services that remain free within usage limits.
Reserved Instances (RI)
For predictable workloads, AWS offers Reserved Instances, which allow you to reserve capacity in advance for a reduced hourly rate. These provide significant savings (up to 72%) compared to on-demand pricing.
Savings Plans
AWS Savings Plans are flexible pricing models that allow you to save on EC2, Lambda, and Fargate usage by committing to a consistent amount of usage (measured in dollars per hour) for a 1 or 3-year term. They offer similar savings to Reserved Instances but with more flexibility.
AWS Pricing Calculator
The AWS Pricing Calculator is an invaluable tool for estimating the costs of AWS services before you commit. It allows you to model your architecture and get an estimated cost for the resources you intend to use.
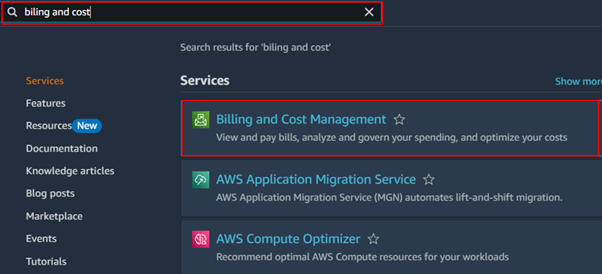
To access the pricing calculator, on the left side of the Billing console select pricing calculator, you can also access this service even if you are not logged in to the management console, lets see how we can create an estimate, click on create an estimate.
 Fill in your details for the estimate.
Select your operating system, number of instances, and workloads.


Select payment options,

 Then you can save and view estimates.

To avoid unexpected charges and optimize your AWS costs, consider these key tips:
- Set Billing Alerts
AWS provides the ability to set up billing alerts, which can notify you when your usage exceeds a specified threshold. By configuring these alerts in the AWS Budgets service, you can track your spending in real time and take action before costs spiral out of control.
For example, if you are a new bae, you can set zero spending in the AWS budget, lets create a small budget for zero spend, this will ensure as we navigate the AWS free tier, the AWS budget does not exceed the free tier with any amount.
In your Billing dashboard, click on the AWS budget, then click on Create Budget.

In the choose budget type, select use a template, then select zero spend budget.

Give your budget a name, for example, my zero-spend budget. Provide the email address you will be notified with in case your budget exceeds zero, then scroll down and click Create a budget.

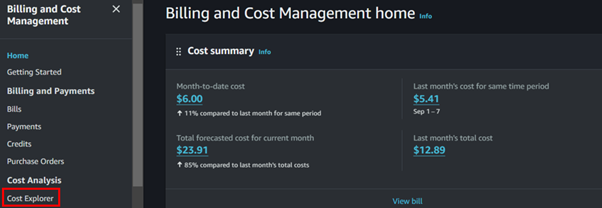
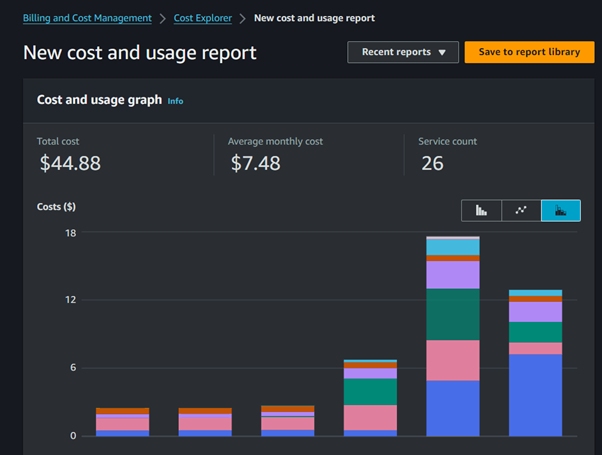
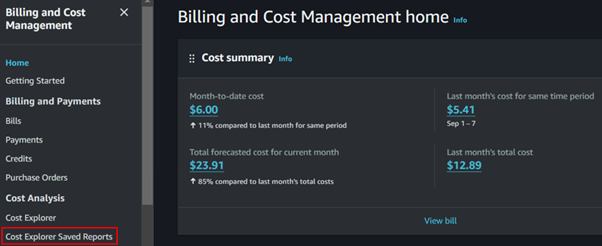
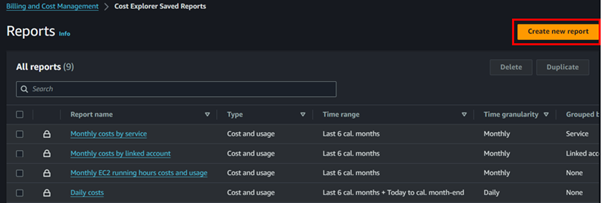
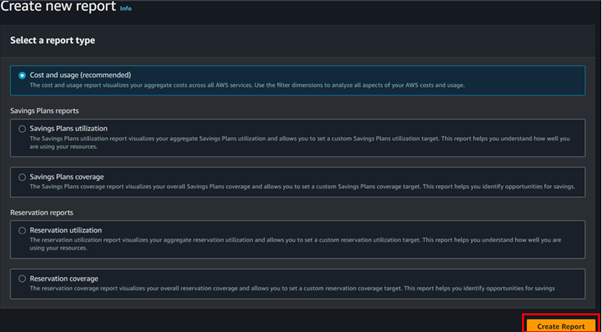
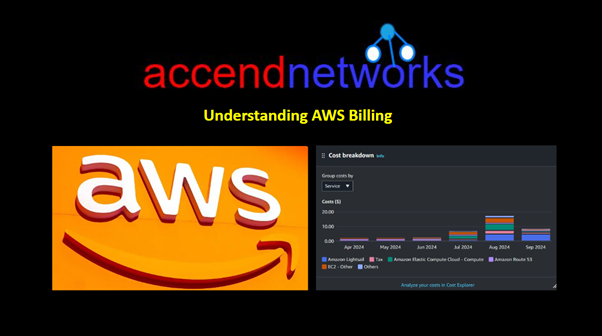
- Use Cost Explorer

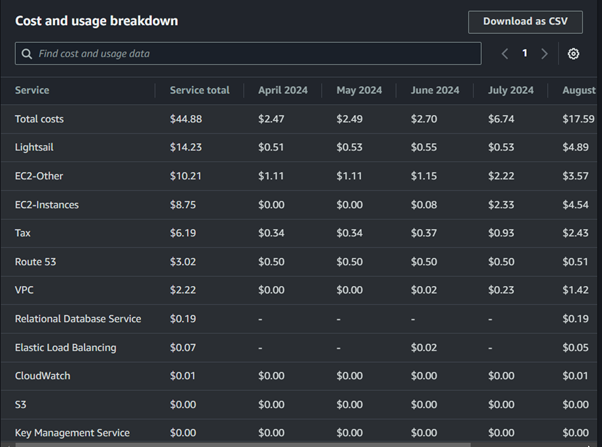
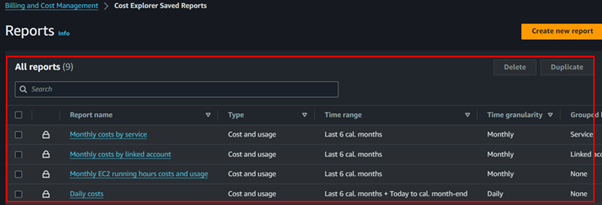
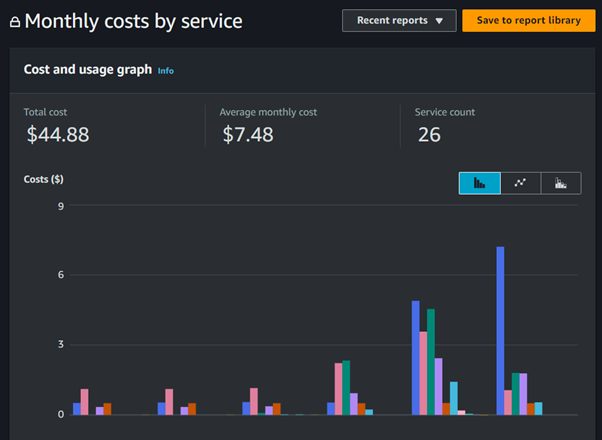
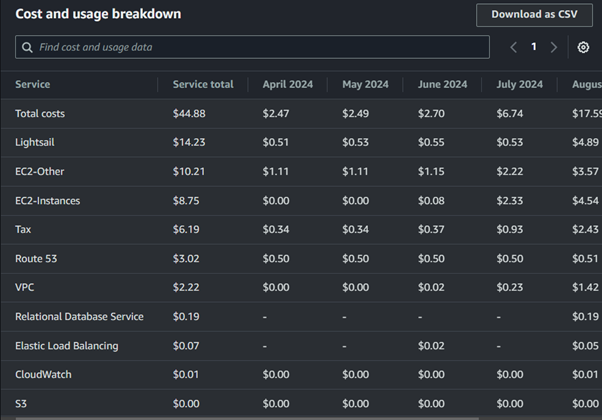
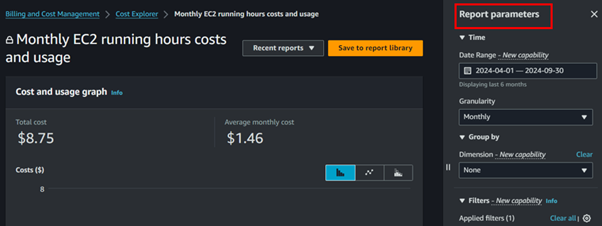
AWS Cost Explorer allows you to visualize your spending patterns over time. It provides detailed reports on your usage, making it easier to identify which services are consuming the most resources and where potential savings can be made.
Filter by Service: Use filters to see which services are driving the majority of your costs.
Set Time Frames: Analyze costs over different periods (daily, monthly, or yearly).
Track Reserved Instances (RIs): Keep an eye on your RI usage to ensure you’re getting the most out of your investments.
Conclusion
By familiarizing yourself with key AWS billing concepts, taking advantage of available tools, and implementing best practices, you can avoid surprises on your AWS bill and ensure that your company’s cloud spending matches its goals.
Thanks for reading and stay tuned for more.