AWS CodeCommit Obsolete: Transitioning from AWS CodeCommit and Steps for a Seamless Migration
AWS CodeCommit, Amazon Web Services’ fully managed version control service, has been a leading solution for developers and organizations seeking a scalable, secure, and reliable version control system. However, AWS recently announced that it will no longer accept new customers for CodeCommit, effective June 6, 2024.
In this article, we’ll examine the impact of this phase-out, examine alternative version control systems, and offer tips on seamlessly transitioning your repositories.
Adapting to AWS CodeCommit’s Shutdown: Key Impacts and Your Next Step
AWS’s choice to end CodeCommit is part of a bigger plan to simplify its offerings and cut down on duplicate services. The rise in popularity of more powerful platforms like GitHub and GitLab, which provide advanced features and strong community backing, has had a big impact on this change. If you’re still using CodeCommit, the takeaway is clear: you can still access your repositories, but it’s time to start thinking about moving. AWS has given helpful documentation to help you through the switch to a new platform.
Exploring Alternative Version Control Systems
With CodeCommit being phased out, organizations need to explore alternative version control systems, and here are some of the top options.
GitHub: It’s the world’s largest Git repository hosting service and offers extensive features, including GitHub Actions for CI/CD, a vibrant community, and seamless integration with many third-party tools.
GitLab: It stands out for its built-in DevOps capabilities, offering robust CI/CD pipelines, security features, and extensive integration options.
Bitbucket: It is well-suited for teams already using Atlassian products like Jira and Confluence.
Self-Hosted Git Solutions: This is for organizations with specific security or customization requirements.
Migrating your AWS CodeCommit Repository to a GitHub Repository
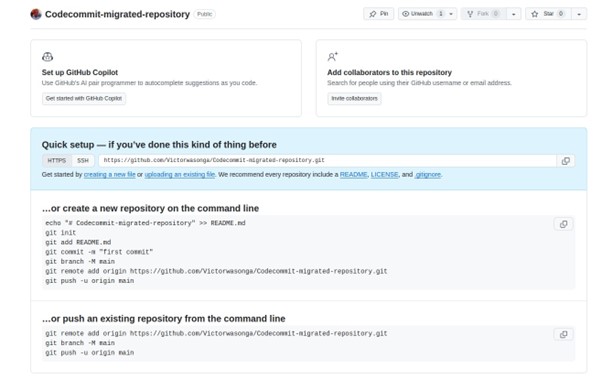
Before you start the migration, make sure you have set up a new repository and the remote repository should be empty.
The remote repository may have protected branches that do not allow force push. In this case, navigate to your new repository provider and disable branch protections to allow force push.
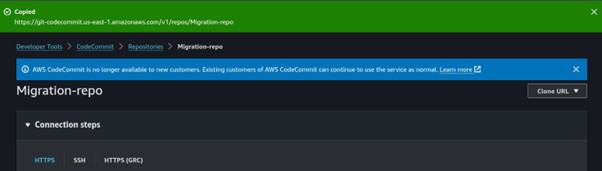
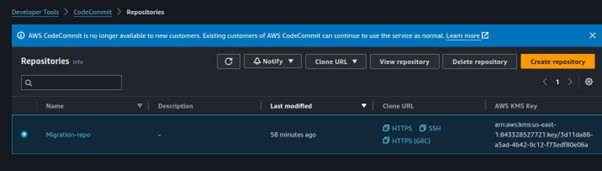
Log into the AWS management console and navigate to the code commit console, in the AWS CodeCommit console, select the clone URL for the repository you will migrate. The correct clone URL (HTTPS, SSH, or HTTPS (CRC)) depends on which credential type and network protocol you have chosen to use.
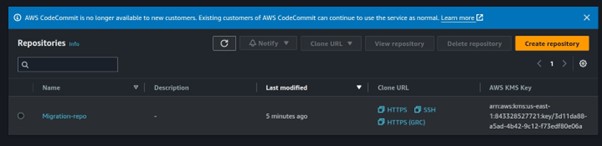
In my case, I am using HTTPS.
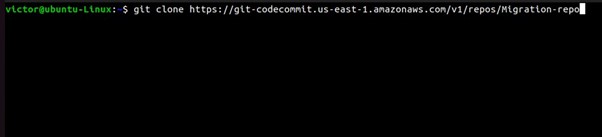
Step 1: Clone the AWS CodeCommit Repository
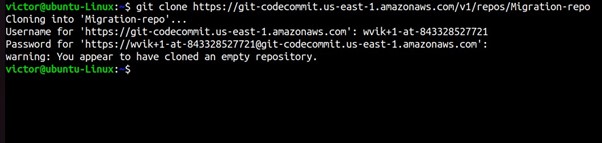
Clone the repository from AWS CodeCommit to your local machine using Git. If you’re using HTTPS, you can do this by running the following command:
git clone https://your-aws-repository-url your-aws-repository
Replace your-aws-repository-url with the URL of your AWS CodeCommit repository.
Change the directory to the repository you’ve just cloned.

Step 2: add the New Remote Repository.
Navigate to the directory of your cloned AWS CodeCommit repository. Then, add the repository URL from the new repository provider.
git remote add <provider name> <provider-repository-url>

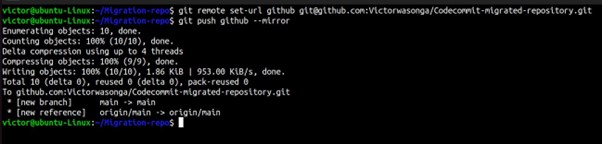
Step 3. Push Your Repository to the New Provider
Push your local repository to the new remote repository
This will push all branches and tags to your new repository provider’s repository. The provider’s name must match the provider’s name from step 2.
git push <provider name> –mirror
I use SSH keys for authentication, so I will run the git set URL command to authenticate with my SSH keys. Then lastly will run the git push command.
Step 4. Verify the Migration
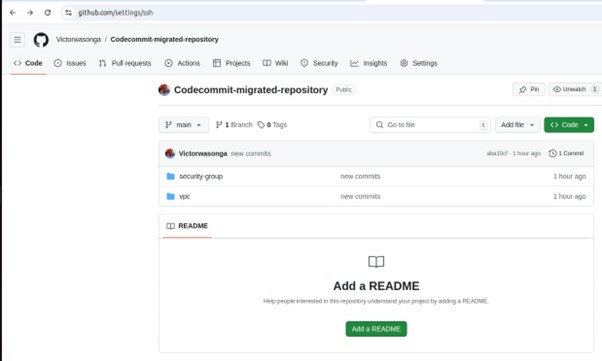
Once the push is complete, verify that all files, branches, and tags have been successfully migrated to the new repository provider. You can do this by browsing your repository online or cloning it to another location and checking it locally.
Step 5: Update Remote URLs in Your Local Repository
If you plan to continue working with the migrated repository locally, you may want to update the remote URL to point to the new provider’s repository instead of AWS CodeCommit. You can do this using the following command:
git remote set-url origin <provider-repository-url>
Replace <provider-repository-url> with the URL of your new repository provider’s repository.
Step 6: Update CI/CD Pipelines
If you have CI/CD pipelines set up that interact with your repositories, such as GitLab, GitHub, or AWS CodePipeline, update their configuration to reflect the new repository URL. If you removed protected branch permissions in Step 3 you may want to add these back to your main branch.
Step 7: Inform Your Team
If you’re migrating a repository that others are working on, be sure to inform your team about the migration and provide them with the new repository URL.
Step 8: Delete the Old AWS CodeCommit Repository
This action cannot be undone. Navigate back to the AWS CodeCommit console and delete the repository that you have migrated.
Conclusion
By carefully evaluating your options and planning your migration, you can turn this transition into an upgrade for your development processes. Embracing a new tool not only enhances your team’s efficiency but also ensures you stay aligned with current industry standards.
This brings us to the end of this blog.
Thanks for reading and stay tuned for more.
If you have any questions concerning this article or have an AWS project that requires our assistance, please reach out to us by leaving a comment below or email us at sales@accendnetworks.com.
Thank you!


 , and then enter your meeting info:


 , then select Polling.

 > Meeting options