Using Azure Roles and RBAC Privilege Identity Management (PIM)
In today’s digital landscape, managing access to resources securely and efficiently is paramount. Microsoft Azure offers a robust solution in the form of Azure Roles and Role-Based Access Control (RBAC) Privilege Identity Management (PIM). This article delves into how these tools can optimize your identity access management, enhance security, and offer cost-effective benefits for your organization.
Introduction to Azure Roles and RBAC
Azure Roles and RBAC are essential components in managing permissions and access control within the Azure environment. Azure Roles define a set of permissions that users or groups can have within your Azure subscription. RBAC allows you to assign these roles to users, groups, and applications at various scopes.
Key Benefits of Using Azure Roles and RBAC
Enhanced Security: By implementing Azure Roles and RBAC, you can ensure that users have only the permissions they need to perform their tasks. This principle of least privilege minimizes the risk of unauthorized access and potential security breaches.
Granular Access Control: RBAC enables you to assign specific permissions at different levels, such as subscription, resource group, or resource level. This granularity ensures that access control is tailored to your organization’s needs.
Improved Compliance: Azure RBAC helps in maintaining compliance with industry standards and regulations by providing detailed audit logs and reports on who accessed what resources and when.
Simplified Management: With Azure Roles and RBAC, managing permissions becomes streamlined. Changes can be easily implemented, reducing the administrative overhead.
Introduction to Privilege Identity Management (PIM)
Privilege Identity Management (PIM) in Azure AD enhances the capabilities of RBAC by adding a layer of security for privileged roles. PIM allows you to manage, control, and monitor access to critical resources, ensuring that privileged access is granted only when necessary.
Advantages of Using PIM
Just-in-Time Access: PIM enables just-in-time (JIT) access, allowing users to activate their roles only when needed. This reduces the window of opportunity for potential attacks.
Approval Workflows: With PIM, you can set up approval workflows for activating privileged roles. This ensures that access is granted only after proper verification and authorization.
Access Reviews: Regular access reviews can be conducted to ensure that the right people have the right access. This helps in maintaining up-to-date and accurate access controls.
Audit Logs: PIM provides detailed audit logs and alerts, helping you track and monitor all privileged access activities.
Implementing Azure Roles and RBAC with PIM: A Step-by-Step Guide
Step 1: Define Azure Roles
- Identify the roles required within your organization.
- Create custom roles if necessary.
Step 2: Assign Roles Using RBAC
- Navigate to the Azure portal.
- Select the appropriate scope (e.g., subscription, resource group).
- Assign roles to users, groups, or applications.
Step 3: Configure PIM
- Enable PIM in the Azure AD portal.
- Define which roles will be managed by PIM.
- Set up JIT access and approval workflows.
Step 4: Perform Access Reviews
- Schedule regular access reviews.
- Review and adjust roles as needed.
Step 5: Monitor and Audit
- Regularly monitor audit logs.
- Set up alerts for any unusual activities.
Optimizing Cost with Azure Roles and RBAC
Using Azure Roles and RBAC effectively can lead to significant cost savings for your organization. By ensuring that users only have the permissions they need, you can reduce the risk of costly security incidents. Additionally, streamlined management and automation reduce administrative overhead, leading to lower operational costs.
Client Benefits
Implementing Azure Roles and RBAC with PIM offers numerous benefits for clients:
- Enhanced Security: Protect sensitive data and resources with granular access control and JIT access.
- Compliance: Maintain compliance with industry standards through detailed audit logs and access reviews.
- Efficiency: Streamline access management processes, reducing administrative overhead and operational costs.
- Scalability: Easily scale access control as your organization grows, ensuring consistent security and compliance.
Conclusion
Azure Roles RBAC and Privilege Identity Management provide a comprehensive solution for managing access to resources in the Azure environment. By implementing these tools, organizations can enhance security, ensure compliance, and optimize cost management. For more information and to implement these solutions in your organization, contact us info@accendnetworks .com for expert identity access management services.
Contact Us: To learn more about how Azure Roles and RBAC Privilege Identity Management can benefit your organization, email us at info@accendnetworks.com. Our team of experts at “Company name” is ready to assist you in enhancing your security and optimizing your access management.
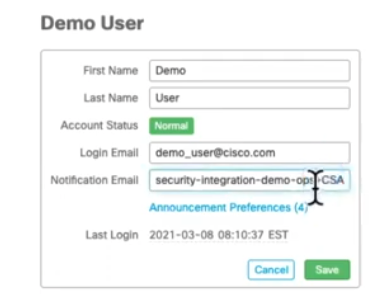 Click on Announcement Preferences and select the boxes that you would like to receive notification.