Accend Networks San Francisco Bay Area Full Service IT Consulting Company

Categories
Blogs

Understanding AMI in AWS

Understanding AMI in AWS: A definitive guide to cloud resilience
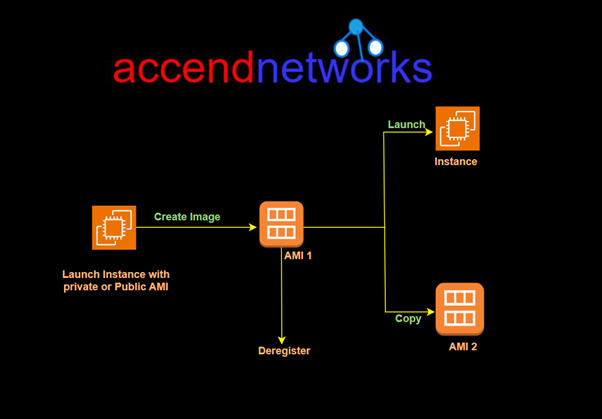
Amazon Machine Image (AMI) and Snapshots play crucial roles in the storage, replication, and deployment of EC2 instances. This guide not only demystifies the significance of AMIs but also unveils effective AWS backup strategies, including the vital process of taking AMI backups.

What is an Amazon Machine Image (AMI)?

An Amazon Machine Image (AMI) is an image that provides the software that is required to set up and boot an Amazon EC2 instance. Each AMI also contains a block device mapping that specifies the block devices to attach to the instances that you launch.

An Amazon Machine Image (AMI) is a template that contains the information required to launch an EC2 instance, it is the encapsulation of server configuration. Each AMI also contains a block device mapping that specifies the block devices to attach to the instances that you launch.

You can launch multiple instances from a single AMI when you require multiple instances with the same configuration. You can use different AMIs to launch instances when you require instances with different configurations, as shown in the following diagram.
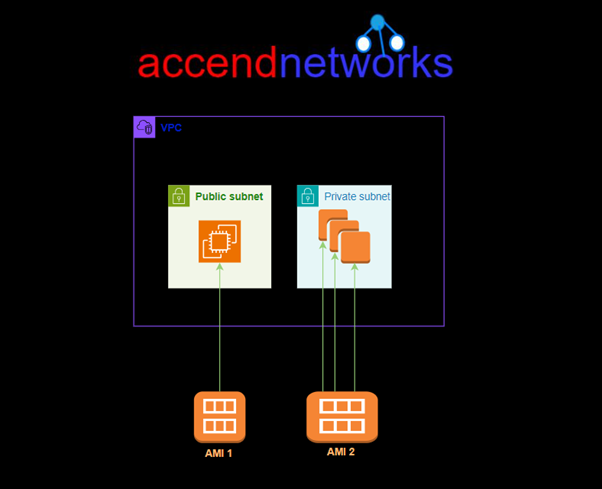
You can launch multiple instances from a single AMI when you require multiple instances with the same configuration. You can use different AMIs to launch instances when you require instances with different configurations, as shown in the following diagram.

Key Components of an AMI:

Root Volume: Contains the operating system and software configurations that make up the instance.

Launch Permissions: Determine who can use the AMI to launch instances.

Block Device Mapping: Specifies the storage devices attached to the instance when it’s launched.

AMIs can be public or private:

Public AMIs: Provided by AWS or third-party vendors, offering pre-configured OS setups and applications.

Private AMIs: Custom-built by users to suit specific use cases, ensuring that their application and infrastructure requirements are pre-installed on the EC2 instance.

Types of AMIs:

EBS-backed AMI: Uses an Elastic Block Store (EBS) volume as the root device, allowing data to persist even after the instance is terminated.

Instance store-backed AMI: Uses ephemeral storage, meaning data will be lost once the instance is stopped or terminated.

Why Use an AMI?

Faster Instance Launch: AMIs allow you to quickly launch EC2 instances with the exact configuration you need.

Scalability: AMIs enable consistent replication of instances across multiple environments (e.g., dev, test, production).

Backup and Recovery: Custom AMIs can serve as a backup of system configurations, allowing for easy recovery in case of failure.

Creating an AMI

Let’s now move on to the hands-on section, where we’ll configure an existing EC2 instance, install a web server, and set up our HTML files. After that, we’ll create an image from the configured EC2 instance, terminate the current configuration server, and launch a production instance using the image we created. Here’s how we’ll proceed:

Step 1: Configuring the instance as desired

Log in to the AWS Management Console with a user account that has admin privileges, and launch an EC2 instance.

I’ve already launched an Ubuntu machine, so next, I’ll configure Apache webserver and host my web files on the instance.

SSH into your machine using the SSH command shown below.

Update your server repository.

Install and enable Apache.

Check the status of the Apache web server.
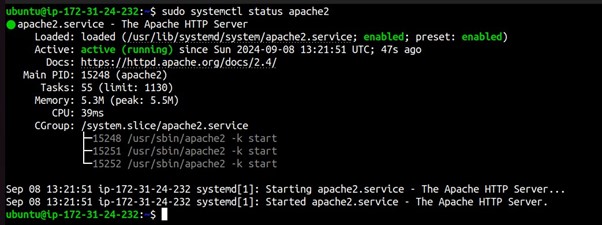
Now navigate to the HTML directory using the below command.

Use the vi editor to edit and add your web files to the HTML directory, run sudo vi index.html

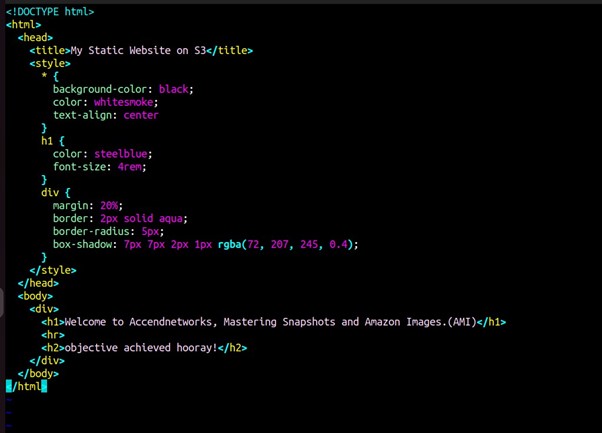
Exit and save the vi editor.

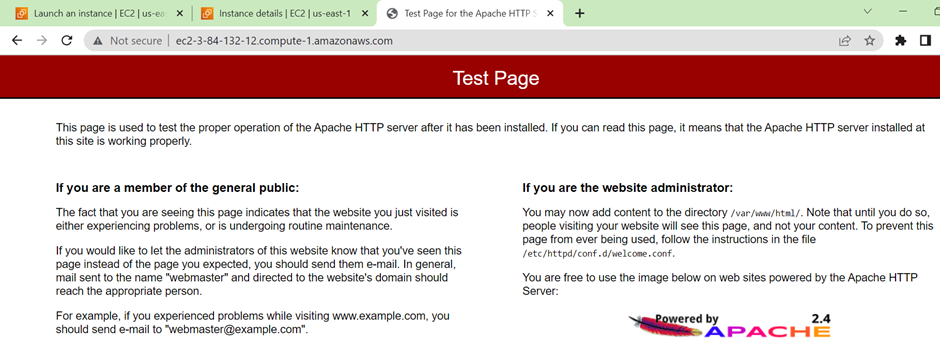
We’ve successfully configured our EC2 instance to host the web application. Now, let’s test it by copying the instance’s IP address and pasting it into your web browser.
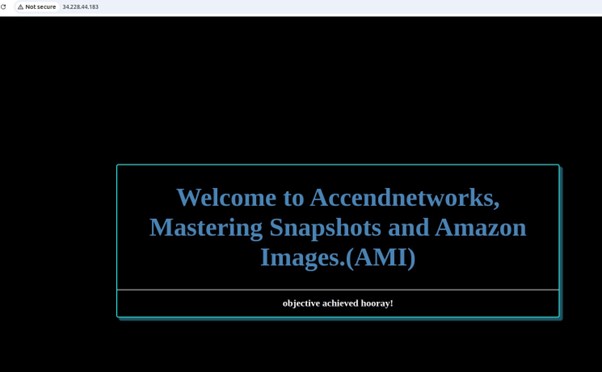
Our instance is up and running, successfully hosting and serving and serving our web application.

Step 2: Creating an image of the instance

Select the running EC2 Instance, select the actions drop-down button, and navigate to Image and Templates then click Create Image.

Provide details for your Image
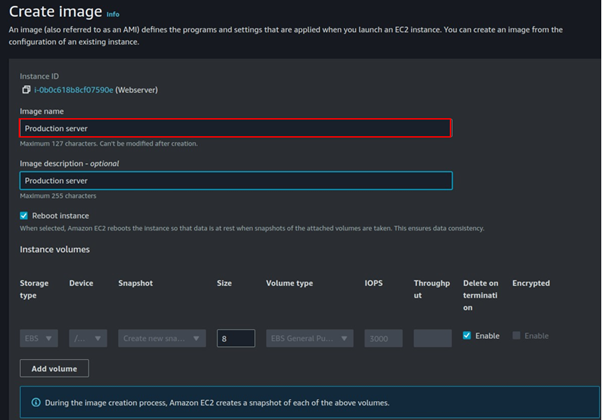
Select tag Image and snapshots together then scroll down and click Create Image.

Once the Image is available and ready for use, you can now proceed and delete your setup server.

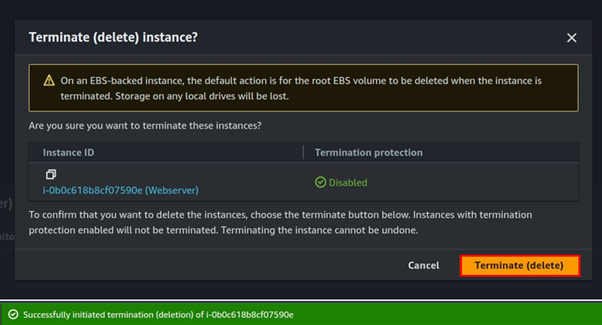
Step 3: Launch new EC2 instance from the created Image.

We will now use the created Image to launch a new EC2 instance, we will not do any configuration since the application has our app already configured.

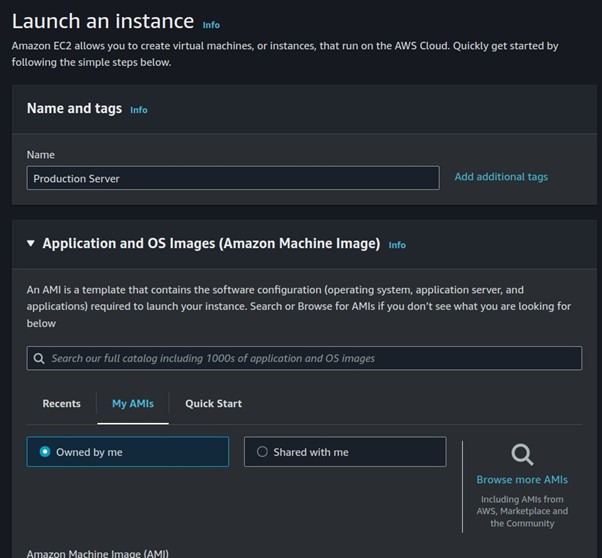
Let’s proceed and launch our EC2 instance, click launch Instance from the EC2 dashboard.

Under Applications and OS, select my AMI, then select owned by me.
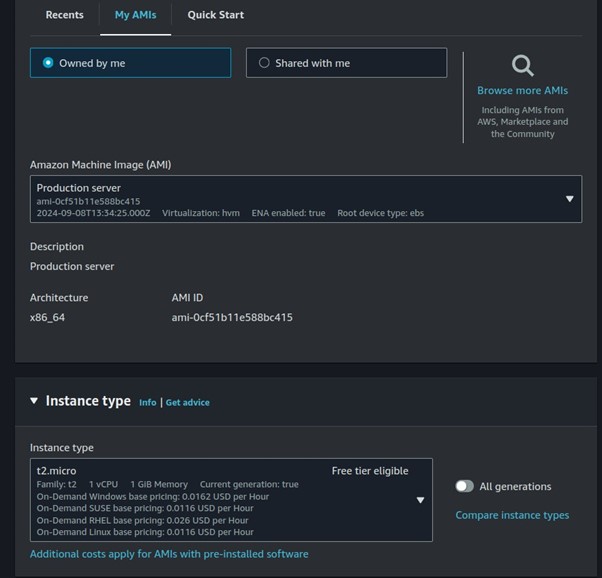
Select t2. Micro, then scroll down.
Select your key pairs.

Configure your security groups

Review and click Create Instance.
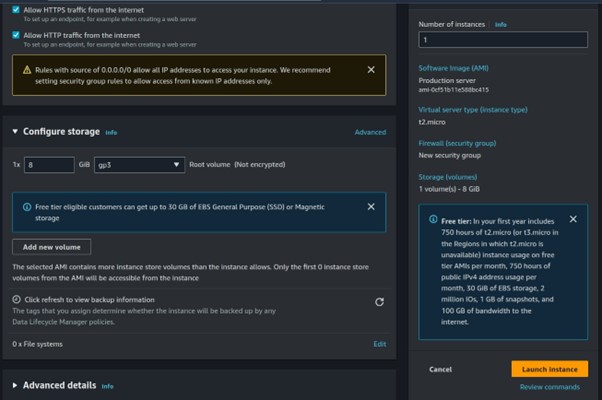
Step 4: Test our application.

Once our application is up and running, grab the public IP and paste it into your browser.

We have created an EC2 instance from an AMI with an already configured application. Application achieved.

Clean up. This brings us to the end of this article.

Conclusion

Amazon Machine Images (AMIs) are fundamental tools in managing EC2 instances. Understanding how to effectively use AMIs can help optimize your AWS environment, improving disaster recovery, scaling capabilities, and data security.

Thanks for reading and stay tuned for more.

If you have any questions concerning this article or have an AWS project that requires our assistance, please reach out to us by leaving a comment below or email us at sales@accendnetworks.com.


Thank you!

Categories
Blogs

AWS Recycle Bin

AWS Recycle Bin: Your Key to Enhanced Data Protection and Recovery

Introduction

As more and more companies depend on the cloud infrastructure to run their businesses, at the same time they need a strong strategy to protect and recover their data, as accidental deletions or unexpected failures can lead to critical data loss, resulting in downtime and potential financial losses.  AWS well known for its wide range of services, provides various tools to keep data safe and retrievable. Among these, the AWS Recycle Bin service stands out as a powerful feature to improve data recovery options. This blog explores the AWS Recycle Bin service, what it offers, and how to use it to protect your important resources.

Getting to Know AWS Recycle Bin

The Recycle Bin service, in the context of AWS, is a concept often used to describe a safety mechanism for storing and recovering deleted resources. While AWS doesn’t offer a specific service named “Recycle Bin,” users can implement similar functionality using AWS services like AWS Lambda and Amazon S3.

In this setup, when a resource is deleted, it isn’t immediately gone forever. Instead, it’s moved to a specific storage area, often called a “Recycle Bin” or “Trash,” where it remains for a set period before being permanently deleted. This serves as a safety net, allowing users to easily recover accidentally deleted resources without needing to go through complicated backup and recovery processes.

By using AWS Lambda functions and S3 event notifications, you can automate the transfer of deleted resources to the Recycle Bin and set up policies for how long they should be retained before final deletion. This approach strengthens your data protection and management strategy within your AWS environment.

The AWS Recycle Bin is particularly useful when mistakes happen or automated systems accidentally delete resources. By enabling the Recycle Bin, you ensure that even if a resource is deleted, it can still be restored, preventing data loss and avoiding service interruptions.

Benefits of AWS Recycle Bin

Enhanced Data Protection: It allows you to recover deleted resources within a specified period, reducing the risk of permanent data loss.

Compliance and Governance: It ensures that data is not permanently lost due to accidental deletions, which is essential for maintaining audit trails and adhering to data retention policies.

Cost Management: By setting appropriate retention periods, you can manage storage costs effectively.

Let’s now get to the hands-on.

Implementation Steps

Make sure you have an EC2 instance up and running.

Get EBS Volume Information

AWS Elastic Block Store (EBS) is a scalable block storage service provided by Amazon Web Services (AWS), offering persistent storage volumes for EC2 instances. To view your block storage, in the EC2 dashboard move to the storage tab.

Take a Snapshot of the Volume

An AWS EBS snapshot is a point-in-time backup of an EBS volume stored in Amazon S3. It captures all the data on the volume at the time the snapshot is taken, including the data that is in use and any data that is pending EBS snapshots are commonly used for data backup, disaster recovery, and creating new volumes from existing data.

On the left side of EC2 UI, click Snapshots then click Create Snapshot.

In the Create snapshot UI, under resource types, select volumes. Then under volume ID, select the drop-down button and select your EBS volume.

Scroll down and click Create Snapshot.

Success.

Head to the Recycle Bin console and click the Create retention rule.

Fill in retention rule details.

Under retention settings for resource type select the drop-down button and select EBS Snapshot, then tick the box apply for all resources, then for retention period, select one day.

For the Rule lock settings, select Unlock.

Rule Created

Now go ahead and delete the snapshot

Open the recycle bin

Click on the snapshot present in the recycle bin

Objective achieved

Snapshot recovered successfully

Conclusion

The AWS Recycle Bin service offers a valuable layer of protection against accidental deletions, ensuring that critical resources like EBS snapshots and AMIs can be recovered within a defined period. Whether you’re protecting against human error or looking to strengthen your disaster recovery strategy, AWS Recycle Bin is an essential tool in your AWS toolkit.

This brings us to the end of this article.

Thanks for reading and stay tuned for more.

If you have any questions concerning this article or have an AWS project that requires our assistance, please reach out to us by leaving a comment below or email us at sales@accendnetworks.com.


Thank you!

Categories
Blogs

AWS Serverless Application

AWS Serverless Application Repository an Overview

Serverless application repository allows developers to discover, deploy, and share serverless applications quickly. This repository contains a wide range of prebuilt applications and re-usable code packages making it easier to start with serverless architecture.  In this blog post, we’ll explore the AWS Serverless Application Repository in detail uncovering its key features, stay tuned.

What is an AWS Serverless Application Repository?

This is a serverless application repository managed by AWS. The AWS Serverless Application Repository makes it easy for developers and enterprises to quickly find, deploy, and publish serverless applications in the AWS Cloud. AWS is only responsible for the infrastructure security serving AWS services on the AWS Cloud.

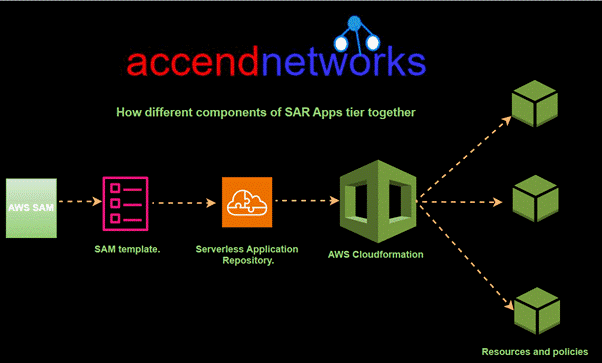
AWS SAM accomplishes serverless development through configuration files, pattern models, and command-line tools.

How Does AWS Serverless Application Repository Work?

AWS serverless application Repository accelerates serverless application deployment by providing an easy-to-search repository of serverless applications that can be readily distributed to both application publishers and application consumers.

As an application consumer, you can find and deploy pre-built applications to meet a specific need, allowing you to swiftly put together serverless architecture in newer, more powerful ways.

Similarly, as an application provider or publisher, you would not want your consumers to rebuild your program from scratch. With SAR, this is not an issue.

Serverless Application Repository provides a platform that enables you to connect with consumers and developers all over the world.

Let’s define these key terms

Publishing Applications – Configure and upload applications to make them available to other developers, and publish new versions of applications.

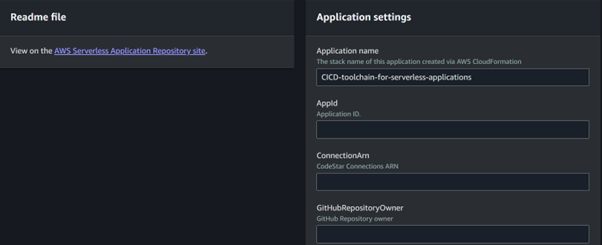
Deploying Applications – Browse for applications and view information about them, including source code and readme files. Also install, configure, and deploy applications of your choosing.

How to access and navigate the AWS Serverless Application Repository?

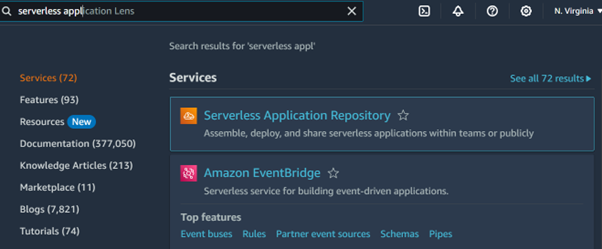
Sign in to the AWS Management Console, and navigate to the Serverless Application Repository:

In the search bar type serverless then select serverless application repository under services.

Steps to find and deploy serverless applications from the repository?

Step 1: Browse the Repository

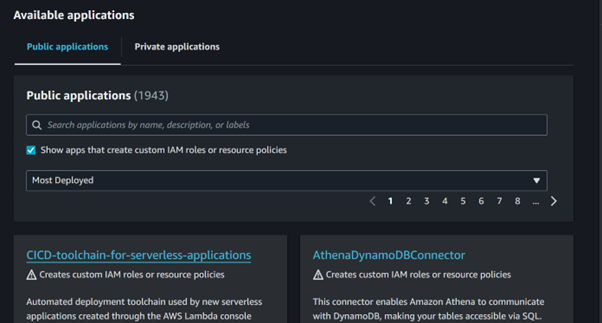
On the left side of the repository UI, select available applications, which will bring you to a wide range of serverless applications. Here you can browse through very many categories, like security, data processing, machine learning, and more.

Step 2: Configure the application

Lastly, if you are already familiar with the application, you can configure it and launch it immediately.

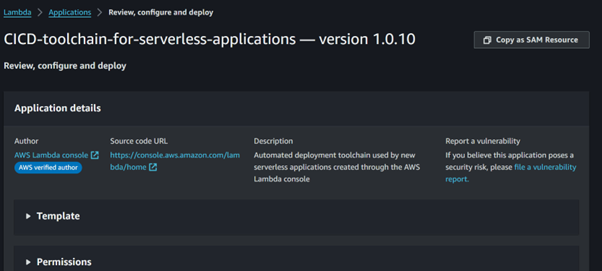
Click on the application.

It will then take you to a new console where you review, configure, and deploy.

When you are done with your configuration, you can now deploy and that’s it.

How to publish your own serverless applications to the repository?

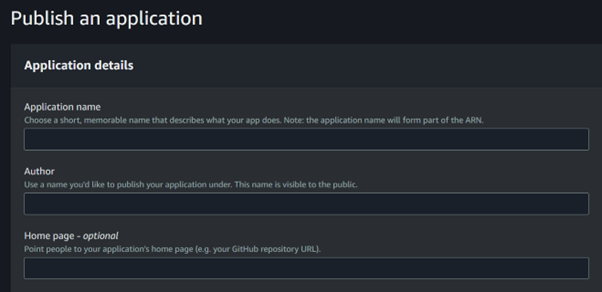
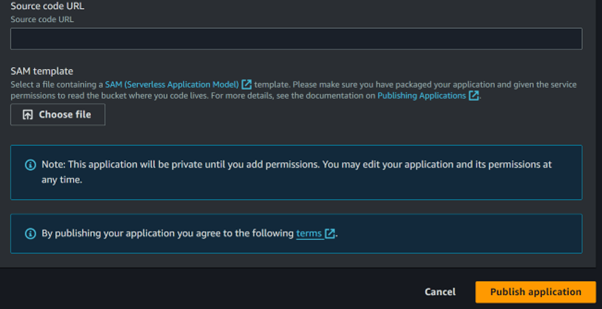
In the left UI of the serverless application repository, select published applications then select publish application.

This will bring you to the publish application UI. Here, you have to provide some details for your AWS Serverless application repository then you can publish your application.

Components of Serverless Application Repository

Application Policy: For your SAR application to be used, you must grant policies. By setting policies, you may create private apps that only your team can access, as well as public apps that can be shared with particular or all AWS accounts.

AWS Region: Whenever you set an application to public and publish it in the AWS Serverless Application Repository, the service publishes it in all AWS Regions.

SAM Template: This file defines all of the resources that will be generated when you deploy your application. SAM is an extension of CloudFormation that simplifies the process of establishing AWS services including Lambda Functions, API Gateway, Dynamo tables, and more.

Features of AWS Serverless Application Repository

AWS CodePipeline can connect GitHub with the Serverless Application Repository.

AWS provides all apps under the MIT open-source license, whereas publicly available applications by other users fall under the Open-Source Initiative (OSI).

AWS Serverless Application Repository includes applications for Alexa Skills, IoT, and real-time media processing from several publishers worldwide.

Applications can be shared across AWS Organizations. Users cannot exchange applications with other organizations.

Benefits of AWS Serverless Application Repository

Extension of AWS CloudFormation: AWS Serverless Application Repository is a service that works alongside AWS CloudFormation. It can use all of the AWS cloud creation resources.

Deep integration with development tools: AWS Serverless Application Repository often combines with other AWS services in the construction of serverless applications

Single-Deployment Configuration: AWS SAM runs on a single CloudFormation stack, unifying all required resources and components.

Conclusion

AWS serverless application repository is a valuable resource for developers looking to accelerate their serverless projects. Offering a range of pre-built applications and reusable components, it makes very simple the deployment process and fosters innovation.

Thanks for reading and stay tuned for more.

If you have any questions concerning this article or have an AWS project that requires our assistance, please reach out to us by leaving a comment below or email us at sales@accendnetworks.com.


Thank you!

Categories
Blogs

Amazon S3

Enhancing Data Integrity in Amazon S3 with Additional Checksums

In the security world, cryptography uses something called “hashing” to confirm that a file is unchanged. Usually, when a file is hashed, the hash result is published. Next, when a user downloads the file and applies the same hash method, the hash results, or checksums (a string of output that is a set size) are compared. This means if indeed the checksum of the downloaded file and the original file are the same, the two files are identical, confirming that there have been no unexpected changes — for example, file corruption, man-in-the-middle (MITM) attacks, etc. Since hashing is a one-way process, the hashed result cannot be reversed to expose the original data. 

Verify the integrity of an object uploaded to Amazon S3

We can use Amazon S3 features to upload an object with the checksum flag “On” with the checksum algorithm that is used to validate the data during upload (or download) — in this example, as SHA-256. Optionally, you may also specify the checksum value of the object. When Amazon S3 receives an object, it calculates the checksum by leveraging the algorithm that you specified. Now, if the two checksum values do not match, Amazon S3 will generate an error.

Types of Additional Checksums

Various checksum algorithms can be used for verifying data integrity. Some common ones include:

MD5: A widely used algorithm, but less secure against collision attacks.

SHA-256: Provides a higher level of security and is more resistant to collisions.

CRC32: A cyclic redundancy check that is fast but not suitable for cryptographic purposes.

Implementing Additional Checksums

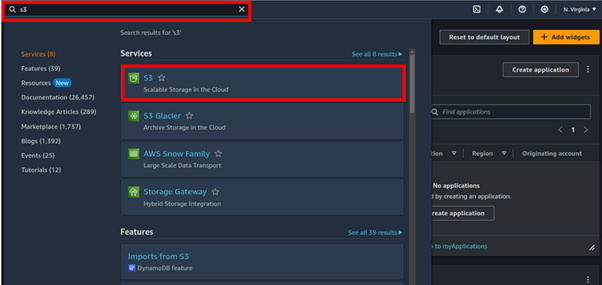
Sign in to the Amazon S3 console. From the AWS console services search bar, enter S3. Under the services search results section, select S3.

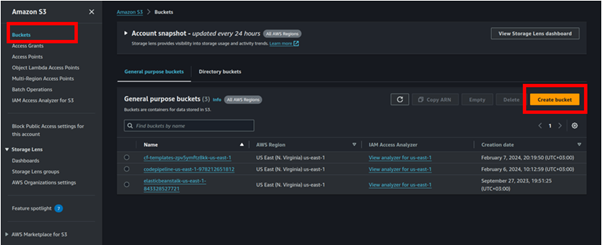
Choose Buckets from the Amazon S3 menu on the left and then choose the Create Bucket button.

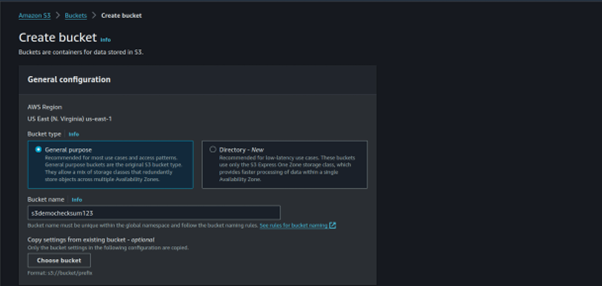
Enter a descriptive globally unique name for your bucket. The default Block Public Access setting is appropriate, so leave this section as is.

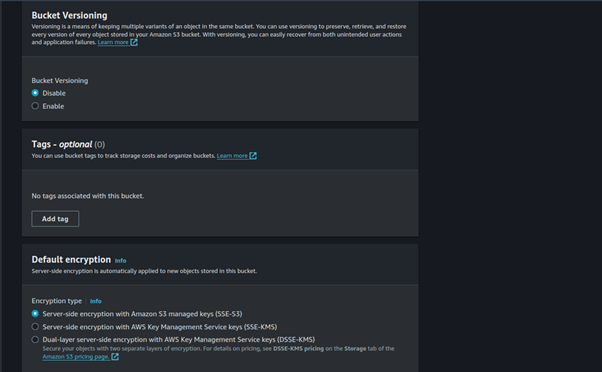
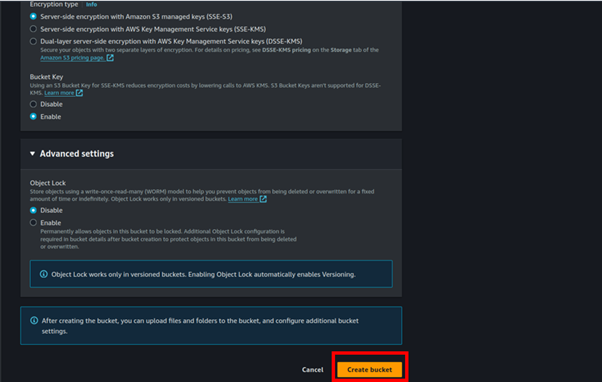
You can leave the remaining options as defaults, navigate to the bottom of the page, and choose Create Bucket.

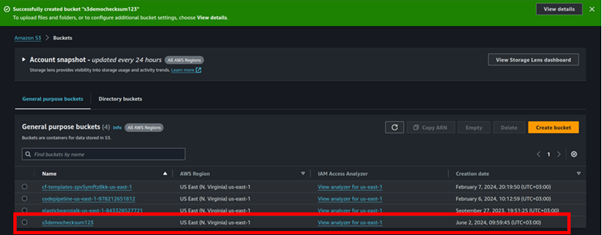
Our bucket has been successfully created.

Upload a file and specify the checksum algorithm

Navigate to the S3 console and select the Buckets menu option. From the list of available buckets, select the bucket name of the bucket you just created.

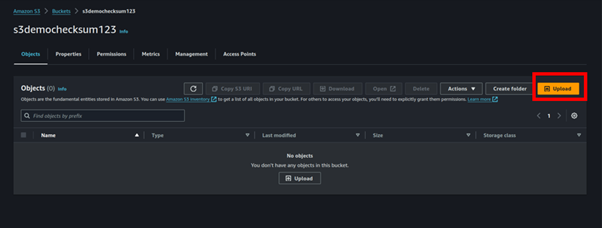
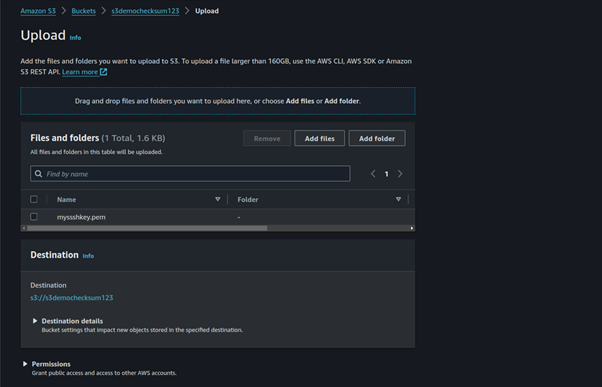
Next, select the Objects tab. Then, from within the Objects section, choose the Upload button.

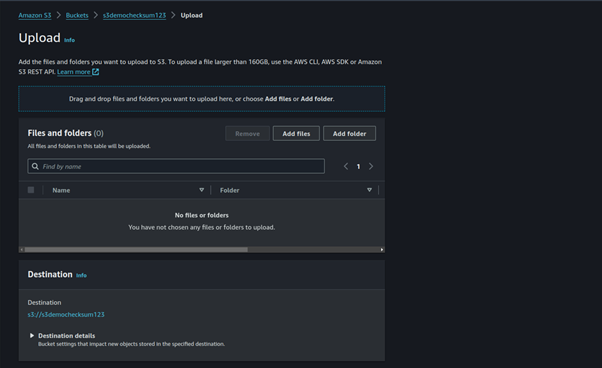
Choose the Add Files button and then select the file you would like to upload from your file browser.

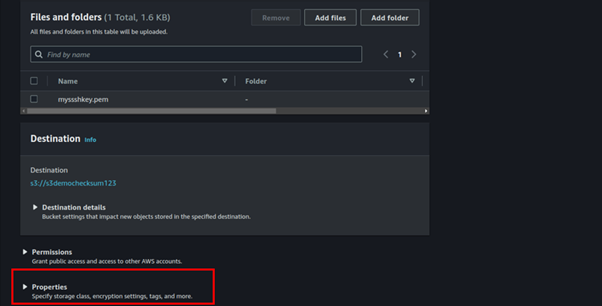
Navigate down the page to find the Properties section. Then, select Properties and expand the section.

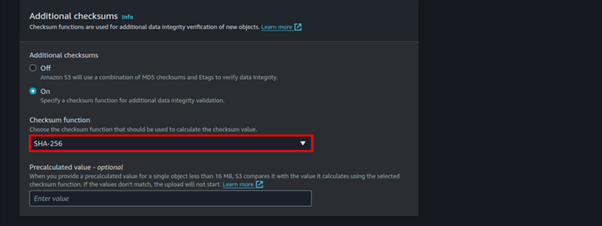
Under Additional checksums select the on option and choose SHA-256.

If your object is less than 16 MB and you have already calculated the SHA-256 checksum (base64 encoded), you can provide it in the Precalculated value input box. To use this functionality for objects larger than 16 MB, you can use the CLI or SDK. When Amazon S3 receives the object, it calculates the checksum by using the algorithm specified. If the checksum values do not match, Amazon S3 generates an error and rejects the upload, but this is optional.

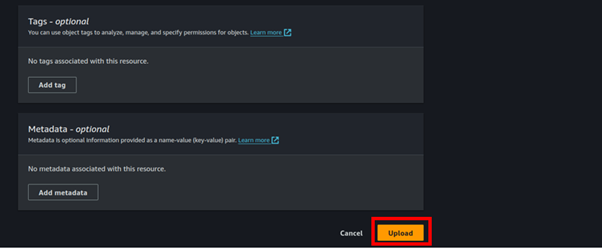
Navigate down the page and choose the Upload button.

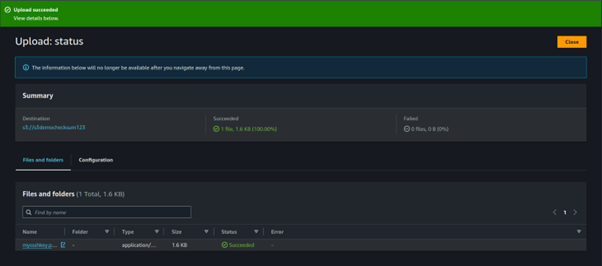
After your upload completes, choose the Close button.

Checksum Verification

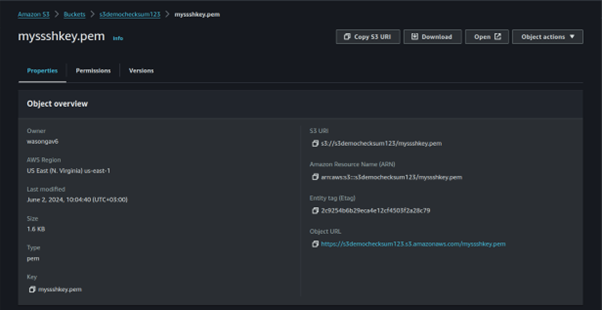
Select the uploaded file by selecting the filename. This will take you to the Properties page.

Locate the checksum value: Navigate down the properties page and you will find the Additional checksums section.

This section displays the base64 encoded checksum that Amazon S3 calculated and verified at the time of upload.

Compare

To compare the object in your local computer, open a terminal window and navigate to where your file is.

Use a utility like Shasum to calculate the file. The following command performs a sha256 calculation on the same file and converts the hex output to base64: shasum -a 256 image.jpg | cut -f1 -d\ | xxd -r -p | base64

When comparing this value, it should match the value in the Amazon S3 console.

Run this code by replacing it with your image.

Congratulations! You have learned how to upload a file to Amazon S3, calculate additional checksums, and compare the checksum on Amazon S3 and your local file to verify data integrity.

This brings us to the end of this blog, thanks for reading, and stay tuned for more.

If you have any questions concerning this article or have an AWS project that requires our assistance, please reach out to us by leaving a comment below or email us at sales@accendnetworks.com.

Thank you!

Categories
Blogs Uncategorized

Understanding AWS Security Groups and Bootstrap Scripts

Understanding AWS Security Groups and Bootstrap Scripts: Enhancing Cloud Security and Automation.

In the realm of AWS, achieving a balance between robust security and streamlined automation is essential for efficient cloud management. AWS Security Groups and Bootstrap Scripts play pivotal roles in this Endeavor. In this article, we’ll delve into these two AWS components and provide a hands-on demo to illustrate how to leverage them effectively.

AWS Security Groups:

What are AWS Security Groups?

AWS Security Groups are a fundamental element of AWS’s network security model. They act as virtual firewalls for your instances to control inbound and outbound traffic. Security Groups are associated with AWS resources like EC2 instances and RDS databases and allow you to define inbound and outbound rules that control traffic to and from these resources.

Key Features of AWS Security Groups:

Stateful: Security Groups are stateful, meaning if you allow inbound traffic from a specific IP address, the corresponding outbound traffic is automatically allowed. This simplifies rule management.

Default Deny: By default, Security Groups deny all inbound traffic. You must explicitly define rules to allow traffic.

Dynamic Updates: You can modify Security Group rules anytime to adapt to changing security requirements.

Use Cases:

Web Servers: Security Groups are used to permit HTTP (port 80) and HTTPS (port 443) traffic for web servers while denying other unwanted traffic.

Database Servers: For database servers, Security Groups can be configured to only allow connections from known application servers while blocking access from the public internet.

Bastion Hosts: In a secure architecture, a bastion host’s Security Group can be set up to allow SSH (port 22) access only for specific administrators.

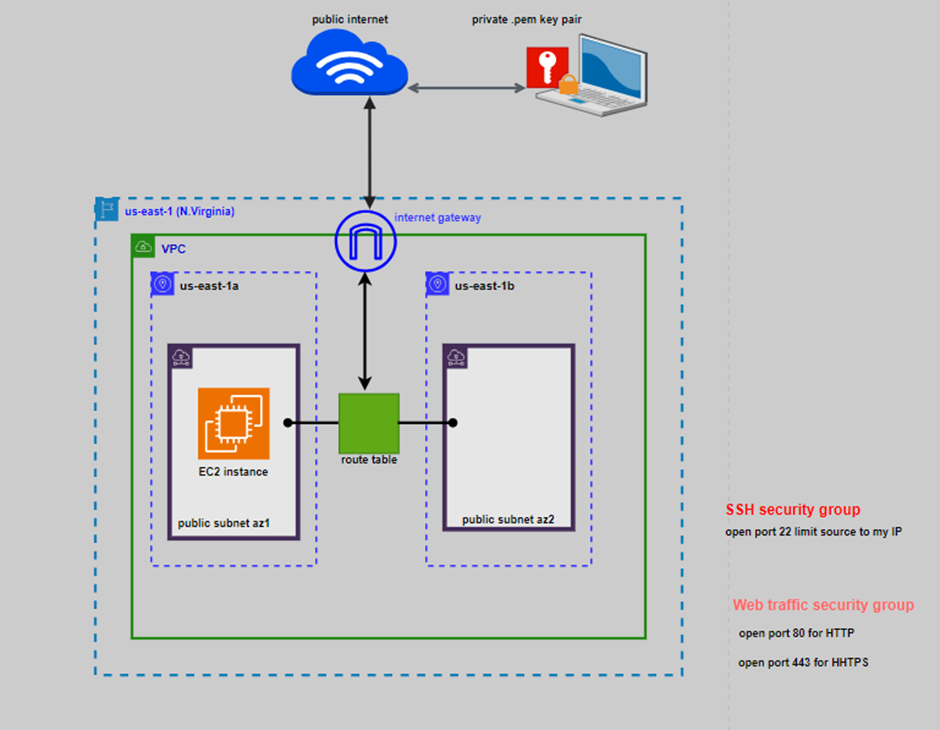
Demo: Creation of security group to open port 22 for SSH, port 80 for HTTP, and port 443 for HHTPS.

To create security group, click on this link and follow our previous demo on the security group.

https://accendnetworks.com/comprehensive-guide-to-creating-and-managing-security-groups-for-your-amazon-ec2-instances/

Bootstrap Scripts

What are Bootstrap Scripts?

A bootstrap script, often referred to as user data or initialization script, is a piece of code or script that is executed when an EC2 instance is launched for the first time. This script automates the setup and configuration of the instance, making it ready for use. Bootstrap scripts are highly customizable and allow you to install software, configure settings, and perform various tasks during instance initialization.

Key Features of Bootstrap Scripts:

Automation: Bootstrap scripts automate the instance setup and configuration process, reducing manual intervention and potential errors.

Flexibility: You have full control over the contents and execution of the script, making it adaptable to your specific use case.

Idempotent: Bootstrap scripts can be designed to be idempotent, meaning they can be run multiple times without causing adverse effects.

Use Cases:

Software Installation: You can use bootstrap scripts to install and configure specific software packages on an instance.

Configuration: Configure instance settings, such as setting environment variables or customizing application parameters.

Automated Tasks: Run scripts for backups, log rotation, and other routine maintenance tasks.

Combining Security Groups and Bootstrap Scripts

The synergy between Security Groups and Bootstrap Scripts offers a robust approach to enhancing both security and automation in your AWS environment.

Security Controls: Security Groups ensure that only authorized traffic is allowed to and from your EC2 instances. Bootstrap scripts can automate the process of ensuring that your instances are configured securely from the moment they launch.

Dynamic Updates: In response to changing security needs, Bootstrap Scripts can automatically update instance configurations.

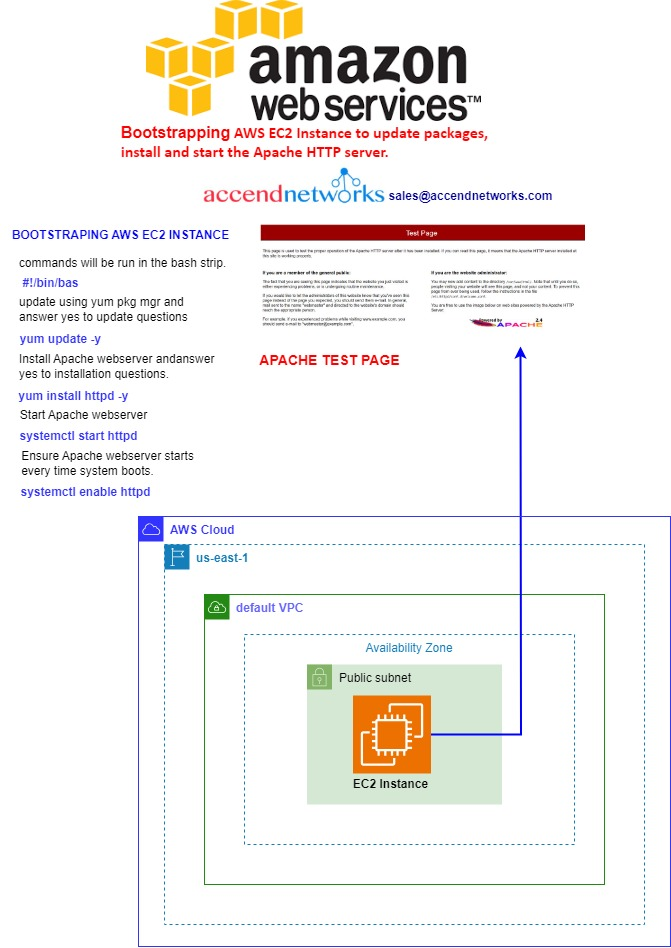
Demo: Bootstrapping AWS EC2 Instance to update packages, install and start Apache HTTP server. (HTTP is on port 80)

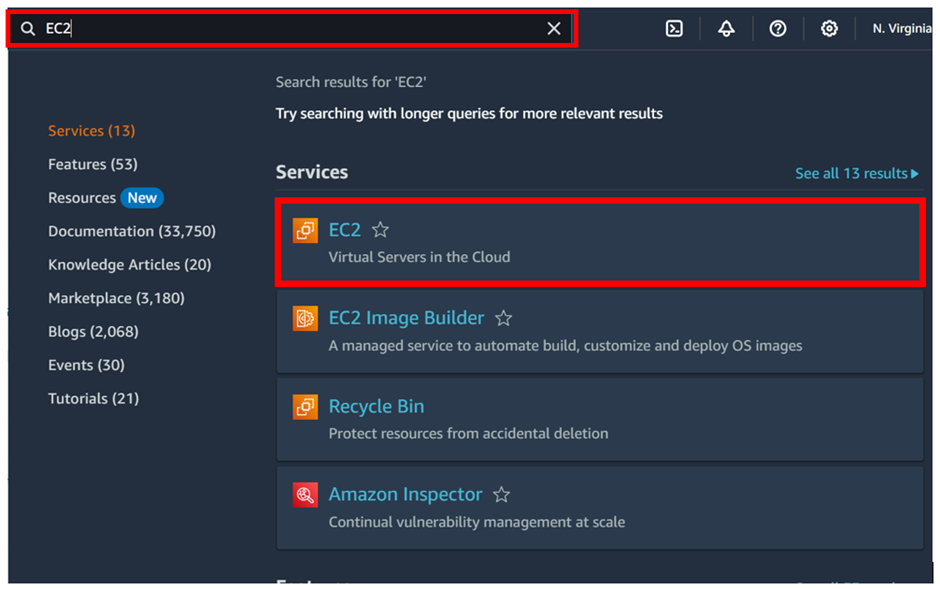
sign in to your AWS Management Console, type EC2 in the search box then select EC2 under services

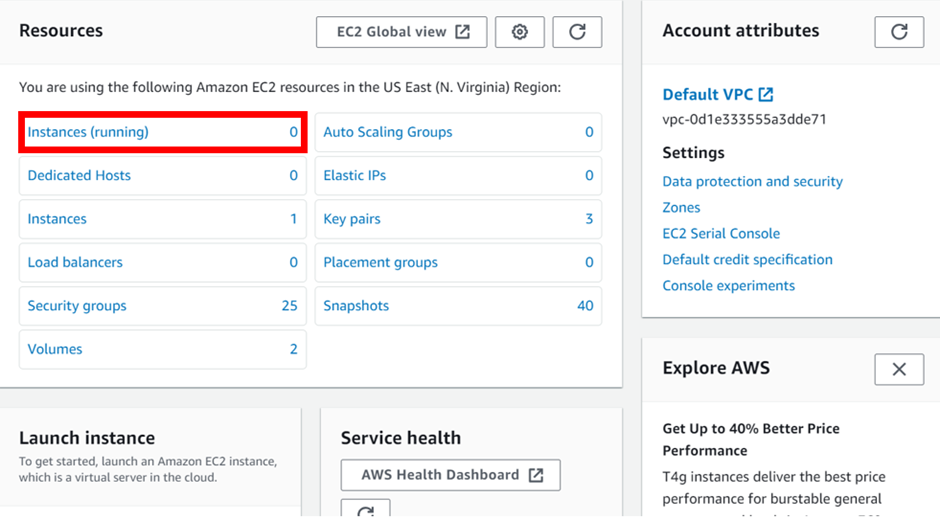
In the EC2 dashboard, select instances then click launch

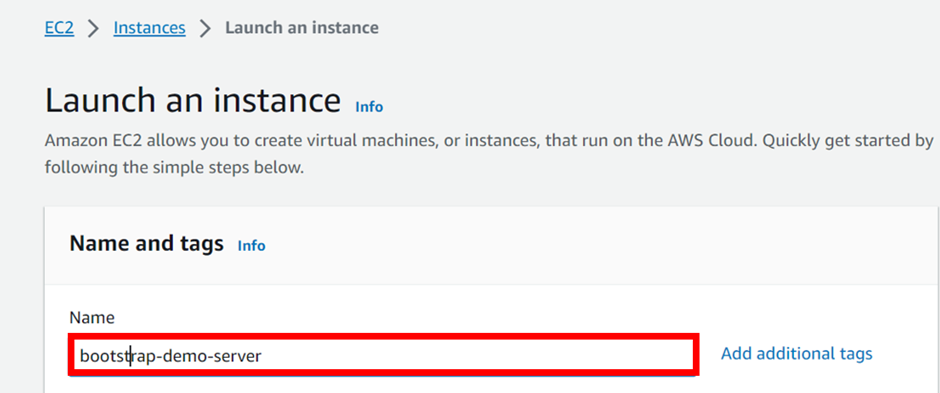
In the launch instance dashboard, under name and tags, give your instance a name. call it bootstrap-demo-server.

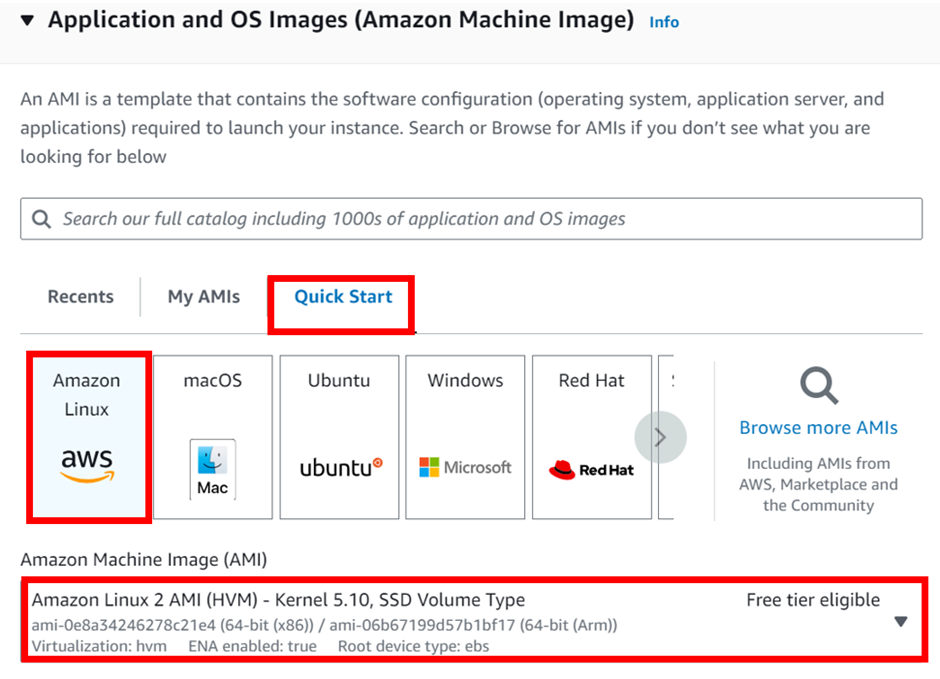
Under application and OS images, select the QuickStart tab then select Amazon Linux. Under Amazon Machine Image (AMI), select the drop-down button and select Amazon Linux 2 AMI. Scroll down.

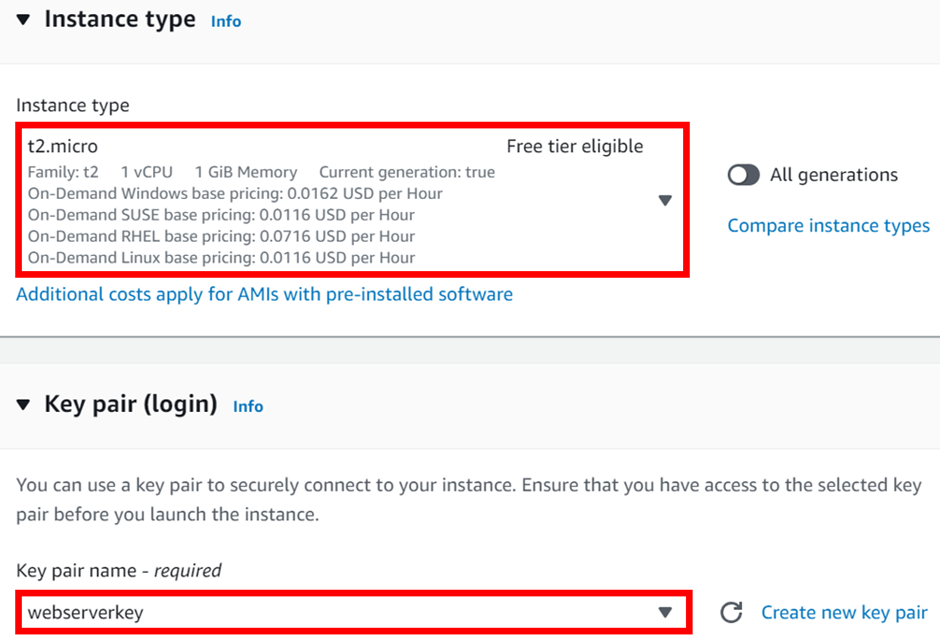
Under instance type make sure it is t2. Micro because it is the free-tier one. Under keypair login select the dropdown and select your key-pair. Scroll down.

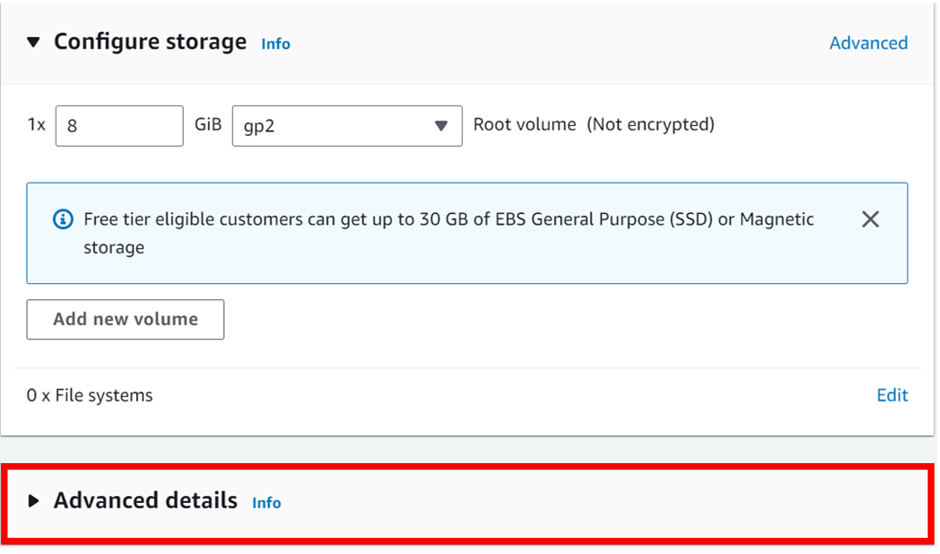
We will leave all the other options as default move all the way to the advanced details section, then click the drop-down button to expand it.

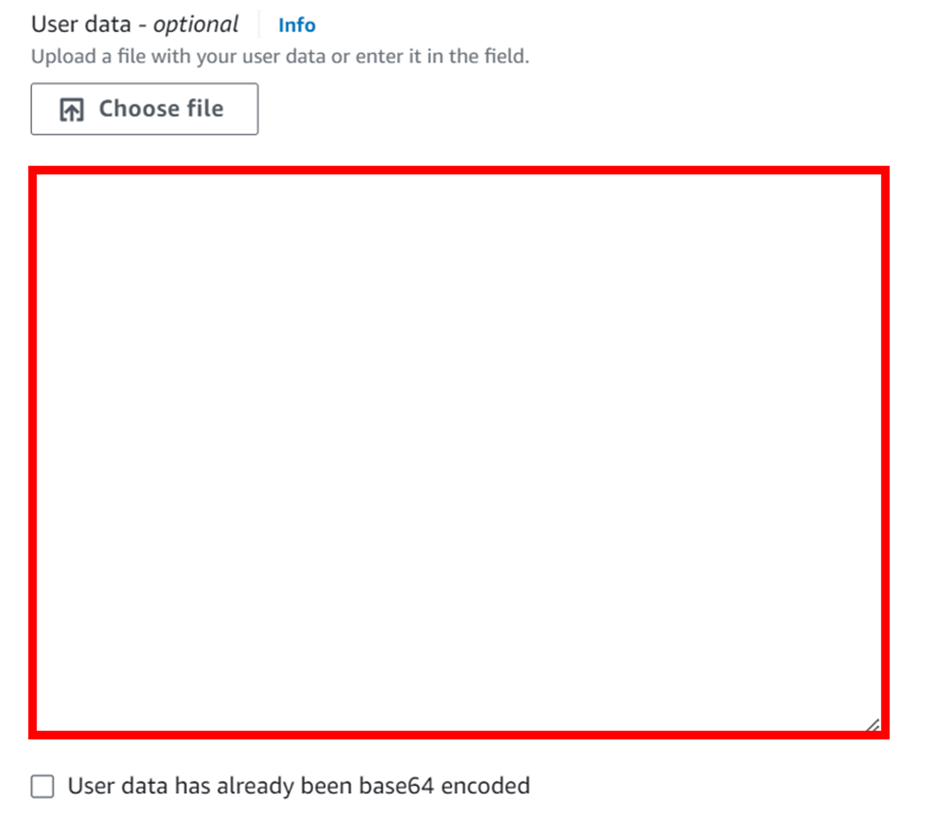
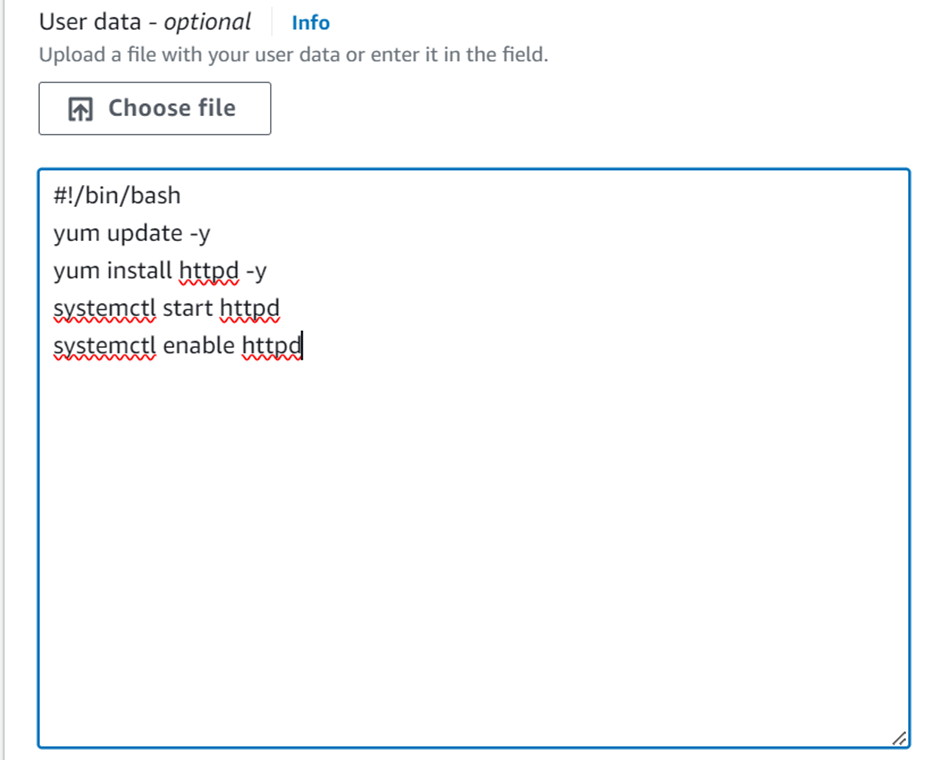
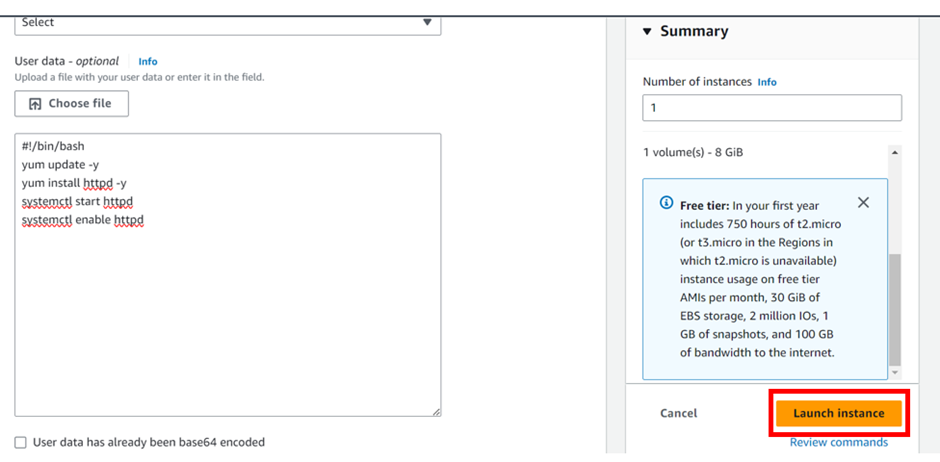
Move all the way down to the instance user data section. Copy and paste this code inside there.

  • #!/bin/bash
  • yum update -y
  •  yum install httpd -y
  •  systemctl start httpd
  •  systemctl enable httpd

Tip: Once the instance is launched and you may have to go back and modify this User Data section, stop the instance, click Actions-Instance settings-Edit user data.

Under instance, summary, review, and click launch instance.

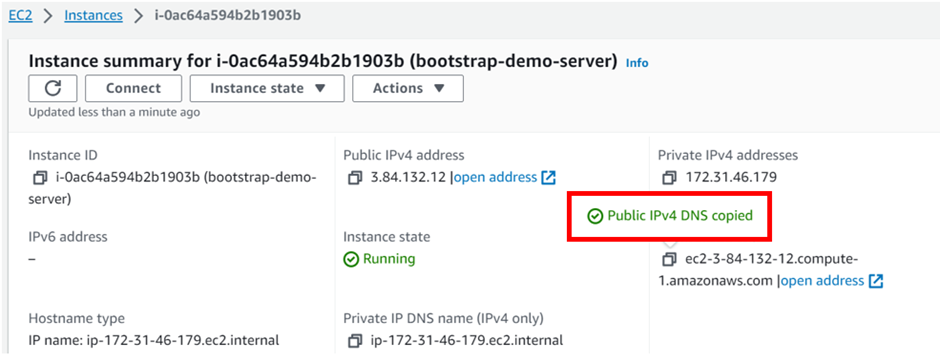
Click on the instance ID then wait for the status check to initialize. Copy the public IPv4 DNS and paste it into your browser.

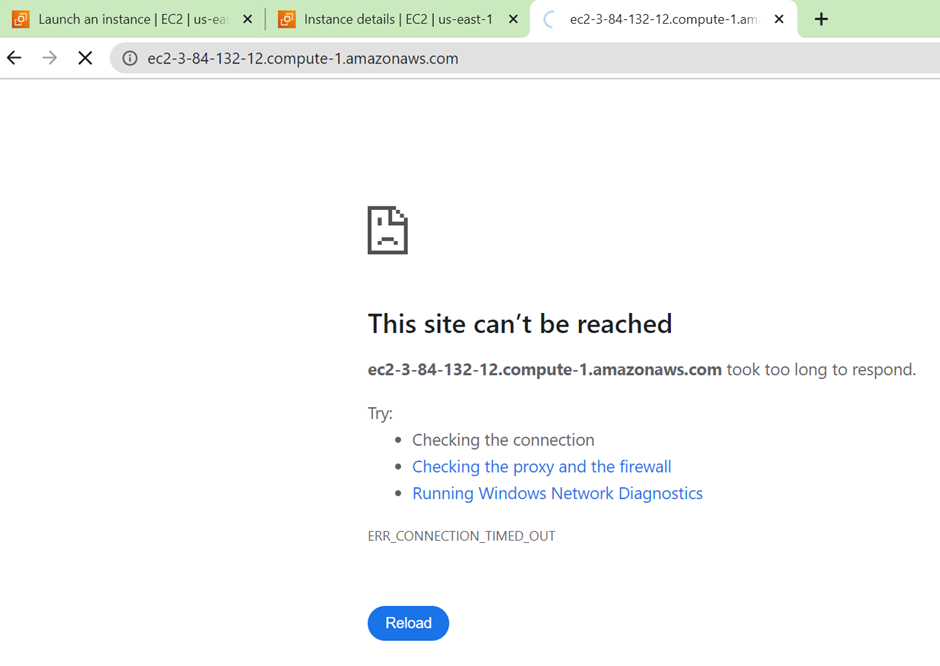
We are getting this error because HTTP port 80 is not open, we will go back to our instance modify security group, and open port 80.

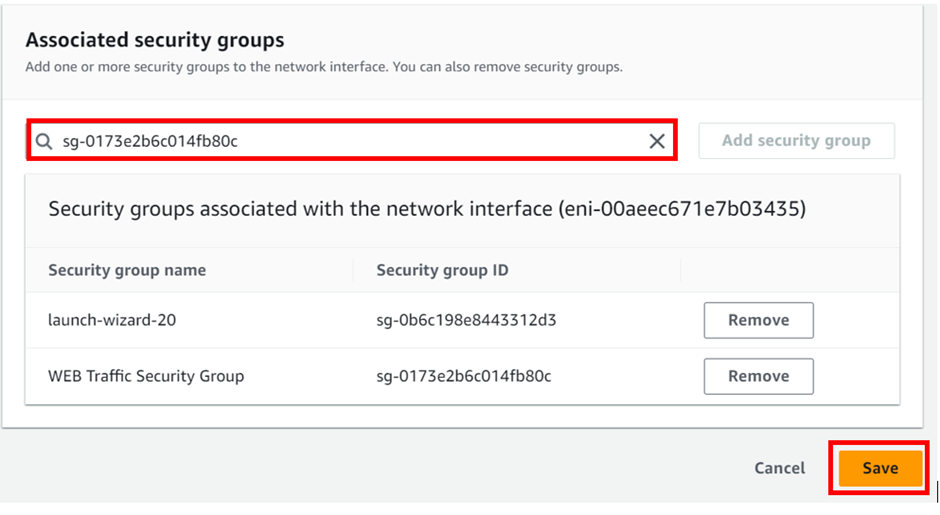
Select your instance and click the instance state dropdown move to security then click modify security group.

Under the associated security group, select the search box and look for the web traffic security group which opens port 80 and 443 select it, then click save.

Now come back to your instance copy its public DNS and paste it into your browser.

Congratulations, we can now access our HTTP web traffic on port 80. This clearly shows how security groups can allow or deny internet traffic.

Again, remember this instance was bootstrapped and installed Apache on launch.

Pull everything down and stay tuned for more.

If you have any questions concerning this article or have an AWS project that requires our assistance, please reach out to us by leaving a comment below or email us at sales@accendnetworks.com

Thank you!