Accend Networks San Francisco Bay Area Full Service IT Consulting Company

Categories
Blogs

AWS CloudHSM

AWS Hardware Security Module: Securing Your Keys in the Cloud

Cloud HSM

Introduction

As organizations increasingly move their operations to the cloud environment, the need for robust security measures becomes equally important. One critical aspect of this cloud security measure is the management and protection of cryptographic keys. This is where the AWS Hardware Security Module or AWS CloudHSM comes in handy. This article explores what CloudHSM is, its use case, and a demo of how to create one.

What is CloudHSM?

AWS CloudHSM is a cryptographic service for creating and maintaining AWS hardware security modules (HSMs) in your AWS environment. HSMs are computing devices that process cryptographic operations and provide secure storage for cryptographic keys. You can use AWS CloudHSM to offload SSL/TLS processing for web servers, protect private keys linked to an issuing certificate authority (CA), or enable Transparent Data Encryption (TDE) for Oracle databases.

When we have the KMS, AWS manages the software for encryption and the encryption keys. But with cloud HSM, AWS only provides us with the encryption hardware. The HSM device is tamper resistant and has FIPS 140-2 Level 3 compliance. CloudHSM supports both symmetric and Asymmetric encryption.

Using AWS CloudHSM you must use CloudHSM client software since there is no API call for this service.

Key Features of Cloud HSM

Hardware-based Security: Keys are stored in hardware, which is inherently more secure than software-based storage.

High Availability and Scalability: Cloud HSM services are typically offered with high availability and can scale to meet the demands of enterprise workloads.

Compliance: Cloud Hardware Security Module is often compliant with industry standards such as FIPS 140-2 Level 3, ensuring they meet regulatory requirements for data protection.

Integration: Cloud HSMs can integrate with various cloud services and on-premises applications, enabling seamless cryptographic operations across different environments.

CloudHSM Backups

Backups are stored in Amazon Simple Storage Service (Amazon S3) within the same Region as the cluster. You can view backups available for your cluster from the CloudHSM console. Backups can only be restored to a genuine HSM running in the AWS Cloud. The restored HSM retains all the configurations and policies you put in place on the original HSM.

Creating a backup CloudHSM triggers backups in the following scenarios:

  • CloudHSM automatically backs up your HSM clusters periodically.
  • When adding an HSM to a cluster, CloudHSM takes a backup from an active HSM in that cluster and restores it to the newly provisioned HSM.
  • When deleting an HSM from a cluster, CloudHSM takes a backup of the HSM before deleting it.

A backup is a unified encrypted object combining certificates, users, keys, and policies. It is created and encrypted as a single, tightly bound object. The individual components are not separable from each other. The key used to encrypt the backup is derived using a combination of persistent and ephemeral secret keys.

Backups are encrypted and decrypted within your HSM only, and can only be restored to a genuine HSM running within the AWS Cloud.

Let’s dive into the practical.

Login to the AWS Management Console then type CloudHSM in the search box then select it under services.

In the CloudHSM dashboard, click Create cluster.

In the create cluster dashboard, click the drop-down button and select your VPC, I will move with the default VPC.

For subnet, you can only select one subnet per AZ, because I selected default VPC, I will move with the default subnet.

We will create a new cluster, so select the radio button on Create a new cluster then click next.

Enter the backup retention period then click next.

We will tag our HSM.

Review page.

For confirmation, make sure to tick the check box, then hit on the Create cluster.

Wait until it gets created complete. And move the status to an uninitialized state.

Select the cluster from the actions drop-down button then select initialize.

We will now create an IAM user, cloudhsmuser with full access.

Take note of the password and download the .csv file

Create HSM in the cluster, select the Availability Zone, and hit on Create.

Wait until the process gets completed.

Download all 4 certificates then hit next.

Configure the HSM user on the EC2 machine using Mobastream.

Make sure Cluster is Active. As per the below screen, the Cluster is in an active state.

That’s it. Thumps up.

Conclusion

AWS Hardware Security Module or Cloud HSM provides a powerful solution for secure key management in the cloud. By leveraging hardware-based security, it offers enhanced protection for cryptographic keys, helping organizations meet stringent compliance requirements and protect sensitive data.

This brings us to the end of this blog.  Thanks for reading, and stay tuned for more. Make sure you clean resources.

If you have any questions concerning this article or have an AWS project that requires our assistance, please reach out to us by leaving a comment below or email us at sales@accendnetworks.com.


Thank you!

Categories
Blogs

AWS CodeCommit: Streamlining Source Control in the Cloud.

What is AWS CodeCommit? Streamlining Source Control in the Cloud.

aws-code-commit

In the era of cloud computing, source control is a pivotal aspect of the workflow, ensuring that code changes are managed efficiently, collaborative efforts are streamlined, and the integrity of the codebase is maintained. Amazon Web Services (AWS) offers a robust solution for source control in the cloud with AWS CodeCommit. This article delves into the features, benefits, and use cases of AWS CodeCommit. We will also go ahead and create a code commit repository and clone the repo to our local machine, add files, commit and push them to our AWS code repository.

What is AWS CodeCommit?

AWS CodeCommit is a version control service hosted by Amazon Web Services that allows developers to store and manage their source code, binaries, and other assets in the AWS cloud.  Additionally, it is designed to work seamlessly with existing Git tools, making it easy for developers to integrate it into their current workflows.

Key Features of AWS CodeCommit.

Fully Managed Service: AWS CodeCommit takes care of the backend infrastructure, so developers can focus on writing code. There are no servers to manage.

Scalability: CodeCommit can handle repositories of any size, with the ability to scale up as your project grows.

High Availability and Durability: your repositories are always accessible and your data is protected against loss.

Security: CodeCommit integrates with AWS Identity and Access Management (IAM) to provide robust access control. You can use IAM policies to define who can access your repositories and what actions they can perform.

code-commit-security

Integration with AWS Services: CodeCommit integrates seamlessly with other AWS services such as AWS CodeBuild, AWS CodeDeploy, and AWS CodePipeline. This allows you to create a complete CI/CD pipeline using AWS tools, enhancing your development and deployment workflows.

integration-aws

Standard Git Interface: CodeCommit supports the standard Git interface, so developers can use their preferred Git client, command-line tools.

Getting Started with AWS CodeCommit

Prerequisite.

Make sure you have full permission to Codecommit, or you can log in as an administrative user additionally, you should have git installed and configured on your machine.


Create a Repository

Log in to your AWS management console, in the search box, type Codecommit then select codecommit under services.

repository

In the code commit UI on the left-hand side, select repositories then click Create Repository.

create-repository

In the create repository dashboard, under repository settings, name your repo, will call mine demo-commit-repo.

Codecommit is encrypted by default using KMS, but you can also choose your custom keys. We will leave it at AWS-managed keys with KMS.

Leave all other settings as default then click Create Repository.

create-respository

Success, we are greeted with connection steps. We can see HTTPS, SSH, HTTPS(GRC).

demo-code-commit

If you don’t see SSH then it means you are connected as the root user.

We will for now use HTTPS git credentials for Codemmit to connect to our git repository.

So let us log in to the I AM console.


services

Select users. Click your username, move to the security tab then scroll all the way down to HTTPS for git credentials.


git-credentials

Click on generate and your codecommit credentials will be generated. Click the download button.

git-download

Go back to the codecommit repository select your repo then click the drop-down button of the clone URL then select clone HTTPS.

In this case, it will copy the HTTPS-type URL.

repo-copied

Use your preferred Git client to clone the repository to your local machine. This allows you to start adding code and making changes.

Go back to your terminal and type in git clone and paste in the cloned URL. When you press enter, you will be prompted for your username and password. Paste them in then press enter.

git-command

We have cloned our remote repo into our local machine.

git-command

With the repository cloned, you can push your changes to CodeCommit.

We will now copy a few files into our directory, commit these files, and push them to our remote repo.

Using linux command make sure you are in the repo directory then add copy files to your repo.

git-command

Using git add the files and then commit the changes as shown in the picture bellow.

ubuntu-command-line
ubuntu-command-line

Once the changes are commited, you can then push them to the remote repo by using the below command.

ubuntu-command-line

Now let’s go and check codecommit, and yes indeed the new files have been pushed to the codecommit repository.

code-commit-repo

If you click on the commits on the left side of the repo UI, you can see the commit history.

code-commit-repo

This brings us to the end of this blog. AWS CodeCommit offers a powerful, secure, and scalable solution for source control in the cloud.

Thanks for reading, and stay tuned for more.

If you have any questions concerning this article or have an AWS project that requires our assistance, please reach out to us by leaving a comment below or email us at sales@accendnetworks.com.


Thank you!

Categories
Blogs

An Overview of DDoS Attacks: Understanding the Threat.

An Overview of DDoS Attacks: Understanding the Threat.

In the current digital era, cybersecurity is key. Among the various threats that organizations face are Distributed Denial of Service (DDoS) attacks which are particularly disruptive. DDoS attack defence is one of the top security concerns on the web today, regardless of the attacker’s purpose, because disruption of availability can result in financial losses and other undesirable repercussions. In this blog article we will explore how AWS Shield operates, its features, and its importance in the current cybersecurity landscape.

DDoS Attacks

DDoS attacks involve overwhelming a server, service, or network with more traffic than it can handle, causing it to slow down or crash. Attackers use millions of tonnes of traffic to bring down a victim’s web applications from multiple sources, which is known as DDoS extortion.

There are basically 3 types of DDoS attacks:

Volume-Based Attacks

These attacks use methods to create huge amounts of traffic in order to completely saturate bandwidth, causing a traffic jam that prevents genuine traffic from flowing into or out of the targeted site.

Protocol Based Attacks

By consuming enormous amounts of per-connection resources, these attacks misuse stateful protocols and therefore put a strain on firewalls and load balancers.

Application Layer Attacks

Some of the most advanced DDoS attacks take use of flaws in the application layer by establishing connections and launching process and transaction requests that consume finite resources such as disc space and memory.

AWS Shield Overview

What is AWS Shield?

AWS Shield is a managed solution for preventing DDoS attacks basically on AWS-hosted applications. It inspects traffic in real-time and applies mitigation strategies automatically in order to avoid performance degradation.

There are basically two types of AWS Shields.

AWS Shield Standard (Free Service)

It is a free service offered to all AWS customers. It guards you against 96% of today’s most prevalent attacks, such as SYN/ACK floods, Reflection attacks, and HTTP slow reads. This protection is deployed to your Elastic Load Balancers, CloudFront distributions, and Route 53 resources automatically and transparently.

AWS Shield Advanced (Paid Service)

It is a paid service that adds volumetric DDoS mitigation, sophisticated attack detection, and mitigation for attacks at the application as well as network layers to AWS Shield.

You also have access to DDoS Response Team (DRT) 24*7 for tailored mitigation during attacks.

Key Features of AWS Shield.

Automatic Protection: AWS Shield offers automatic protection for all AWS customers at no additional cost. This basic protection, known as AWS Shield Standard, defends against most common, frequently occurring network and transport layer DDoS attacks.

Advanced Protection: AWS Shield Advanced provides enhanced protections for more sophisticated and larger scale DDoS attacks. It includes additional detection and mitigation capabilities, 24/7 access to the AWS DDoS Response Team (DRT), and financial protection against spikes in your AWS bill resulting from a DDoS attack.

Real-Time Visibility: AWS Shield Advanced customers have access to detailed attack diagnostics and the ability to create alarms in Amazon CloudWatch based on the occurrence of DDoS events.

Integration with AWS Services: AWS Shield works seamlessly with other AWS services like AWS WAF (Web Application Firewall), Amazon CloudFront, and Amazon Route 53, providing a holistic approach to security.

Why AWS Shield is Important

Comprehensive Protection

AWS Shield’s multi-layered defence strategy covers a wide range of attack vectors. Its integration with other AWS services ensures a robust security posture for your applications.

Cost-Effective

With its automatic protection feature, AWS Shield Standard offers fundamental DDoS protection at no extra cost, making it a cost-effective solution for all AWS customers. For those requiring advanced protection, AWS Shield Advanced offers additional benefits, including financial safeguards.

Reduced Complexity

Managing cybersecurity can be complex, AWS Shield’s managed service approach reduces this complexity, allowing organizations to focus more on their core business activities.

Enhanced Business Continuity

DDoS attacks can disrupt business operations significantly. AWS Shield enhances business continuity by ensuring that applications remain available and performant even under attack.

This brings us to the end of this blog, thanks for reading and stay tuned for more.

If you have any questions concerning this article or have an AWS project that requires our assistance, please reach out to us by leaving a comment below or email us at sales@accendnetworks.com.

Thank you!

Categories
Blogs

AWS Backup an Amazon EC2 instance

AWS Backup of an Amazon EC2 Instance

AWS Backup is a fully managed backup services that Centralises data protection across AWS services and on-premises enviroments. It simplifies the backup process by providing a unified interfaces to manage backups, retention policies , and recovery options. In this blog article, we will provide a demo of a backup and restore job on an AWS EC2 instance.

Let’s proceed as follows.

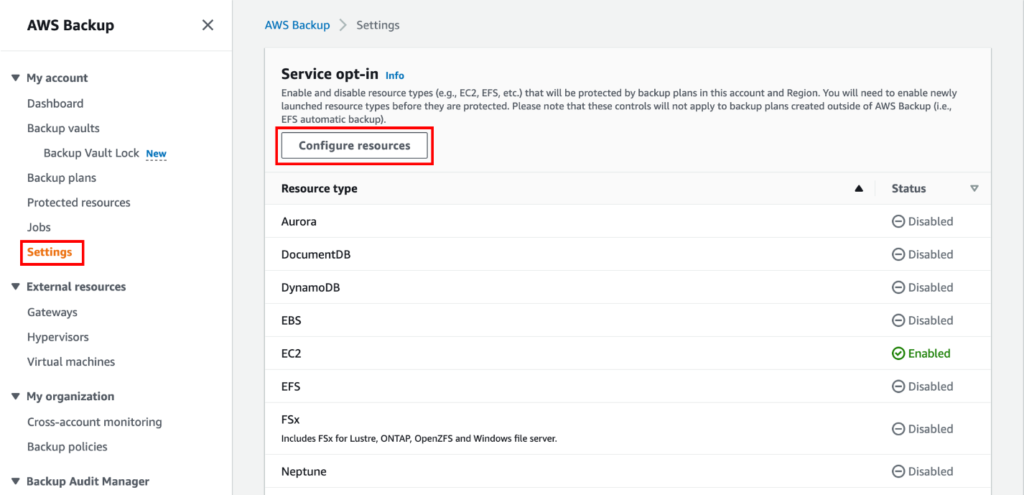
In the left navigation pane in the AWS Backup console, under My account, choose Settings. On the Services opt-in, choose Configure resourses.

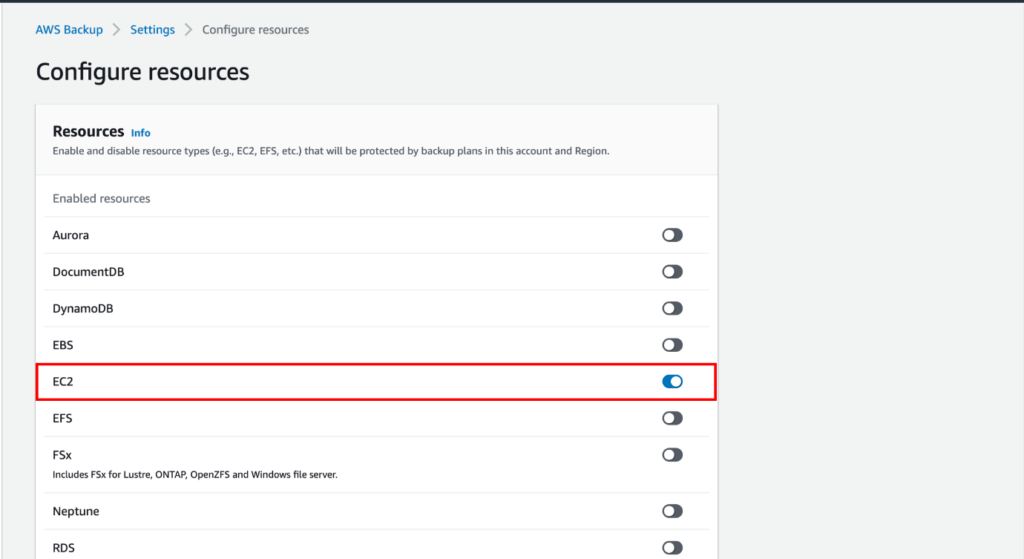
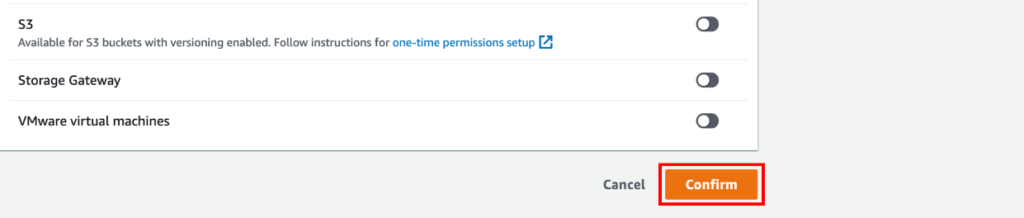
On the Configure resources page, use the toggle switches and make sure only EC2 is selected.

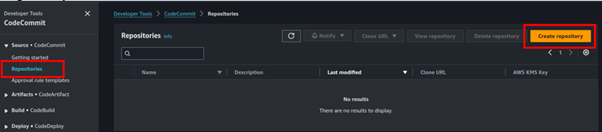
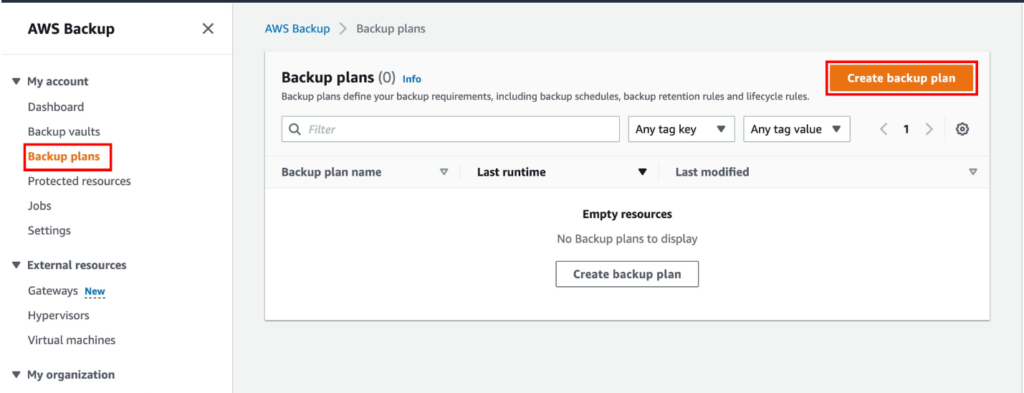
In the AWS Backup console, select  Backup plans in the left navigation pane under My account, and then click Create Backup Plan.

For backup plan options, select Build New Plan.

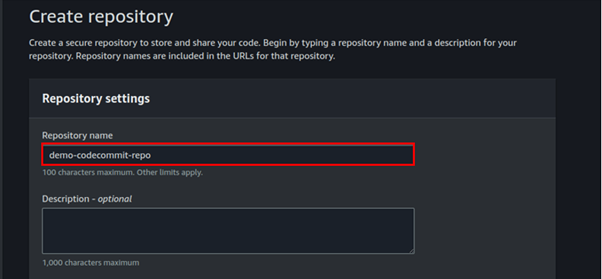
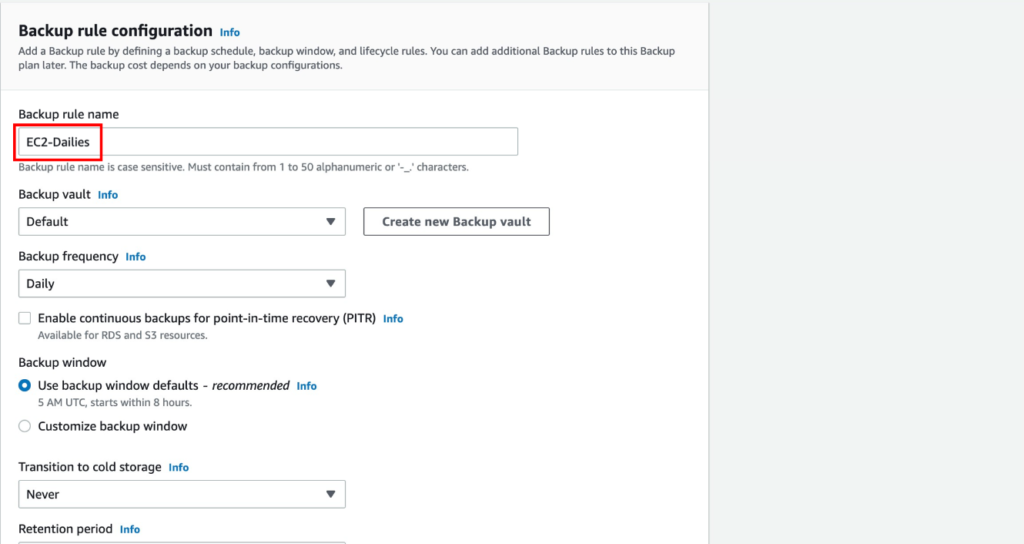
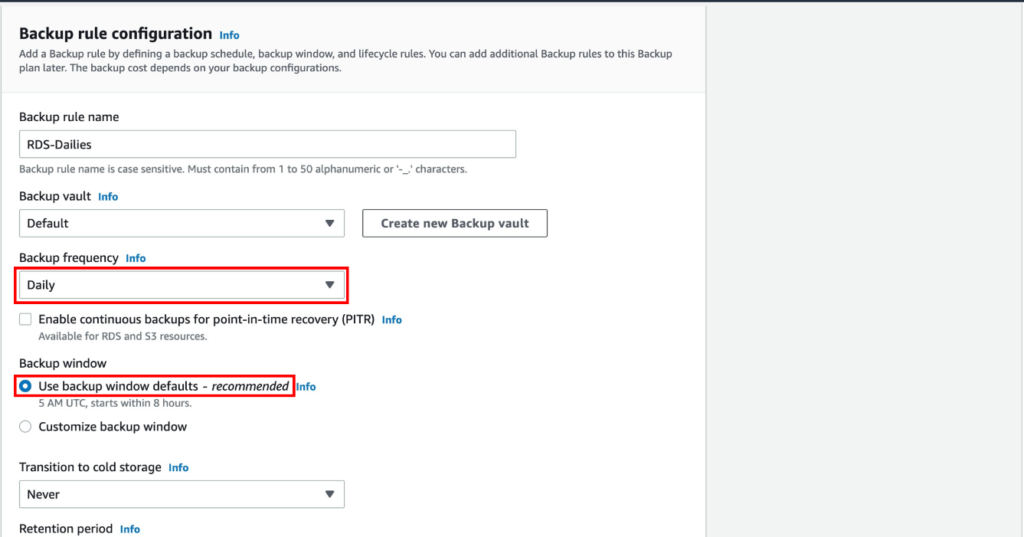
Backup plan name — provide a unique backup plan name. For this demo, enter EC2-webapp.

Backup rule name — For this tutorial, enter EC2-Dailies.

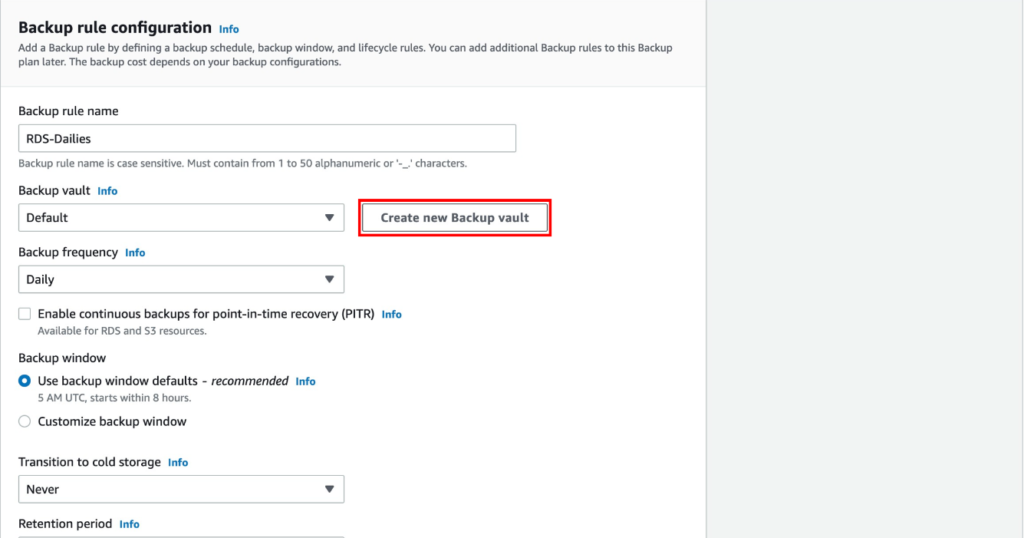
Instead of using the default backup vault that is automatically created for you in the AWS Backup console, you can create specific backup vaults to save and organize groups of backups in the same vault.
To create a backup vault, choose Create new Backup vault.

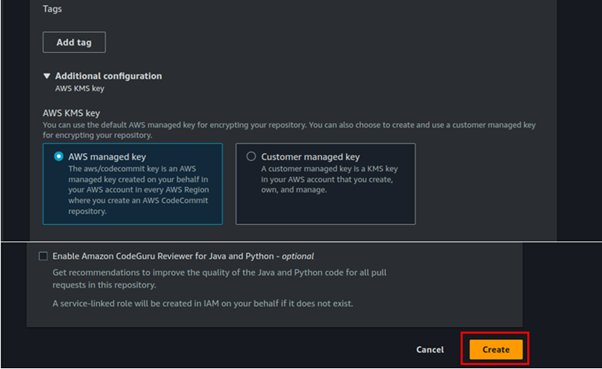
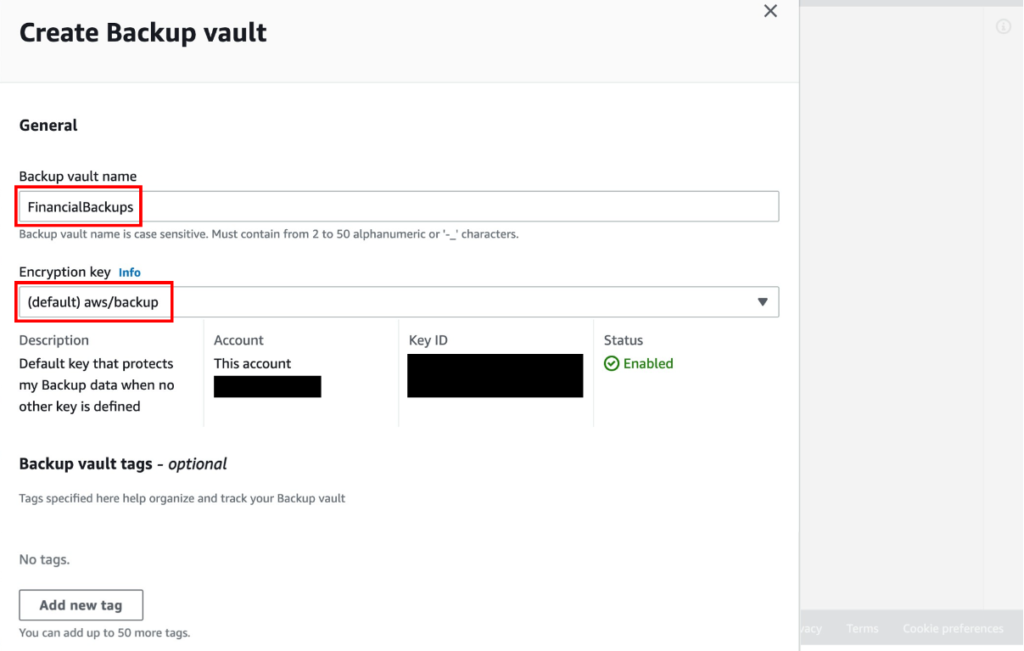
Enter a name for your backup vault. Encryption move with the default one.

Backup frequency select daily, for the backup window move with the default backup window which is set to start at 5 AM UTC and lasts 8 hours.

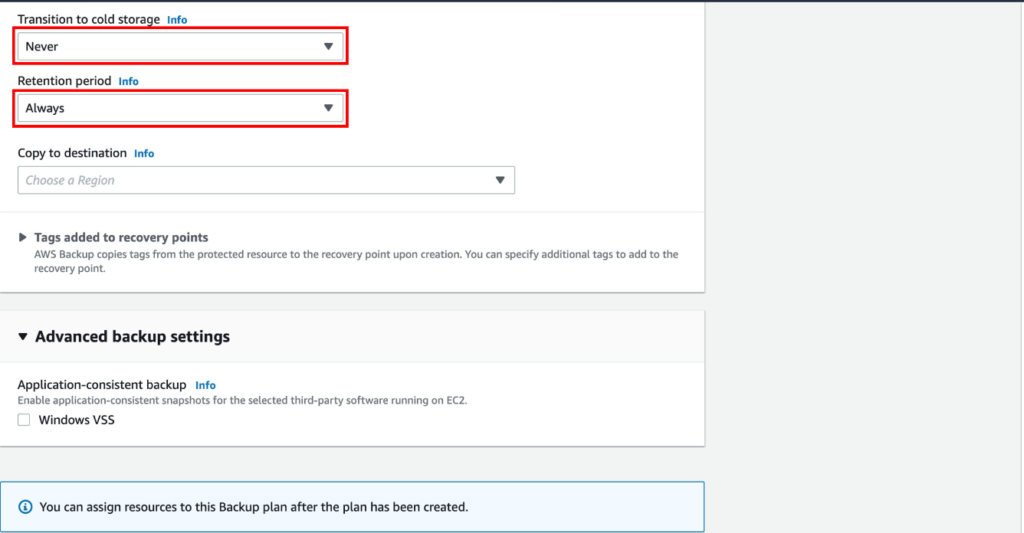
For the retention period, select always.

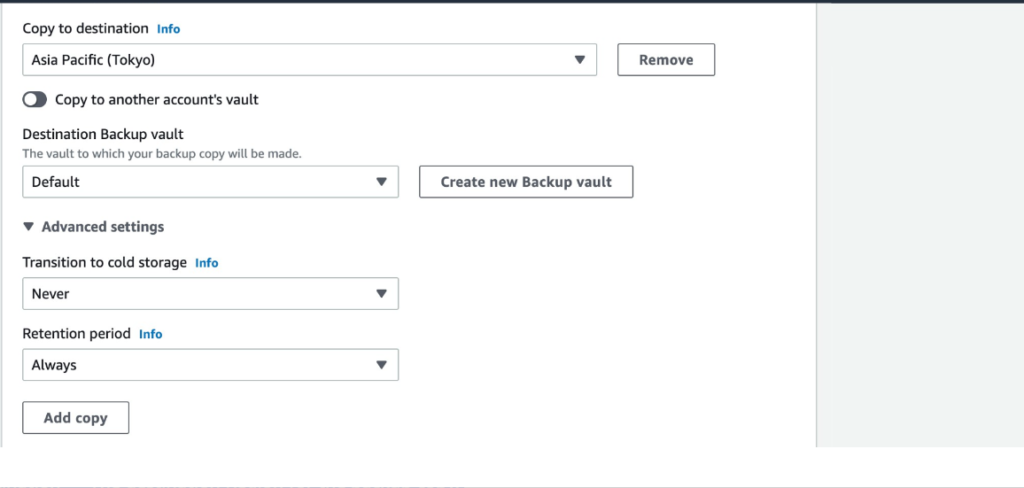
Copy to destination — As part of your backup plan, you can optionally create a backup copy in another AWS Region. Select your destination region then move with the default vault.

Note: Cross-region copy incurs additional data transfer costs.

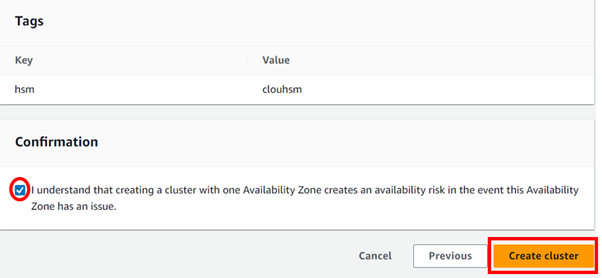
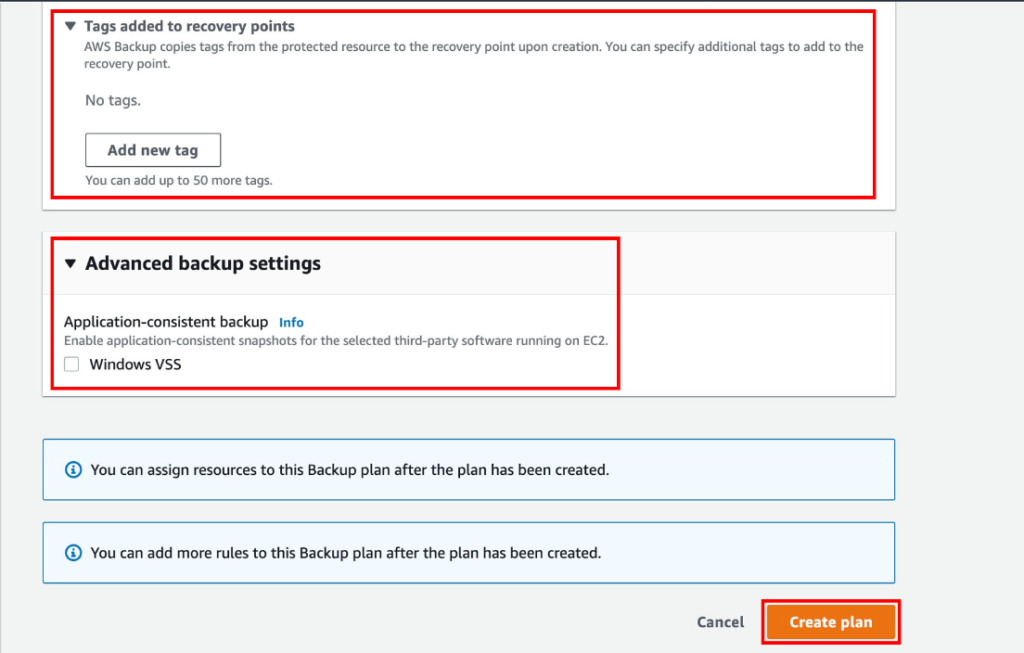
Those are the only settings we need. Click Create Plan.

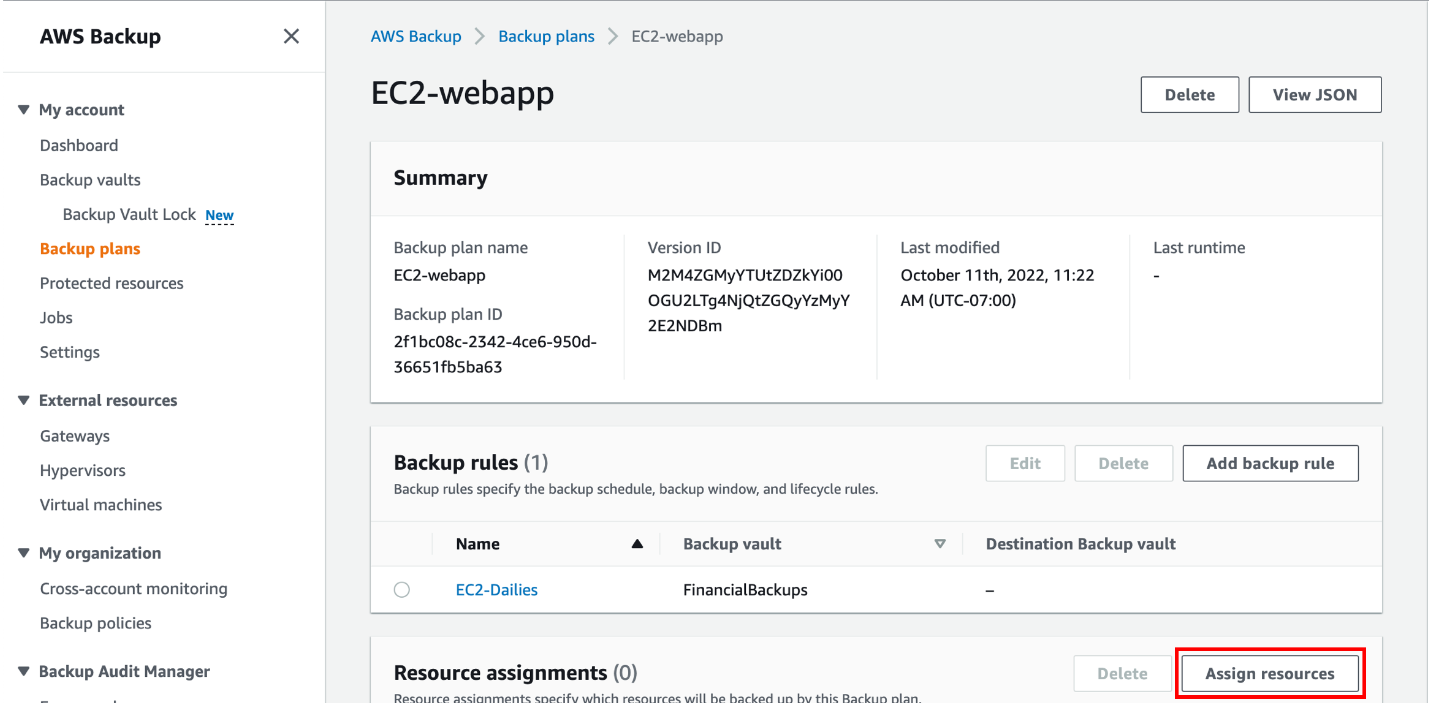
Assign resources to the backup plan

Select the created backup plan and choose the Assign resources button.

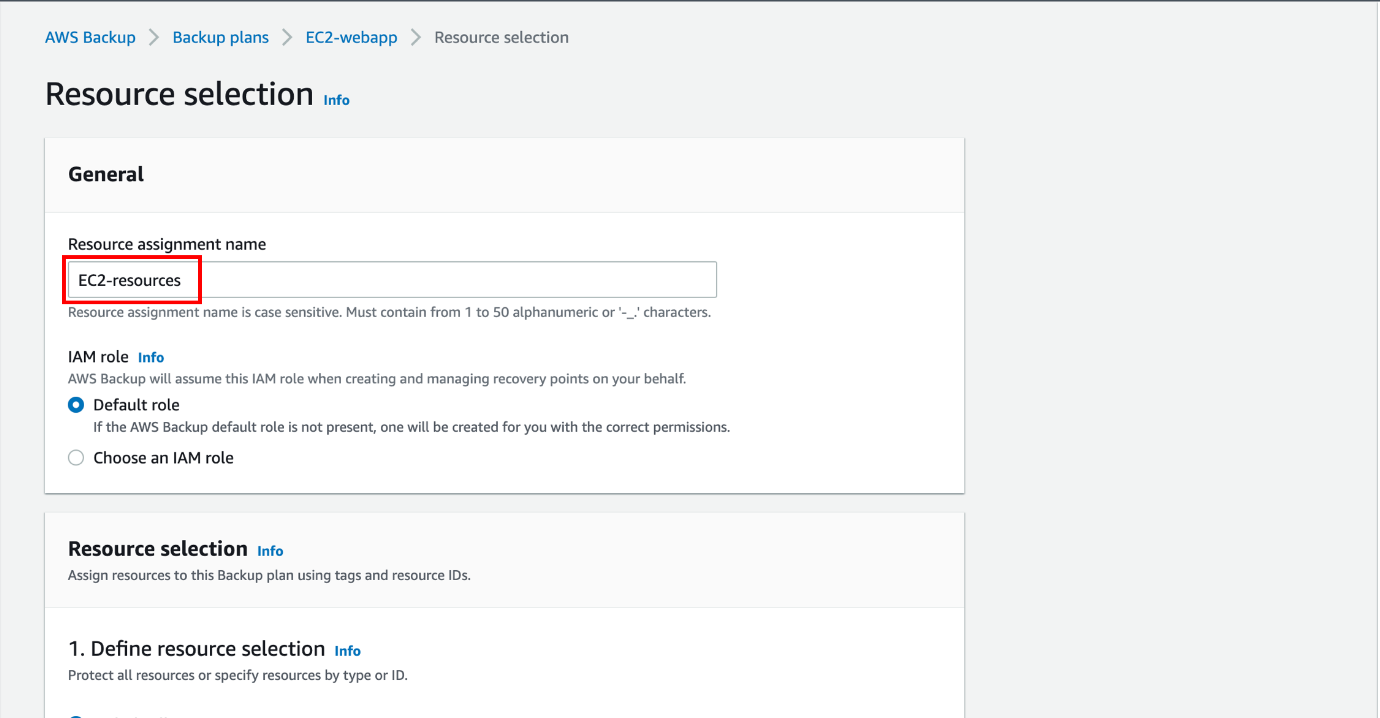
Under the resource assignment name, choose a name.

For the IAM role move with the default role.


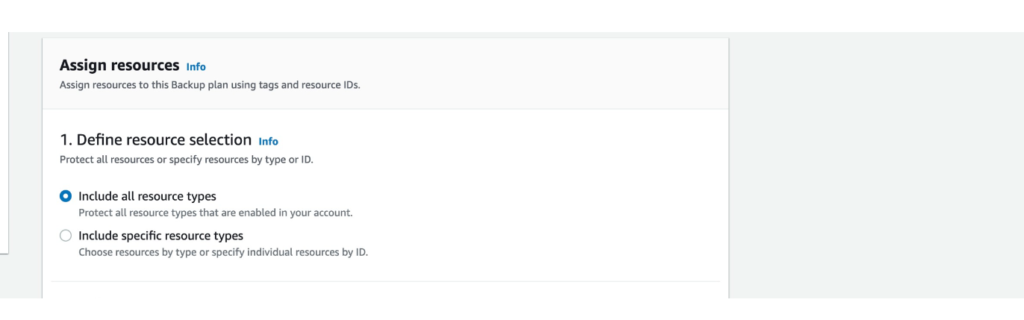
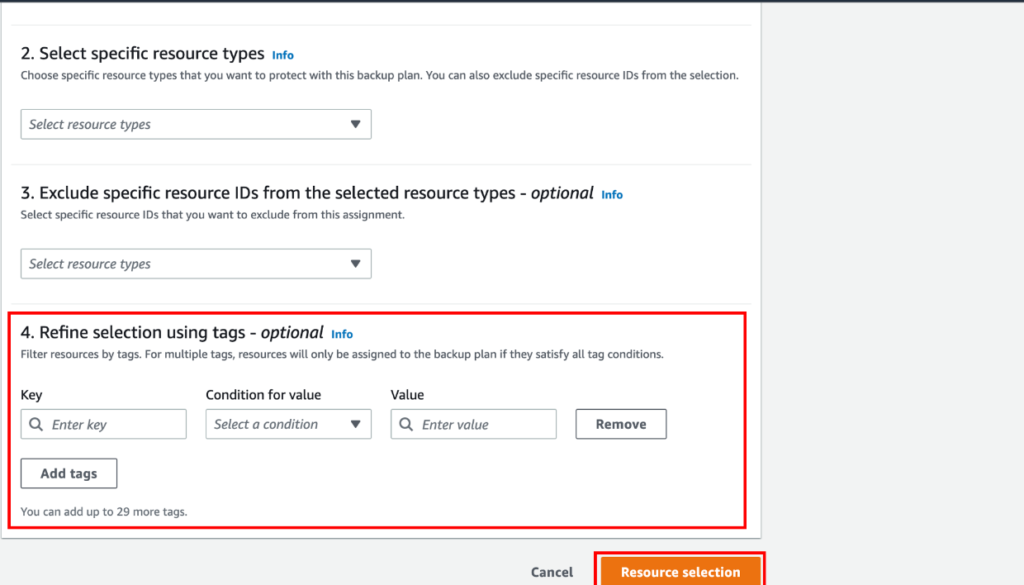
Define resource selection move as shown below.

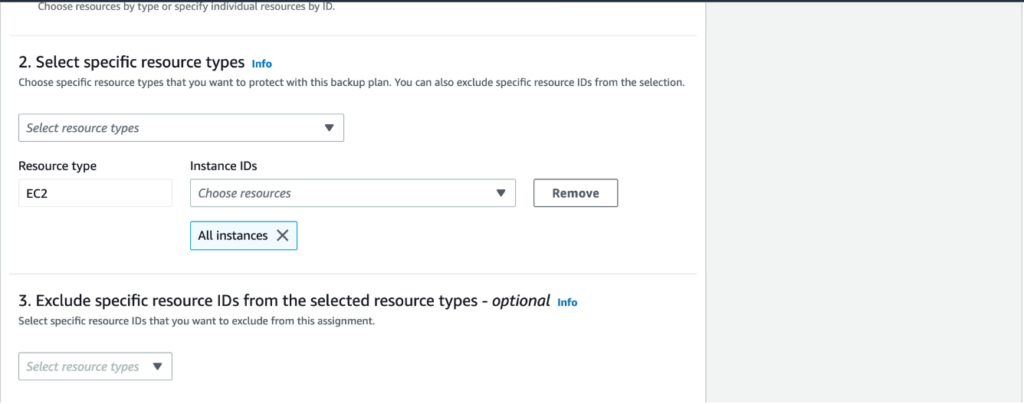
Foe resources ID-based assignment, select the Resource type and the name of the resource.

To exclude specific resource IDs, select the Resource type and the name of the resource.

For tags-based resource assignment, provide the key-value pair of the Amazon EC2 instance.

Choose the Resource selection button to assign the resources to the backup plan.

Navigate to the AWS Backup console. The backup jobs will be seen under Jobs.

Restore an Amazon EC2 instance using AWS Backup

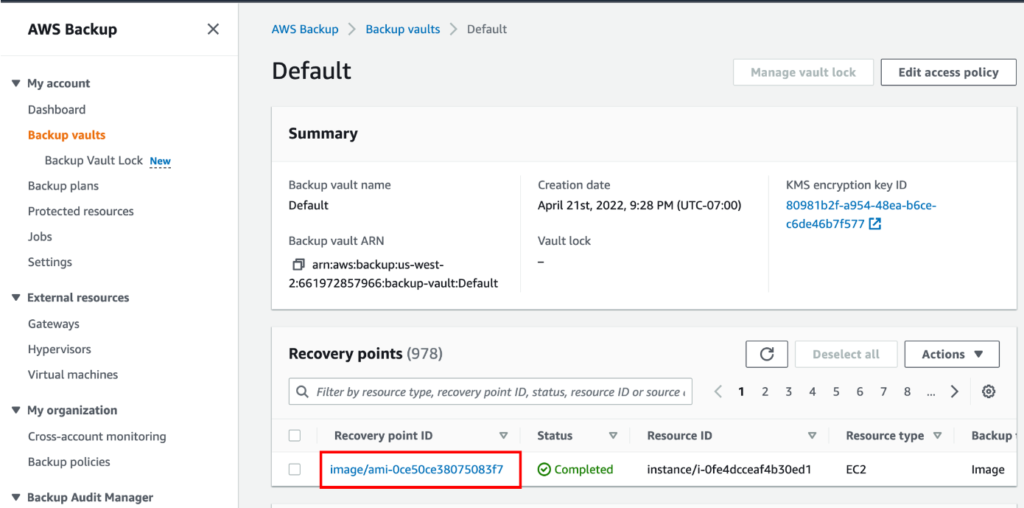
Navigate to the backup vault selected in the backup plan and select the latest completed backup.

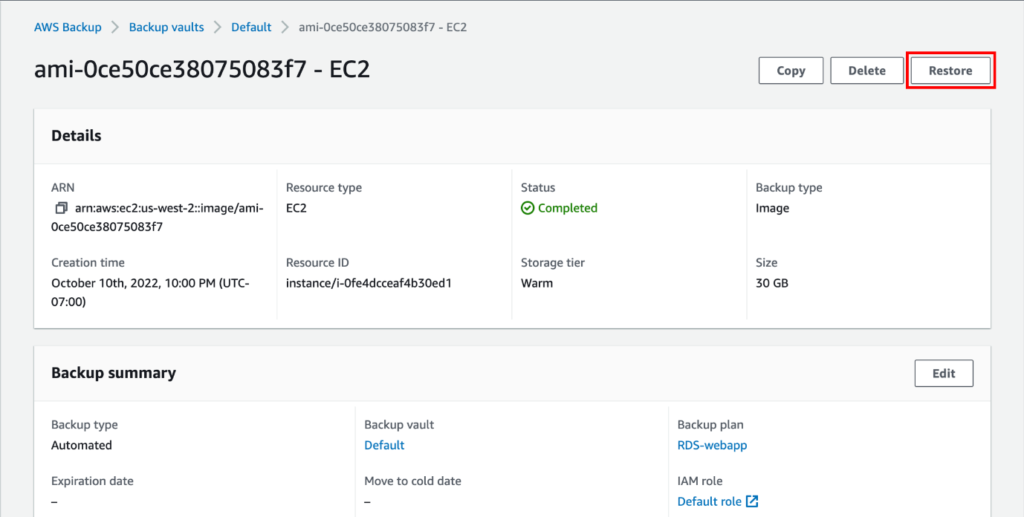
To restore the EC2 instance, select the recovery point ARN and choose Restore.

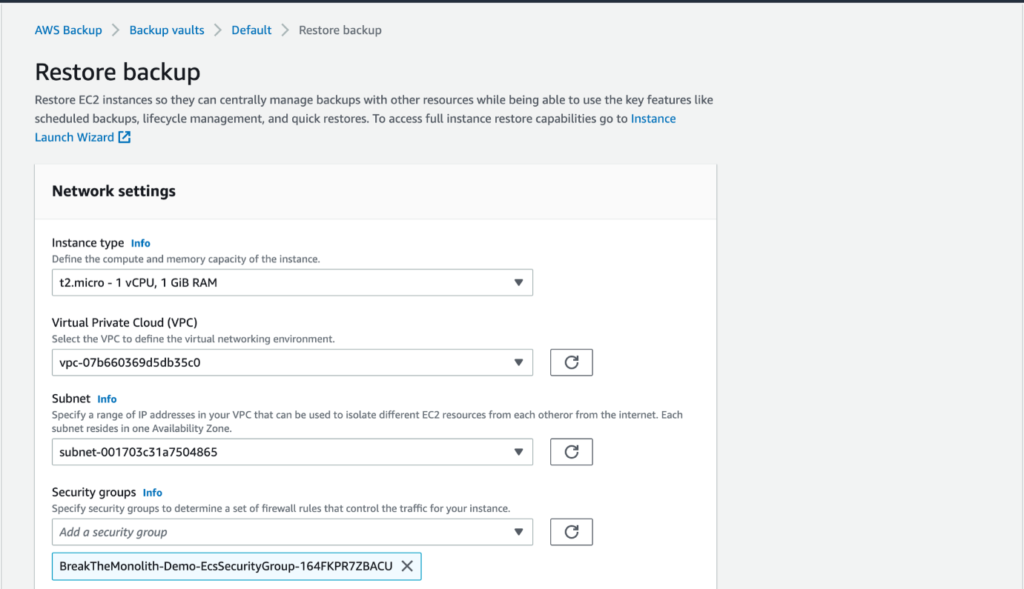
The restore of the ARN will bring you to a Restore backup screen that will have the configurations for the EC2 instance using the backed-up AMI and all the attached EBS volumes.

In the Network settings pane, accept the defaults or specify the options for the Instance type, Virtual Private Cloud (VPC), Subnet, Security groups, and Instance IAM role settings.

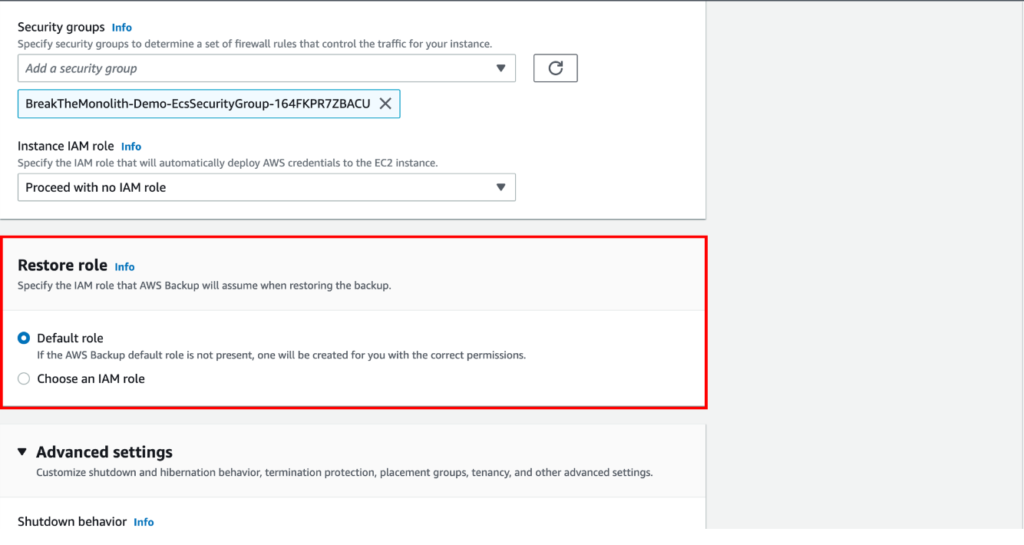
This example proceeds with no IAM role. The IAM role can be applied to the EC2 instance after the restore process is completed.

To successfully do a restore with the original instance profile, you must edit the restore policy. If you apply an instance profile during the restore, you must update the operator role and add the PassRole permissions of the underlying instance profile role to Amazon EC2. The default service role created by AWS Backup manages creating and restoring backups.

It has two managed policies: AWSBackupServiceRolePolicyForBackup and AWSBackupServiceRolePolicyForRestores. It also allows “Action”: “I AM PassRole” to launch EC2 instances as part of a restore.

In the Restore role pane, accept the Default role or Choose an IAM role to specify the IAM role that AWS Backup will assume for this restore.

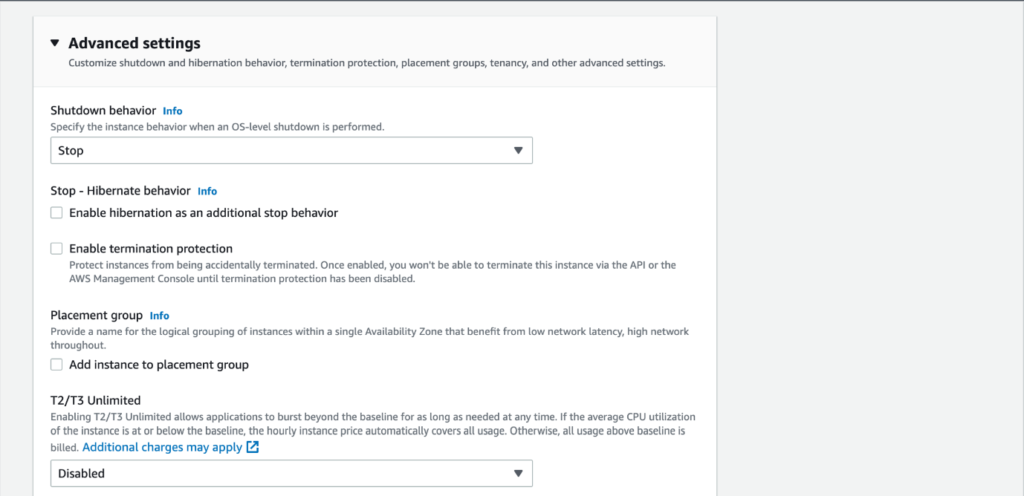
In the Advanced settings pane, accept the defaults.

AWS Backup will use the SSH key pair used at the time of backup to automatically perform your restore.

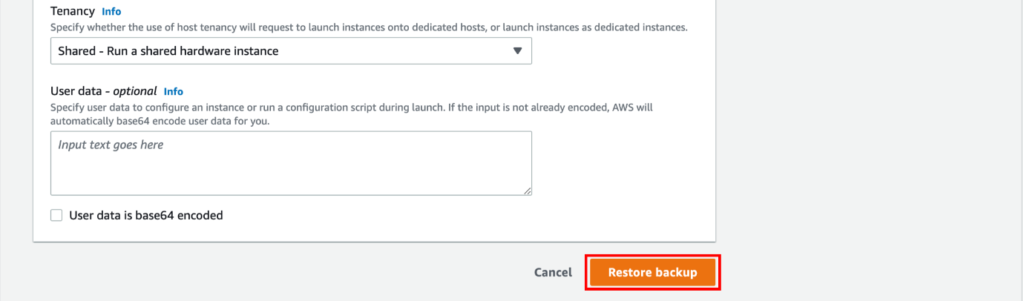
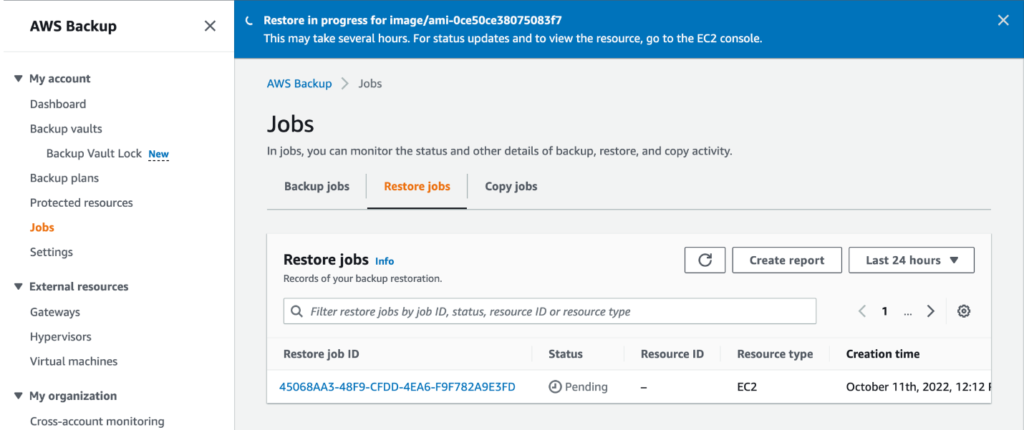
After specifying all of your settings, choose Restore Backup. The Restore jobs pane will appear, and a message at the top of the page will provide information about the restore job.

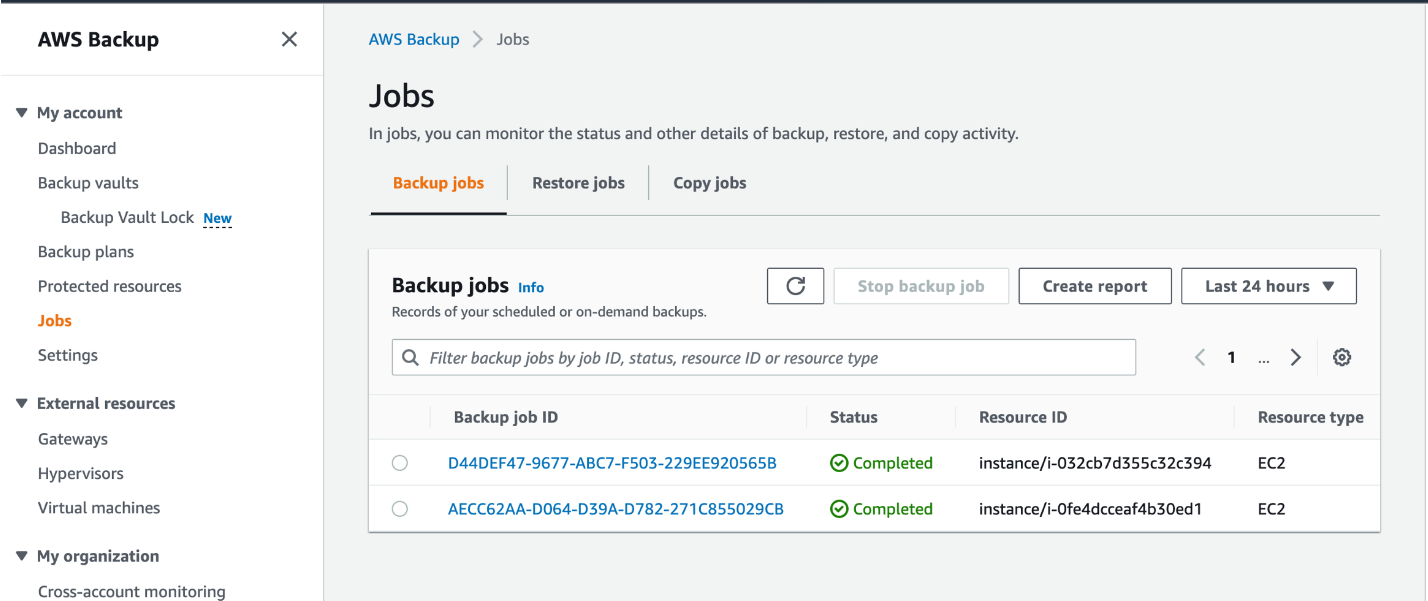
Check for your restored backup job under Restore jobs in the AWS Backup console.

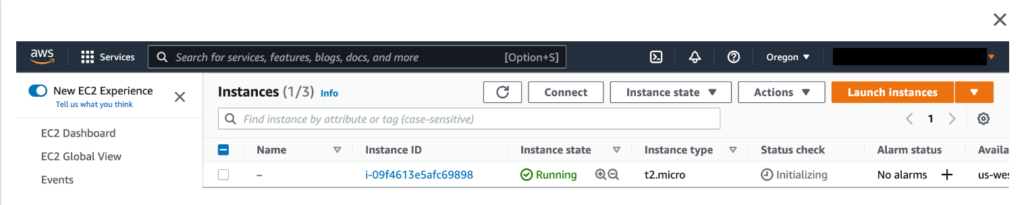
Once the job status appears as completed, navigate to the Amazon EC2 console and select Instances in the left navigation pane to see the restored EC2 instance. The EC2 instance is restored using the backup of the AMI and the attached EBS volume.

This brings us to the end of this blog article.

AWS Backup empowers organizations to protect their data assets with a scalable, automated, and secure backup solution.

Thanks for reading and stay tuned for more.

If you have any questions concerning this article or have an AWS project that requires our assistance, please reach out to us by leaving a comment below or email us at sales@accendnetworks.com

Thank you!

Categories
Blogs

Protecting Applications with AWS Shield

Protecting Applications with AWS Shield

DDoS (Distributed Denial of Service) attacks are still a big threat to online businesses. Attackers use millions of tonnes of traffic to bring down a victim’s web applications from multiple sources.

What is AWS Shield?

AWS Shield is a managed solution for preventing DDoS attacks basically on AWS-hosted applications. It inspects traffic in real-time and applies mitigation strategies automatically in order to avoid performance degradation.

Meanwhile, it inspects incoming requests fast and blocks harmful traffic using a multivariate method (based on traffic signatures, anomaly algorithms, packet filtering, and other techniques).

Types of AWS Shields:

AWS Shield Standard (Free Service)

It is a free service offered to all AWS customers. It guards you against 96% of today’s most prevalent attacks, such as SYN/ACK floods, Reflection attacks, and HTTP slow reads.

AWS Shield Advanced (Paid Service)

It is a paid service that adds volumetric DDoS mitigation, sophisticated attack detection, and mitigation for attacks at the application as well as network layers to AWS Shield.

You also have access to DDoS Response Team (DRT) 24*7 for tailored mitigation during attacks.

How does AWS Shield Work?

At the network and transport layers as well as the application layer, AWS Shield Standard and AWS Shield Advanced provide protection against DDoS attacks on resources.

Meanwhile, it provides automatic protection to all customers who use services like Amazon CloudFront, Amazon Route 53, and Elastic Load Balancer at no additional cost.

It enables organizations to build custom web access control lists (web ACLs) that can include traffic inspection conditions that become rules. There is a corresponding action for each rule (allow, block, or count).

The count mode can assist organizations in observing traffic patterns and determining whether to implement a given rule in allow or block mode.

The rate-limiting feature is one of the clearest examples of this. If an IP address receives more than two thousand requests in a five-minute period, it will be automatically blocked using this feature.

How To Setup AWS Shield

follow these steps in order to configure AWS Shield to your AWS account.

Sign in to the AWS Console. In the search box, type shield then select WAF and Shield under services.

In the left side of the navigation pane Under Shield, click on ‘Getting started’.

you will be brought to the AWS shield dashboard, then on the right side of the dashboard under Get started with shield advanced, click subscribe to shield advance.

In order to Subscribe to AWS, Shield Advanced, we need to accept all the terms & conditions.

Check all checkboxes to proceed further and then click on the ‘Subscribe’ button.

As a result, we have successfully subscribed to Advanced protection.

Now, we can proceed further ‘Add resources to Protect’.

Now, click on ‘Add resources to Protect’ to add resources.

Here, we can choose the Region and then can choose the Resource type that you want to protect and can click on Load more resources to add other resources.

NOTE: Membership alone does not grant access to all of the features, such as the AWS SRT (Shield Response Team), which can provide immediate support during an assault (including proactive event response, i.e. they will start to mitigate the attack as soon as they notice it). You must sign up for Enterprise or Business support to further receive SRT help.

This brings us to the end of this blog, thanks for reading and stay tuned for more.

Conclusion

AWS Shield stands as a critical component in the range of tools and services available to businesses and organizations seeking robust protection against Distributed Denial of Service (DDoS) attacks. By leveraging AWS Shield’s advanced capabilities, businesses can fortify their defences, mitigate potential disruptions, and maintain the integrity and availability of their applications and data in the face of evolving cyber threats.

If you have any questions concerning this article or have an AWS project that requires our assistance, please reach out to us by leaving a comment below or email us at sales@accendnetworks.com.

Thank you