Accend Networks San Francisco Bay Area Full Service IT Consulting Company

Categories
Blogs

Mastering Data Redundancy: Amazon S3 Replication Demystified.

Mastering Data Redundancy: Amazon S3 Replication Demystified.

In today’s data-driven world, safeguarding your digital assets is paramount. As the preferred choice for scalable and secure data storage, Amazon S3 has revolutionized the way we manage and protect our valuable information. However, the true power of data resilience lies in Amazon S3 Replication, an often-underutilized feature that holds the key to an unshakeable data strategy.

INTRODUCTION

Replication is a process of automatically copying objects between buckets in the same or different AWS Regions.
This copying happens when you create new objects or update existing ones. Amazon Simple Storage Service (S3) replication allows you to have an exact copy of your objects stored in other buckets.

PURPOSE OF S3 REPLICATION

Reduce Latency.
Enhance availability.
Disaster Recovery.
Copy Objects to cost-effective storage class.
Data redundancy.
Meet compliance requirements.

REPLICATION OPTIONS:

AMAZON S3 SAME REGION REPLICATION

S3 Same Region Replication (SRR) will automatically replicate objects from a source bucket to a destination bucket within the same AZ or different AZ in the same region. It uses asynchronous replication, which means objects are not copied to the destination bucket as soon as it is created or modified.

AMAZON S3 CROSS-REGION REPLICATION

S3 Cross Region Replication (CRR) will automatically replicate objects or data from the source bucket to the destination bucket in different regions. It minimizes latency for data access in different geographic regions.

S3 BATCH REPLICATION:

With CRR and SRR, Amazon S3 protects your data by automatically replicating new objects that you upload. S3 Batch Replication, on the other hand, lets you replicate existing objects using S3 Batch Operations, which are managed jobs.

Let’s get Practical

We will show steps in setting up s3 CRR

Conditions for enabling Cross-region replication

Setting up CRR:

Log in to the AWS s3 console then in the search box type s3, then select s3 under services.
In the s3 console, select buckets then click Create Bucket.
In the create bucket console we will name our bucket as sourcedemobucket11, for region, we will keep it in the Asia Pacific (Mumbai) ap-south 1 region. Also, note that the S3 bucket name needs to be globally unique. scroll down.
Under bucket versioning, it’s disabled by default. Enable it by checking the radio button. Then leave everything as default, scroll down, and click Create bucket.
Now following the same steps create a destination bucket: destinationdemobucket12 with versioning enabled, but this time let’s put it in US-east-1
After versioning is enabled leave everything as default and click Create bucket.
Next, click on your source bucket head over to the management tab then scroll down to the replication rule.
Now, click on “Create a replication rule”
Give your replication rule a name as “replicatedemo11’’
Choose the destination bucket as “destinationdemobucket12”.

Notice that you have an option to choose a destination bucket in another account.

In order to replicate objects from the source bucket to the destination bucket, you need to create an IAM role. So, select the drop-down button under the I AM role and click Create New Role.
If you want your S3 objects to be replicated within 15 minutes you need to check the “Replication Time Control (RTC) box. But you will be charged for this. So, we will move forward without enabling that for now and click on save.
As soon as you click on save, a screen will pop up asking if you want to replicate existing objects in the S3 bucket. But that will incur charges so we will proceed without replicating existing objects and click on submit.
After completing this setup, you can see a screen saying “Replication configuration successfully updated”.
head over to our destination bucket: destinationdemobucket12 to check if the uploaded file is replicated to our destination bucket. You can see that our uploaded file is successfully copied to the destination bucket. if you are not seeing it just click the refresh button.
Note: pull everything down

Facts about CRR

Thanks for your attention and stay tuned for more.

If you have any questions concerning this article or have an AWS project that require our assistance, please reach out to us by leaving a comment below or email us at 
[email protected].

Thank you!
Categories
Blogs

Maximizing Efficiency and Cost Savings with AWS S3 Lifecycle Management

Maximizing Efficiency and Cost Savings with AWS S3 Lifecycle Management

Introduction

In the age of cloud computing, managing vast amounts of data efficiently and cost-effectively is a top priority for organizations of all sizes. Amazon Web Services (AWS) offers a robust solution for this challenge through Amazon S3 (Simple Storage Service). AWS S3 is a scalable and durable cloud storage service used to store and retrieve data. To further optimize data management, AWS provides a feature known as S3 Lifecycle Management. This powerful tool automates the management of objects stored in S3 buckets, allowing users to optimize their storage costs, meet compliance requirements, and simplify data management. In this article, we will delve into the world of AWS S3 Lifecycle Management, exploring its benefits, configuration options, and real-world applications.

Understanding AWS S3 Lifecycle Management

AWS S3 Lifecycle Management is a set of rules and policies applied to S3 objects to automate their lifecycle. This automation is particularly valuable when managing large volumes of data, as it helps keep storage costs in check, ensures data durability, and streamlines data management.

The key components of S3 Lifecycle Management include two types of actions

Transition actions

These rules define when objects should transition from one storage class to another. You can specify actions such as moving objects from the standard storage class to the infrequent access (IA) storage class after a certain number of days or changing the storage class to Glacier for archiving purposes.

Expiration actions

Expiration rules define when objects should be deleted from S3. You can set expiration based on a specific number of days since the object’s creation or the date when it was last modified.

Benefits of AWS S3 Lifecycle Management

Cost Optimization.

Data Durability.

Compliance and Data Retention.

Simplified Data Management.

Real-World Applications

Data Backup and Archiving: you can set up rules to transition objects to Glacier after 90 days, ensuring data durability and cost savings.
Log Data Management: Organizations can automatically move logs from the standard storage class to Glacier after a certain period, saving on storage costs while maintaining compliance with data retention policies.
Content Delivery: In scenarios where you store content for your website or application in S3, you can use S3 Lifecycle Management to move old or infrequently accessed content to a more cost-effective storage class.

Creation of Lifecycle rule

sign-in to your AWS Management Console.
Type S3 in the search box, then select S3 under services.
In the Buckets list, choose the name of the bucket that you want to create a lifecycle rule.
From the above screen, we observe that the bucket is empty. Before uploading the objects in a bucket, you can choose to first create lifecycle rule.
Choose the Management tab, and choose the Create lifecycle rule.
Under Lifecycle rule name, enter a name for your rule, and call it demolifecyclerule. always remember the name must be unique within the bucket.
Choose the scope of the lifecycle rule, I will select apply to all objects so select the radio button then Scroll down.
Under Lifecycle rule actions, choose the actions that you want your lifecycle rule to perform, and remember depending on the actions that you choose, different options appear.
I will start by transitioning current versions of objects between storage classes.
Then under choose storage class transitions, choose standard-IA, under days after object creation, a minimum of 30 days is required, so enter 30 days then click add to add another transition.
In the other transition, I will now move to intelligent tiering, and here a minimum of 90 days is required, so I will enter it.
Next, I will choose Transition non-current versions of objects between storage classes: move to that tab then choose the storage class to transition to.
Then To permanently delete previous versions of objects, under Permanently delete noncurrent versions of objects, in Days after objects become noncurrent, enter the number of days. You can optionally specify the number of newer versions to retain by entering a value under.
Review then click Create rule.
Success.
clean up.
If you have any questions concerning this article or have an AWS project that require our assistance, please reach out to us by leaving a comment below or email us at [email protected]!
Thank you!
Categories
Blogs

Mastering Data Protection: AWS Backup.

Mastering Data Protection: AWS Backup.

In the ever-evolving digital landscape, where data is the lifeblood of businesses and organizations, the concept of data backup has become paramount. In essence, a backup is a secure and duplicate copy of your critical data and information. ensuring that in the face of unexpected calamities, or data corruption, your valuable information remains intact and recoverable. A well-implemented backup strategy is akin to a safety net for your digital assets, providing you with the assurance that, even in the worst-case scenarios, your data can be resurrected, and business operations can continue with minimal disruption.

What is AWS Backup Service and Why It Matters?

AWS Backup is a fully managed service offered by Amazon Web Services (AWS). It makes it easy to centralize and automate data protection across AWS services. AWS Backup is designed to simplify the backup process, making it easier to create, manage, and restore backups for critical data.

Key components of AWS backup service.

Backup’s

A backup or recovery point represents the content of a resource, such as an Amazon Elastic Block Store (Amazon EBS) volume at a specified time. It is a term that refers generally to the different backups in AWS services, such as Amazon EBS snapshots and DynamoDB backups.

Backup vaults

Vaults are simply logical containers that help you organize and manage your backups effectively. You can create multiple vaults to categorize and store backups based on your requirements.

Backup plan

These are at the heart of AWS Backup and define your backup policies and schedules. Within a backup plan, you specify settings such as backup frequency, retention periods, and lifecycle rules.

Lifecycle Rules:

Lifecycle rules determine the retention period of your backups and when they should be deleted. You can configure rules to automatically transition backups to cold storage or remove them when they’re no longer needed.

Backup Jobs:

Once the backup is scheduled, the backup details can be monitored status and other details like backup, restore, and copy activity. Backup job statuses include pending, running, aborted, completed, and failed.

Recovery Points:

These are specific states of your resources captured by backup jobs at particular points in time. AWS Backup retains multiple recovery points based on the retention settings in your backup plan.

Vault Lock:

Vault lock provides an additional layer of security for your backups. When enabled, it prevents the deletion of backup data for a specified retention period, ensuring data integrity and compliance with retention policies.

the importance of AWS backup in today’s data-driven world.

Data resilience.

Data loss can be catastrophic for any organization. AWS Backup ensures that your critical data is protected and can be quickly recovered in case of accidental deletions, hardware failures, or data corruption.

Security and Compliance

AWS Backup integrates with AWS Identity and Access Management (IAM) and AWS Key Management Service (KMS) to provide secure, encrypted backups. This is crucial for meeting regulatory requirements and maintaining data privacy.

Simplicity and Automation

AWS Backup simplifies the backup process with automated policies, making it easy to create, schedule, and manage backups without the need for complex scripting or manual interventions.

Centralized Management

With AWS Backup, you can manage backups for multiple AWS services from a single console, streamlining backup operations and reducing management overhead.

Cross-Region and Cross-Account Backups

AWS Backup enables you to create backups that span regions and AWS accounts, enhancing data resilience and disaster recovery capabilities.

Cross-Account and Cross-Regional Backups

Cross-account and cross-regional backups form the cornerstone of a resilient data protection strategy. Cross-account backups involve replicating critical data from one AWS account to another, mitigating the risk of accidental data loss, and enhancing security by adhering to the principle of least privilege.

Cross-regional backups extend this protection by replicating data across different AWS regions, guarding against region-specific outages or unforeseen disruptions.

If you have any questions concerning this article or have an AWS project that require our assistance, please reach out to us by leaving a comment below or email us at [email protected]

Thank you!
Categories
Blogs

A Comprehensive Guide to Creating and Managing Security Groups for Your Amazon EC2 Instances

A Comprehensive Guide to Creating and Managing Security Groups for Your Amazon EC2 Instances

Security-group-for-amazon

Introduction:

In the ever-evolving landscape of cloud computing, Amazon Elastic Compute Cloud (EC2) has emerged as a cornerstone for hosting web applications, running virtual servers, and managing various workloads in a scalable and cost-effective manner. As EC2 instances play a pivotal role in your AWS infrastructure, it’s essential to ensure that they are not only readily available but also well-protected from unauthorized access. This is where Amazon EC2 Security Groups come into the picture. In this comprehensive guide, we will provide you with a step-by-step approach to creating and managing security groups effectively.

Understanding Amazon EC2 Security Groups

Security Groups in AWS are essentially virtual firewalls that allow you to define inbound and outbound traffic rules for your EC2 instances. With security groups, you can establish fine-grained control over your EC2 instances’ network traffic, ensuring they are protected and compliant with your organization’s security policies

Let’s dive into the process of creating your first security group for an EC2 instance:

In the previous article on creating a new EC2 instance, we created our EC2 instance using the launch wizard security group that opened port 22 and source was from anywhere from the internet.

We will now configure the security group for our EC2 instance.

We will modify our SSH security group and only limit the source traffic to my IP address.

Again, we will open port 80 for HTTP and source is going to come from anywhere from the internet. we will also open port 443 for HTTPS and the source of this web traffic is also going to come from anywhere from the internet.

We will then go to our EC2 instance already launched and add these security group.

Log in to your AWS Management Console

Navigate to the EC2 Dashboard.

In the EC2 dashboard on the left side of the navigation pane under Network and security select security groups. Then click create security group

amazon-ec2
create-security-group

In the security group dashboard, give your security group a name, call it SSH security Group.

Use the same name as the description.

Under VPC, select your VPC click in the search box and select the default VPC.

Scroll down.

Under inbound rule click add rule.

Under type select the drop down and look for SSH, then select it. Under source select the drop down and select my IP, this will select the IP address of your local machine.

inbound-rules-info

Scroll down and click create security group.

create-security-group-tag

We have successfully created the SSH security group, and limited the source of traffic to our IP address. This is always a security best practice. This means that its only my IP address that can SSH into my EC2 instance through port 22.

shh-security-group

if you look at inbound rules tab under type, its SSH and under protocol is TCP, port range is 22 and source we can see my IP address 196.216.90.16/32

Next we will proceed and create our Web traffic security group, so click create security group a gain.

Under basic details, give your security group a name, call it web traffic security group. Under description I will give it a description. Type in allow HTTP and HTTPS traffic from the internet. Under VPC, select the default one.

Scroll down, under inbound rule, click add rule.

add-rules

Under type, select the drop down look for HTTP then select it. Under destination, click the drop and select anywhere for IPv4 addresses.

This will open port 80 for HTTP traffic if you look under port range, you will see the value 80.

Click add rule again then under source select the drop down and look for HTTPS then select it. Under destination, click the drop and select anywhere for IPV4 addresses.

Again, this will open port 443 for HTTPS traffic if you look under port range, you will see the value 443.

http-rules-info

Scroll down and click create security group.

create-security-group-tag

There we go; we have successfully created the web traffic security group and opened port 80 for HTTP and port 443 for HTTPS and our destination is anywhere in the internet.

web-traffic-security-group

If you look under inbound rules tab, we can see our IP version is IPv4, type is HTTPS and HTTP and port range is 80 and 443.

Next, we will now associate our security groups we’ve created to our EC2 instance.

Select your instance, click action drop down button, select security tab then click change security groups.

In the change security group tab, under associated security groups, click remove launch wizard security group.

Click add security group then click the search box for add security group, select the two security groups we’ve just created. The SSH and the web traffic security groups then click save.

associated-security-groups-add

We have successfully changed the security group settings for our EC2 instance.

security-groups-changed-successfully-1

Click instance ID, then navigate to the security tab, you will see the three security groups, one on port 22, port 80 and port 443.

instances-demo
instances-demo

This brings us to the end of this blog. Thanks for your time.

Pull everything down to avoid surprise bills.

Please leave us a comment or any questions if you have concerning this article below. Thank you! 

Categories
Blogs

EMBARK ON YOUR CLOUD JOURNEY – A GUIDE TO CREATING A NEW AMAZON EC2 INSTANCES

EMBARK ON YOUR CLOUD JOURNEY - A GUIDE TO CREATING A NEW AMAZON EC2 INSTANCES

In the realm of cloud computing, the Amazon Elastic Compute Cloud (EC2) service stands as a cornerstone of innovation, offering the power to deploy virtual servers with unparalleled flexibility and scalability. Whether you are an experienced cloud architect or just setting foot in the world of AWS, understanding how to create an EC2 instance is the first step towards harnessing the full potential of cloud-based computing.
In this comprehensive guide, we will walk you through the intricacies of creating an EC2 instance, demystifying the process from start to finish.
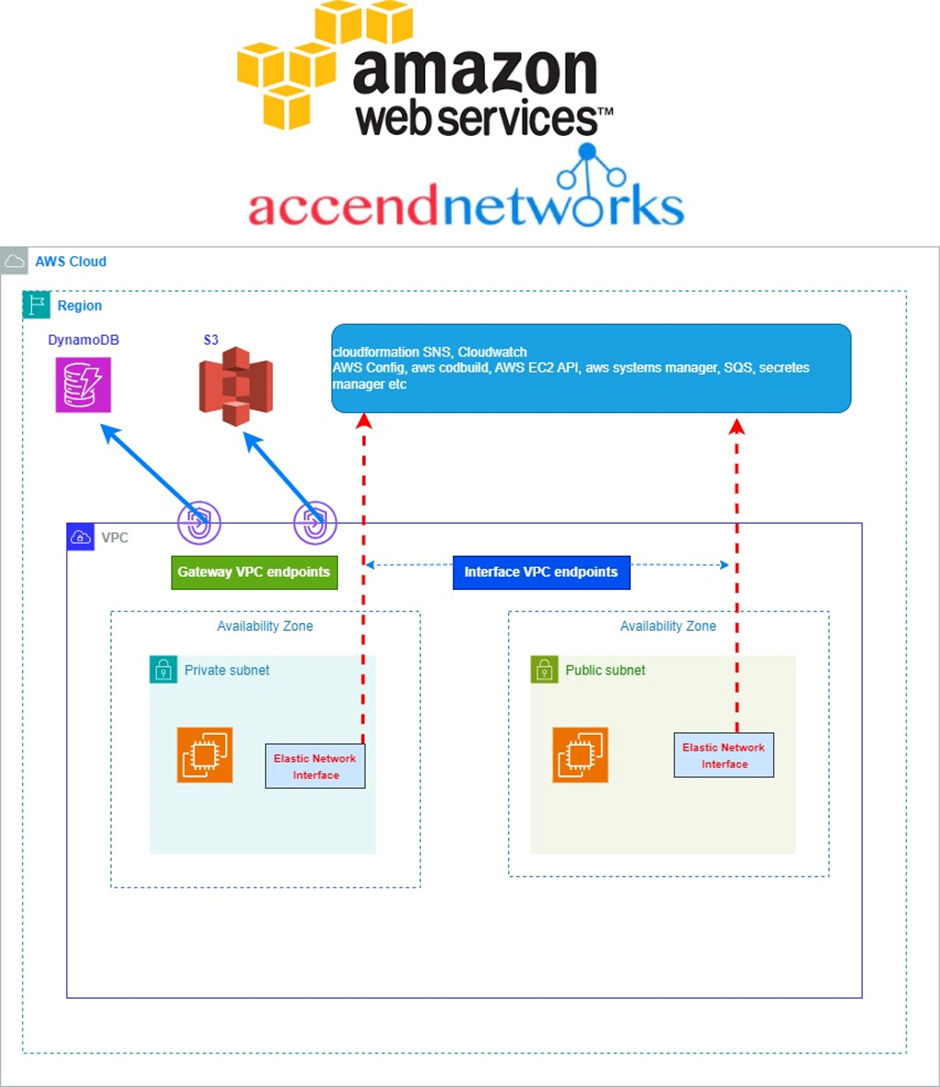
We will use the following reference architecture to accomplish our project.

What is an EC2 instance?

Amazon Elastic Compute Cloud (Amazon EC2) is a virtual server within Amazon Web Services (AWS) that provides on-demand, scalable computing capacity in the Amazon Web Services (AWS) Cloud. It allows users to run applications, host websites, and perform various computing tasks in a scalable and flexible manner.
Some key advantages of EC2 is that it reduces hardware costs so you can develop and deploy applications faster. You can use Amazon EC2 to launch as many or as few virtual servers as you need, configure security and networking, and manage storage. You can add capacity (scale up) to handle compute-heavy tasks, such as monthly or yearly processes, or spikes in website traffic. When usage decreases, you can reduce capacity (scale down) again. This is where the name Elastic comes from.
According to our reference architecture, we will launch this ec2 instance in the Northern Virginia region us-east-1.
Our reference architecture has not specified the VPC CIDR and subnet CIDR blocks so we will assume the default VPC.
Remember when you first created an AWS account, a default VPC is always created for you.
A Virtual Private Cloud (VPC) is a network infrastructure service provided by Amazon Web Services (AWS) that allows users to create and manage isolated, secure, and customizable network environments within the AWS cloud.
Our reference architecture contains two data centers (availability zones) for high availability and fault-tolerance.
To create an EC2 instance we need key pairs.
To create a key pair in the EC2 dashboard under network and security click key pairs
Then in the key pair dashboard click create key pairs.
We will give our key pair a aname  and I will call it ec2demokeypair. Key pair type will be RSA, and private key file formart will be .pem
Then click create key pair.
Succesfully created our key pairs. Take note of the directory where your private key is downloaded.
After creating our key pair we will now proceed and create our EC2 instance.
So in the search box, type EC2 then select EC2 under services.
In the EC2 dashboard select instances then select launch instances.

In the launch instance dashboard under name and tags, give your instance a name, and I will call it ec2demoinstance.

Then under application and OS Images, select the quickstart tab then select Amazon Linux.
Under Amazon machine Images, choose your machine image, I will leave it at Amazon Linux 2023 AMI this is free tier eligible.
Scroll down.

Under instance type, select the drop down and select t2.Micro, this is also free tier eligible then under key pair name select the drop down and select ec2demokey key pair you just created previously.

Scroll down, then click the edit button under networking.
Under VPC, we will leave it at our default VPC as you can see its already selected. When you first create an AWS account, a VPC is always created for you.
Then under subnet let’s put this instance in the us-east-1a this is according to our reference architecture, select the drop down and select it.
Then under firewall and security we will move with the launch wizard and if we can see  its inbound rules security details description it allows SSH on port 22 and source is anywhere from the internet. This will enable us SSH into our instance

We will leave storage as default:

We will also not use advance details so we will leave it. Move under review summery, take a review and then click launch instance:

There we go, our instance is launching:

Then success, our instance has successfully launched click your instance ID to view it.
We can see our instance is up and running and the status cheque is initializing wait for it to pass the status cheque, meanwhile you can click the refresh button.
After waiting for a couple of seconds our instance has initialized and passed status cheque. You can now start performing your operations on your instance.
This is all we need to do for this project.

Clean up resources to avoid surprise bills. Stay tuned for more thank you for your time.  

Feel free to reach out to us for any questions concerning this blog at [email protected].