


Accend Networks San Francisco Bay Area Full Service IT Consulting Company
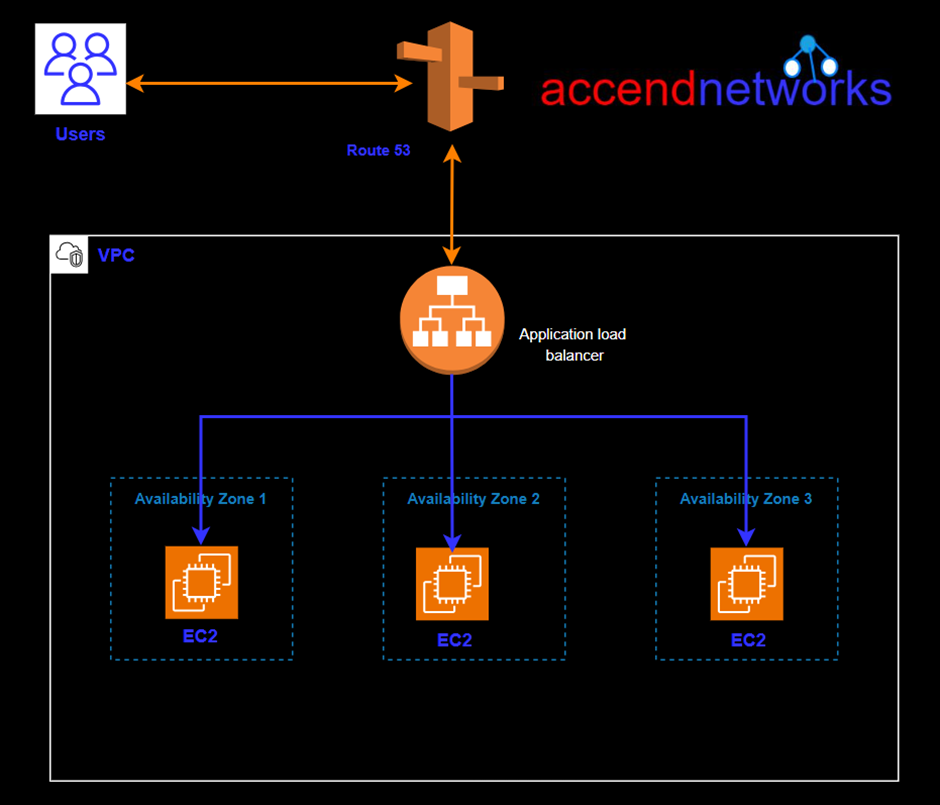
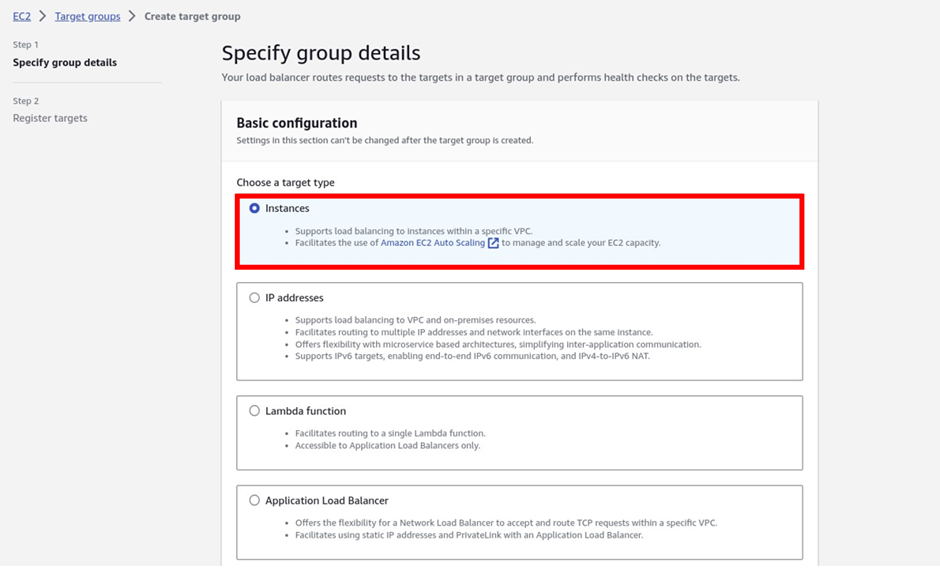
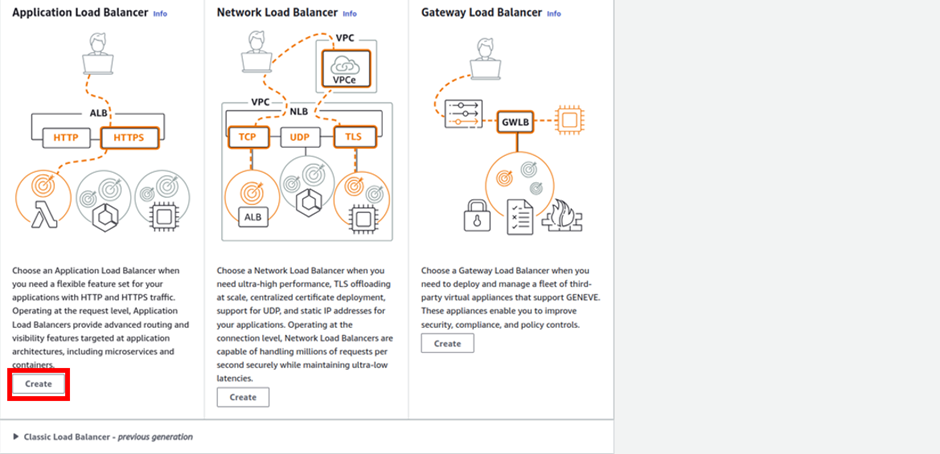
The Application Load Balancer is a feature of Elastic Load Balancing. Elastic Load Balancing automatically distributes your incoming traffic across multiple targets, such as EC2 instances, containers, and IP addresses, in one or more Availability Zones.
It monitors the health of its registered targets, and routes traffic only to the healthy targets.
High Availability: A load balancer distributes incoming application traffic across multiple targets, such as EC2 instances, in multiple Availability Zones. If one server fails or becomes overloaded, the load balancer redirects traffic to healthy servers, preventing service interruptions.
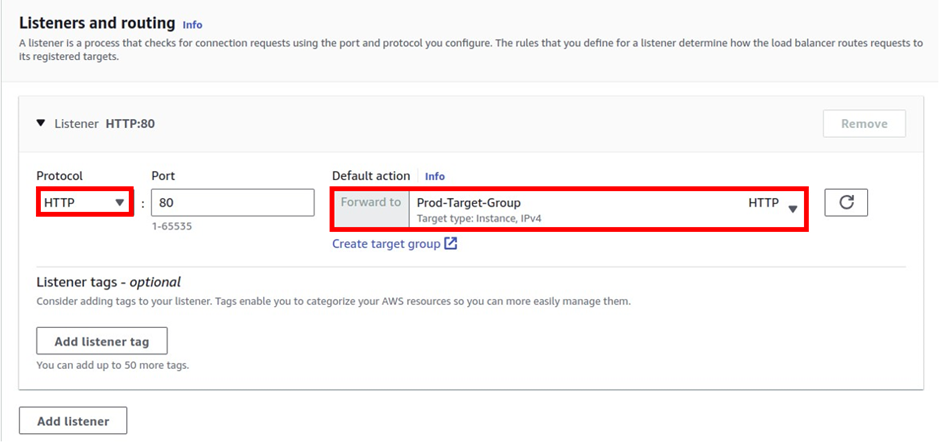
A listener checks for client connection requests, using the protocol and port you configure. The rules that you define for a listener determine how the load balancer routes requests to its registered targets.
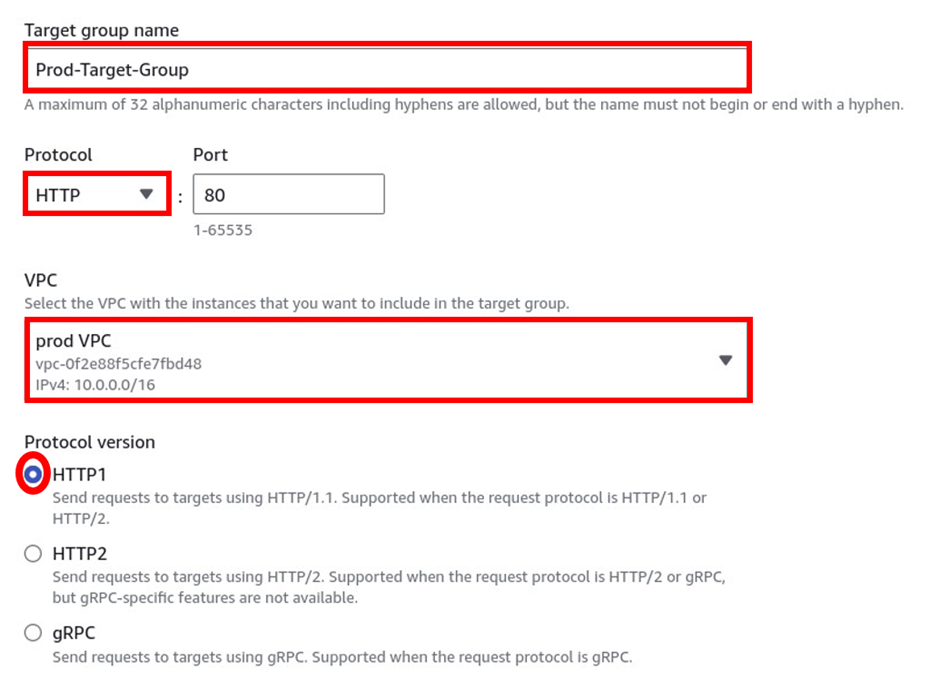
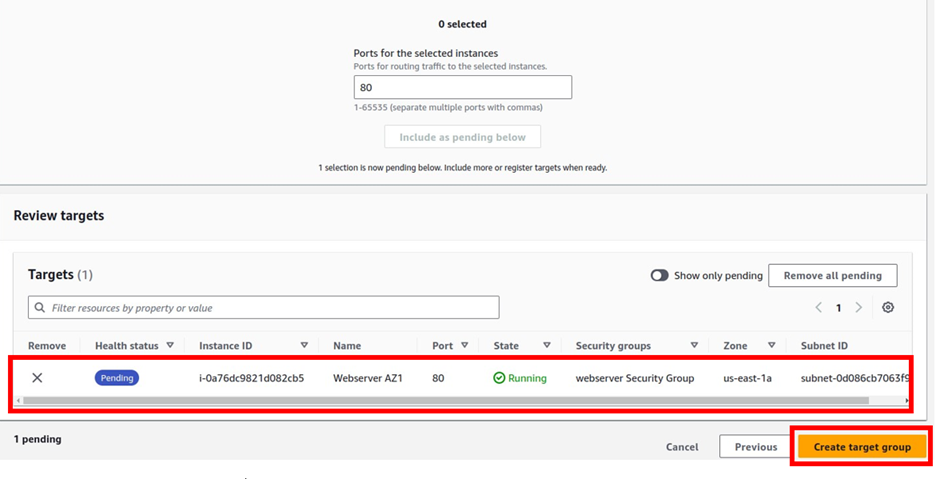
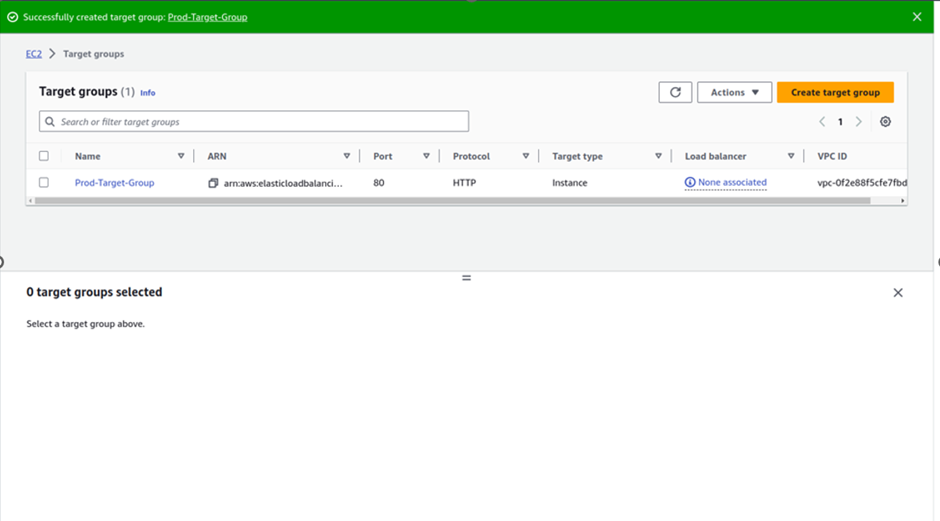
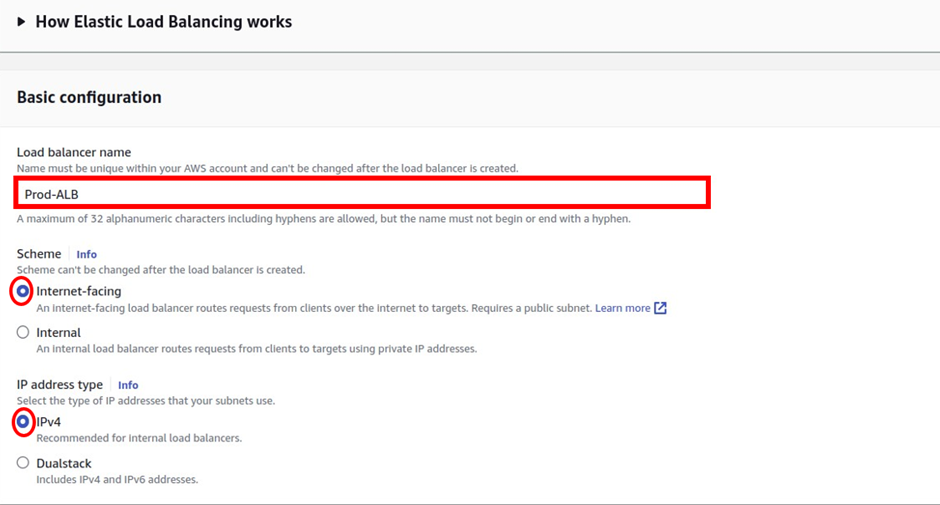
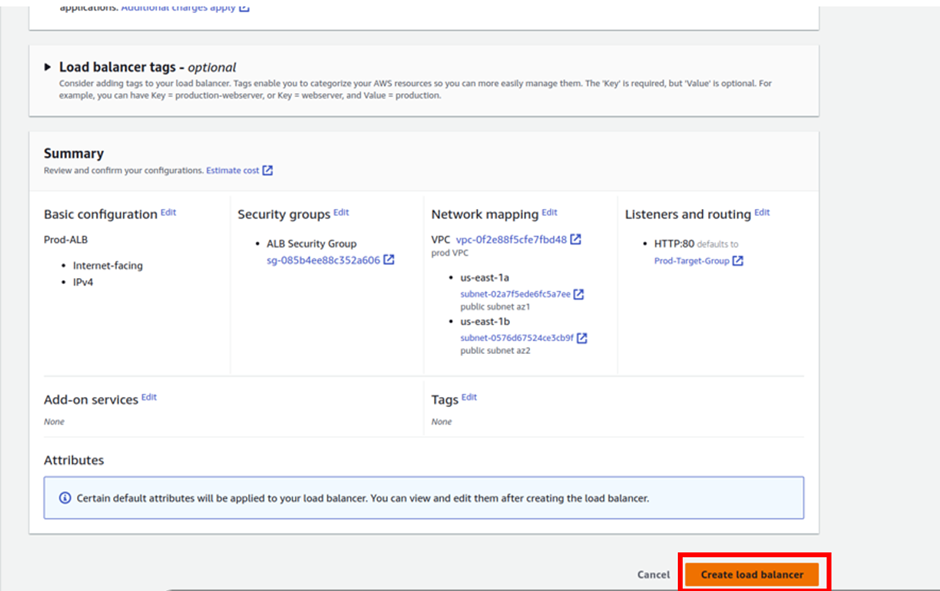
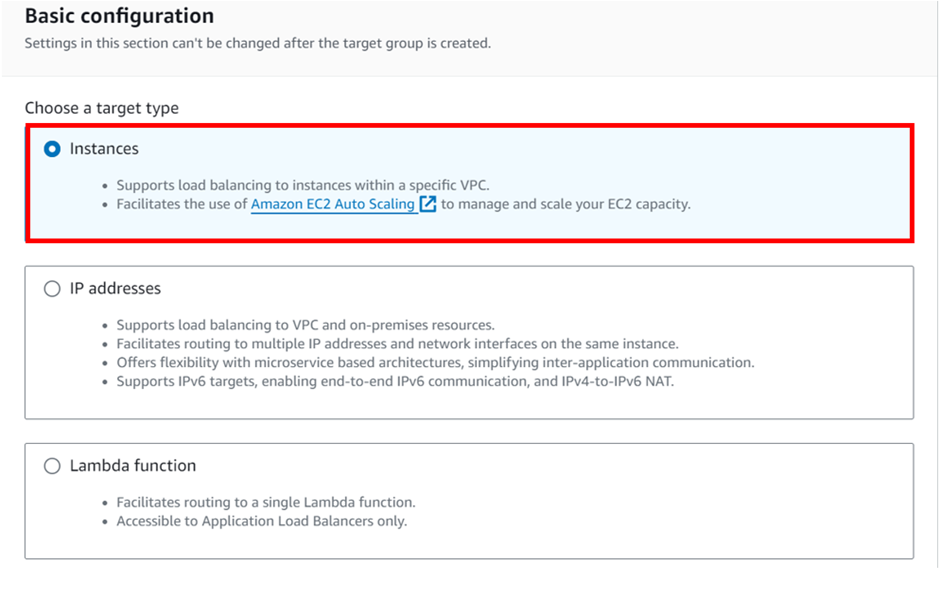
Under the target group name, give it a name, and call it the prod-target group. For protocol, it is going to be HTTP, port 80, and under VPC, select the drop-down and make sure you select your VPC, I had created a custom VPC, called prod-VPC, so I will select it. Then protocol version, leave it on HTTP1 then scroll down.
If you have any questions concerning this article or have an AWS project that requires our assistance, please reach out to us by leaving a comment below or email us at sales@accendnetworks.com.
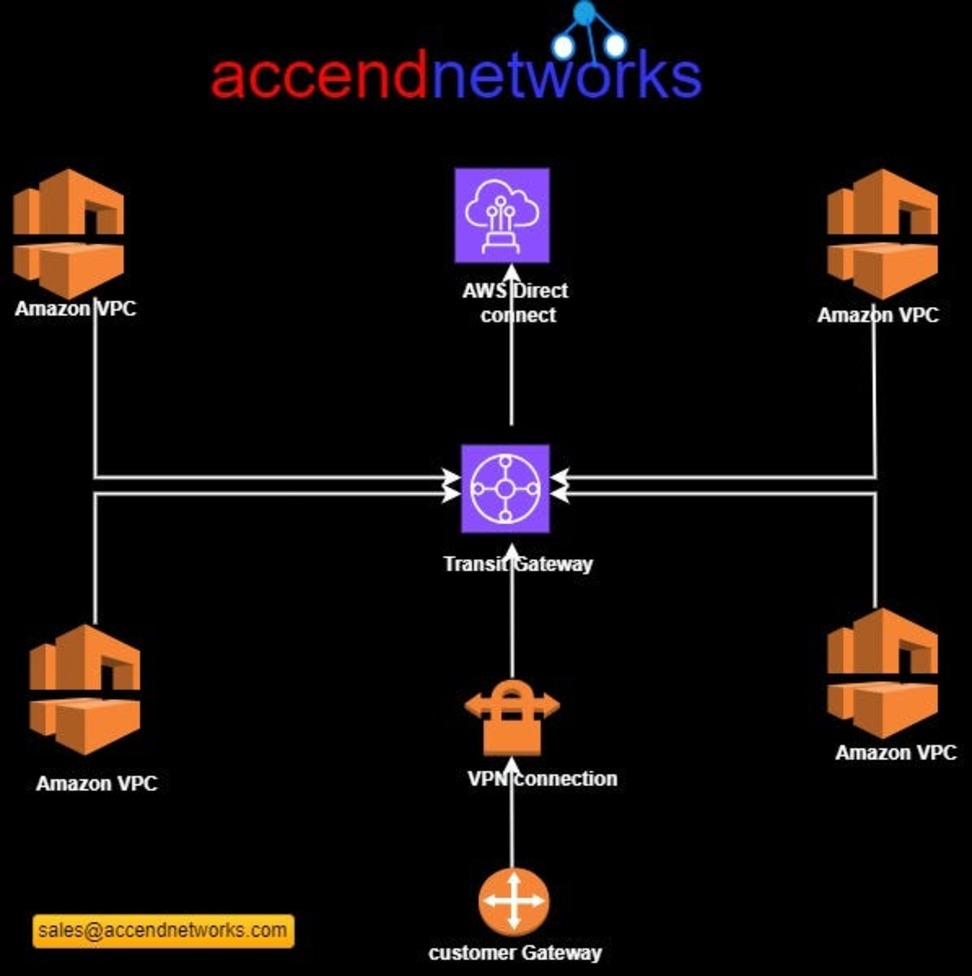
The network architecture in the cloud can quickly become complex as the number of VPCs, accounts, regions, on-premises data Centers, and edge locations grows. Transit Gateways allow customers to simplify the network layout and connectivity between all these environments.
AWS Transit Gateway serves as a central hub that connects VPCs and on-premises networks, eliminating the need for individual connections.
With Transit Gateway, you only need to create connections from the VPCs, VPNs, and Direct Connect links to the Transit Gateway. Transit Gateway will then dynamically route traffic between all the connected networks.

Examining the above architecture, we find ourselves navigating through four distinct Virtual Private Clouds (VPCs) denoted as A, B, C, and D, all seamlessly interconnected through established VPC peering links. The complexity becomes apparent as we observe the presence of six peering links, a testament to the intricacy involved in setting up connections for just four VPCs. It becomes evident that as the number of VPCs increases, the complexity of the setup grows exponentially.
In this complicated setup, we have six connections between the VPCs, and the corporate office is linked in through a customer gateway. Now, here’s where it gets tricky: connecting the corporate office to each VPC using Site-to-Site VPNs. This involves having a virtual gateway in each VPC and making a separate secure connection (VPN) to the customer gateway for each VPC. So, in the end, we’re dealing with four of these VPN connections, and it gets even more complicated if we want a backup plan (redundancy).
If we dive a bit deeper into the problem, adding redundancy means we need an extra customer gateway and twice the number of those VPN connections. The more we look into it, the more complex it becomes, turning our setup into a really tangled network.
Now, let’s check out the same setup but using a Transit Gateway. This other option can make all the connections simpler and easier to deal with.
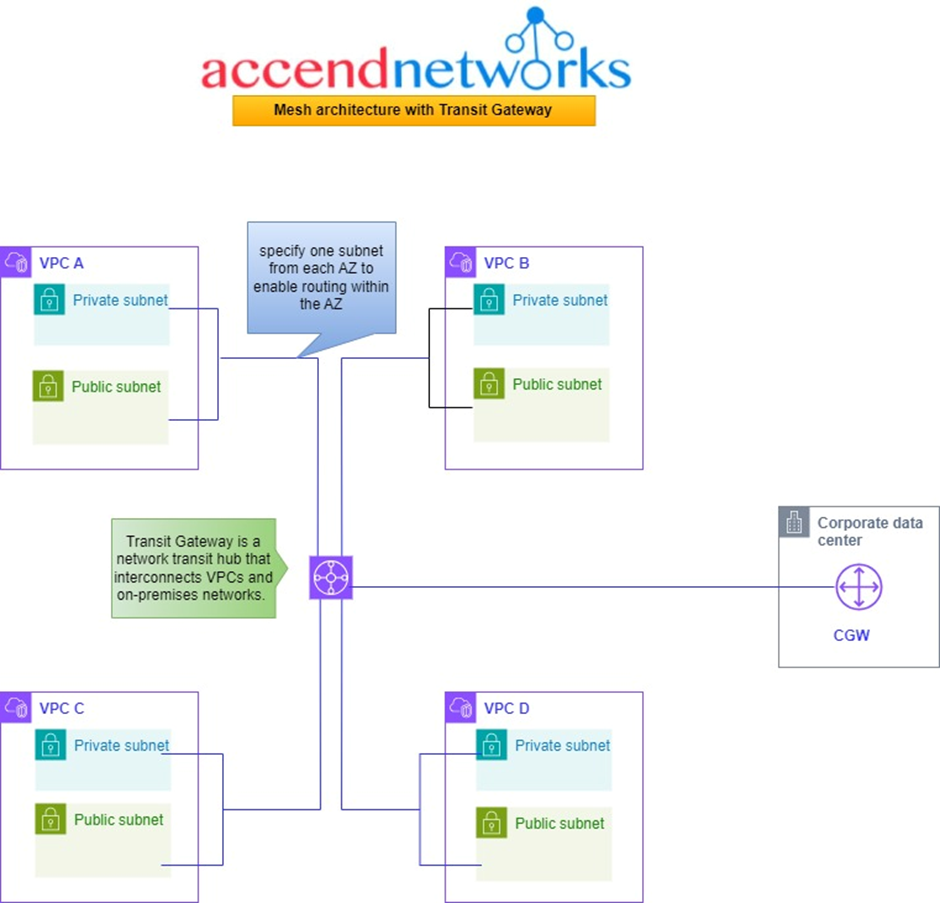
In this situation, as seen from the above architecture, we have the same four VPCs and a corporate office. Now, let’s simplify things by putting a Transit Gateway in the middle. It acts like the main hub that connects all the VPCs and the on-premises networks.
So, each of these VPCs gets linked to the Transit Gateway. You choose a subnet from each availability zone, which helps in directing traffic within that zone for other subnets. It’s like giving each area its own route.
Now, there’s also the customer data Center and the corporate office has a customer gateway that also connects to the Transit Gateway. That’s pretty much the setup. This service allows us to connect through a cloud router, this central hub, to any of these VPCs.
Transit Gateways (TGWs) can be attached to VPNs, Direct Connect Gateways, third-party appliances, and even other Transit Gateways in different regions or accounts.
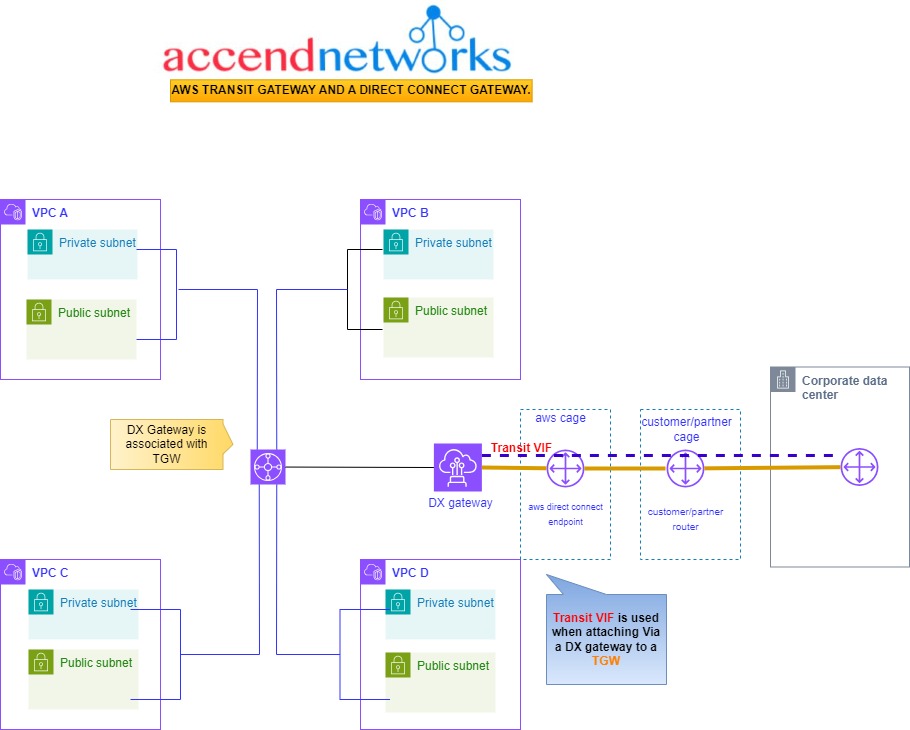
Explore how AWS Transit Gateway seamlessly integrates with Direct Connect Gateway, enabling transitive routing for growing companies with multiple VPCs.
Conclusion.
AWS Transit Gateway makes cloud network setups simpler. It acts like a hub connecting your VPCs, VPNs, and data Centers, making things easy to manage. It does away with confusing mesh setups, provides easy scalability, and keeps your network organized and secure.
As your cloud presence grows, Transit Gateway is the key to keeping your network simple, efficient, and secure.
If you have any questions concerning this article or have an AWS project that requires our assistance, please reach out to us by leaving a comment below or email us at sales@accendnetworks.com.
Thank you!
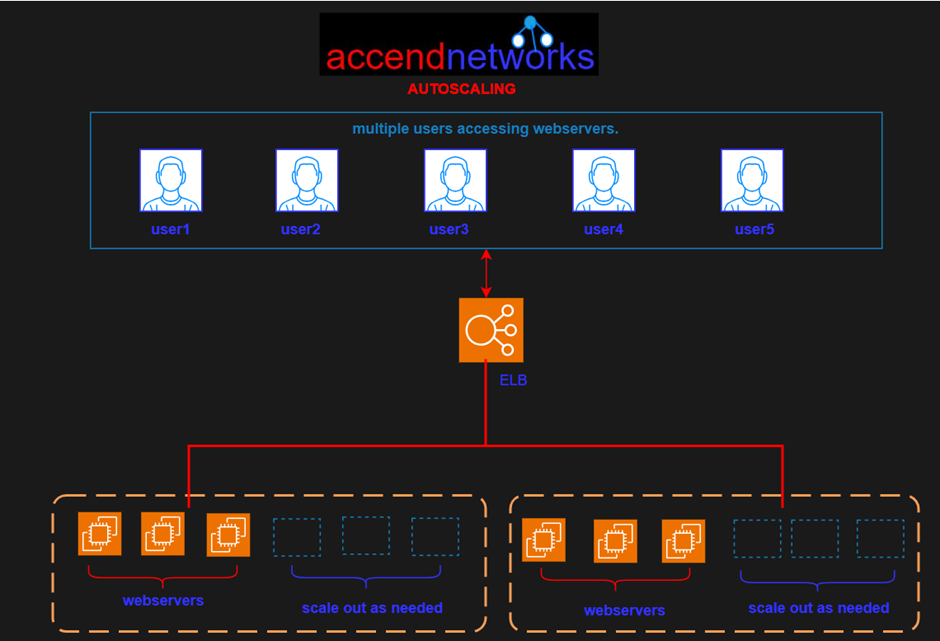
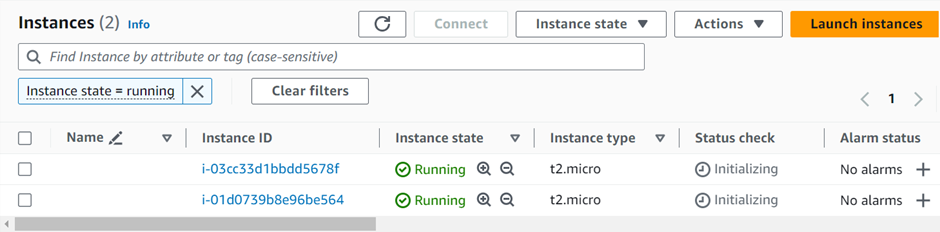
Amazon Web Services (AWS) offers a robust solution through Auto Scaling Groups, facilitating automatic adjustments to instance numbers based on demand.
First, consider a scenario where you want to maintain an average CPU utilization of 40%.
Then, for a more granular approach, consider Simple/Step Scaling.
Next, Scheduled Actions can be employed in scenarios where scaling needs can be anticipated. e.g. an increase in minimum capacity to 10 at 5 pm every Friday.
Now, Predictive Scaling introduces a proactive approach by continuously analyzing historical data.
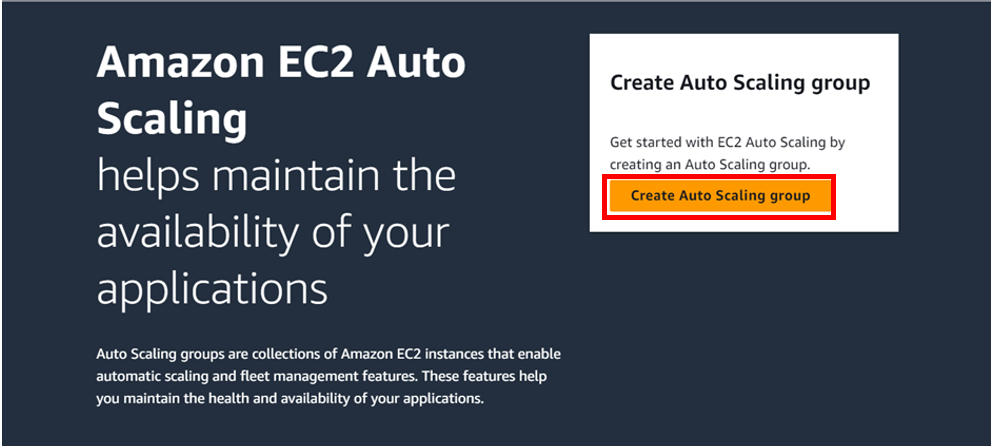
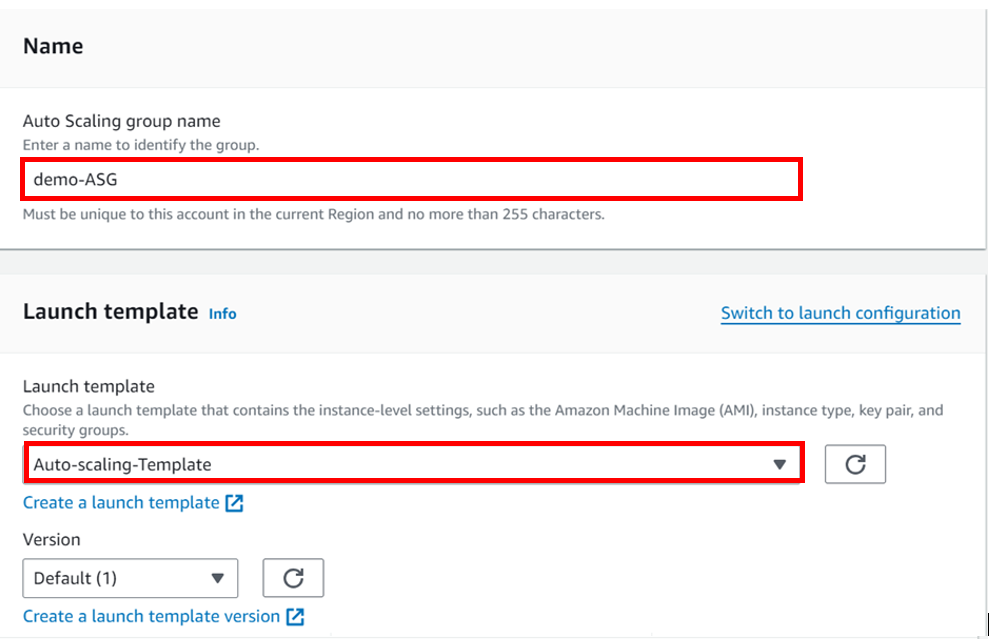
To create an autoscaling group, firstly start by creating a launch template. Then launch template specifies how to configure EC2 instances that are going to be launched by an autoscaling group. We will do this practically.
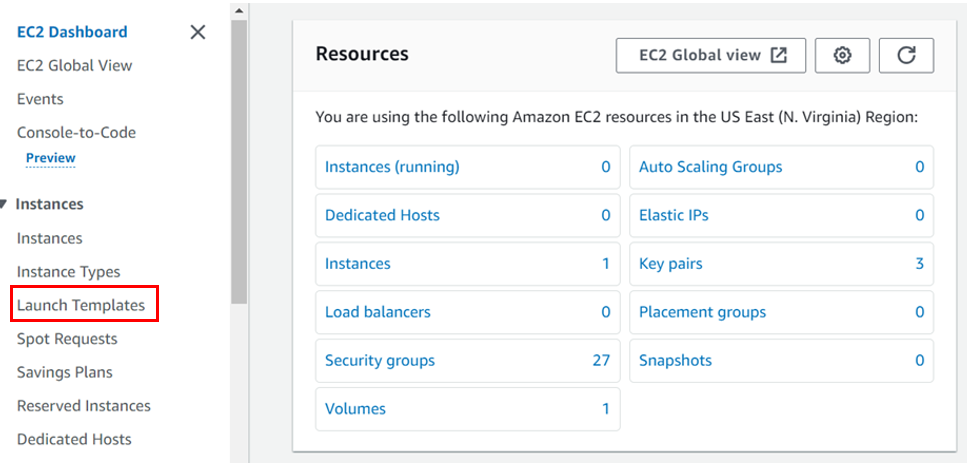
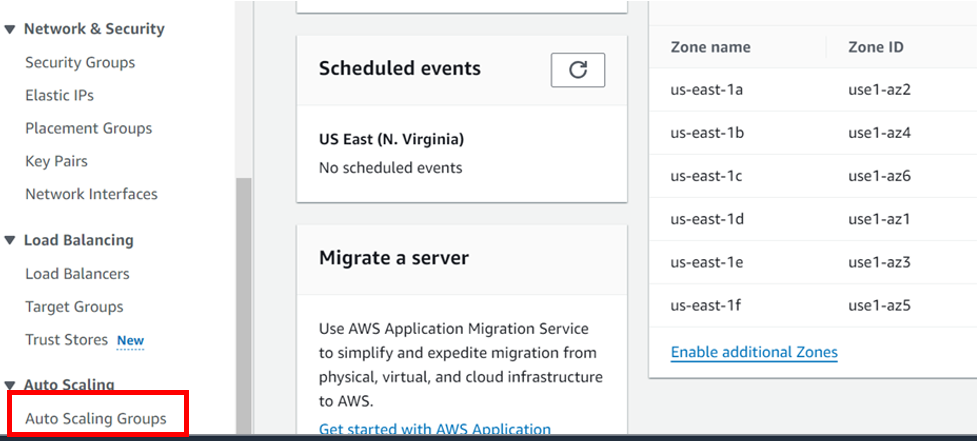
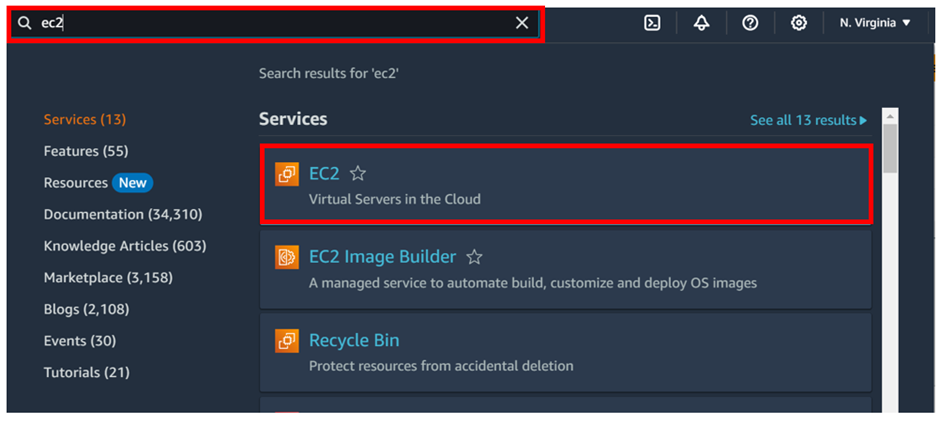
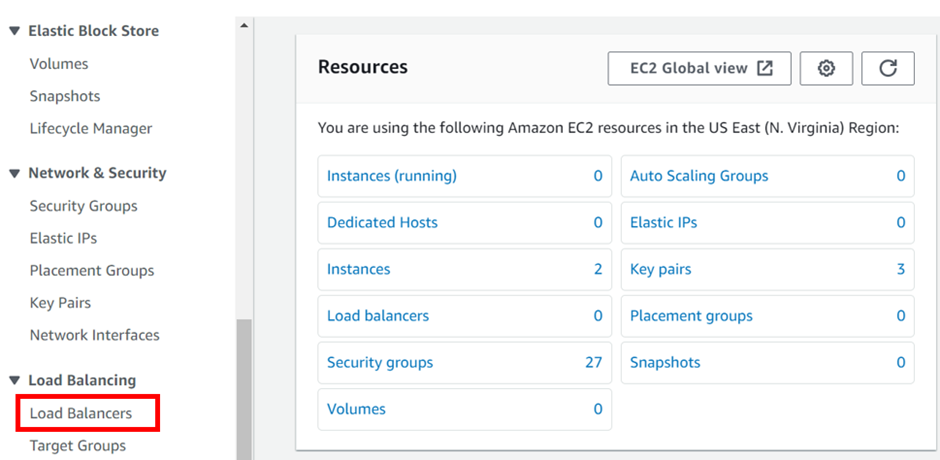
Go to the log into the management console, type EC2 in the search box, and select EC2 under services.
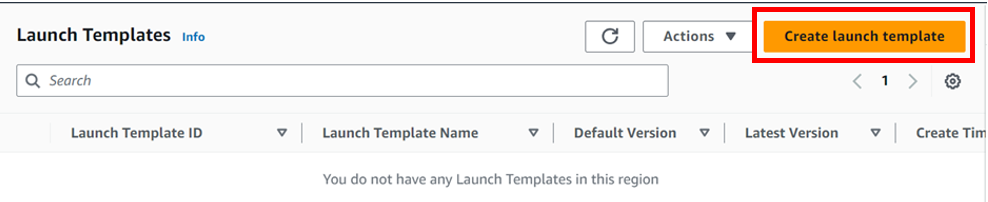
In the EC2 console on the left side of the navigation pane under instances, click launch templates, then click Create launch template.
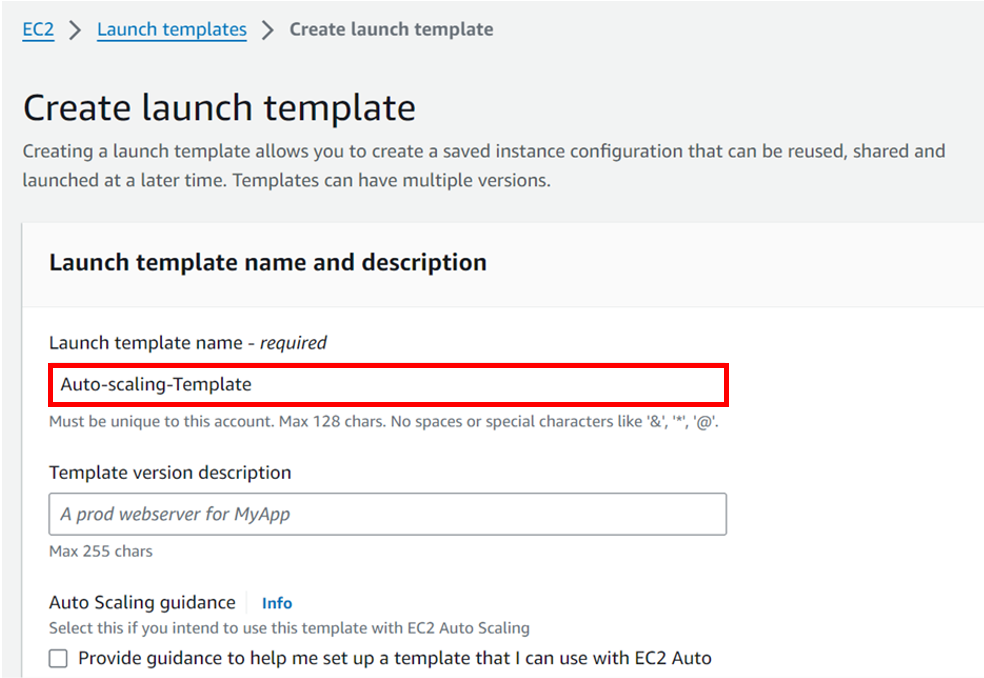
Give your template a name, I will call it Auto-scaling-Template and then you can skip the version description for now and scroll down.
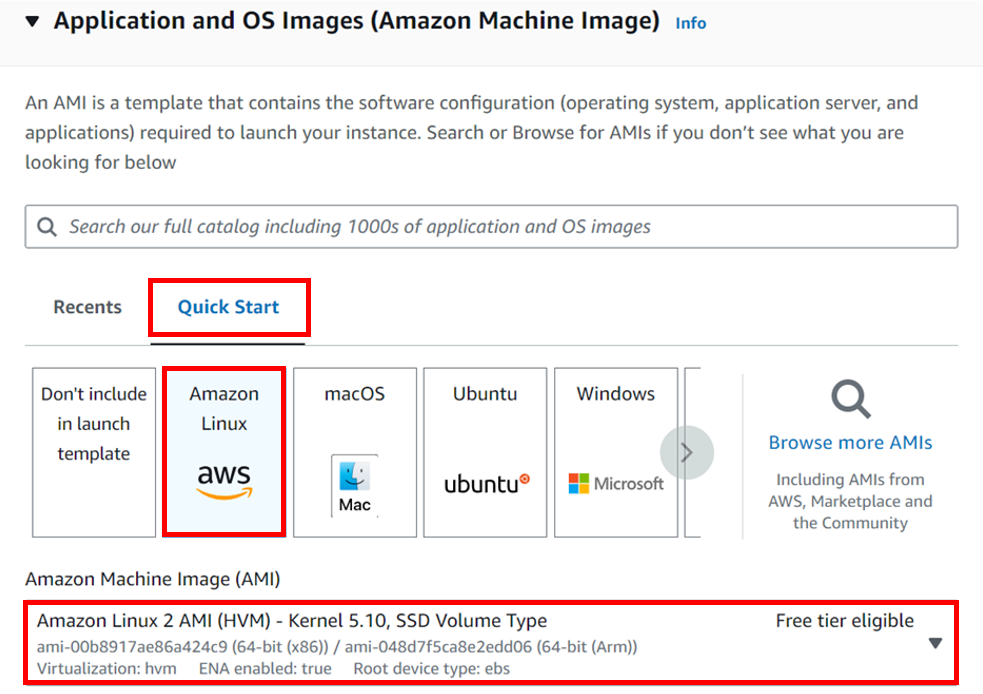
Under instance type select the drop-down button and select t2. Micro because it is the free one. Then under key-pair login, select the drop-down and select your key-pair. Scroll down.

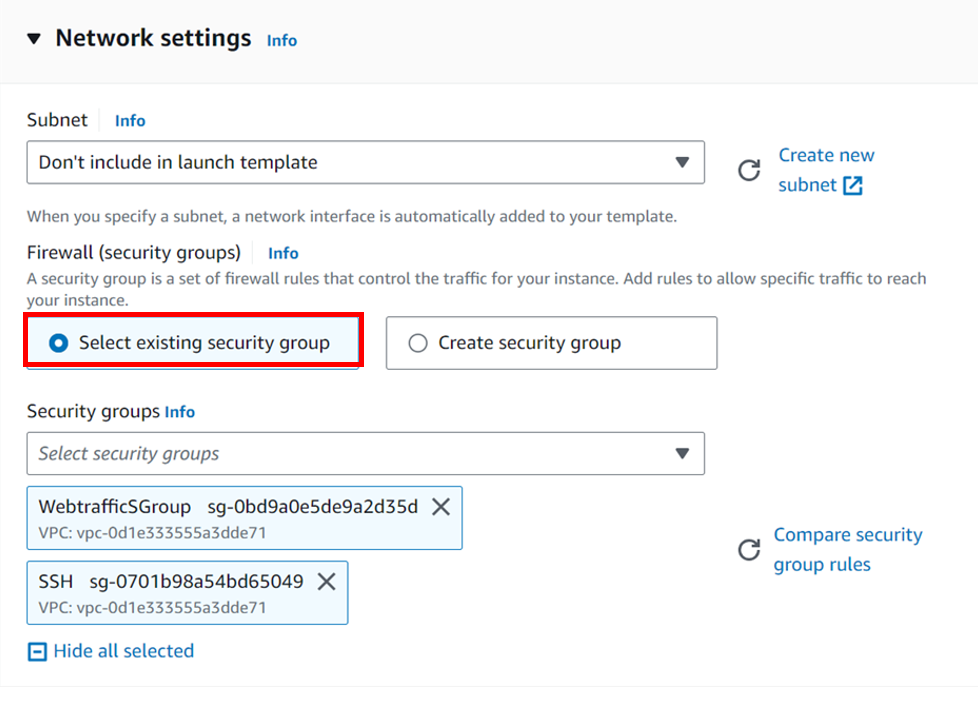


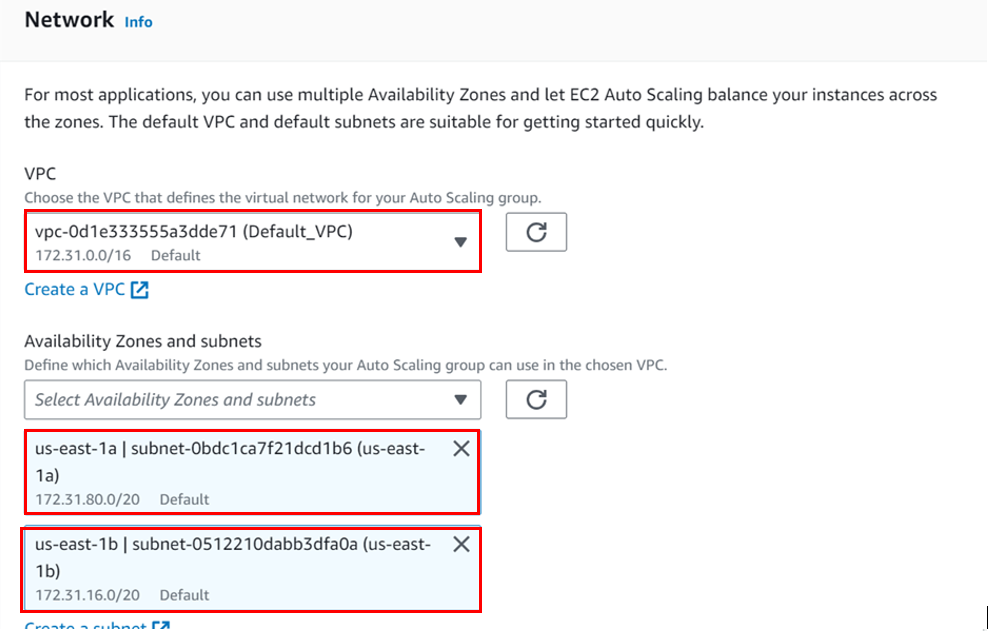
Under network, select your VPC, I will move with the default VPC and then under availability zone, select the drop-down and select your AZs, I will select Us-east-1a, and then 1b AZs then scroll down and click next.


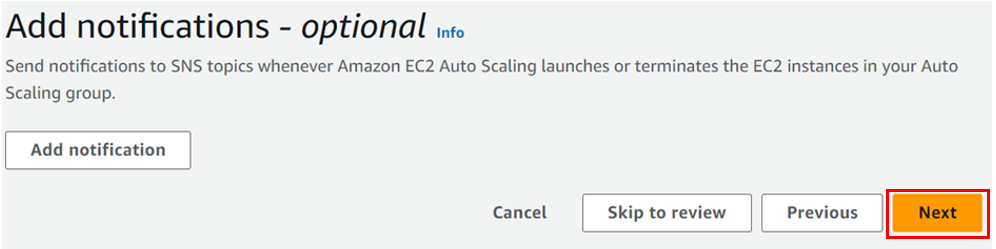
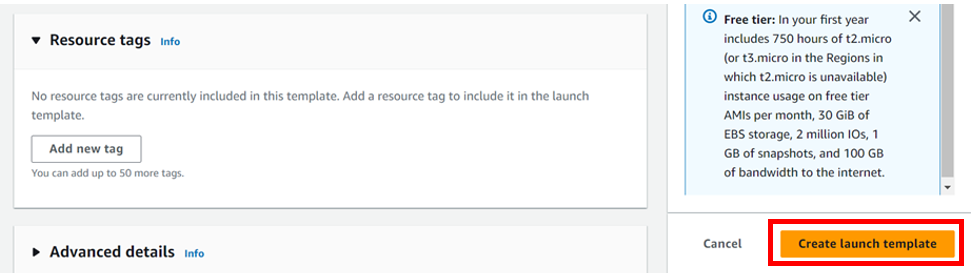
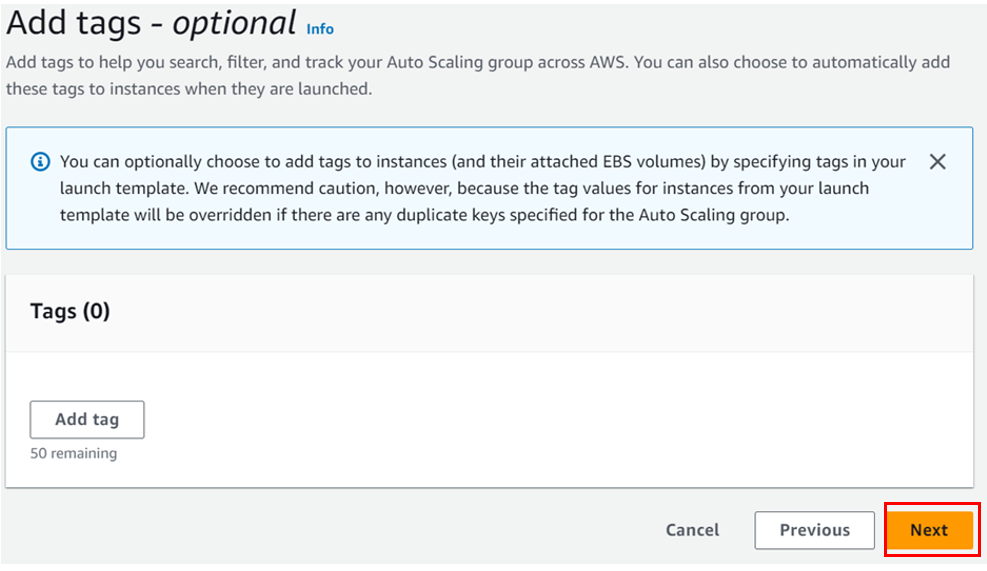
Leave tags optional and click next.
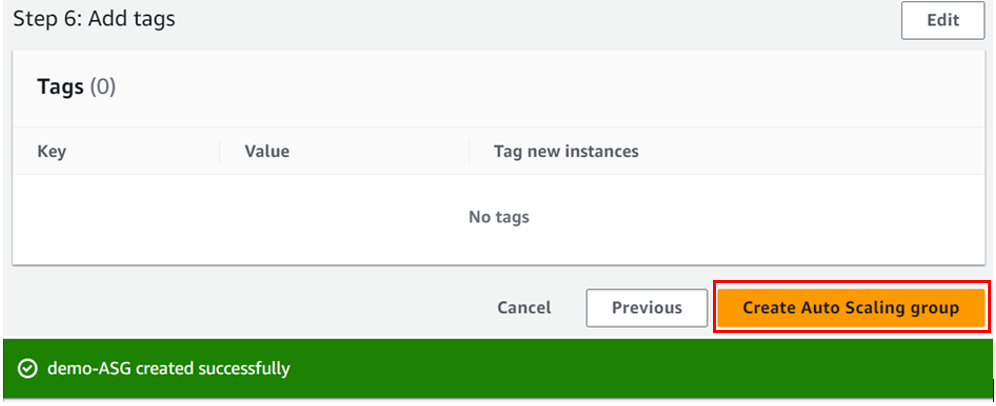
On this page, review and click create auto-scaling-group.
If you have any questions concerning this article or have an AWS project that requires our assistance, please reach out to us by leaving a comment below or email us at sales@accendnetworks.com.
Thank you!
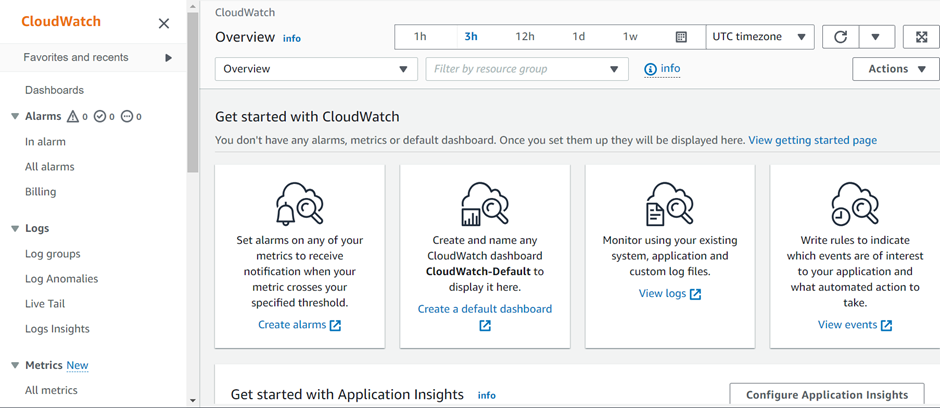
CloudWatch metrics give the users visibility into resource utilization, application performance, and operational health. These help you make sure that you can resolve technical issues and streamline processes and that the application runs smoothly.
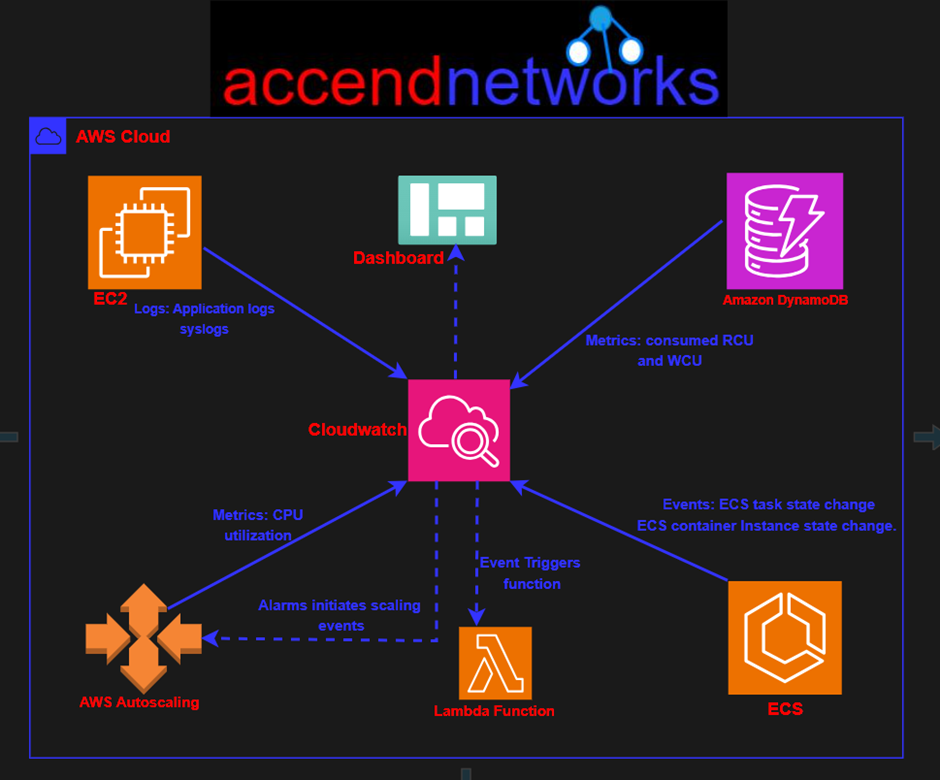
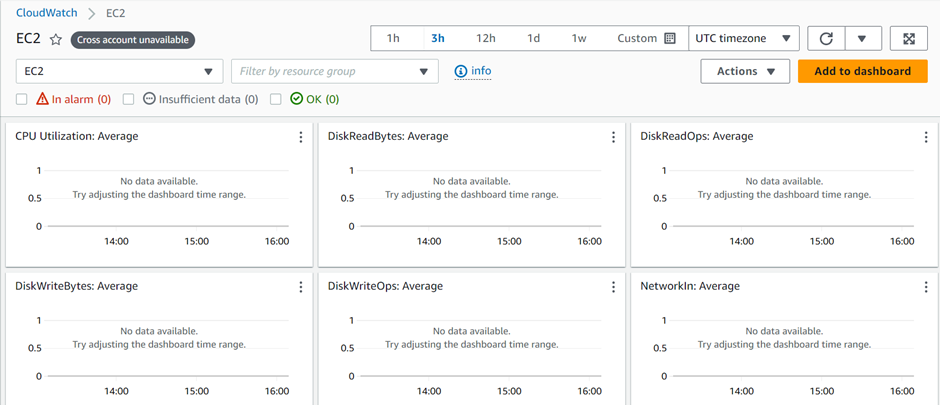
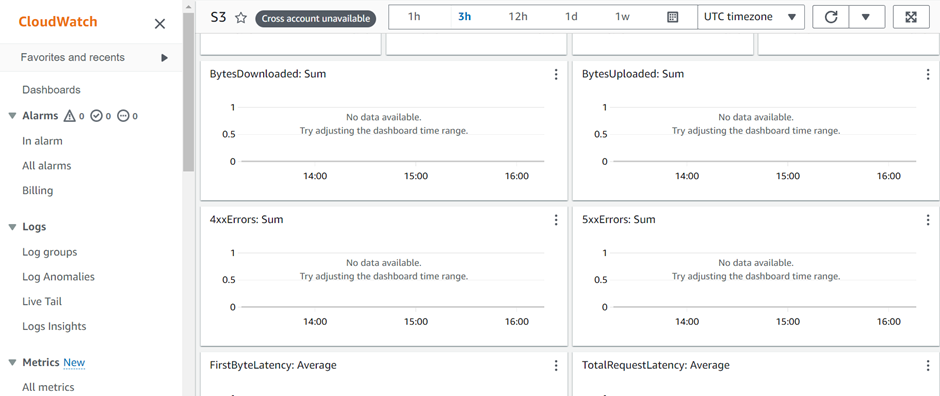

The Amazon CloudWatch service provides real-time insights into cloud operations. Hence, this enable you to optimize operational efficiency and reduce costs.
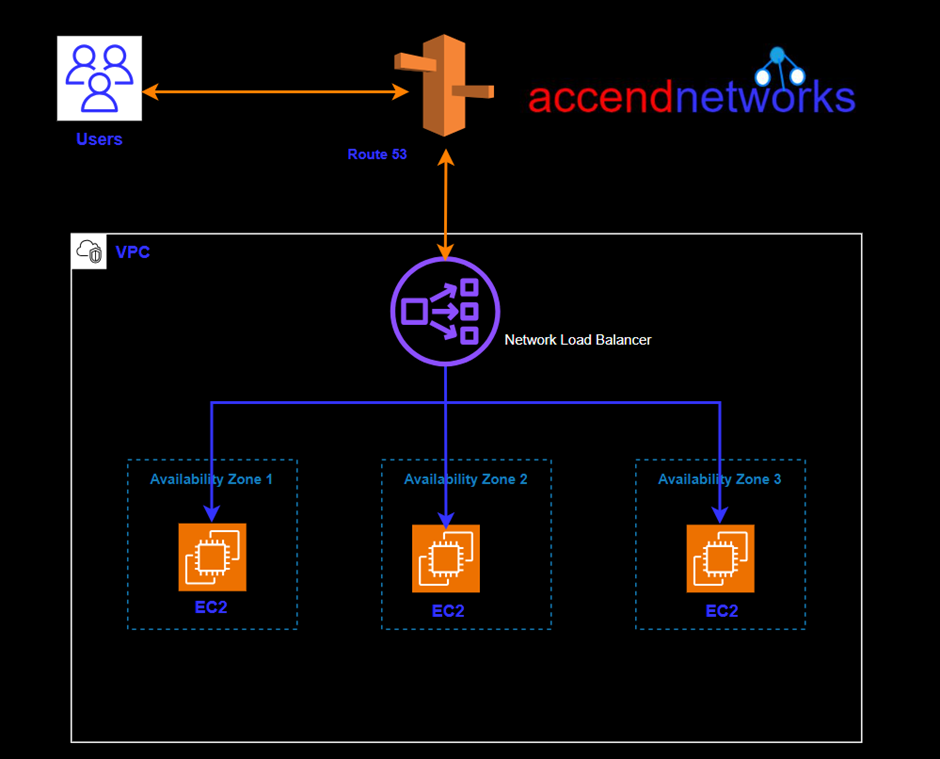
In today’s fast-paced digital era, where every millisecond counts, minimizing latency and optimizing network performance have become paramount for businesses. Network load balancing plays a crucial role in achieving these goals. By distributing incoming network traffic across multiple servers, network load balancing ensures efficient resource utilization, enhances scalability, and reduces latency.
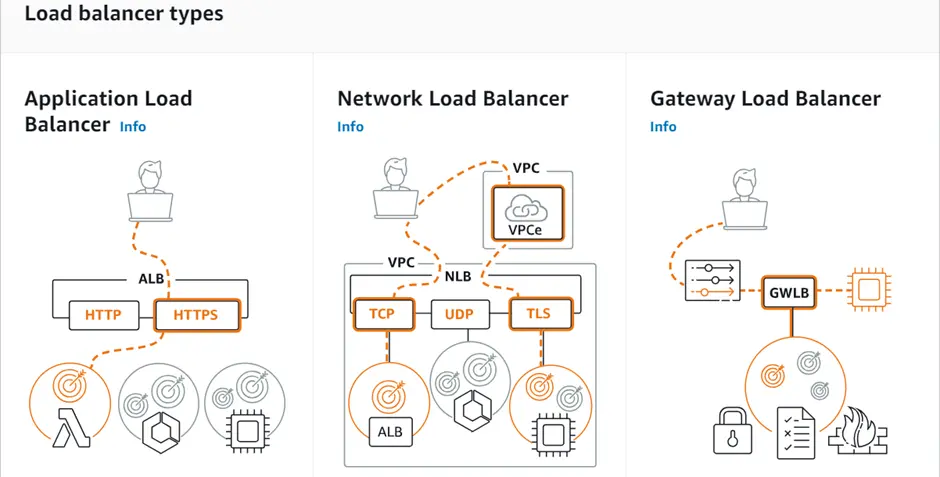
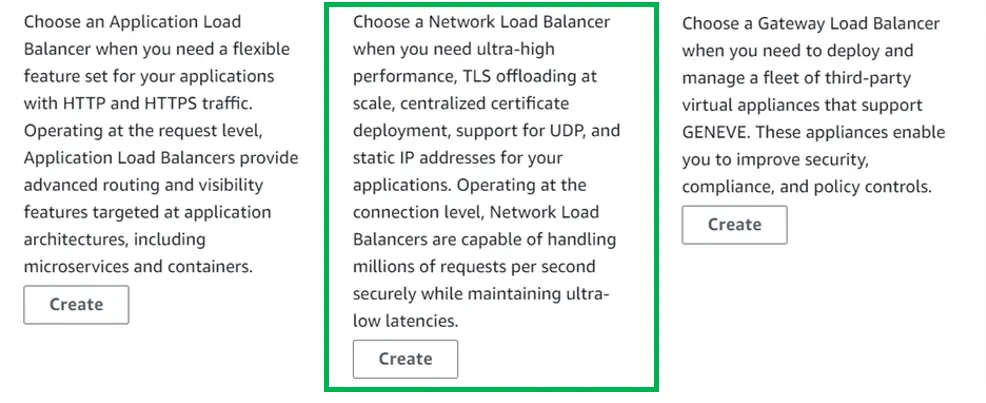
We can see in the above diagram, choose a network load balancer if you need ultra-high performance.
A Network Load Balancer operates on the Transport Layer (Layer 4) of the Open Systems Interconnection (OSI) model rather than the application layer, making it ideal for Transmission Control Protocol (TCP) and User Datagram Protocol (UDP) traffic. It is suitable for applications anticipating an unexpected spike in traffic because it can handle millions of concurrent requests per second.
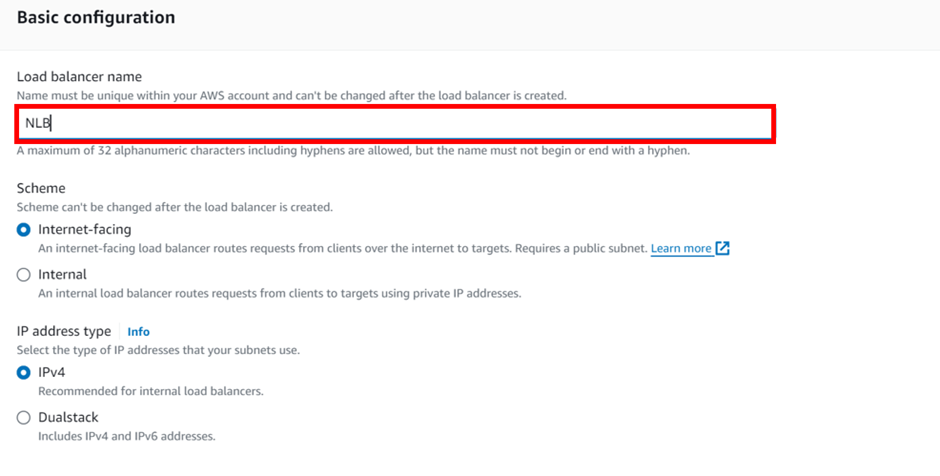
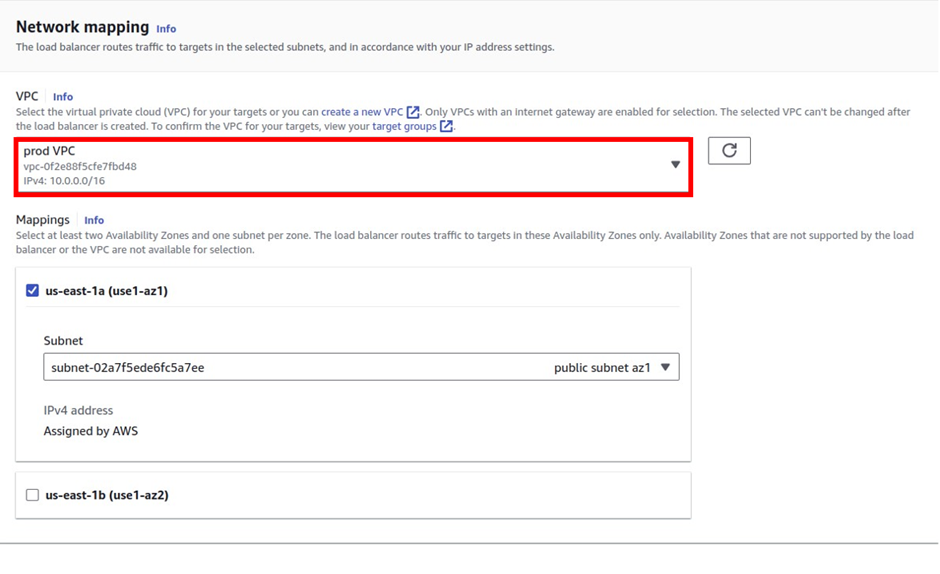
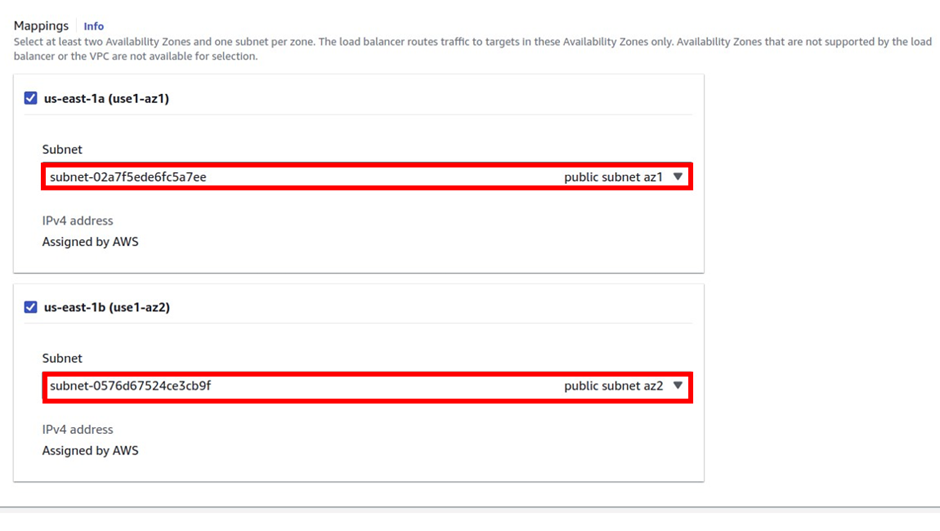
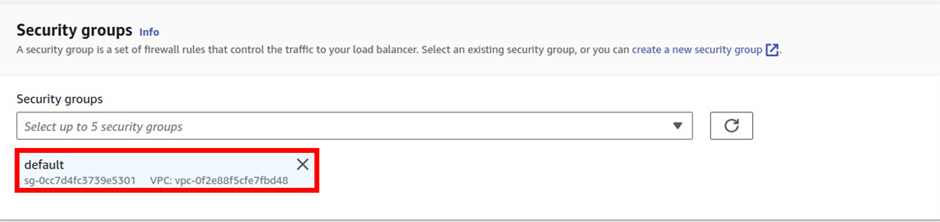
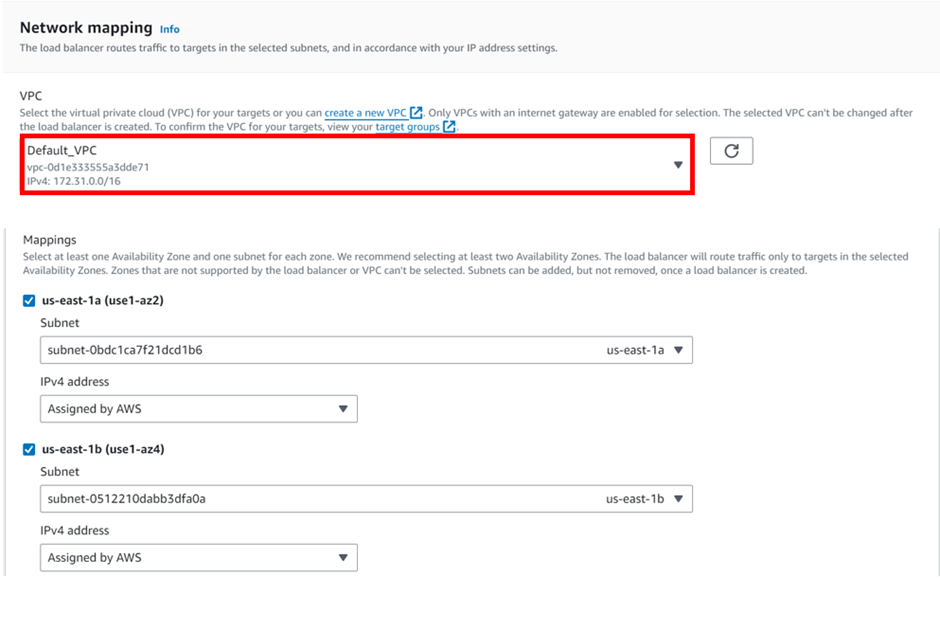
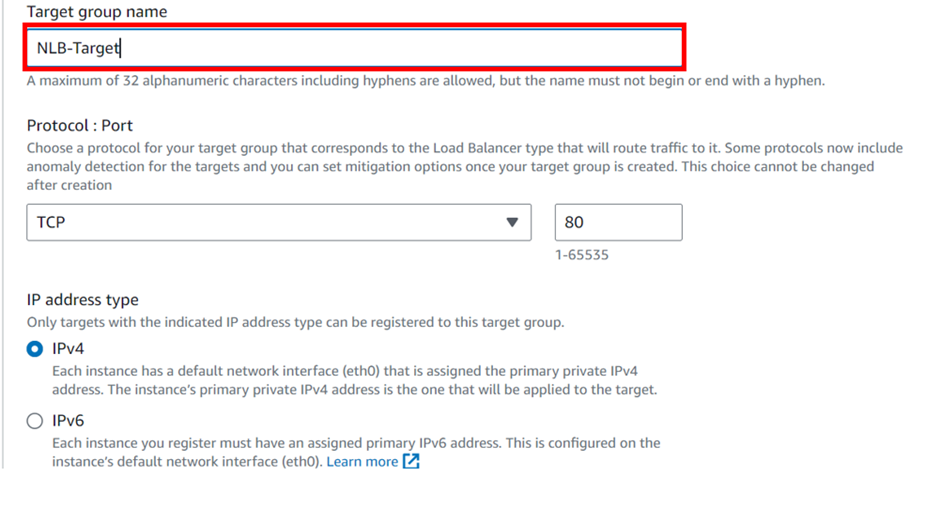
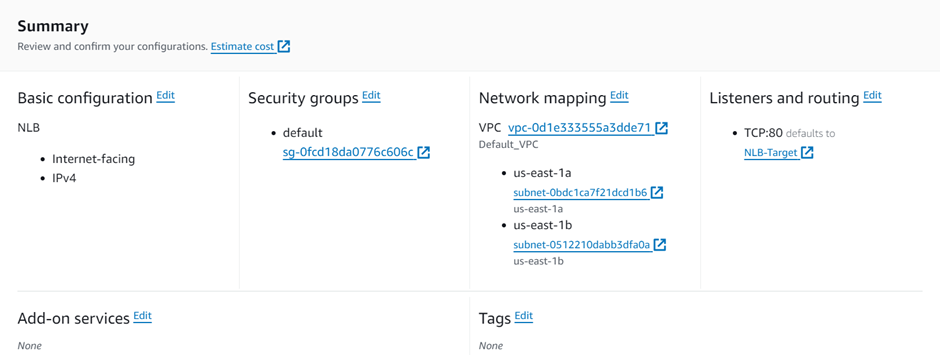
select your VPC, then under mappings select the availability zones make sure to select the AZs where your targets will reside for the EC2 instance target then under security Select the security group for your load balancer then scroll down.


If you have any questions concerning this article or have an AWS project that requires our assistance, please reach out to us by leaving a comment below or email us at sales@accendnetworks.com.