Deployment of SDDC using VMware Cloud on AWS Services
VMware Cloud on AWS brings VMware’s enterprise-class Software-Defined Data Center (SDDC) software to the AWS Cloud and enables customers to run production applications across VMware vSphere-based private, public, and hybrid cloud environments with optimized access to AWS.
Benefits of VMware Cloud on AWS
Often enterprises are given a binary choice between private and public cloud as their deployment options. In these cases, many enterprises have a hybrid environment where two different teams manage two separate hosting platforms. VMware Cloud on AWS offers a hybrid platform where IT organizations have access to both public and private while retaining the ability to shift workloads seamlessly between them. Being able to live migrate and extend into a virtual machine without having to reconfigure an application provides a much more flexible environment.
VMware Cloud on AWS allows access to the range of AWS services as an extension of an existing VMware solution. IT organizations can rent a VMware SDDC using some of the latest technologies with the flexibility of the pay-as-you-go model. Companies can quickly add capacity to a new project or move workloads hosted on dedicated hardware to the cloud.
Prerequisites and Limitations for VMWare Cloud on AWS
The following are some prerequisites that you will need to consider before deploying VMware Cloud on AWS:
MyVMware Account: This profile will need to be completely filled out before you can even start your initial deployment.
AWS Account: This account needs to have administrative privileges for some of the reasons in deployment.
Activation Link: This link will be sent to the email address correlated with your MyVMware profile.
VMC on AWS offers many capabilities that have some limitations at maximum and minimum levels, and these limits are considered hard limits (can’t be changed) unless otherwise indicated.
The Architecture of VMware Cloud on AWS
VMware Cloud on AWS is based on VMware software stack such as vSphere, vCenter, vSAN, NSX-T, designed to run on AWS bare-metal dedicated infrastructure. It enables businesses to manage VMware-based resources and tools on AWS with seamless integration with other Amazon services such as Amazon EC2, Amazon S3, Amazon Redshift, Amazon Direct Connect, Amazon RDS, and Amazon DynamoDB.
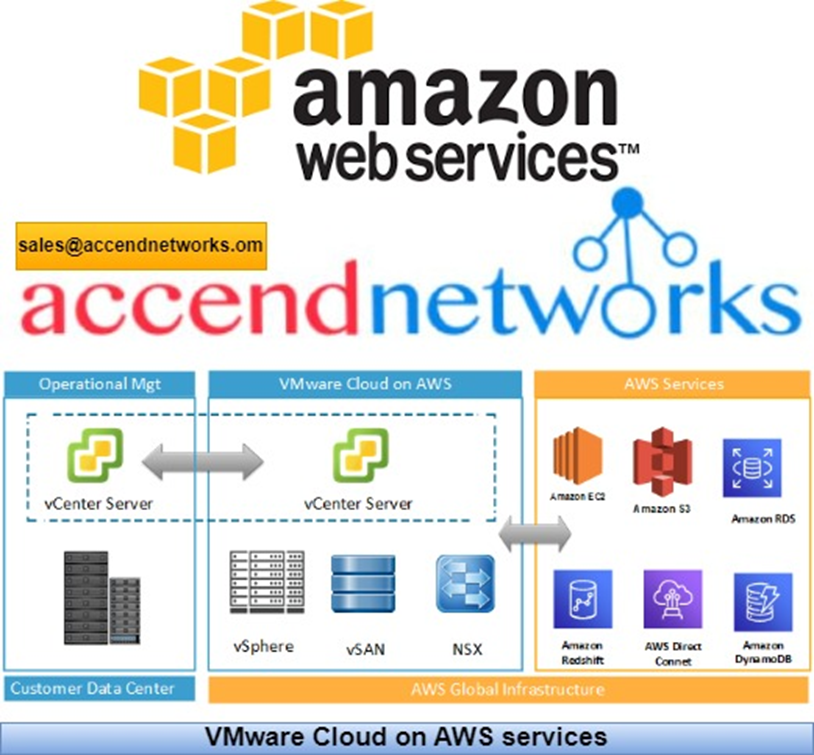
VMware Cloud on AWS allows you to create vSphere data centers on Amazon Web Services. These vSphere data centers include vCenter Server for managing your data center, vSAN for storage, and VMware NSX for networking. Using Hybrid Linked Mode, you can connect an on-premises data center to your cloud SDDC and manage both from a single vSphere Client interface. With your connected AWS account, you can access AWS services such as EC2 and S3 from virtual machines in your SDDC.
Organizations that adopt VMware Cloud on AWS will see these benefits:
· A broad set of AWS services and infrastructure elasticity for VMware SDDC environments.
· Flexibility to strategically choose where to run applications based on business needs.
· Proven capabilities of VMware SDDC software and AWS Cloud to deliver customer value.
· Seamless, fast, and bi-directional workload portability between private and public clouds.
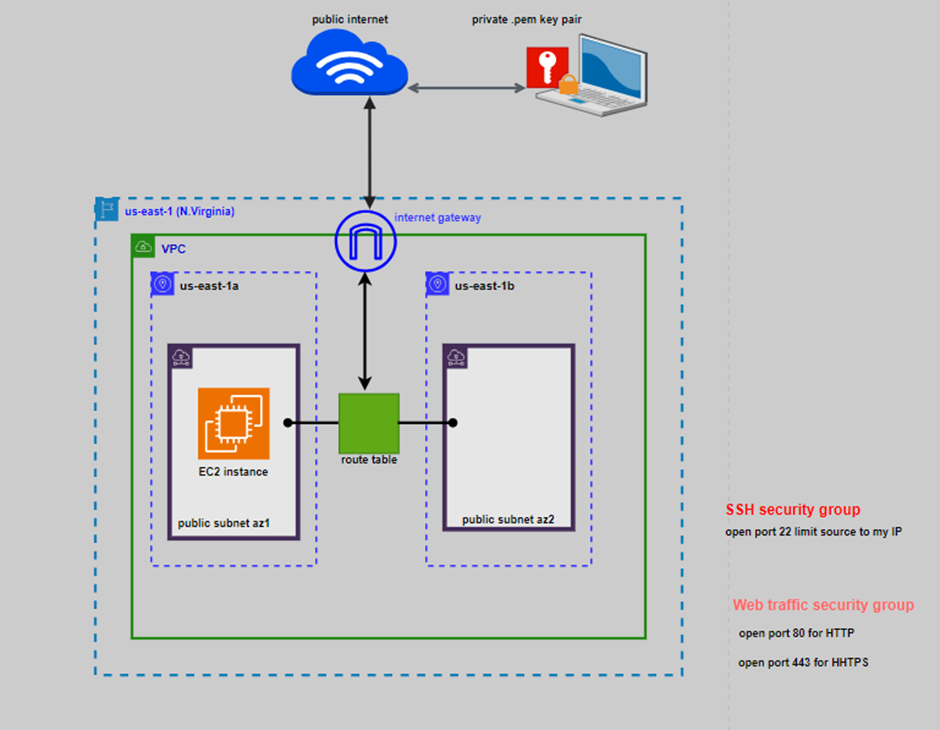
When you deploy an SDDC on VMware Cloud on AWS, it’s created within an AWS account and VPC dedicated to your organization. The Management Gateway is an NSX Edge Security gateway that provides connectivity to the vCenter Server and NSX Manager running in the SDDC. The internet-facing IP address is assigned from a pool of AWS public IP addresses during SDDC creation. The Compute Gateway provides connectivity for VMs, and VMware Cloud on AWS creates a logical network to provide networking capability for these VMs. A connection to an AWS account is required, and you need to select a VPC and subnet within that account. You can only connect an SDDC to a single Amazon VPC, and an SDDC has a minimum of four hosts.
Steps before SDDC Deployment in VMware Cloud on AWS
Creating a New VPC
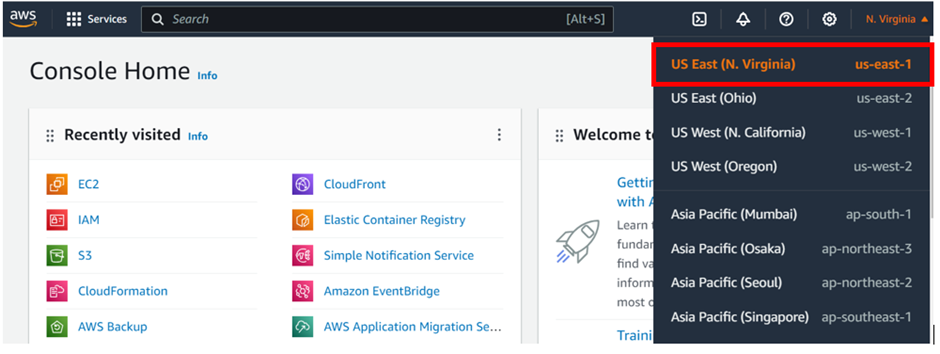
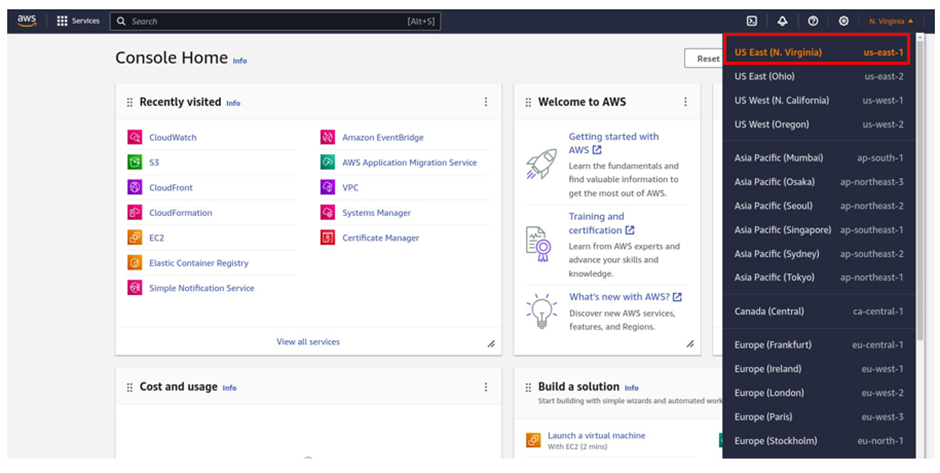
Choose the correct region to deploy your VMware Cloud on AWS SDDC.
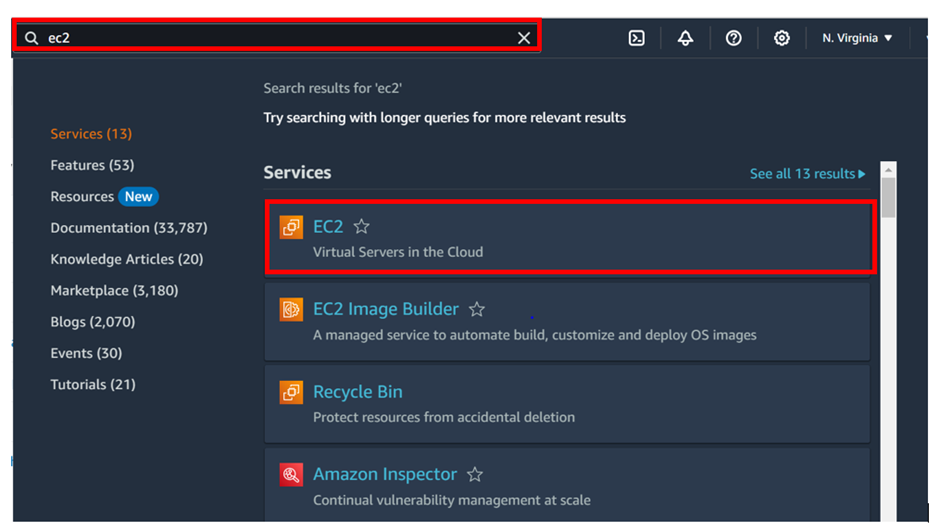
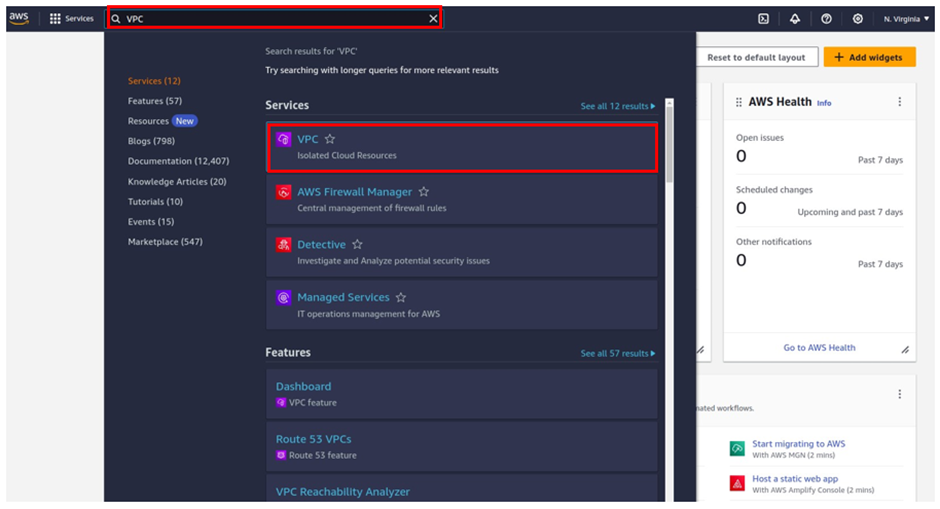
Straight away in the search box type VPC, then select VPC under services.
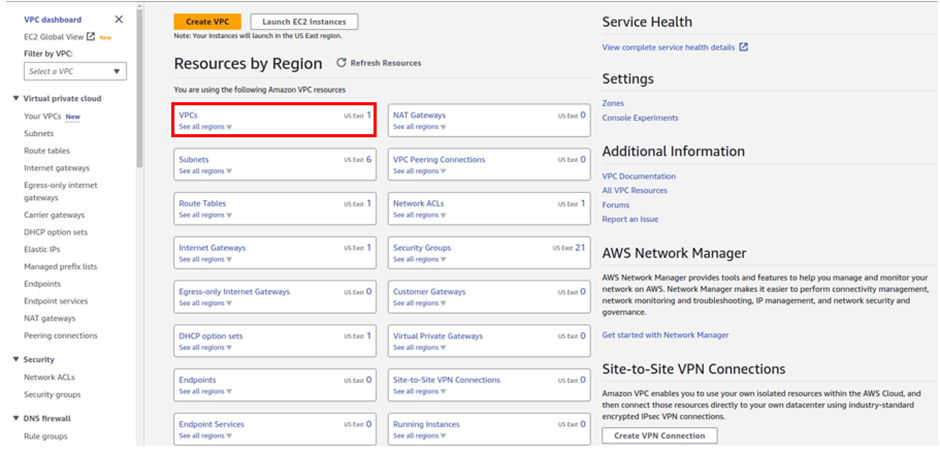
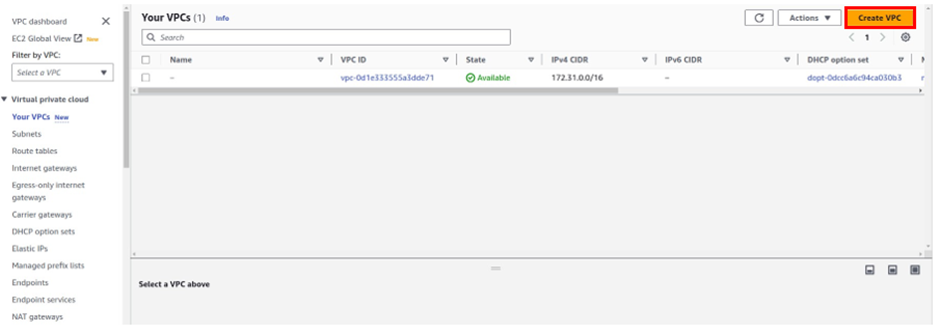
once in the VPC dashboard, select VPC’s then click Create VPC.
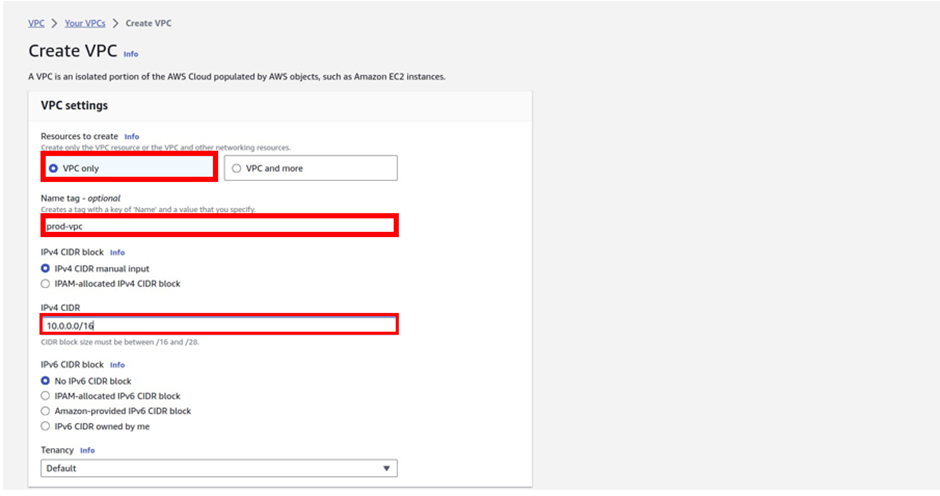
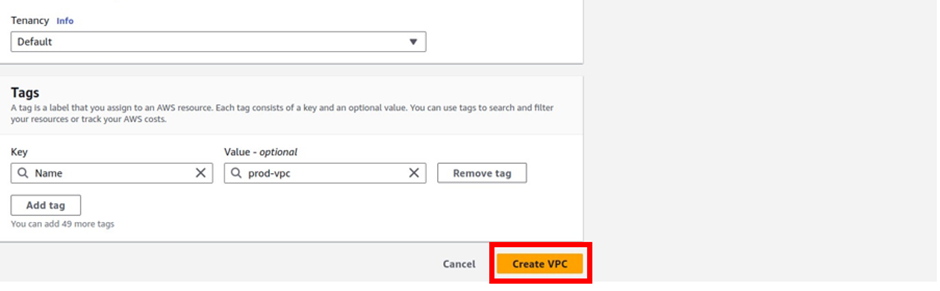
Enter the VPC details such as Name tag, IPv4 CIDR block, Tenancy as Default, and click Create.
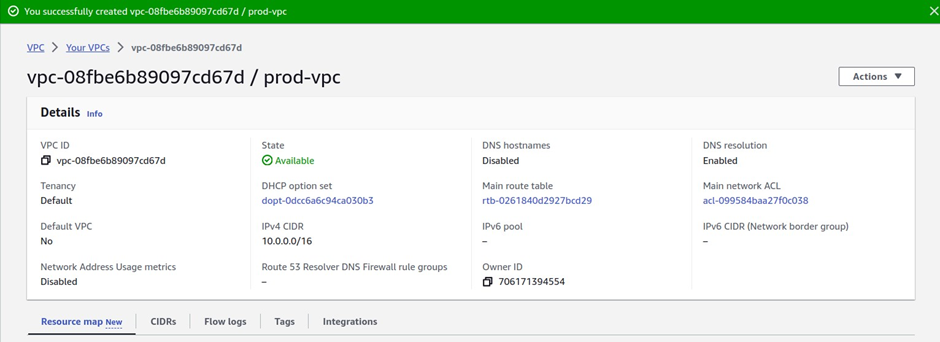
There we go, we have successfully created VPC, click close.
Creating a Private Subnet
You will now create a private subnet
Open the Amazon VPC console, and select Subnets.
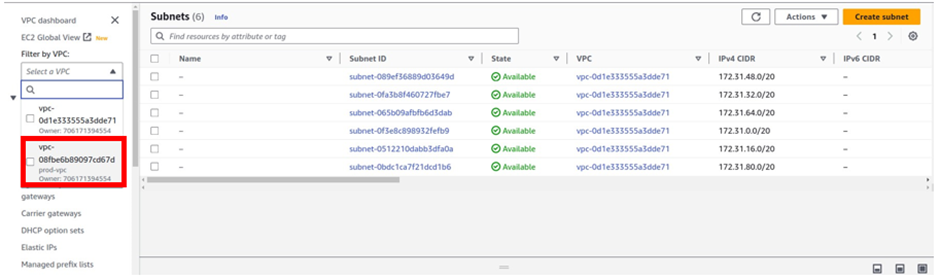
Select Create Subnet.
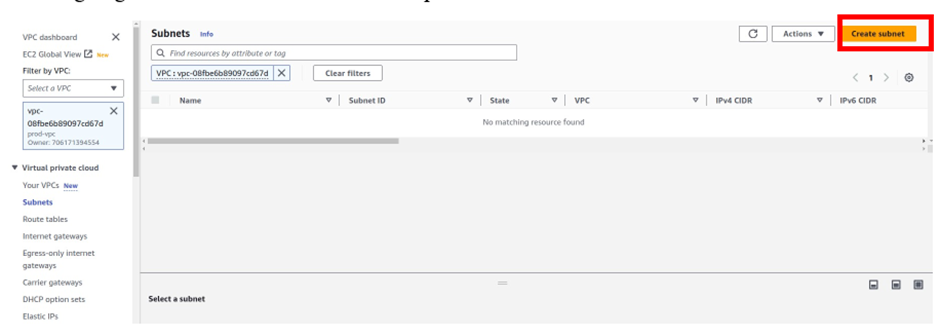
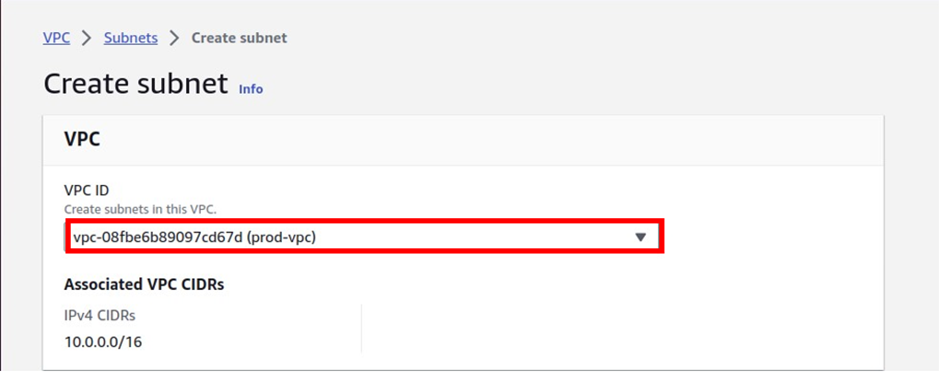
In the Create Subnet dashboard, select the VPC to create the subnet then provide, a Name tag, select the desired Availability Zone, IPv4 CIDR block, and click on Create.
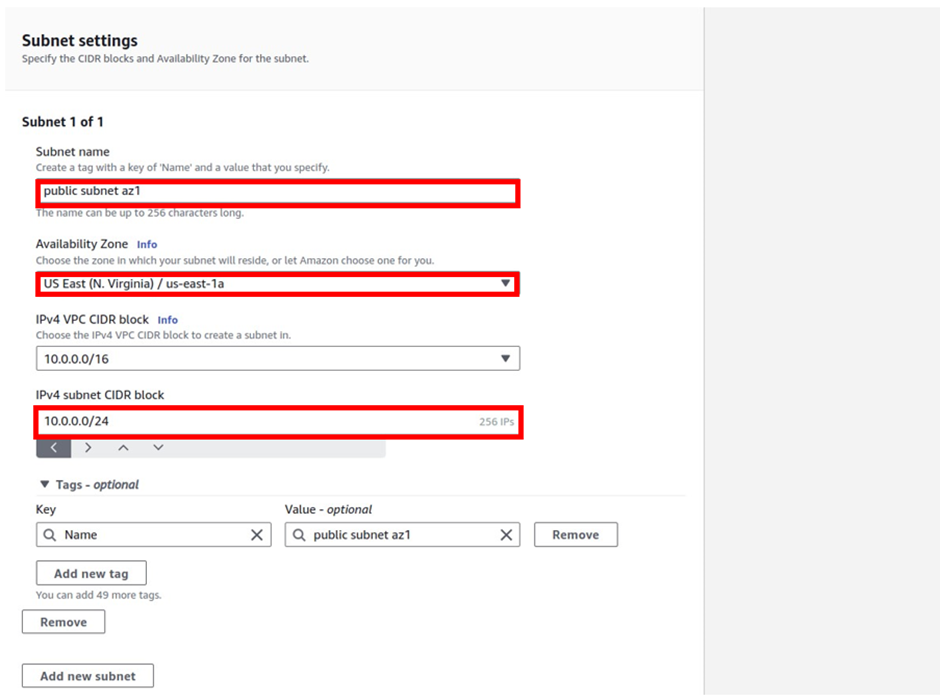

Repeat steps to create desired subnets for each remaining Availability Zone in the region and click Close.
Activate VMware Cloud on AWS Service
You can now activate your VMware Cloud on AWS service. When the purchase is processed, AWS sends a welcome email to the specified email address and starts the process using the following steps:
- Select the Activate Service link after receiving the Welcome email from AWS.
- Log in with MyVMware credentials.
- Review the terms and conditions for the use of services, and select the check box to accept.
- Select Next to complete the account activation process successfully, and you will be redirected to the VMware Cloud on AWS console.
- Create an organization that is linked to the MyVMware account.
- Enter the Organization Name and Address for logical distinction.
- Select Create Organization to complete the process.
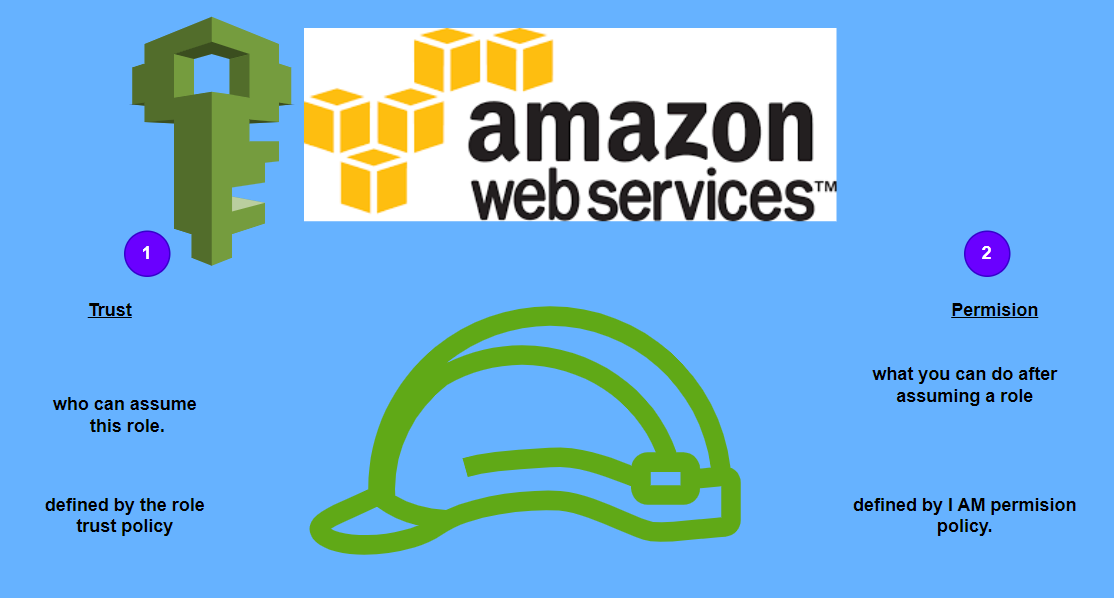
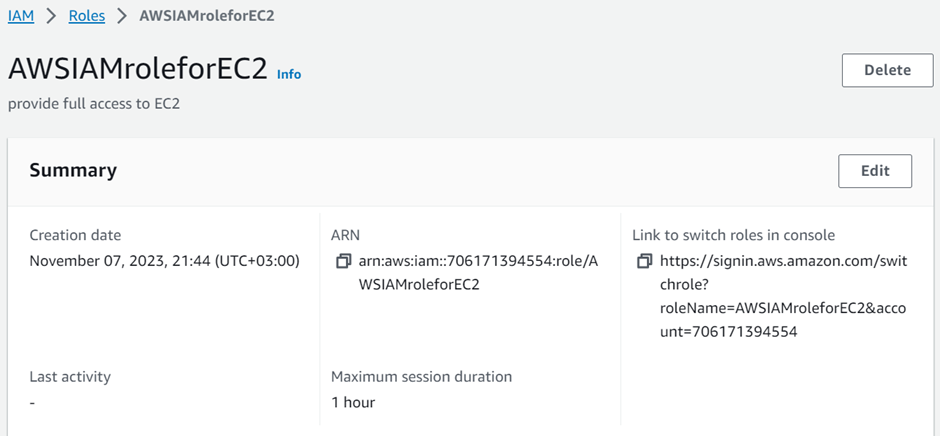
Identity and Access Management (IAM)
Assign privileged access to specific users to access the Cloud Services and SDDC console, SDDC, and NSX components. There are two types of Organization Roles; Organization Owner and Organization Member available.
The Organization Role with Organization Owner can add, modify, and remove users and access to VMware Cloud Services. The Organization Role with Organization Member can access Cloud Services but not add, remove, or modify users.
Deployment of SDDC on VMware Cloud on AWS
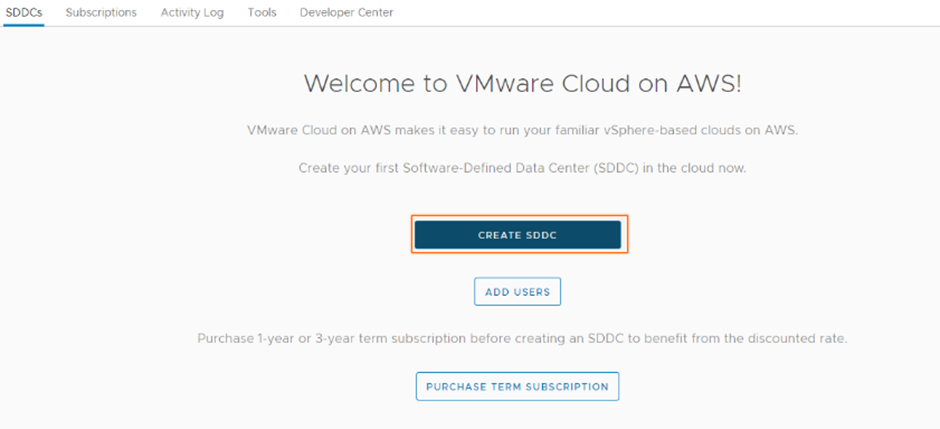
Sign in to Cloud Services Portal (CSP) to start the deployment of SDDC on VMC on AWS. Log in to the VMC Console.
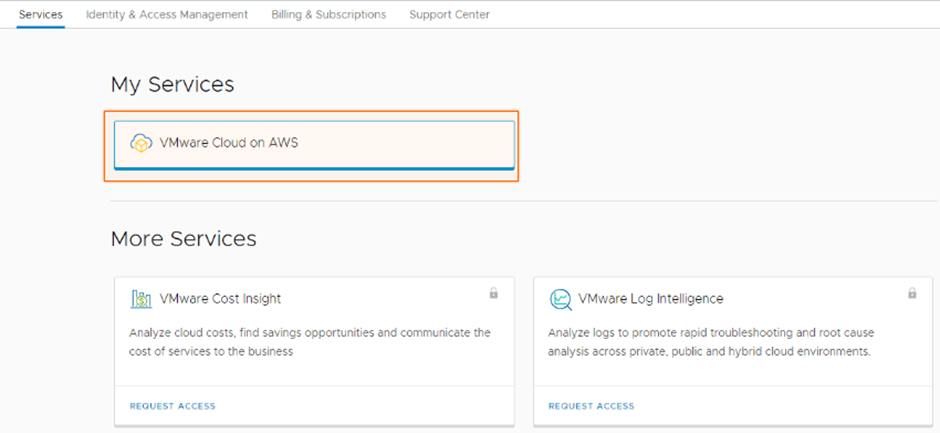
Select VMware Cloud on AWS Service from the available services.
Select Create SDDC.
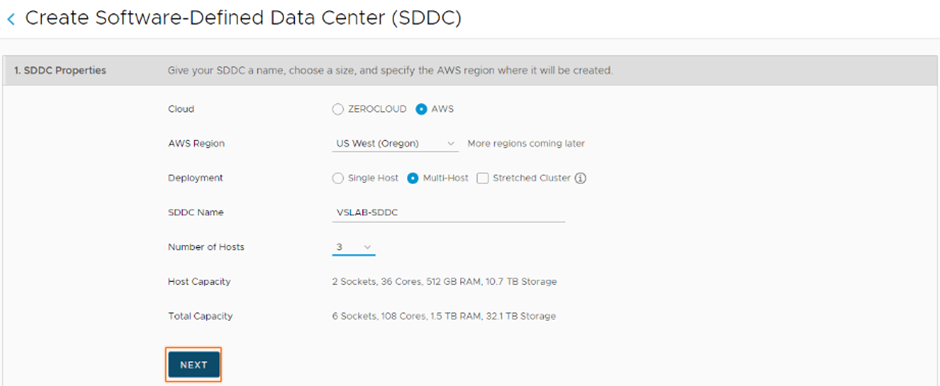
Enter the SDDC properties such as AWS Region, Deployment (either Single Host, Multi-Host, or Stretched Cluster), Host Type, SDDC Name, Number of Hosts, Host Capacity, and Total Capacity, and click Next.
Connect to a new AWS account, and click NEXT.
Select your previously configured VPC and subnet, and NEXT.
Enter the Management Subnet CIDR block for the SDDC, and click NEXT.
Click the two checkboxes to acknowledge to take responsibility for the costs, and click DEPLOY SDDC.

You’ll be charged when you click on DEPLOY SDDC and can’t pause or cancel the deployment process once it starts and will take some time to complete.
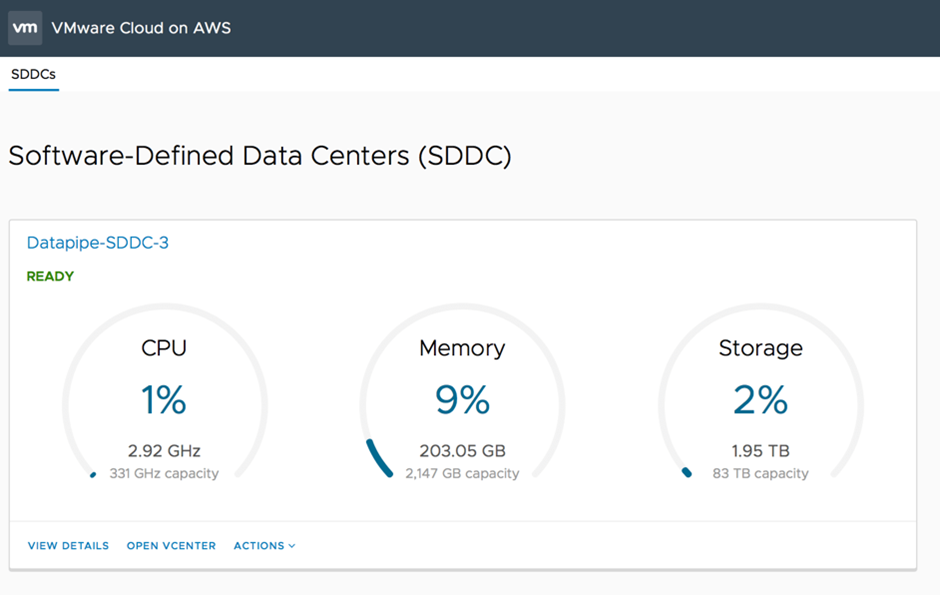
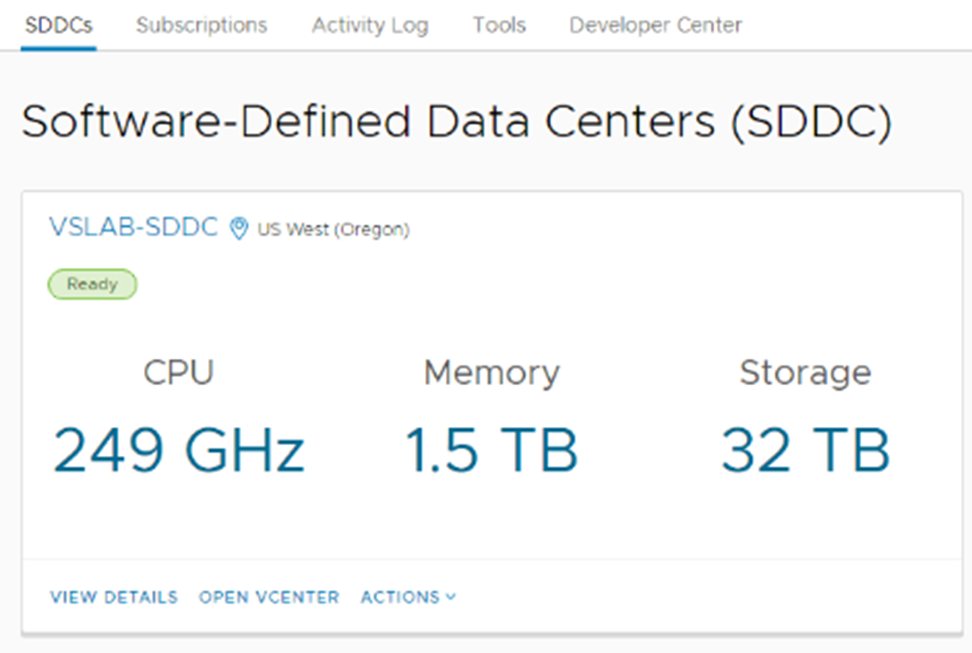
Your VMware-based is ready on AWS.
Stay tuned for more.
If you have any questions concerning this article or have an AWS project that requires our assistance, please reach out to us by leaving a comment below or email us at. sales@accendnetworks.com
Thank you!