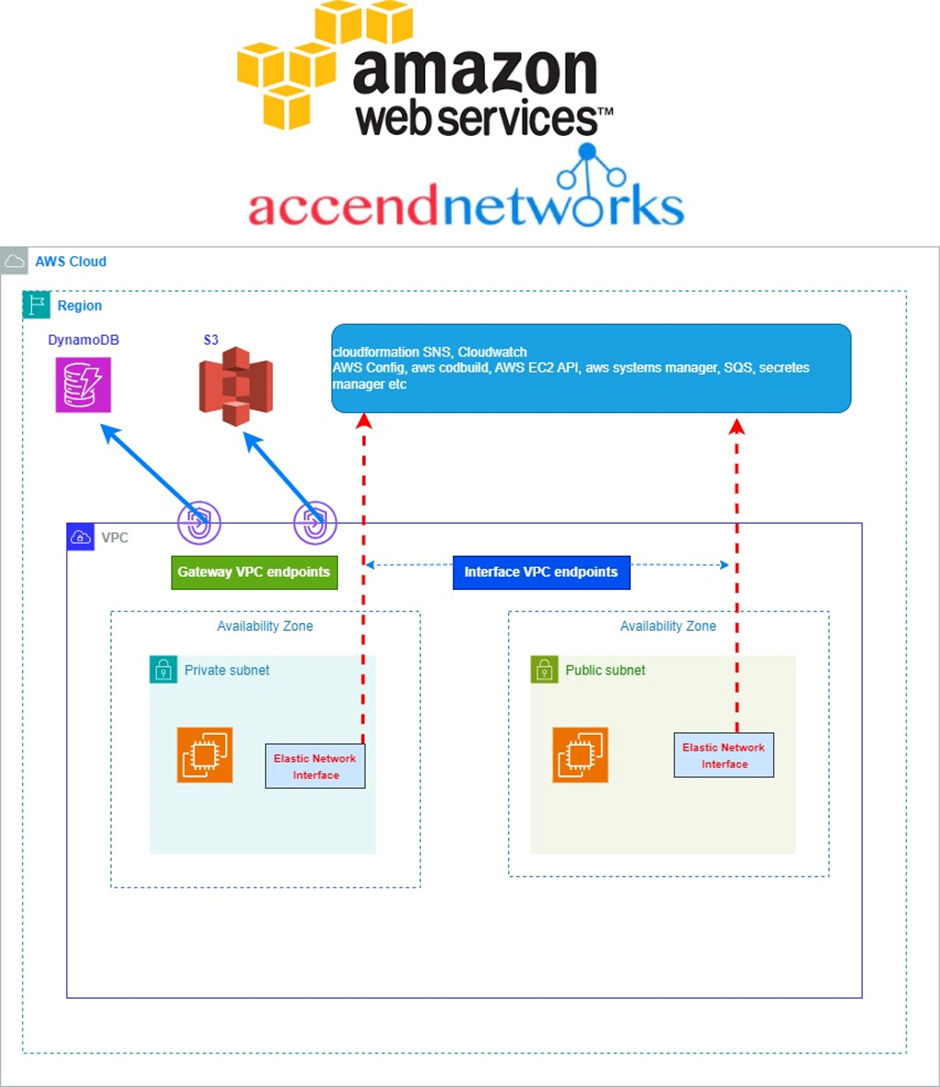
Filtering Traffic with AWS Web Application Firewall Part Two.
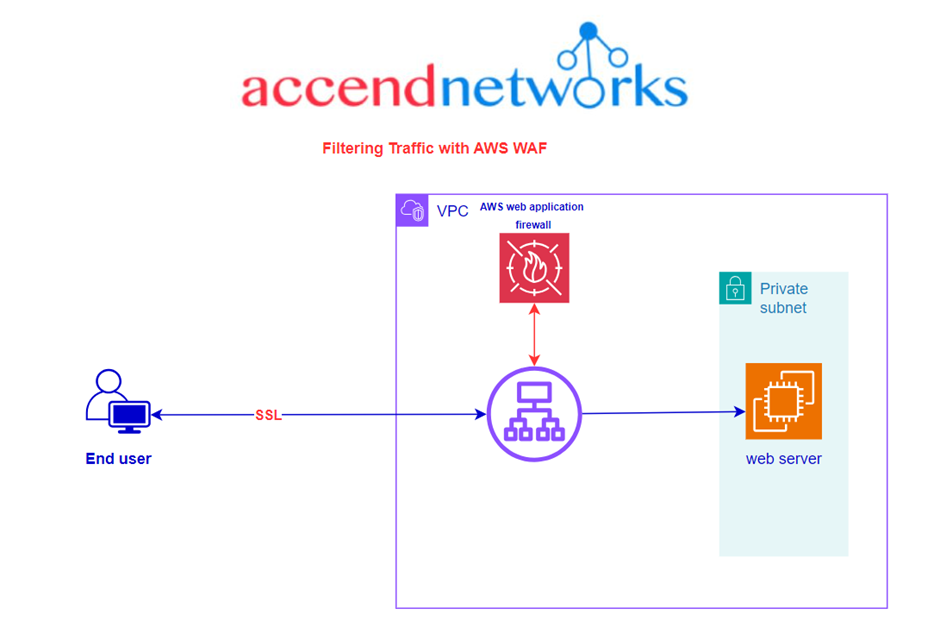
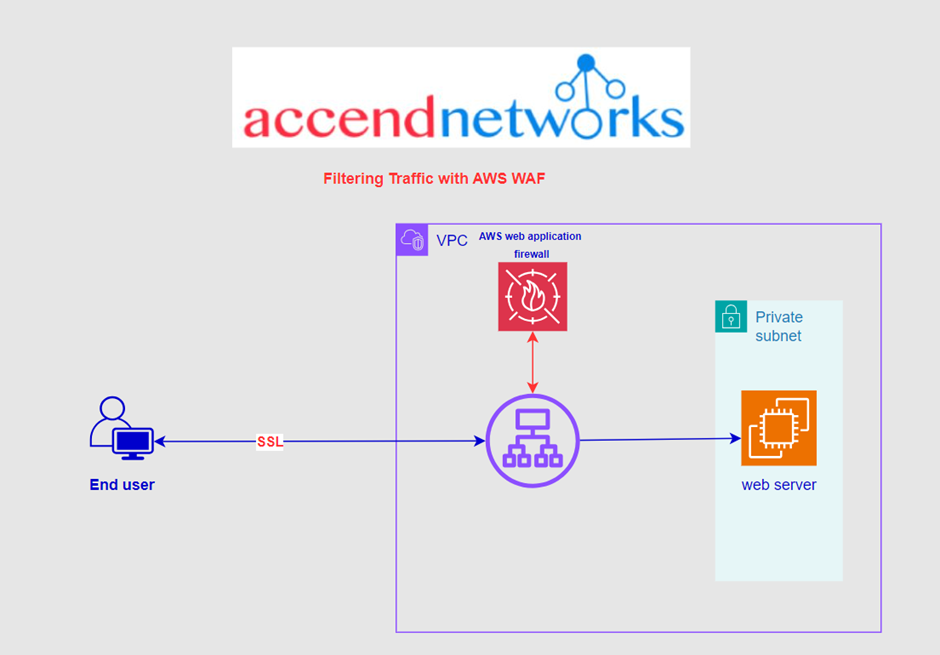
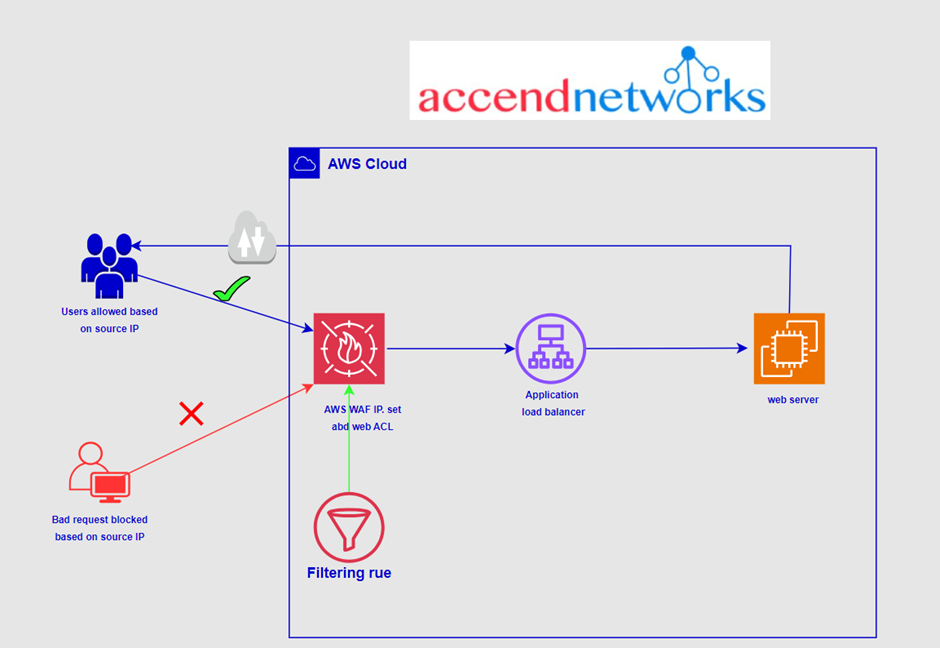
A Web Application Firewall is a specialized security solution designed to monitor, analyze, and filter HTTP traffic between web applications and the Internet.
In this blog article, we will showcase the practical aspects of a WAF in action.
A prerequisite for this demo is you should have two running EC2 instances(webservers) with Apache installed.
We will start by creating an application load balancer. Log into the management console,
https://aws.amazon.com/console/ then in the
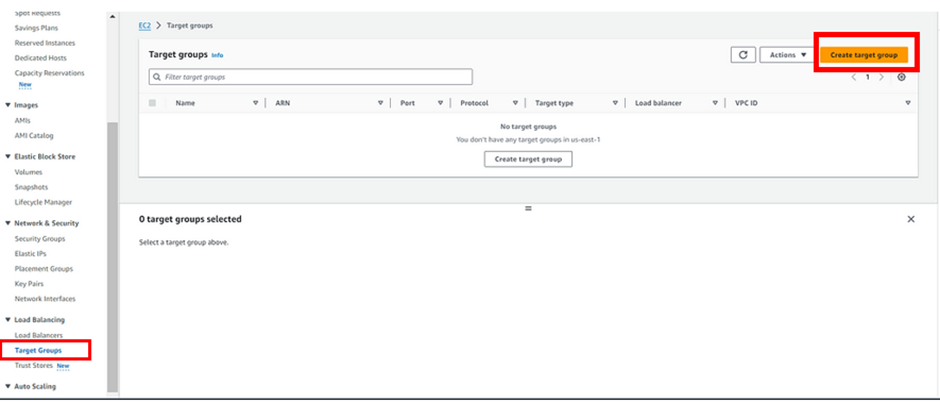
EC2 Console, Navigate to
Target Groups, present in the left panel under
Load Balancing. Click on the
Create target group then
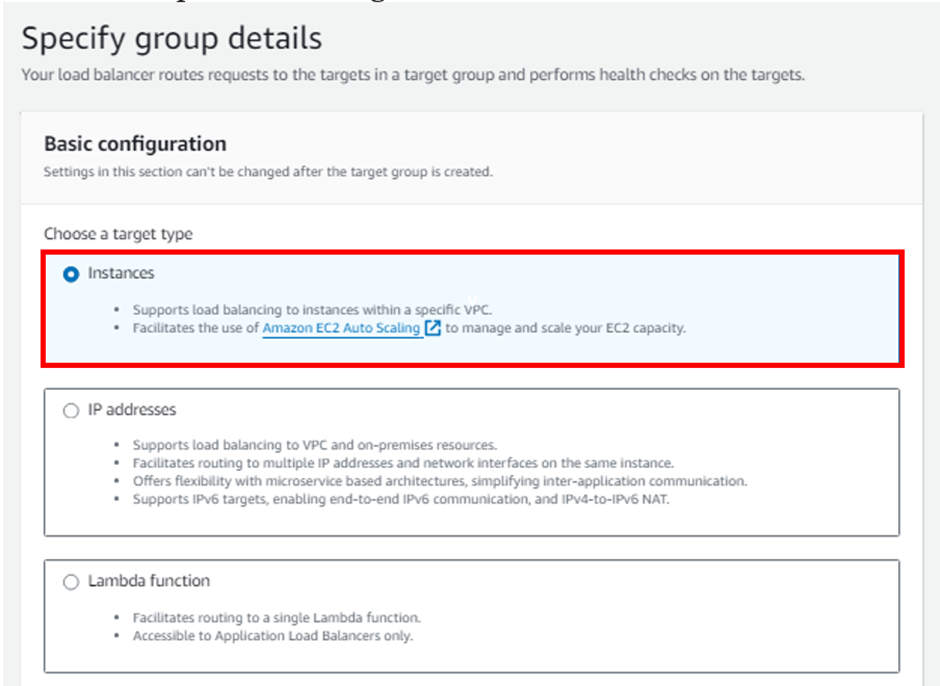
Specify group details.
Under Basic configurations,
Choose a target group: Choose Instances
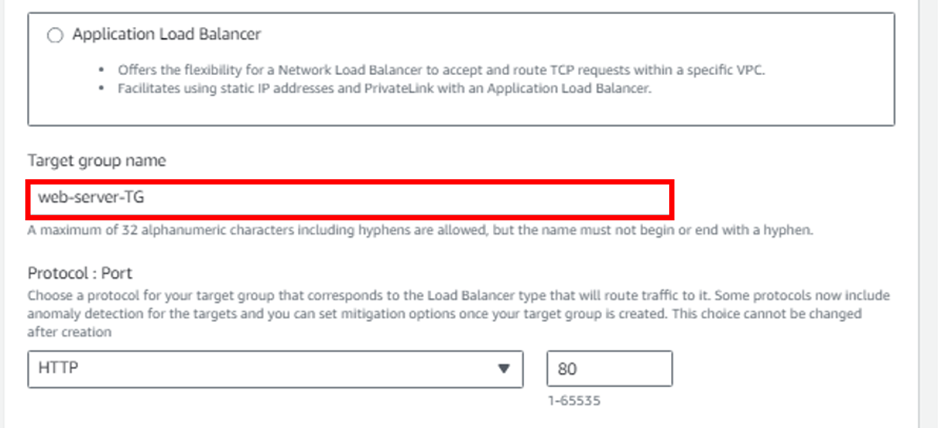
Target group name : Enter web-server-TG
Keep all the settings as default.
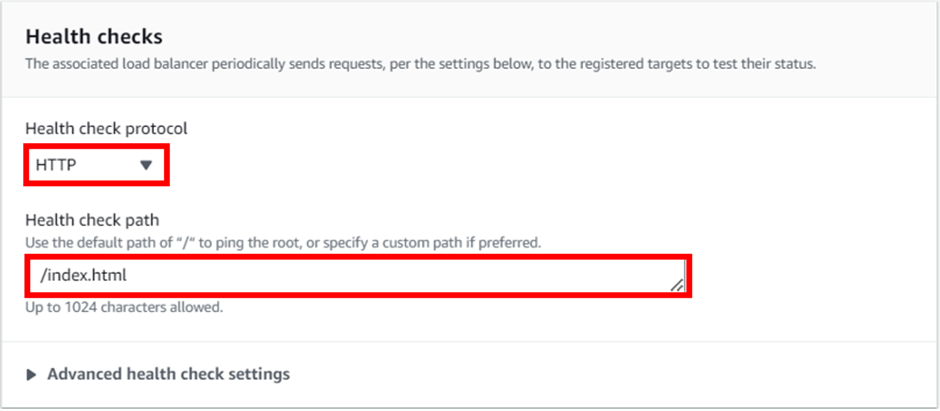
Health check protocol: HTTP
Health check path: Enter /index.html
Scroll down and click the Next button.
Register targets.
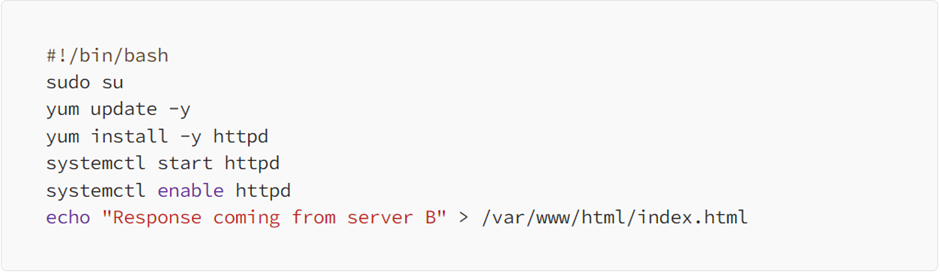
For this project have already created two instances and called them webservers A and B. And bootstrapped with the bellow code. The code Echo’s response coming from webserver’s A and B.
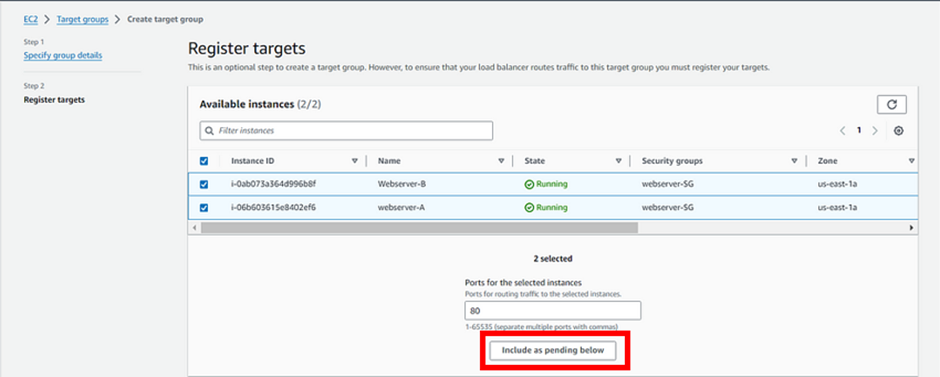
I will select both instances and click on the Include as pending below button.
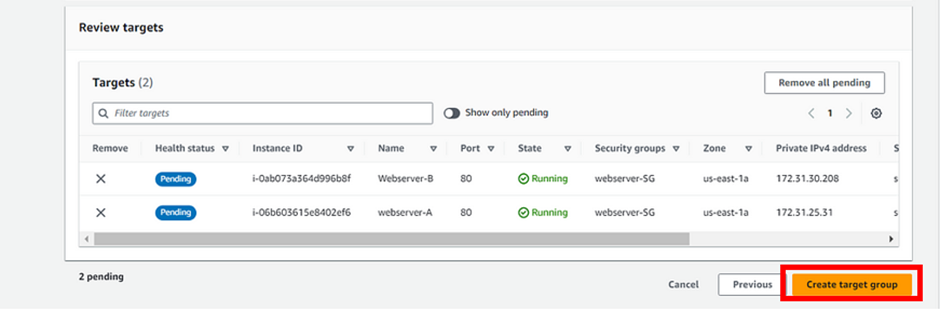
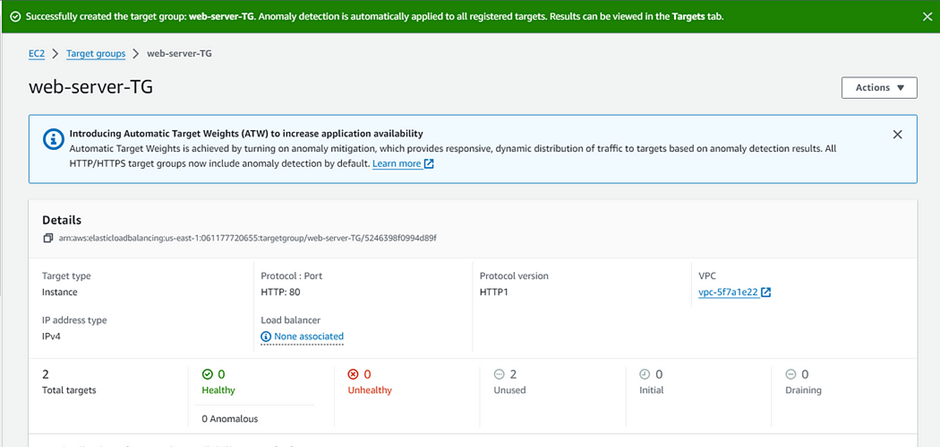
Instances will be present in the Review target’s part, having health status as Pending. Click on the Create target group button.
success.
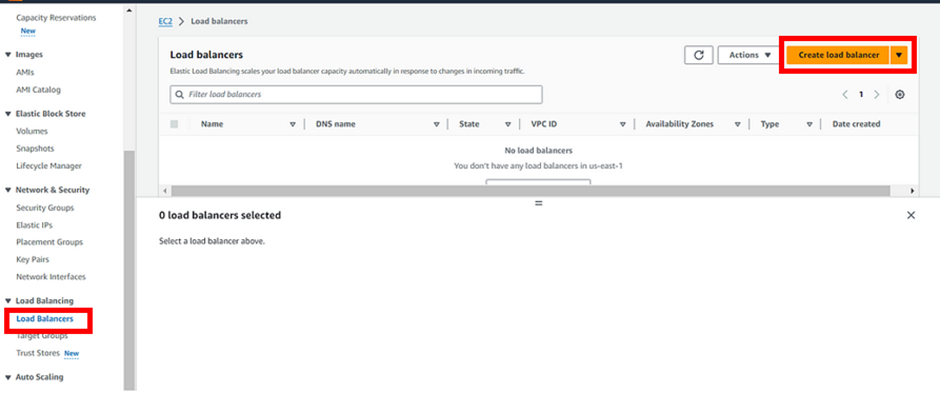
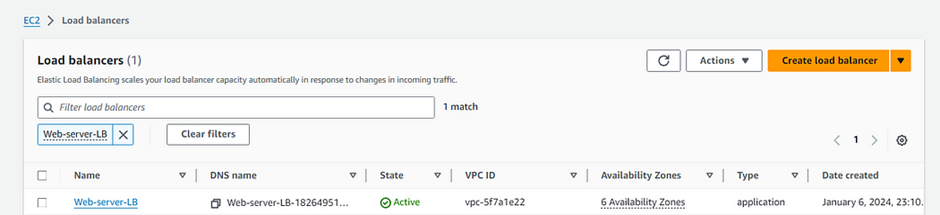
After creating Target group, proceed and create load balancer. In the EC2 console, navigate to Load balancers the left-side panel then Click on Create load balancer. We will create an application load balancer.
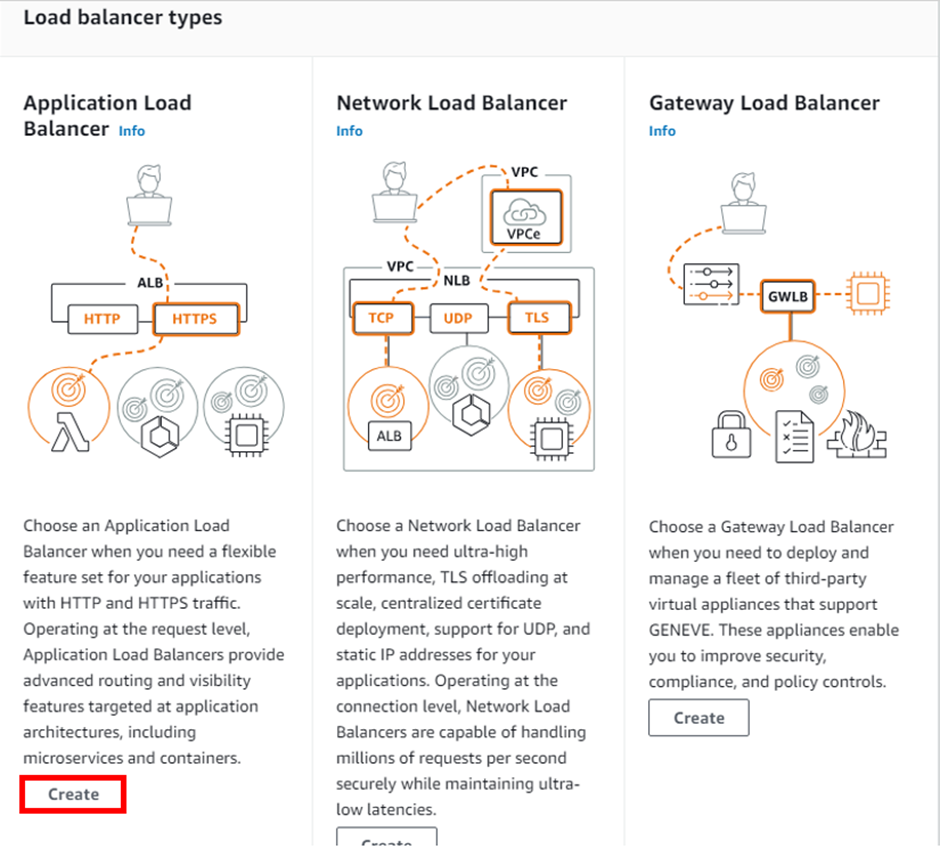
Under the Application load balancer, click on the Create button.
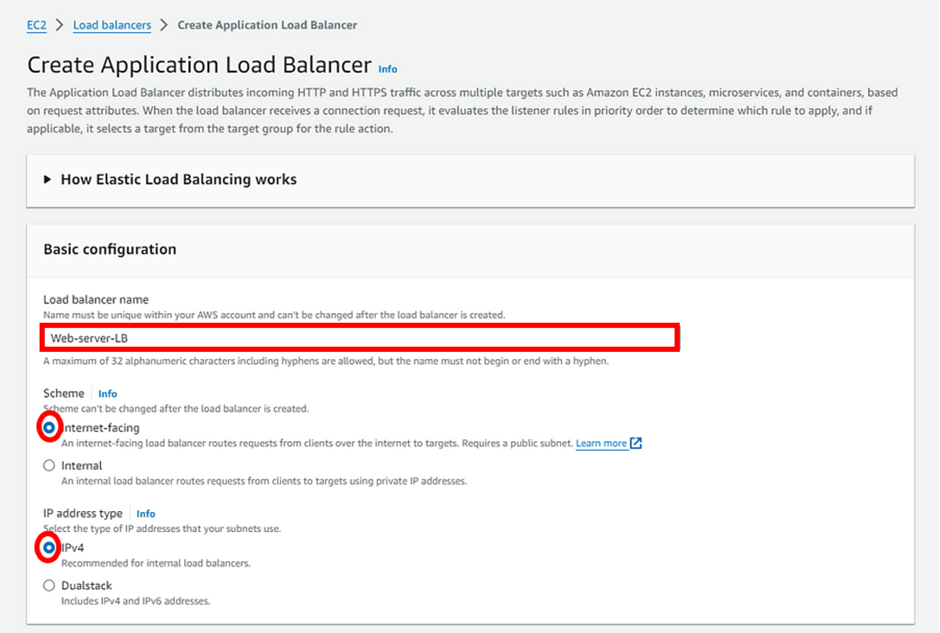
configure the load balancer as below
For the Basic configuration section,
Name: Enter Web-server-LB
Scheme: Select Internet-facing
IP address type: Choose IPv4
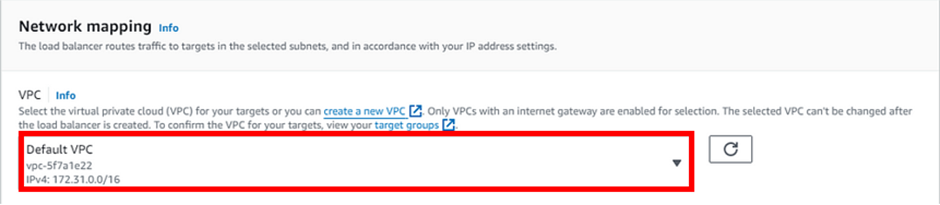
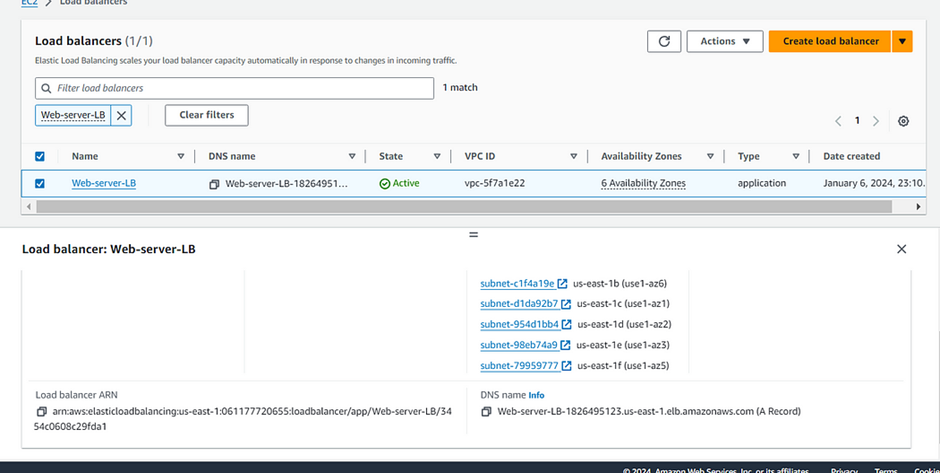
For the Network mapping section:
Move with the Default VPC.
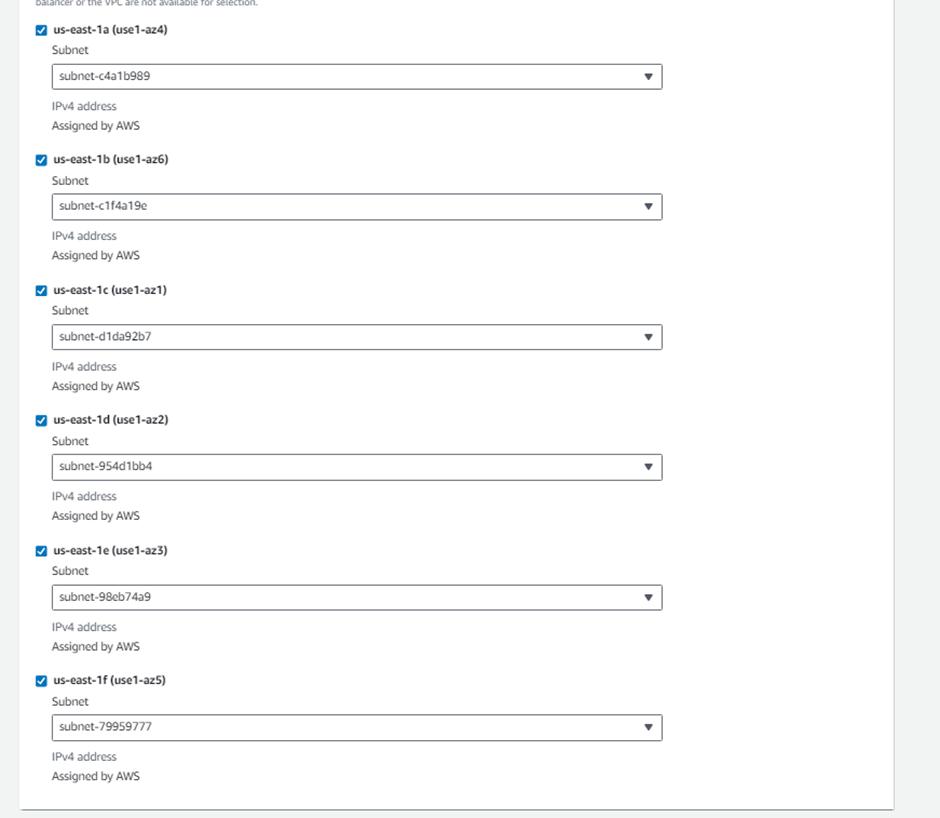
Mappings: Select all the AZ’s present.
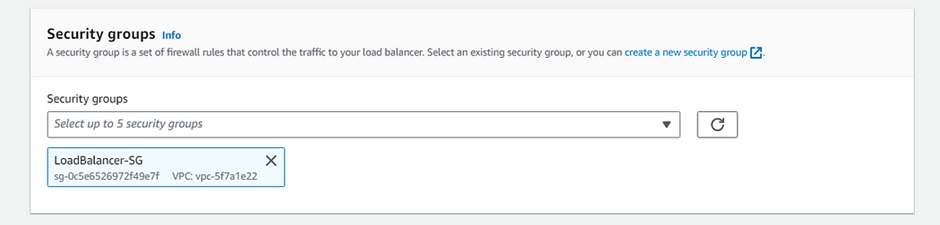
For the Security groups section, I have created a security group and opened port 80 for HTTP, and called it Load balancer-SG, I will select it.
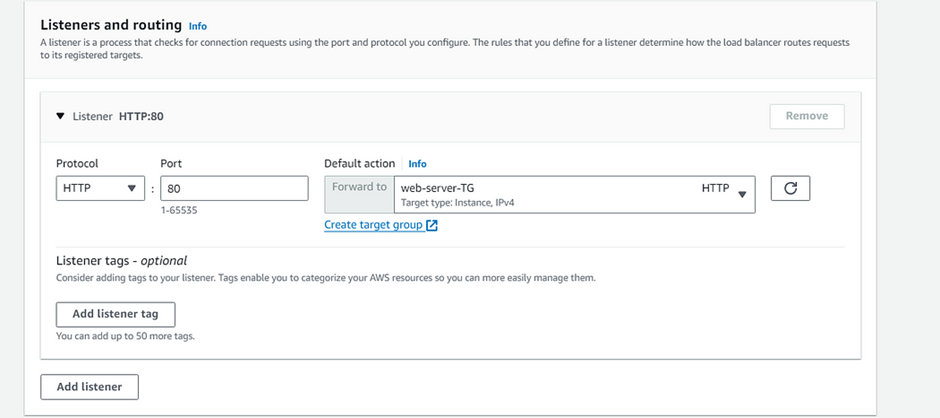
For the Listeners and routing section,
The listener is already present with Protocol HTTP and Port 80.
Select the target group web-server-TG for the Default action forwards to option.
Keep the tags as default and click on the Create load balancer.
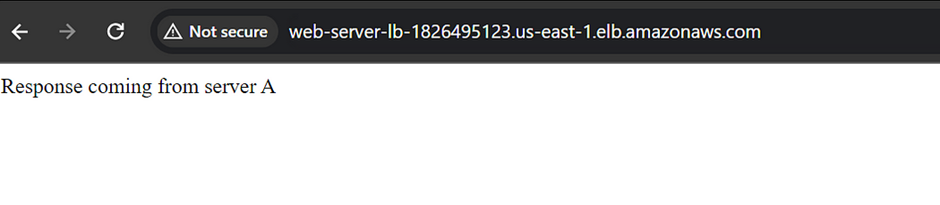
copy the DNS name of the load balancer and paste it into your browser.
Refresh the browser a few times and you will see the request is serving from both instances (servers). You will see the output as RESPONSE COMING FROM SERVER A & RESPONSE COMING FROM SERVER B.
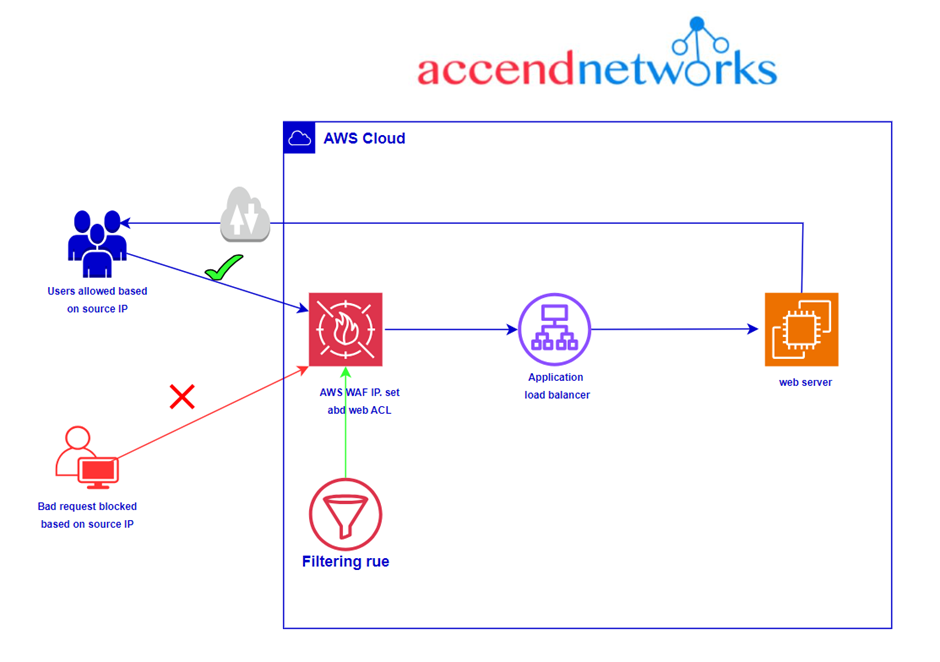
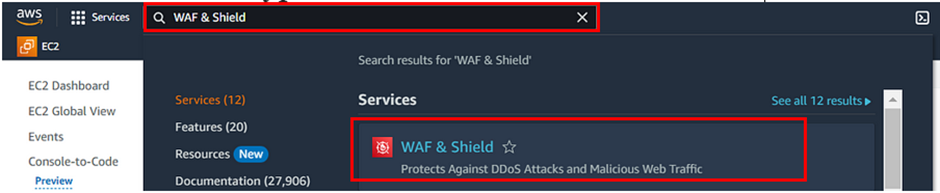
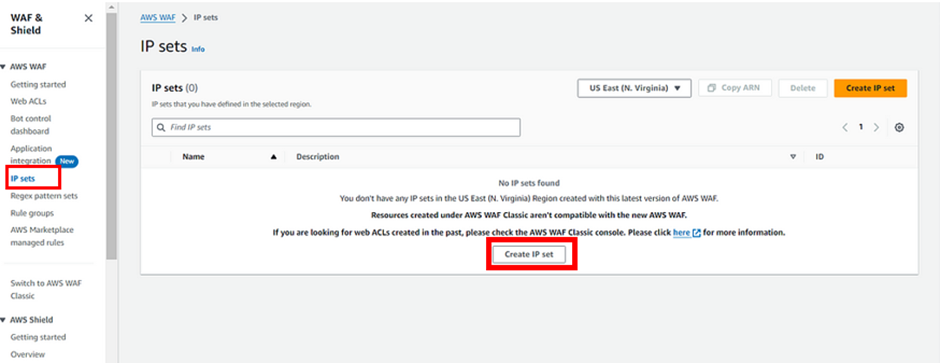
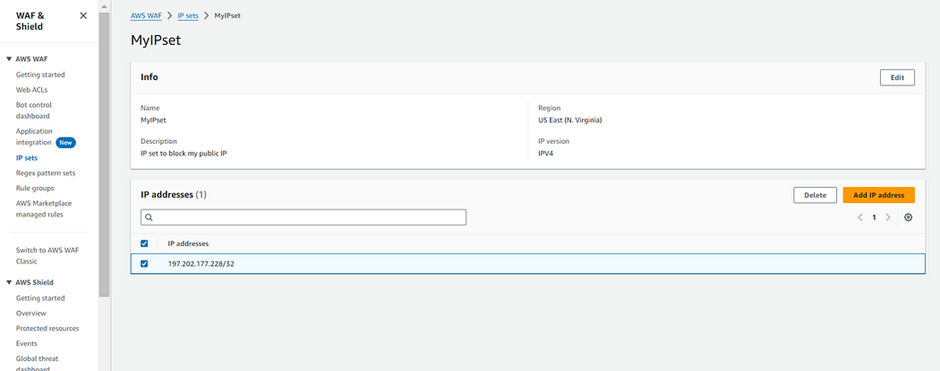
Creating an IP set
In the search box, type WAF & Shield then select it under services.
On the left side, you will be able to see the IP sets menu. Click on IP sets and click on Create IP sets.
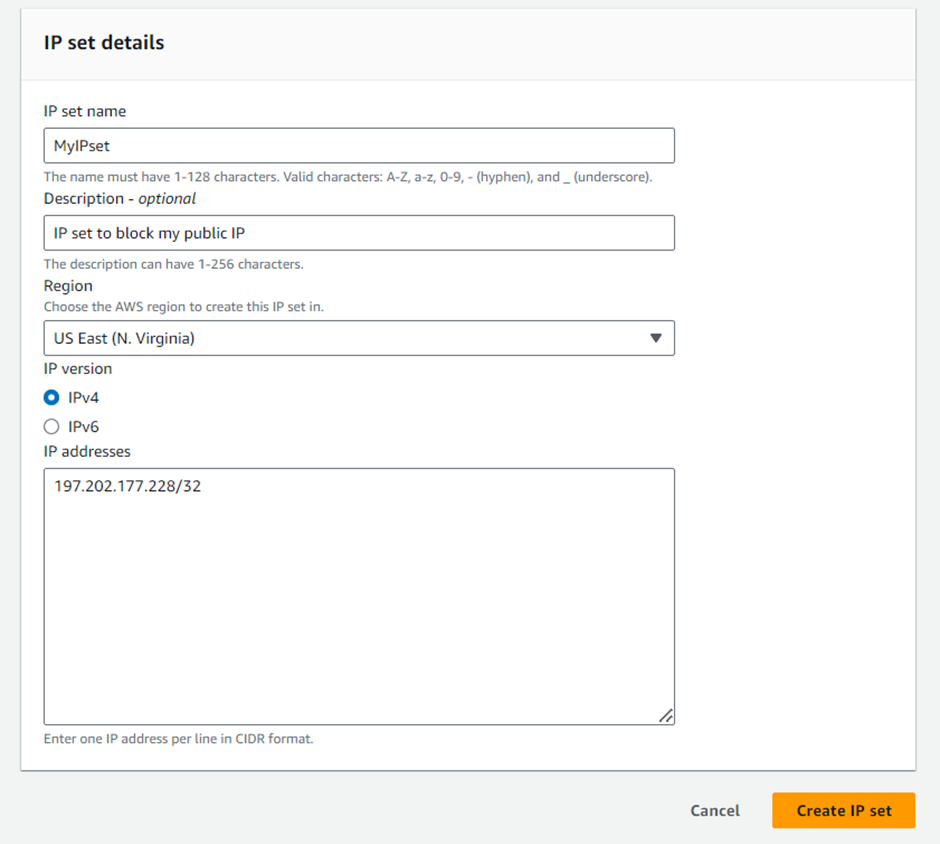
On the next screen, fill out the details under Create IP set.
IP set details:
IP set name: Enter MyIPset
Description: Enter IP set to block my public IP
Region: Select US EAST (N.Virginia )
IP Version: Select IPv4
IP address: Enter the IP of your local network/32
Note: You have to give /32 after the IP is pasted or else you won’t be able to create an IP set. Then once you have provided the above details, click on Create IP set.
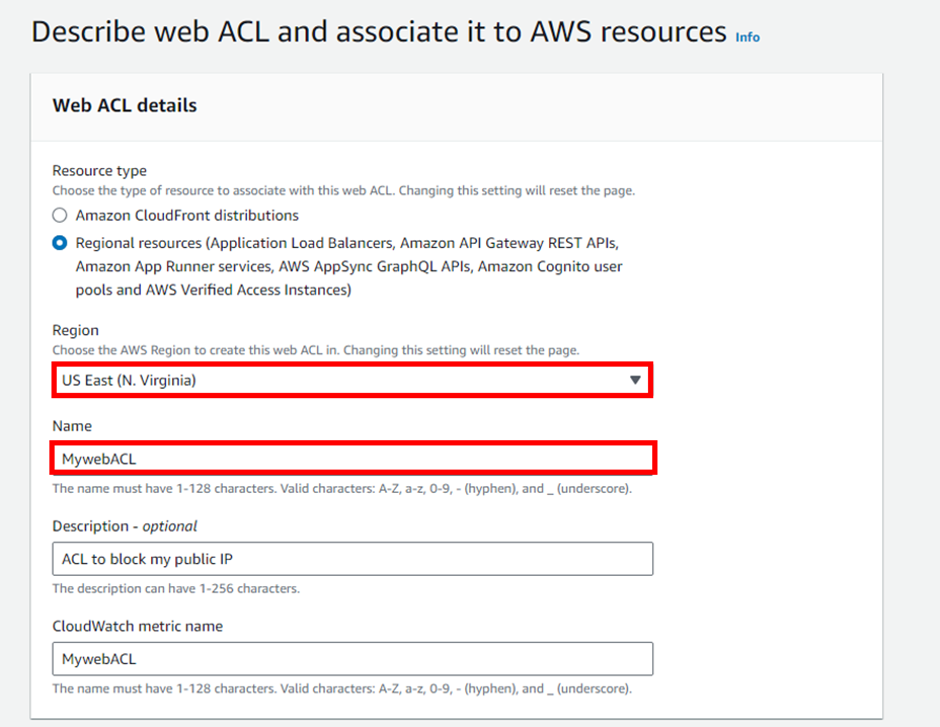
Creating a Web ACL
Web ACL details,
Navigate to the AWS WAF dashboard and select Web ACLs. Click on Create web ACL to create a new web ACL.
Configure the ACL as below:
Web ACL details
Name: Enter MywebACL
Description: Enter ACL to block my public IP
Resource type: Select Regional resources (Application Load Balancer and API Gateway)
Region: Select US EAST (N.Virginia)
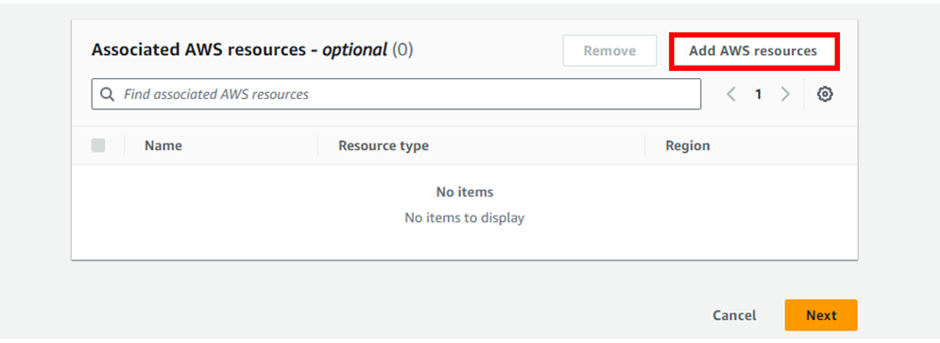
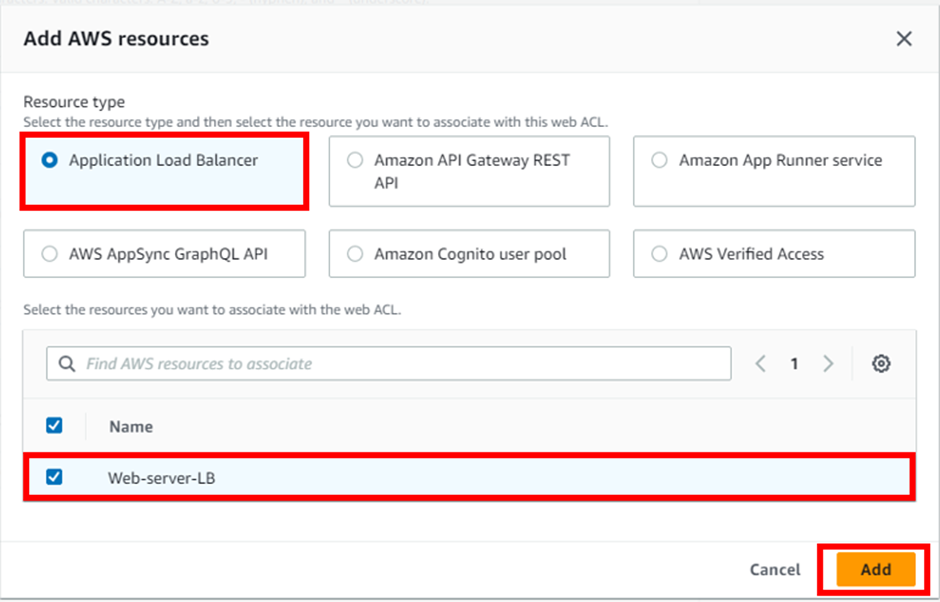
To associate an AWS resource, click on Add AWS resources.
In Add AWS resources select Application Load Balancer and select the name of ALB. Click on Add.
Lastly, click on the Next button.
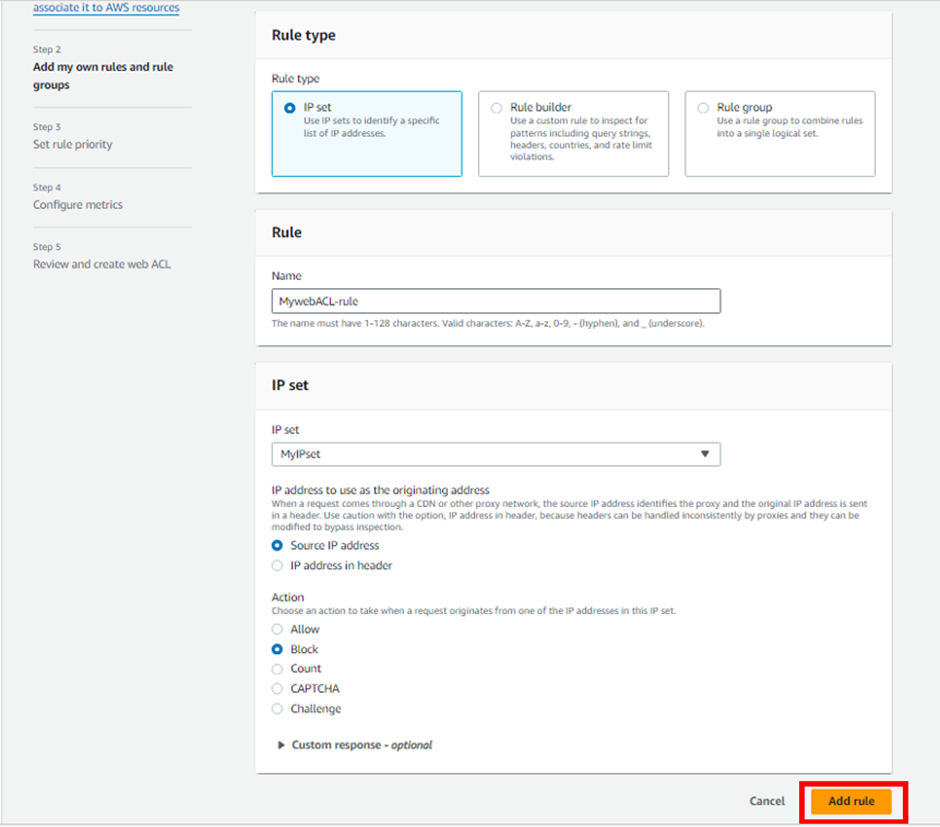
Add rules and rule groups
Under Rules click on Add rule and Add my own rules and rule groups in the drop-down menu.
In Rule typeselect IP set as shown below and fill in the details as given below:
Rule type: Select IP set
Name: Enter MywebACL-rule
IP set: select the IP set created Above (MyIPset)
IP address to use as the originating address:
Source IP address
Action:Select Block
Once you provide the above details, click on the Add rule.
Lastly, click on the Next button.
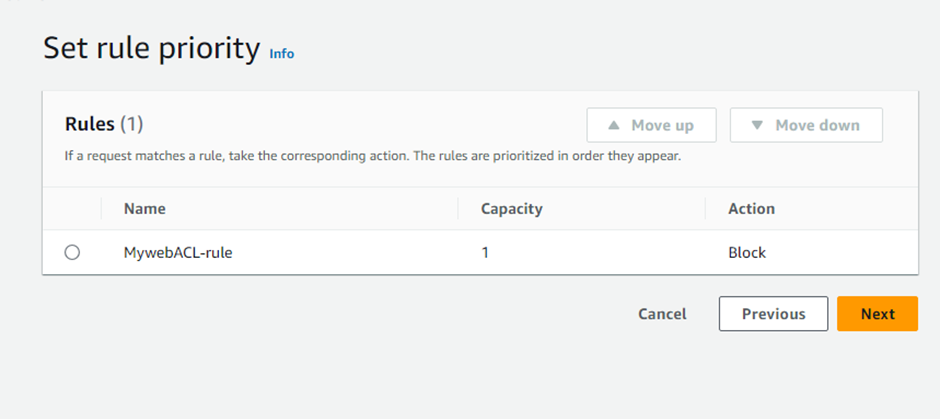
Set rule priority
Leave as default and click on Next.
Configure metrics.
Leave as default and click on Next.
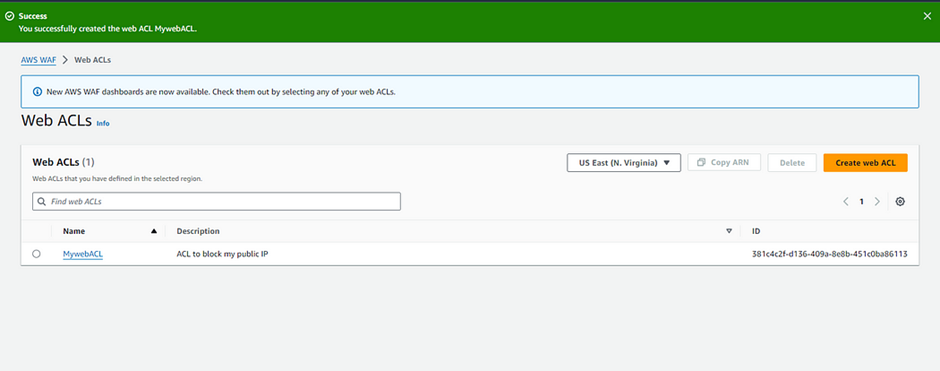
Review and create web ACL
Review all your inputs and click on Create Web ACL
We have successfully created a web ACL for ALB with the help of an IP set created with your public IP.
Testing the working of the WAF.
To test the WAF, navigate to Load Balancers and select the Application load balancer Web-server-LB.
Copy the DNS name and paste it into your browser.
You will get a 403 forbidden error showing that WAF blocked your connection to ALB.
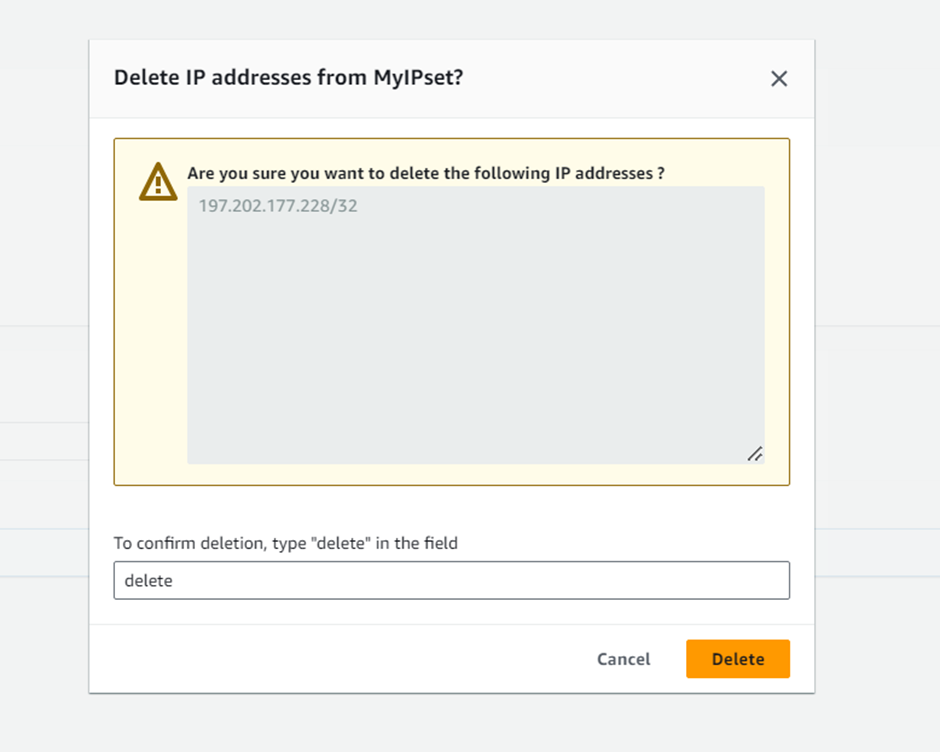
Unblocking the IP.
To unblock the IP, navigate to IP sets and click on MyIPset. Select your public IP and then click on Delete
You have successfully removed the IP from WAF.
Again, select load balancer you just created. Copy its DNS name and paste into your browser.
This time around, you will get the response from the web servers either stating RESPONSE COMING FROM SERVER A or RESPONSE COMING FROM SERVER Bas shown below:
Congratulations, you are all done. Thanks for reading and stay tuned for more.
If you have any questions concerning this article or have an AWS project that requires our assistance, please reach out to us by leaving a comment below or email us at
sales@accendnetworks.com.
Thank you!