What is AWS Artifact.
Amazon Web services has become a bedrock of cloud computing offering a plethora of services to cater for diverse business needs. Among its offerings are the AWS artifacts, a collection of compliance and security reports that provides valuable insights into the security and regulatory compliance of AWS services.
What is AWS Artifact?
AWS Artifact is a centralized resource for accessing documentation related to AWS services’ security and compliance. Additionally, it offers a collection of reports and certifications that can be used by customers, auditors, and regulators to understand AWS’s adherence to industry standards and best practices.
AWS Artifact is not a service you can use to build a resource like an EC2 instance, or an RDS database, in contrast to other AWS services. Instead, you use it to access and download AWS security and compliance data as well as any online agreements.
AWS Artifact provides on-demand downloads of AWS security and compliance documents, such as AWS ISO certifications, Payment Card Industry (PCI) reports, and Service Organization Control (SOC) reports. You can submit the security and compliance documents (also known as audit artifacts) to your auditors or regulators to demonstrate the security and compliance of the AWS infrastructure and services that you use.
The primary categories of artifacts available in AWS Artifacts.
Compliance Reports: These reports detail how AWS aligns with various compliance frameworks such as SOC (Service Organization Control) reports, PCI DSS (Payment Card Industry Data Security Standard), HIPAA (Health Insurance Portability and Accountability Act), and more. These reports are invaluable for organizations that need to demonstrate compliance with specific regulations.
Agreements: AWS Artifacts also provides access to agreements such as the AWS Customer Agreement, AWS Data Processing Addendum and others. These agreements outline the terms and conditions governing the use of AWS services and data protection responsibilities.
Third-Party Attestations: AWS Artifacts includes attestations from third-party auditors and assessors. These attestations validate AWS’s security and compliance controls, providing an additional layer of assurance to customers.
Certifications: AWS holds various certifications for its services, including ISO (International Organization for Standardization) certifications, and more. These certifications demonstrate AWS’s commitment to meeting stringent security and compliance requirements.
Benefits of AWS Artifacts
AWS enables you to keep tabs on the resources used by your applications, accessibility, and stored data. Additionally, it offers identification and access control together with ongoing real-time security information monitoring.
Key Features and Benefits
Transparency and Assurance: AWS Artifacts promotes transparency by providing customers with detailed information about AWS’s security and compliance posture.
Simplified Compliance Reporting: For complex organizations instead of conducting extensive audits and assessments, customers can leverage AWS’s compliance reports and certifications to auditors and regulators.
Streamlined Audits: Auditors and regulators can access AWS Artifacts to gain insights into AWS’s security controls and compliance which streamlines the audit process.
Improved Manageability: Allows you to manage agreements with AWS at scale.
Updated and Accessible Documentation: AWS Artifacts ensures that documentation is kept up to date, reflecting the latest security measures and compliance.
How to Access AWS Artifacts
AWS Artifacts can be accessed through the AWS Management Console and AWS CLI. Users with appropriate permissions can navigate to the AWS Artifacts section to view and download the available reports, agreements, attestations, and certifications. I will show a demo on how we can use the AWS management console to download accounts agreement. Proceed as follows.
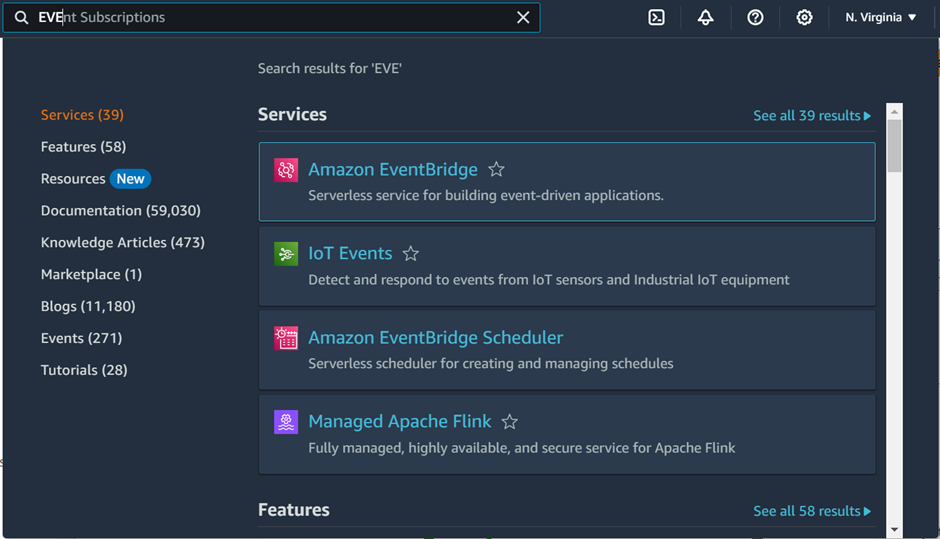
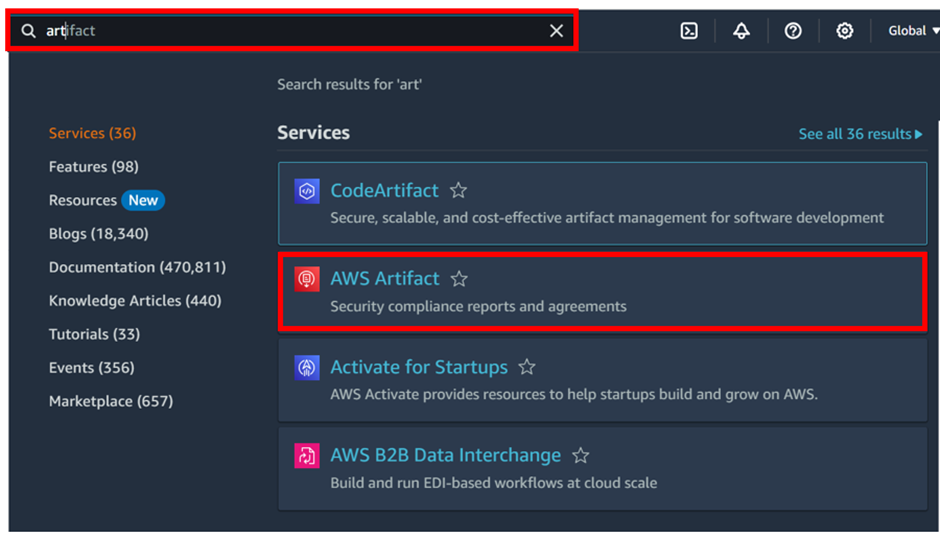
Log into the AWS management console and type AWS artifacts in the search box, then select AWS Artifacts under services select.
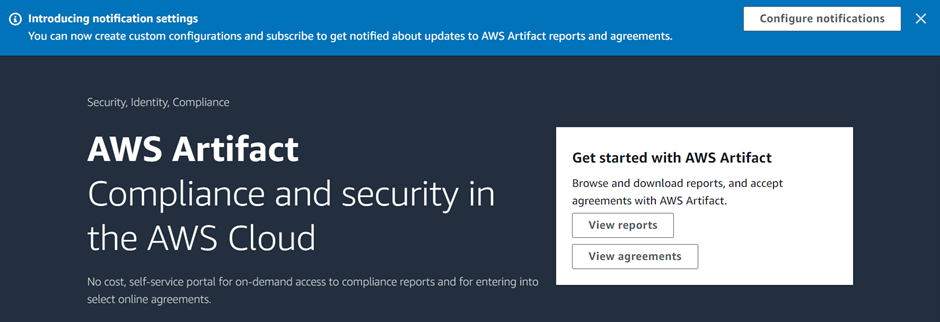
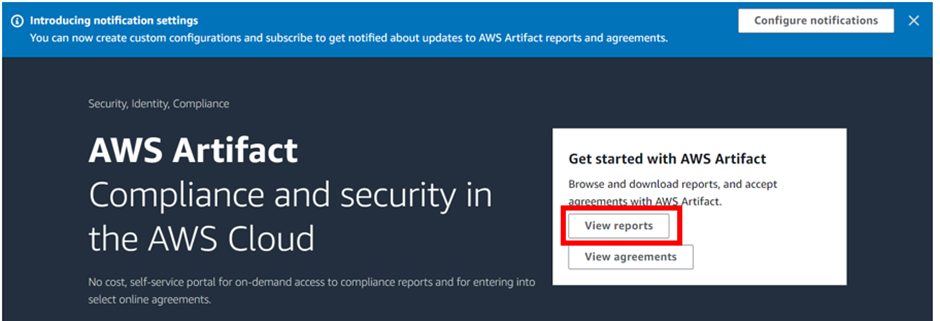
As we can see in the Artifacts console, we can subscribe to notifications for the availability of new reports and agreements or updates to existing reports and agreements.
We can view reports and also view agreements.
To download a report, make sure you have enough permissions then click view report as shown.
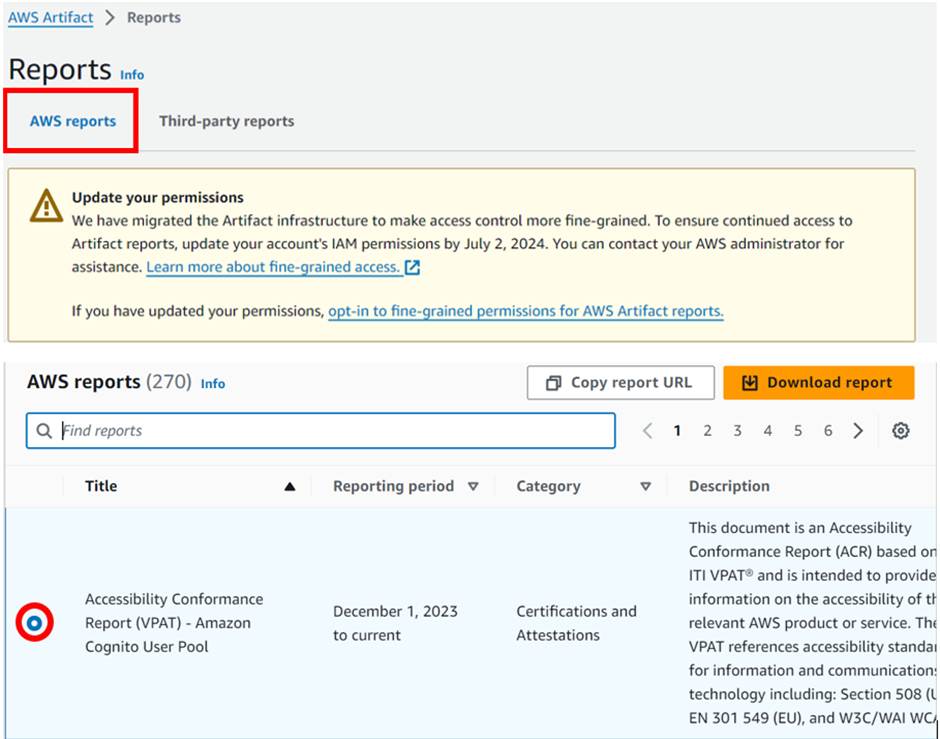
In the reports console, we can see we have third party reports and AWS reports. Let’s move with AWS reports. Here there are a range of reports. Select the first one, Accessibility and conformance report then click download.
Download successful, go ahead and access it in your download’s directory. Thats it. This brings us to the end of this blog.
Conclusion
AWS artifacts play a crucial role in enhancing transparency, simplifying compliance reporting and providing a guarantee to customers, auditors and regulators regarding AWS security and compliance practices.
Thanks for reading and stay tuned for more.
If you have any questions concerning this article or have an AWS project that requires our assistance, please reach out to us by leaving a comment below or email us at sales@accendnetworks.com
Thank you!