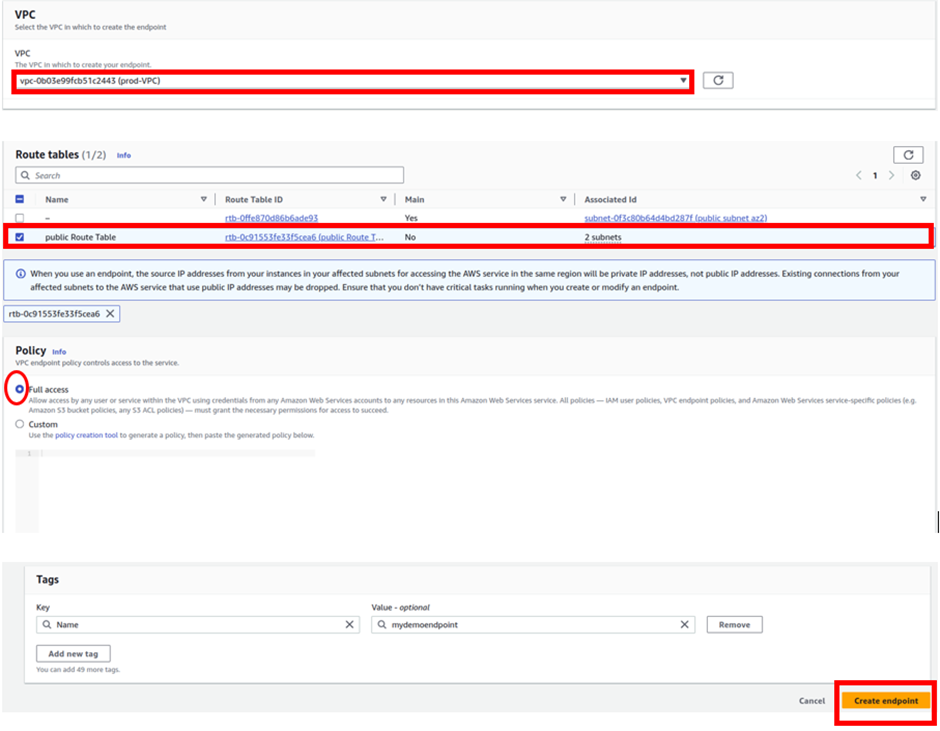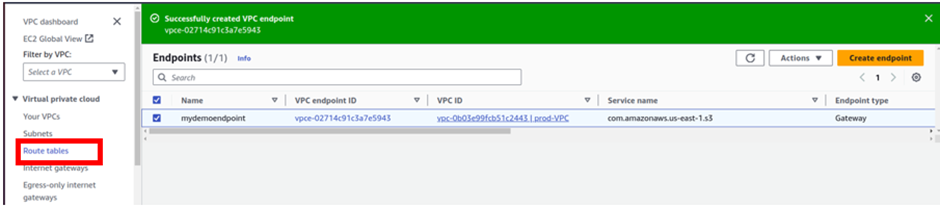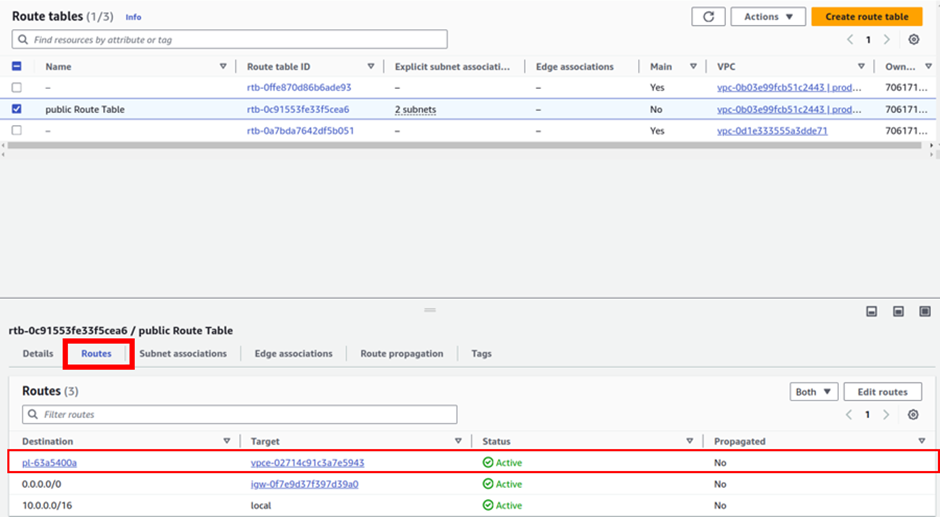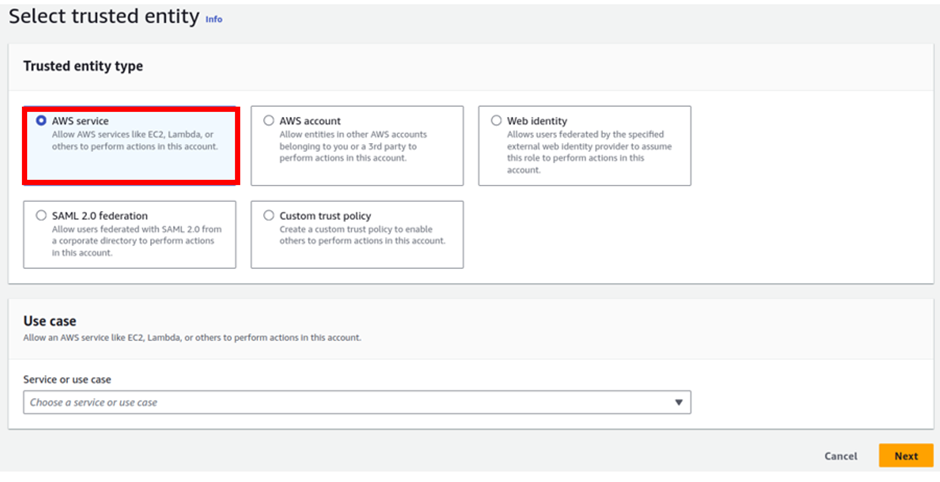
How To Configure Serverless Computing..
Serverless computing has emerged as a revolutionary paradigm in the world of cloud computing, transforming the way developers build and deploy applications. Unlike traditional server-centric models, serverless computing abstracts away infrastructure management, allowing developers to focus solely on writing code and delivering value to end-users.
What is serverless computing?

Serverless computing is a cloud computing model where the Cloud provider manages the underlying infrastructure required to run an application.
Comparison with traditional architecture
Traditional architecture and serverless computing represent two different approaches to building and deploying applications. Here are some differences between the two:
Infrastructure management:
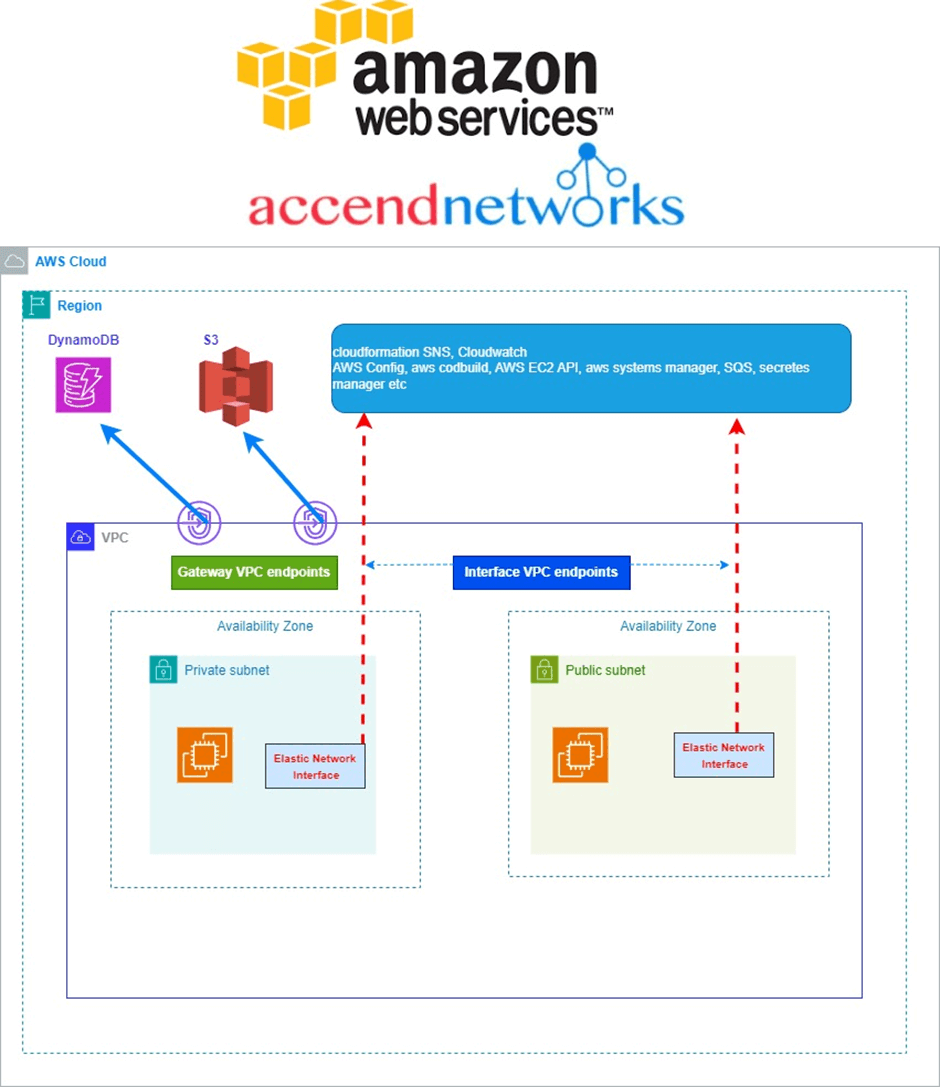
In traditional architecture, developers manage the underlying infrastructure, such as servers, storage, and networking. In serverless computing, the cloud provider manages the infrastructure, allowing developers to focus on writing code.
Scaling: In traditional architecture, scaling is typically achieved by adding more servers or resources as needed. In serverless computing, the cloud provider automatically scales the resources needed to handle the workload.
Cost: Traditional architecture can be expensive, as it requires the purchase and management of hardware and software. Serverless computing, on the other hand, is typically billed on a usage basis, which can be more cost-effective for variable workloads.
Cold starts: In serverless computing, functions may experience a cold start when they are invoked for the first time or after a period of inactivity. This can lead to longer response times, whereas in traditional architecture, the infrastructure is typically always running and ready to respond to requests.
Control: With traditional architecture, developers have full control over the infrastructure and can customize it to meet their specific needs. With serverless computing, the cloud provider manages the infrastructure and developers have less control over the environment.
Benefits of serverless computing
Serverless Computing has offered the following benefits just to mention a few.
Cost savings: Serverless applications are cost-effective because developers only pay for the resources used during the function’s execution, rather than paying for the entire infrastructure.
Scalability: Serverless applications can automatically scale up or down based on demand, ensuring that the application can handle sudden spikes in traffic or other events.
Reduced operational complexity: Serverless computing eliminates the need for developers to manage infrastructure and server-side resources, reducing operational complexity and allowing developers to focus on writing code.
Improved fault tolerance and availability: The cloud provider manages the infrastructure required to run the application, including monitoring, scaling, and failover, ensuring that the application is always available and can handle sudden spikes in traffic or other events. This provides a high level of fault tolerance and availability.
Best practices
Here are some best practices for developing serverless applications:
Function design: Design functions to be small, stateless, and focused on a single task. This will help ensure that they can be easily tested, deployed, and scaled independently.
Use event-driven architectures: Use events to trigger functions in response to changes in the system. This can help reduce the cost of running your application, as functions only execute when needed.
Minimize cold starts: Cold starts occur when a function is invoked for the first time or when it has been idle for a while. These can lead to longer response times for users. To minimize cold starts, consider using provisioned concurrency or keeping functions warm by periodically invoking them.
Optimize resource usage: Because serverless applications are charged based on usage, it’s important to optimize resource usage to reduce costs. Consider using a CDN to cache static content, and use serverless databases to minimize the amount of server resources needed.
Use security best practices: Serverless applications are still vulnerable to security threats, so use security best practices such as encrypting sensitive data, limiting access to resources, and regularly patching software.
When to use serverless applications?
Serverless computing can be a good choice for certain types of applications. Here are some scenarios where serverless computing may be a good fit:
Event-driven workloads: Serverless computing is well-suited for event-driven workloads that are triggered by events, such as HTTP requests, changes to a database, or messages from a queue.
Variable workloads: Serverless computing is also well-suited for workloads that have variable demand, as the cloud provider can automatically scale the resources needed to handle the workload. This can reduce the cost of running the application during periods of low demand.
Rapid development: Serverless computing can be a good choice for applications that require rapid development and deployment. By removing the need to manage infrastructure, developers can focus on writing code and deploying features quickly.
Data processing: Serverless computing can also be a good choice for data processing workloads that can be broken down into smaller, independent tasks. This can help reduce the cost and complexity of managing the infrastructure needed to process large amounts of data.
Conclusion:
Serverless computing on AWS marks a paradigm shift, empowering developers to focus on creating innovative applications without the burden of managing infrastructure.
Stay tuned for more.
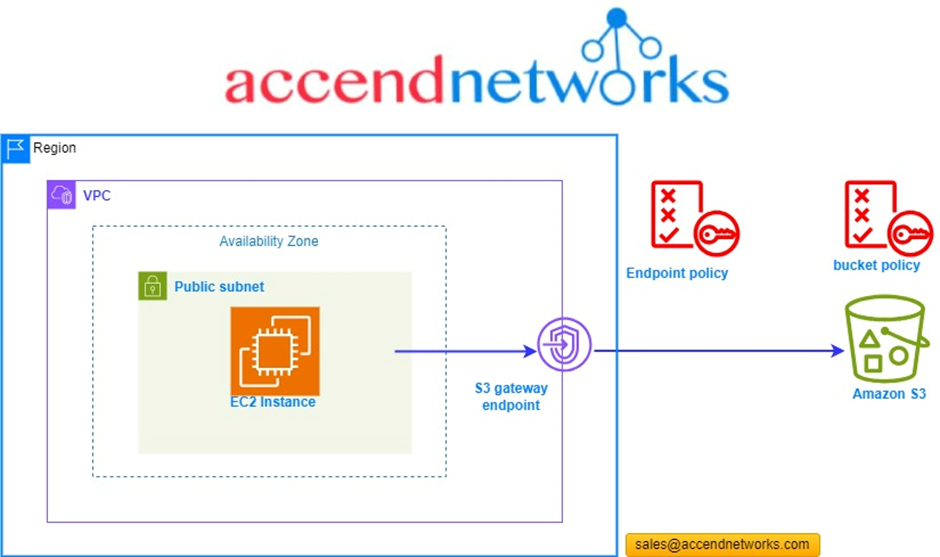
If you have any questions concerning this article or have an AWS project that requires our assistance, please reach out to us by leaving a comment below or email us at sales@accendnetworks.com.
Thank you!