Accend Networks San Francisco Bay Area Full Service IT Consulting Company

Categories
Blogs

Boosting Performance: The Power of Read Replicas in Database Management.

Boosting Performance: The Power of Read Replicas in Database Management.

Introduction

In the ever-evolving landscape of data-driven applications, performance is a critical factor that can make or break user experiences. Database management plays a pivotal role in this scenario, and one effective strategy for enhancing performance is the use of read replicas. If your database server goes down or is incredibly choked due to high volume and starts grinding to a halt, it doesn’t really matter if your application servers are still up — they wouldn’t be able to do useful things for your user without talking to the database server.

The Cloud gives us a really easy way to scale database compute capacity and resilience: the Read Replica!

What’s a Read Replica?

A read replica is a read-only copy of a DB instance. You can reduce the load on your primary DB instance by routing queries from your applications to the read replica. In this way, you can elastically scale out beyond the capacity constraints of a single DB instance for read-heavy database workloads.

In AWS, Amazon Relational Database Service (RDS) allows you to create read replicas of your primary DB instance with basically zero effort. RDS uses asynchronous replication to keep the read replicas up-to-date with the master. The specific replication technology used varies, depending on what database engine your primary DB uses (e.g., MySQL, Oracle, PostgreSQL, etc)

Read replicas have distinct endpoints, different from the primary DB instance. Your application will have to be configured to connect to the correct endpoint (primary vs read replica), depending on what it needs to do. That means read-write workloads are directed to the primary DB endpoint, while your read-only workloads (e.g., dashboards and report generation) are directed to the read replica.

Read replicas are not free — they are priced just like a primary instance. If your read replica is the same size as your primary instance, then it would cost the same. If it is larger or smaller (read replicas don’t need to be exactly the same size as the primary DB instance), then the pricing adjusts as you would expect.

OK, So What’s a Read Replica Good For?

The primary benefit of a read replica is making your database more performant. Since a read replica is effectively a duplicate server, you get that extra compute capacity for your database needs.

And it’s not just that you get twice the computing power — it’s how you get it.

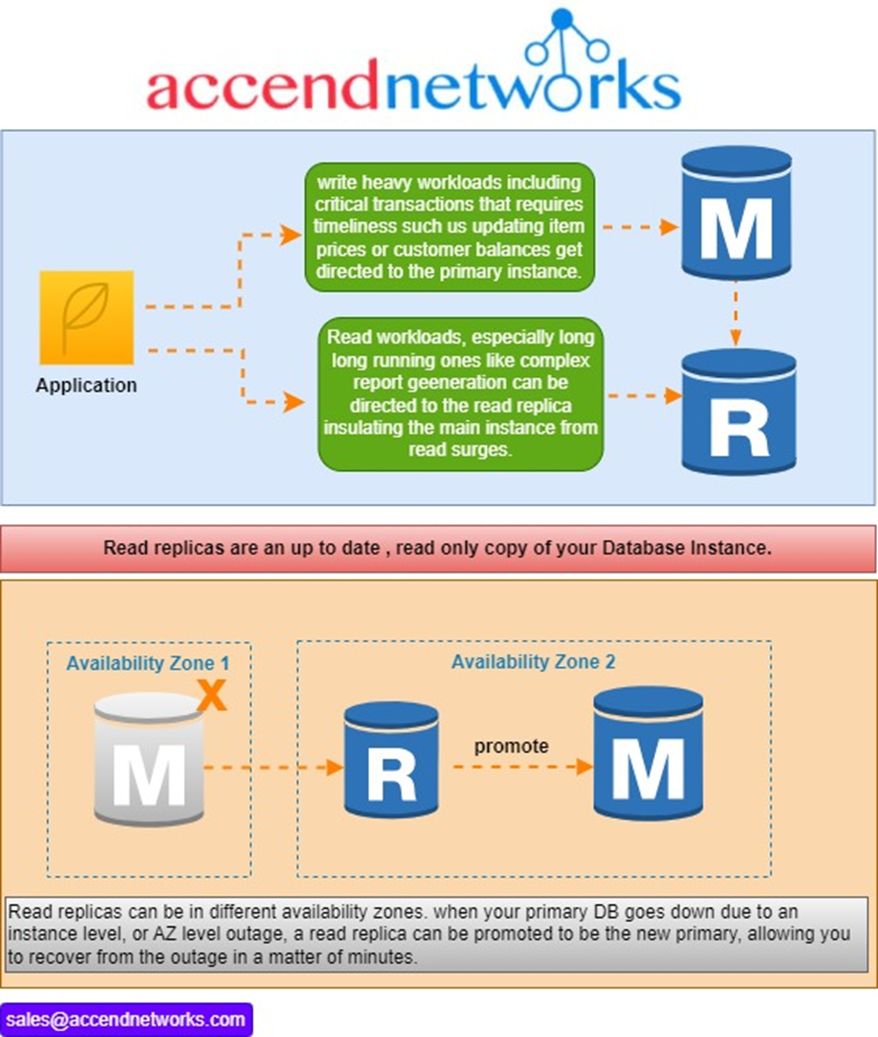
If you doubled the size of your primary DB instance, instead of adding a read replica to it, sure, you’d get equivalent total specs. But with the read replica setup, you can effectively partition your workloads so that heavy read processing can’t bog down your critical transaction processing. If you merely doubled the size of the primary DB instance, a surge of heavy report generation and dashboarding could suddenly slow down the entire DB instance and affect other areas of your application.

And that’s not all! Read replicas also give you an availability improvement. If you wanted Availability Zone (AZ)-level high availability, you could place your read replica in a different AZ from your primary DB instance. When your primary DB goes down, whether just an instance problem or a legitimate AZ-level service disruption, your read replica can be promoted to be a standalone DB, becoming the new primary DB instance. This takes only minutes — a lot faster than if you had to manually create a new primary DB instance from scratch using a backup.

How read replicas work

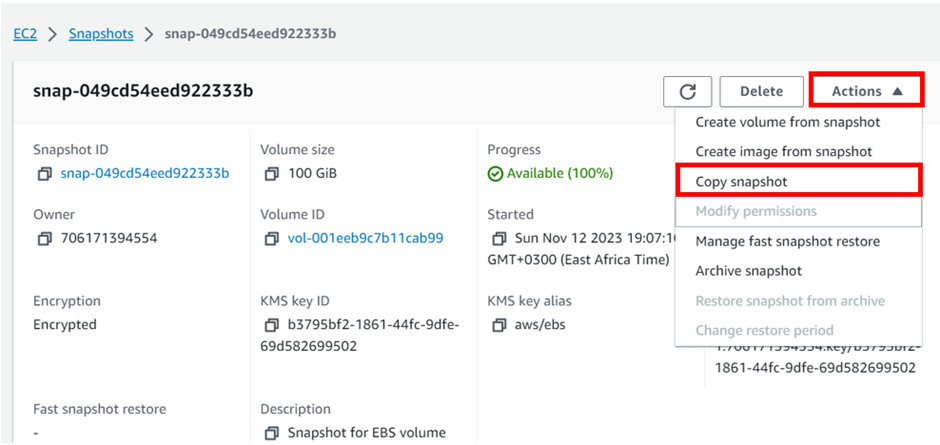
When you create a read replica, you first specify an existing DB instance as the source. Then Amazon RDS takes a snapshot of the source instance and creates a read-only instance from the snapshot. Amazon RDS then uses the asynchronous replication method for the DB engine to update the read replica whenever there is a change to the primary DB instance.

The read replica operates as a DB instance that allows only read-only connections. An exception is the RDS for the Oracle DB engine, which supports replica databases in mounted mode. A mounted replica doesn’t accept user connections and so can’t serve a read-only workload. The primary use for mounted replicas is cross-region disaster recovery. For more information, see Working with Read Replicas for Amazon RDS for Oracle.

Applications connect to a read replica just as they do to any DB instance. Amazon RDS replicates all databases from the source DB instance

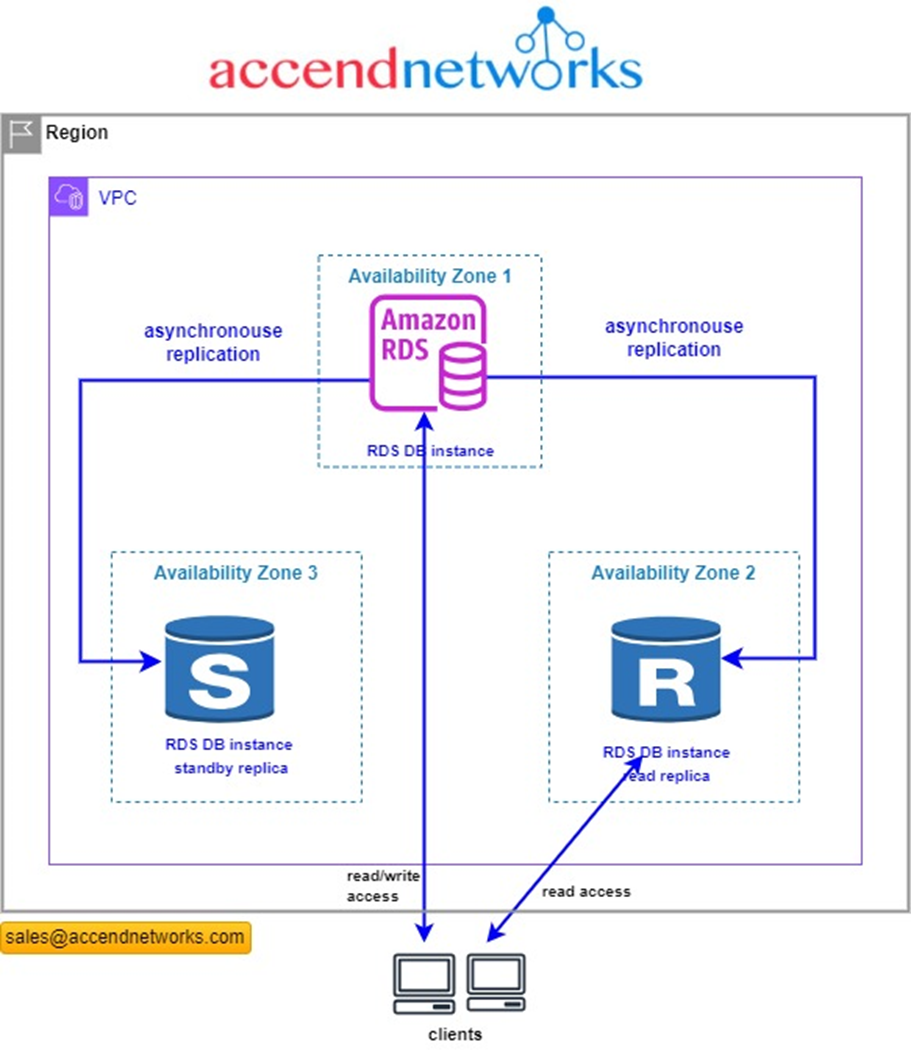
Read replicas in a multi-AZ deployment

You can configure a read replica for a DB instance that also has a standby replica configured for high availability in a multi-AZ deployment. Replication with the standby replica is synchronous. Unlike a read replica, a standby replica can’t serve read traffic.

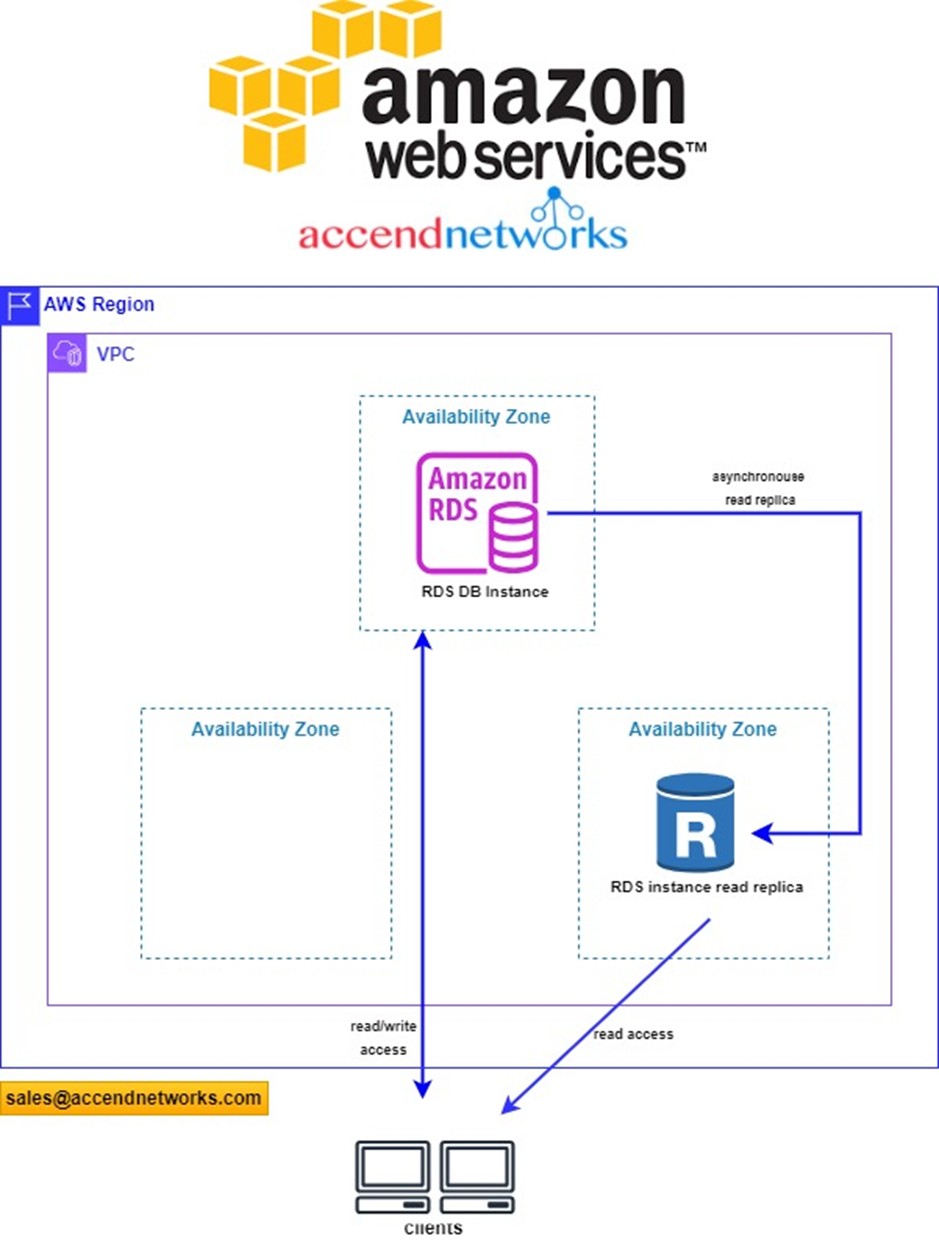
In the following scenario, clients have read/write access to a primary DB instance in one AZ. The primary instance copies update asynchronously to a read replica in a second AZ and also copies them synchronously to a standby replica in a third AZ. Clients have read access only to the read replica.

For more information about high availability and standby replicas, see Configuring and managing a Multi-AZ deployment.

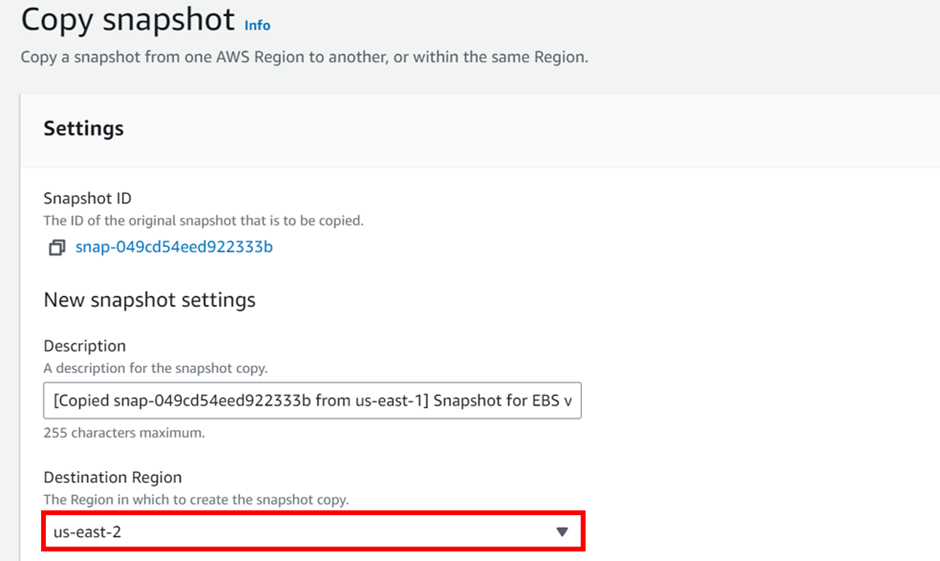
Cross-Region read replicas

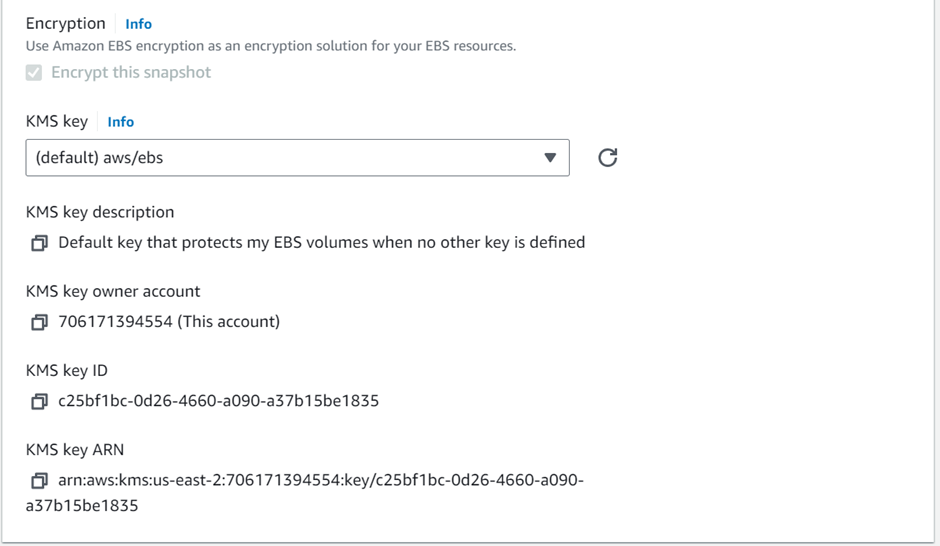
In some cases, a read replica resides in a different AWS Region from its primary DB instance. In these cases, Amazon RDS sets up a secure communications channel between the primary DB instance and the read replica. Amazon RDS establishes any AWS security configurations needed to enable the secure channel, such as adding security group entries.

Some commendable features of the Read Replicas:

  • At most, we can have up to 5 read replicas of any particular database.
  • In a bigger organization, where the data is humongous in amount, we can also create read replicas of the Read replicas but this feature comes along with a latency constraint.
  • For making, it more scalable at times of heavy workloads, these replicas can also be transformed into independent databases.
  • Whenever some hardware failure occurs on the primary database, at that time one of the replicas is promoted as primary in order to reduce the amount of loss that occurred by the failure.

Let us go through the steps involved in creating a read replica.

Note: As we all know, the concept of replicas is useful for huge organizations as they have a large database to work with. Thus, AWS has not allotted this facility for free tier accounts as we individuals do not need this service.

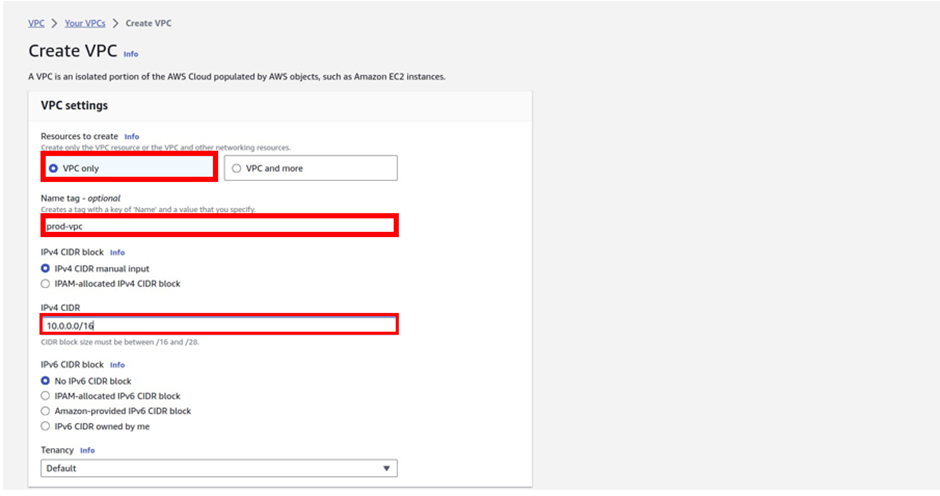
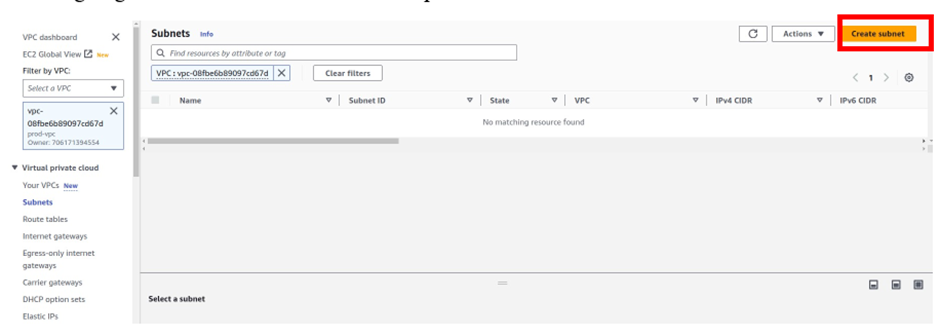
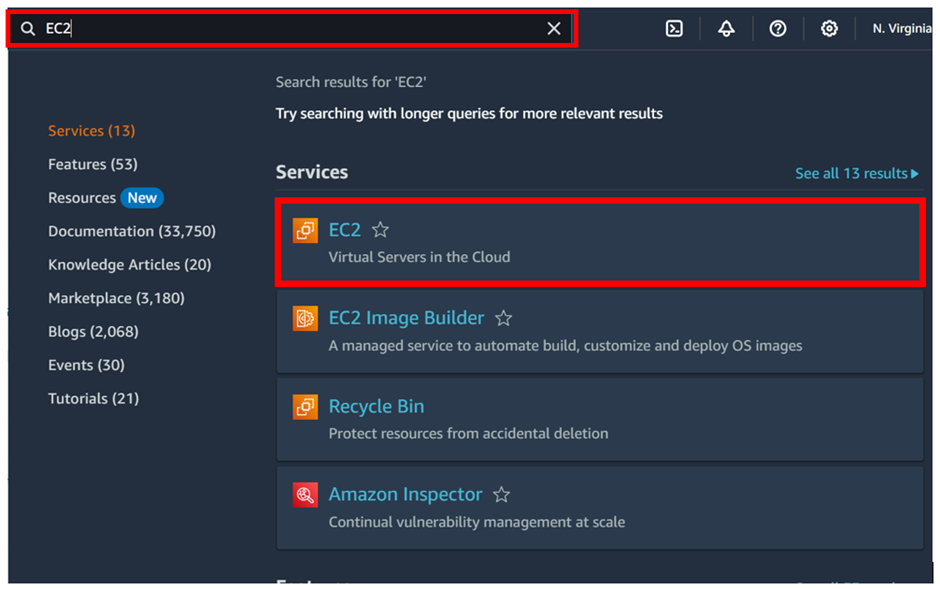
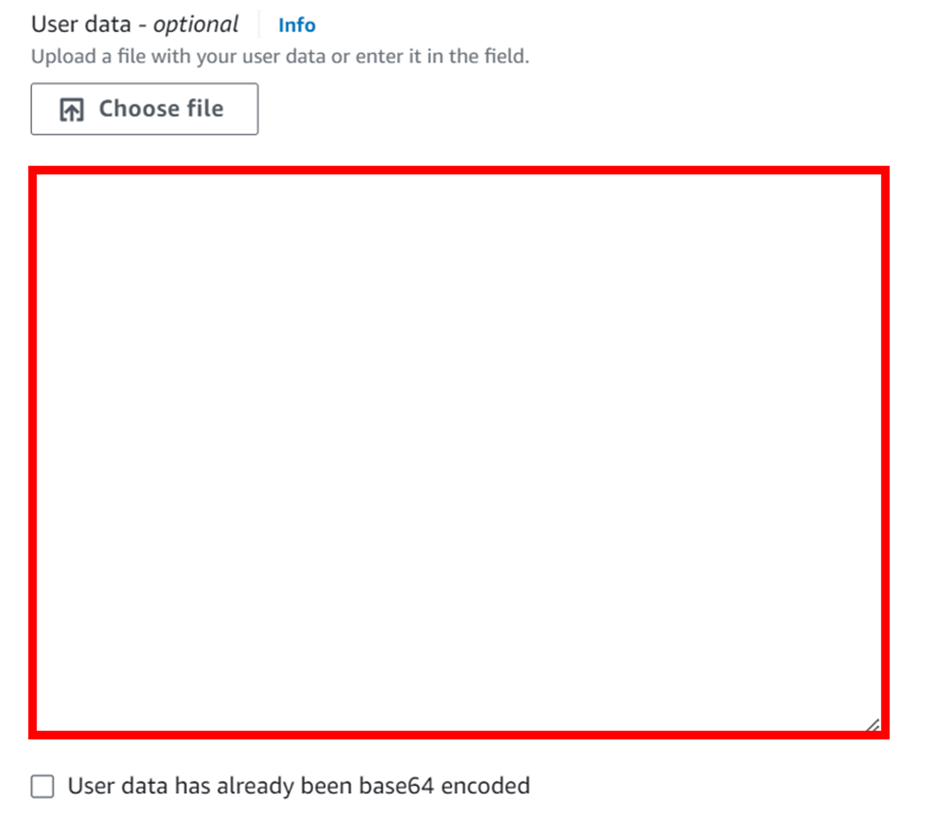
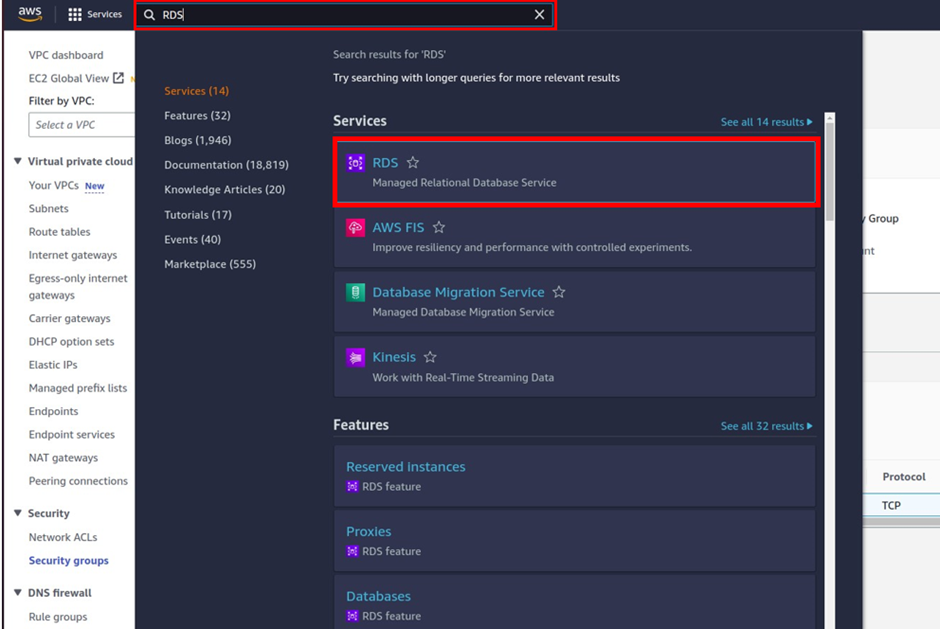
Login into your AWS account, in the search box type RDS then select RDS under service.

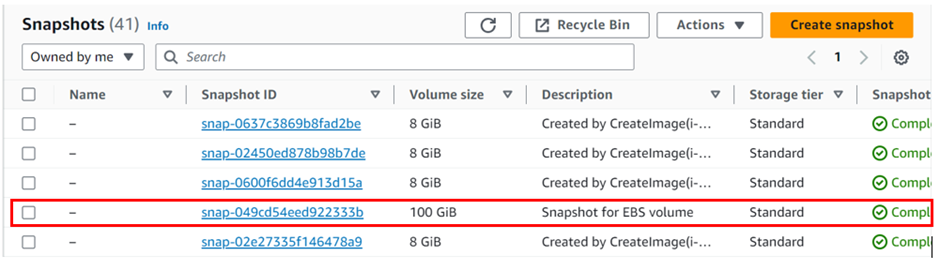
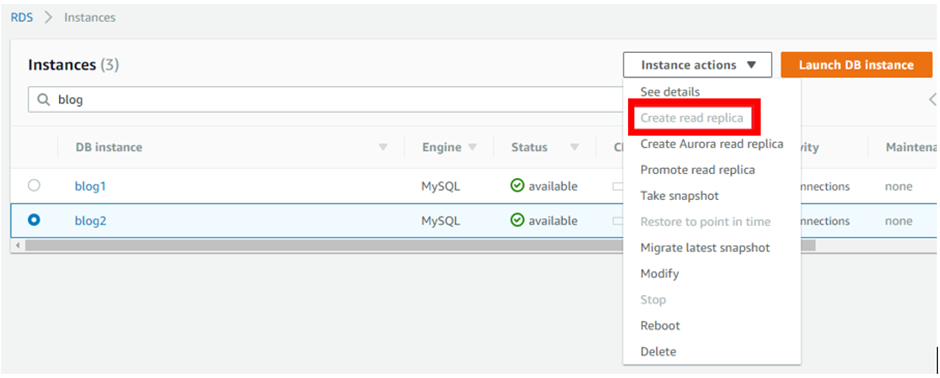
Select the database you want to make read replicas of. From “Actions” choose “Read Replicas”.

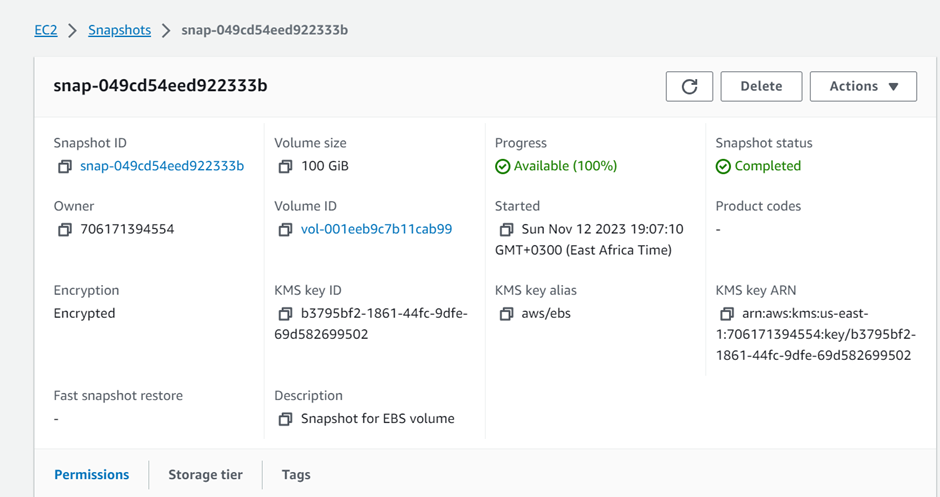
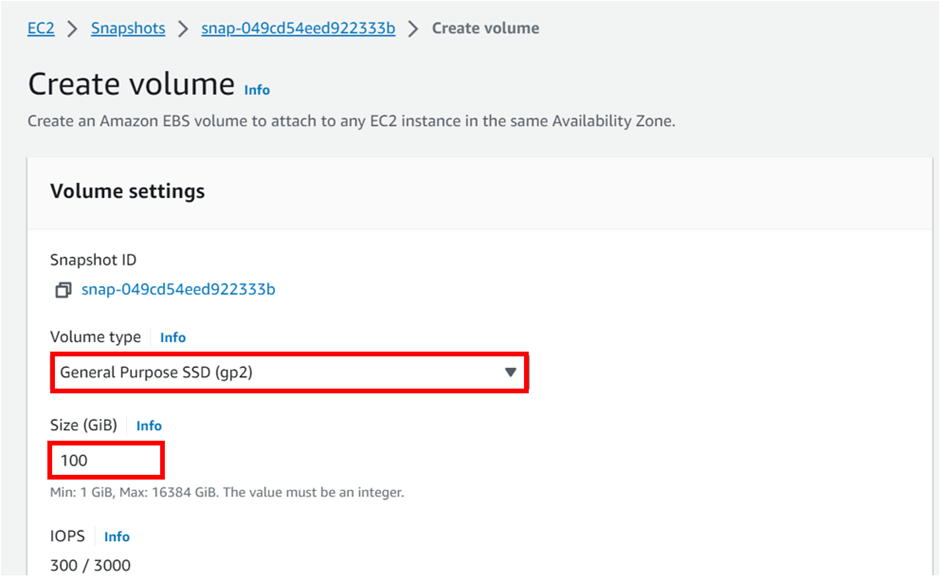
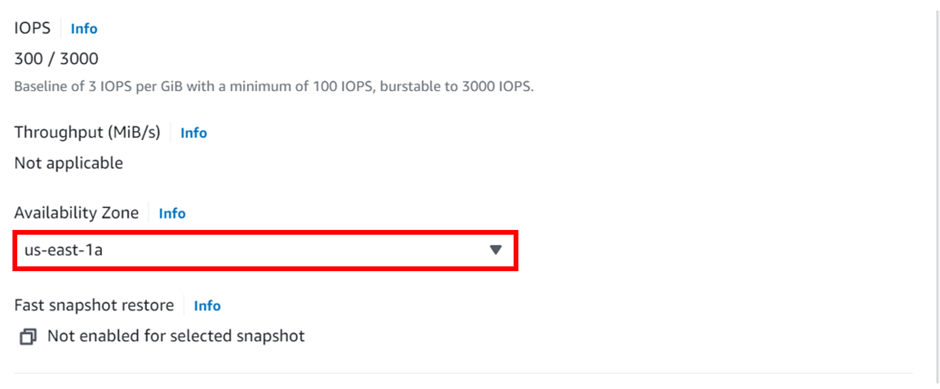
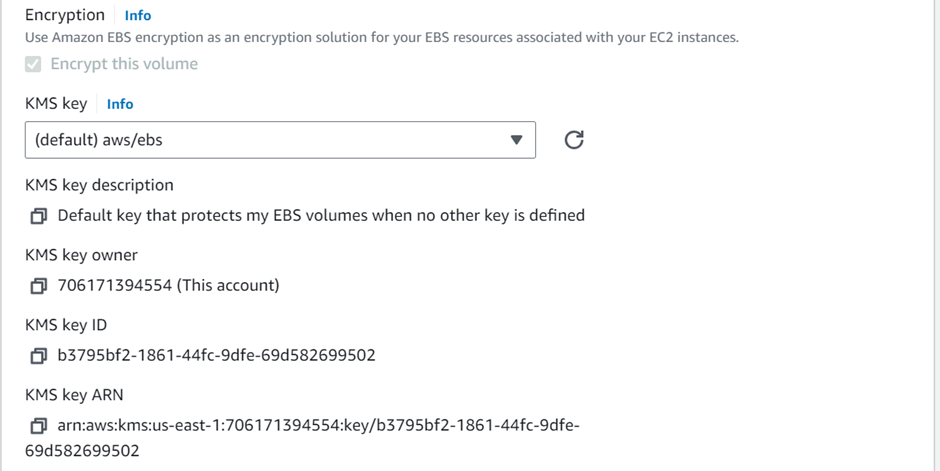
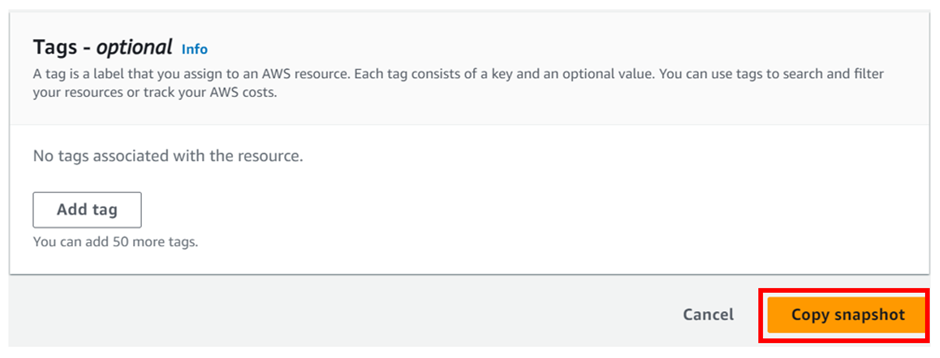
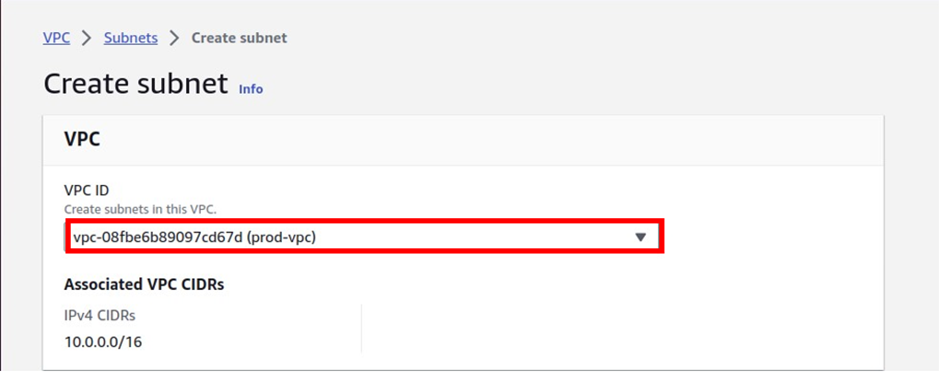
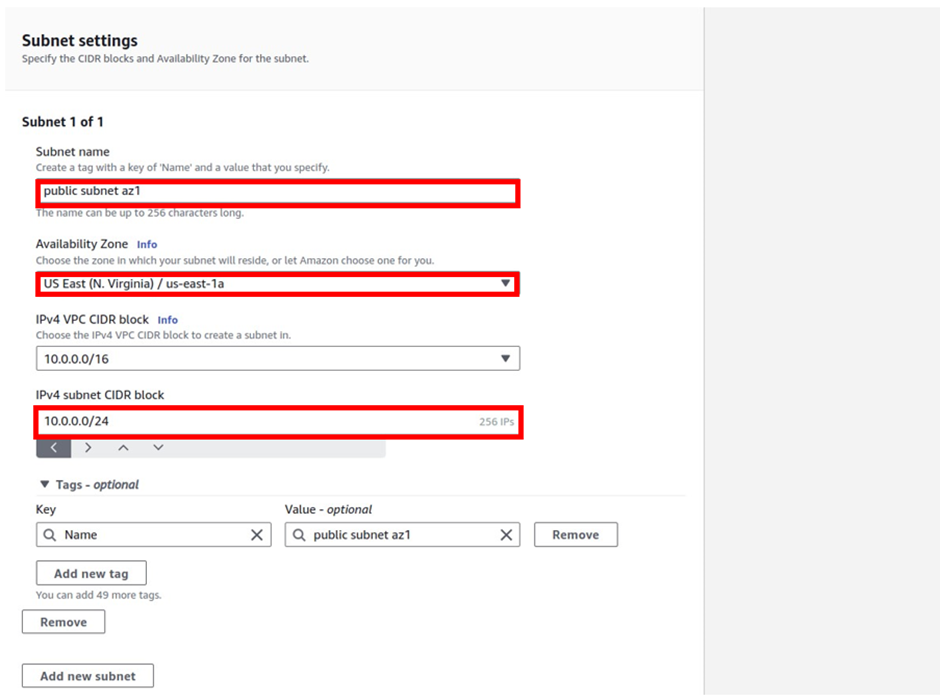
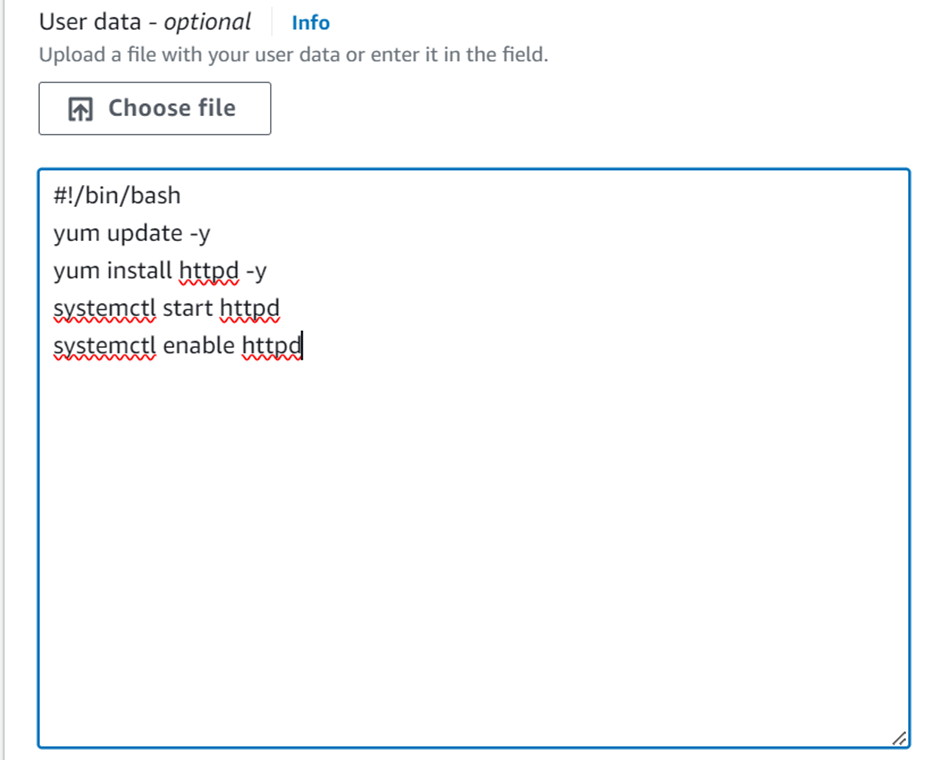
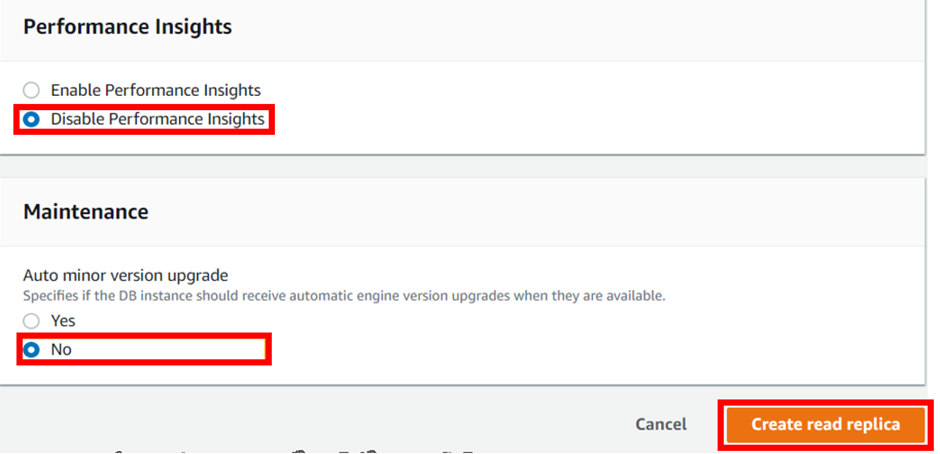
In the create-read replica DB instance dashboard, align all the configurations as per your requirements.

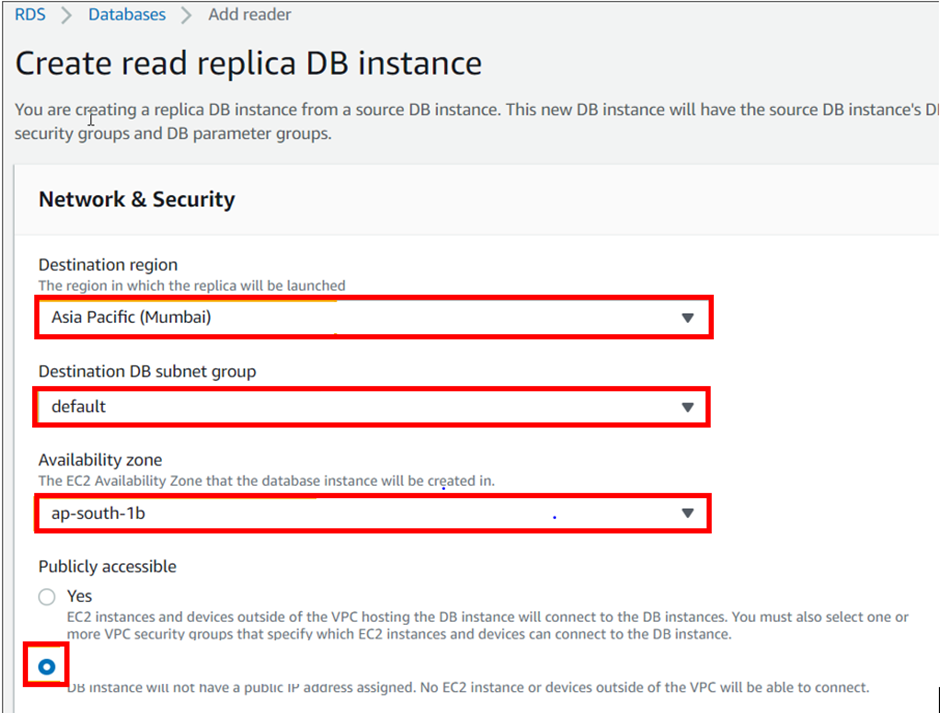
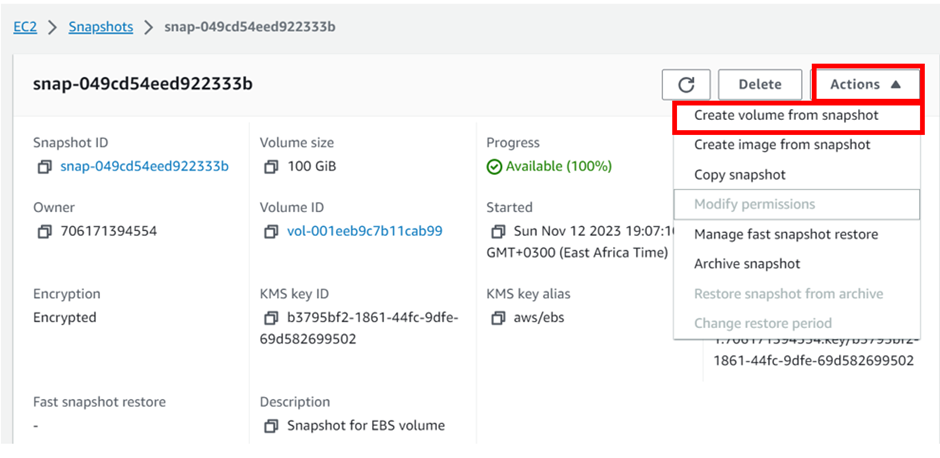
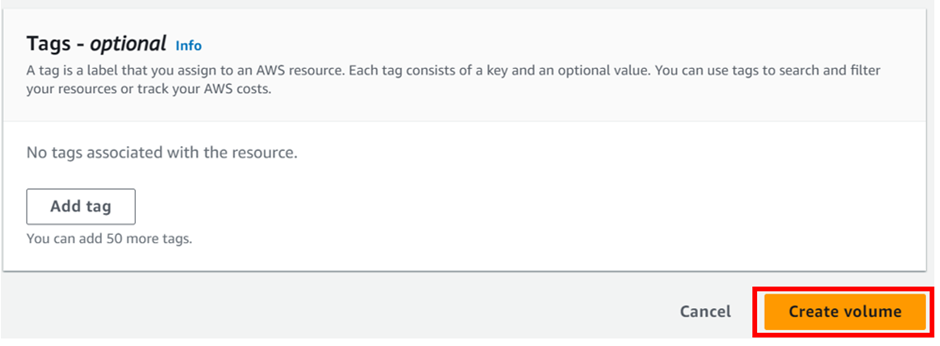
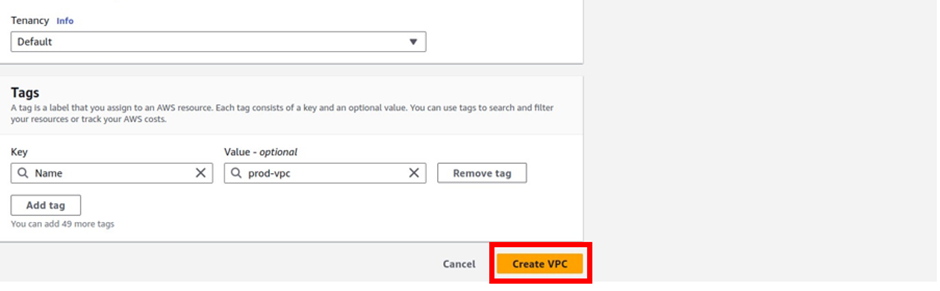
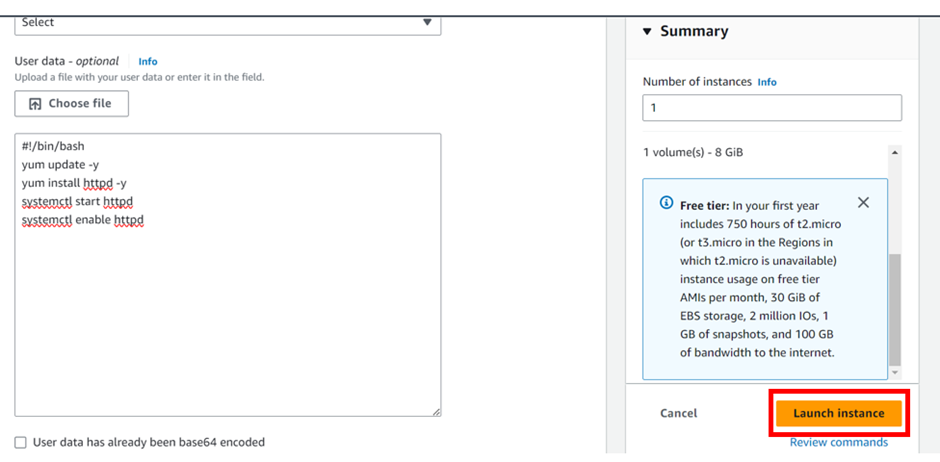
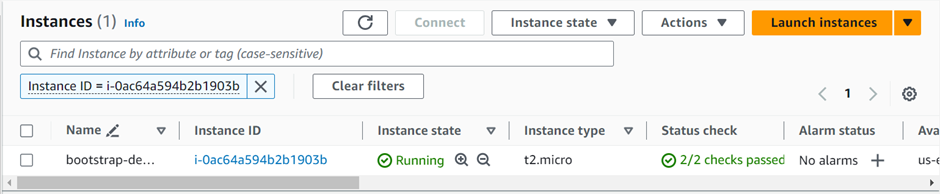
When you find everything appropriately configured as per the needs. Click on “Create Read Replica”.

Make sure to pull everything down, to avoid surprise bills.

If you have any questions concerning this article or have an AWS project that requires our assistance, please reach out to us by leaving a comment below or email us at. sales@accendnetworks.com

Thank you!

Categories
Blogs

CREATING EBS VOLUME FROM SNAPSHOTS AND TRANSFER OF SNAPSHOTS BETWEEN REGIONS.

Creating EBS Volume From Snapshots And Transfer Of Snapshots Between Regions.

Embarking on a cloud-driven journey requires not only innovation but also the ability to seamlessly manage and transfer data across diverse landscapes. Today, we explore a pivotal aspect of this journey — the art of creating EBS volumes from snapshots and orchestrating the seamless transfer of snapshots between AWS regions.

To back up the data in your EBS volumes, Amazon has developed EBS snapshots. This disaster recovery solution works by copying your EBS volumes at specific points in time. Should disaster strike, you can restore your data from the latest snapshot.

How Do AWS EBS Snapshots Work?

EBS snapshots work as an incremental storage system that captures and stores each moment-in-time snapshot of your EBS volume. All snapshots are stored in Amazon Simple Storage Service (S3). The next time a snapshot is taken, only data that was not included in the previous snapshot will be stored.

EBS snapshots can thus be used to track how your EBS volumes have changed over time, whether a new volume was created or an old volume modified.

The advantages of Using EBS Snapshots

The main advantages of using AWS’ EBS snapshots are:

  • Comprehensive backup— having a solid system for backing up your data is critical. EBS snapshots allow you to restore your data to any point in time when a snapshot was taken and enables you to delete old snapshots without worrying about data loss for valid data.
  • Reliability of Amazon S3— when you are backing up your data with a third party, you want to make sure you are in good hands. Amazon’s S3 is an industry-leading cloud storage service. The infrastructure is reliable and it is generally cost-effective.
  • Time savings— because EBS snapshots are an incremental back-up system, backing up will be a fairly quick process. Once all your block-level data is saved to your S3, only changes on the block level will be recorded. This is much quicker than a full back-up.
  • Cost-efficiency— storage costs money and costs can balloon as your company grows. The incremental nature of snapshots eliminates redundancy in your backups, which can help reduce your storage costs. Likewise, they take up much less storage space and are thus cheaper than the heavier EBS volumes they capture.

An EBS Snapshot is nothing more than a backup of an EBS Volume. It can’t be attached to an instance, the user can’t read any data from it, and it’s not possible to utilize it for anything but creating other EBS Snapshots or EBS Volumes. Therefore, the key step in this equation is creating an EBS Volume from an EBS Snapshot. This is what we’re going to cover in this blog.

Prerequisites

A basic knowledge of EBS Volumes. You can follow our previous post on EBS volumes.

Select an EBS Snapshot and create a Volume

From the EC2 Dashboard, click on “Snapshots.” From the list of EBS Snapshots, choose the desired snapshot, click on

From the top menu, click on “Actions.” then click Create volume from snapshot.

You will be brought to a new page to confirm the parameters of the new volume.

Confirm EBS Volume Parameters & Confirm Deployment

Note that during the volume creation process, you’ll encounter the same parameters we’ve covered in the main EBS — Elastic Block blog. If you’re uncertain about any of them, make sure to refer to that page.

From the Settings, confirm the “Snapshot ID.”

From the Settings, select the “Volume type.”

From the Settings, input the “Size.”

2.4 — From the Settings, select the “IOPS.”

Note: depending on the “Volume type,” this option may not be available, as shown in the example.

Remember our snapshot was encrypted with the default encryption, so our volume from the snapshot will be automatically encrypted.

From the Settings, click on “Create Volume.”

You’ll receive a confirmation that a volume has been created. If you navigate to the EBS > Volumes tab, you’ll notice that you now have a volume that is tagged with the ID of the snapshot we’ve just utilized.

Conclusion on Creating an EBS Volume from an EBS Snapshot

The snapshot can’t be utilized by any application or service. To attach the data/storage to an EC2 instance, it must be in the form of an EBS Volume. In this article, we’ve taken a snapshot and walked through the steps of creating an EBS Volume from it.

Remember we have created this EBS volume in the same availability zone, but on the same note we would create this EBS volume from the snapshot in a different availability zone, this is very simple, under availability zone you would simply select the availability zone where you would want to create the snapshot.

COPYING SNAPSHOT TO A DIFFERENT AWS REGION.

EBS Volumes are created inside of a specific AZ. It isn’t possible to move an EBS Volume from one AZ to another directly. An EBS Snapshot will create a backup of an EBS Volume at the time of inception.

An EBS Snapshot can be used to create an EBS Volume in a different Availability Zone.

EBS Snapshot in One Availability Zone

Initial State

we’re looking at the EBS Snapshots page in the US-east-1 region — we can clearly see that we have EBS Snapshot in this region.

When we come to the Ohio region, Us-eat-2 we can see we have no snapshots there.

Creating a Copy of an EBS Snapshot into a Different Availability Zone

Select an EBS Snapshot & Copy

From the list of EBS Snapshots, choose the desired snapshot, I will choose the snapshot I just created. click on it.

From the top menu, click on “Actions.”

From the drop-down menu, click on “Copy snapshot.”

You will be brought to a new page to confirm the parameters of the new snapshot.

Configure Snapshot & Confirm Copy

From the Settings, choose the desired Availability Zone, for this tutorial, we’re using us-east-2.

On the bottom of the page, click on “Copy snapshot.”

You’ll receive a confirmation that a snapshot has been created. If you navigate to the target region (In this case us-east-2) you’ll see that there’s a new entry with the snapshot

Conclusion on Copying EBS Snapshots between Availability Zones

In this blog, we’ve covered why you might want to copy an EBS Snapshot from one Availability Zone to another. We’ve also covered the exact steps to take and showcased a move from us-east-1 to us-east-2.

Pull down and stay tuned for more.

If you have any questions concerning this article or have an AWS project that requires our assistance, please reach out to us by leaving a comment below or email us at. sales@accendnetworks.com

Thank you!

Categories
Blogs

Deployment of SDDC using VMware Cloud on AWS Services

Deployment of SDDC using VMware Cloud on AWS Services

VMware Cloud on AWS brings VMware’s enterprise-class Software-Defined Data Center (SDDC) software to the AWS Cloud and enables customers to run production applications across VMware vSphere-based private, public, and hybrid cloud environments with optimized access to AWS.

Benefits of VMware Cloud on AWS

Often enterprises are given a binary choice between private and public cloud as their deployment options. In these cases, many enterprises have a hybrid environment where two different teams manage two separate hosting platforms. VMware Cloud on AWS offers a hybrid platform where IT organizations have access to both public and private while retaining the ability to shift workloads seamlessly between them. Being able to live migrate and extend into a virtual machine without having to reconfigure an application provides a much more flexible environment.

VMware Cloud on AWS allows access to the range of AWS services as an extension of an existing VMware solution. IT organizations can rent a VMware SDDC using some of the latest technologies with the flexibility of the pay-as-you-go model. Companies can quickly add capacity to a new project or move workloads hosted on dedicated hardware to the cloud.

Prerequisites and Limitations for VMWare Cloud on AWS

The following are some prerequisites that you will need to consider before deploying VMware Cloud on AWS:

MyVMware Account: This profile will need to be completely filled out before you can even start your initial deployment.

AWS Account: This account needs to have administrative privileges for some of the reasons in deployment.

Activation Link: This link will be sent to the email address correlated with your MyVMware profile.

VMC on AWS offers many capabilities that have some limitations at maximum and minimum levels, and these limits are considered hard limits (can’t be changed) unless otherwise indicated.

The Architecture of VMware Cloud on AWS

VMware Cloud on AWS is based on VMware software stack such as vSphere, vCenter, vSAN, NSX-T, designed to run on AWS bare-metal dedicated infrastructure. It enables businesses to manage VMware-based resources and tools on AWS with seamless integration with other Amazon services such as Amazon EC2, Amazon S3, Amazon Redshift, Amazon Direct Connect, Amazon RDS, and Amazon DynamoDB.

VMware Cloud on AWS allows you to create vSphere data centers on Amazon Web Services. These vSphere data centers include vCenter Server for managing your data center, vSAN for storage, and VMware NSX for networking. Using Hybrid Linked Mode, you can connect an on-premises data center to your cloud SDDC and manage both from a single vSphere Client interface. With your connected AWS account, you can access AWS services such as EC2 and S3 from virtual machines in your SDDC.

Organizations that adopt VMware Cloud on AWS will see these benefits:

· A broad set of AWS services and infrastructure elasticity for VMware SDDC environments.

· Flexibility to strategically choose where to run applications based on business needs.

· Proven capabilities of VMware SDDC software and AWS Cloud to deliver customer value.

· Seamless, fast, and bi-directional workload portability between private and public clouds.

When you deploy an SDDC on VMware Cloud on AWS, it’s created within an AWS account and VPC dedicated to your organization. The Management Gateway is an NSX Edge Security gateway that provides connectivity to the vCenter Server and NSX Manager running in the SDDC. The internet-facing IP address is assigned from a pool of AWS public IP addresses during SDDC creation. The Compute Gateway provides connectivity for VMs, and VMware Cloud on AWS creates a logical network to provide networking capability for these VMs. A connection to an AWS account is required, and you need to select a VPC and subnet within that account. You can only connect an SDDC to a single Amazon VPC, and an SDDC has a minimum of four hosts.

Steps before SDDC Deployment in VMware Cloud on AWS

Creating a New VPC

Choose the correct region to deploy your VMware Cloud on AWS SDDC.

Straight away in the search box type VPC, then select VPC under services.

once in the VPC dashboard, select VPC’s then click Create VPC.

Enter the VPC details such as Name tag, IPv4 CIDR block, Tenancy as Default, and click Create.

There we go, we have successfully created VPC, click close.

Creating a Private Subnet

You will now create a private subnet

Open the Amazon VPC console, and select Subnets.

Select Create Subnet.

In the Create Subnet dashboard, select the VPC to create the subnet then provide, a Name tag, select the desired Availability Zone, IPv4 CIDR block, and click on Create.

Repeat steps to create desired subnets for each remaining Availability Zone in the region and click Close.

Activate VMware Cloud on AWS Service

You can now activate your VMware Cloud on AWS service. When the purchase is processed, AWS sends a welcome email to the specified email address and starts the process using the following steps:

  • Select the Activate Service link after receiving the Welcome email from AWS.
  • Log in with MyVMware credentials.
  • Review the terms and conditions for the use of services, and select the check box to accept.
  • Select Next to complete the account activation process successfully, and you will be redirected to the VMware Cloud on AWS console.
  • Create an organization that is linked to the MyVMware account.
  • Enter the Organization Name and Address for logical distinction.
  • Select Create Organization to complete the process.

Identity and Access Management (IAM)

Assign privileged access to specific users to access the Cloud Services and SDDC console, SDDC, and NSX components. There are two types of Organization Roles; Organization Owner and Organization Member available.

The Organization Role with Organization Owner can add, modify, and remove users and access to VMware Cloud Services. The Organization Role with Organization Member can access Cloud Services but not add, remove, or modify users.

Deployment of SDDC on VMware Cloud on AWS

Sign in to Cloud Services Portal (CSP) to start the deployment of SDDC on VMC on AWS. Log in to the VMC Console.

Select VMware Cloud on AWS Service from the available services.

Select Create SDDC.

Enter the SDDC properties such as AWS Region, Deployment (either Single Host, Multi-Host, or Stretched Cluster), Host Type, SDDC Name, Number of Hosts, Host Capacity, and Total Capacity, and click Next.

Connect to a new AWS account, and click NEXT.

Select your previously configured VPC and subnet, and NEXT.

Enter the Management Subnet CIDR block for the SDDC, and click NEXT.

Click the two checkboxes to acknowledge to take responsibility for the costs, and click DEPLOY SDDC.

You’ll be charged when you click on DEPLOY SDDC and can’t pause or cancel the deployment process once it starts and will take some time to complete.

Your VMware-based is ready on AWS.

Stay tuned for more.

If you have any questions concerning this article or have an AWS project that requires our assistance, please reach out to us by leaving a comment below or email us at. sales@accendnetworks.com

Thank you!

Categories
Blogs Uncategorized

Understanding AWS Security Groups and Bootstrap Scripts

Understanding AWS Security Groups and Bootstrap Scripts: Enhancing Cloud Security and Automation.

In the realm of AWS, achieving a balance between robust security and streamlined automation is essential for efficient cloud management. AWS Security Groups and Bootstrap Scripts play pivotal roles in this Endeavor. In this article, we’ll delve into these two AWS components and provide a hands-on demo to illustrate how to leverage them effectively.

AWS Security Groups:

What are AWS Security Groups?

AWS Security Groups are a fundamental element of AWS’s network security model. They act as virtual firewalls for your instances to control inbound and outbound traffic. Security Groups are associated with AWS resources like EC2 instances and RDS databases and allow you to define inbound and outbound rules that control traffic to and from these resources.

Key Features of AWS Security Groups:

Stateful: Security Groups are stateful, meaning if you allow inbound traffic from a specific IP address, the corresponding outbound traffic is automatically allowed. This simplifies rule management.

Default Deny: By default, Security Groups deny all inbound traffic. You must explicitly define rules to allow traffic.

Dynamic Updates: You can modify Security Group rules anytime to adapt to changing security requirements.

Use Cases:

Web Servers: Security Groups are used to permit HTTP (port 80) and HTTPS (port 443) traffic for web servers while denying other unwanted traffic.

Database Servers: For database servers, Security Groups can be configured to only allow connections from known application servers while blocking access from the public internet.

Bastion Hosts: In a secure architecture, a bastion host’s Security Group can be set up to allow SSH (port 22) access only for specific administrators.

Demo: Creation of security group to open port 22 for SSH, port 80 for HTTP, and port 443 for HHTPS.

To create security group, click on this link and follow our previous demo on the security group.

https://accendnetworks.com/comprehensive-guide-to-creating-and-managing-security-groups-for-your-amazon-ec2-instances/

Bootstrap Scripts

What are Bootstrap Scripts?

A bootstrap script, often referred to as user data or initialization script, is a piece of code or script that is executed when an EC2 instance is launched for the first time. This script automates the setup and configuration of the instance, making it ready for use. Bootstrap scripts are highly customizable and allow you to install software, configure settings, and perform various tasks during instance initialization.

Key Features of Bootstrap Scripts:

Automation: Bootstrap scripts automate the instance setup and configuration process, reducing manual intervention and potential errors.

Flexibility: You have full control over the contents and execution of the script, making it adaptable to your specific use case.

Idempotent: Bootstrap scripts can be designed to be idempotent, meaning they can be run multiple times without causing adverse effects.

Use Cases:

Software Installation: You can use bootstrap scripts to install and configure specific software packages on an instance.

Configuration: Configure instance settings, such as setting environment variables or customizing application parameters.

Automated Tasks: Run scripts for backups, log rotation, and other routine maintenance tasks.

Combining Security Groups and Bootstrap Scripts

The synergy between Security Groups and Bootstrap Scripts offers a robust approach to enhancing both security and automation in your AWS environment.

Security Controls: Security Groups ensure that only authorized traffic is allowed to and from your EC2 instances. Bootstrap scripts can automate the process of ensuring that your instances are configured securely from the moment they launch.

Dynamic Updates: In response to changing security needs, Bootstrap Scripts can automatically update instance configurations.

Demo: Bootstrapping AWS EC2 Instance to update packages, install and start Apache HTTP server. (HTTP is on port 80)

sign in to your AWS Management Console, type EC2 in the search box then select EC2 under services

In the EC2 dashboard, select instances then click launch

In the launch instance dashboard, under name and tags, give your instance a name. call it bootstrap-demo-server.

Under application and OS images, select the QuickStart tab then select Amazon Linux. Under Amazon Machine Image (AMI), select the drop-down button and select Amazon Linux 2 AMI. Scroll down.

Under instance type make sure it is t2. Micro because it is the free-tier one. Under keypair login select the dropdown and select your key-pair. Scroll down.

We will leave all the other options as default move all the way to the advanced details section, then click the drop-down button to expand it.

Move all the way down to the instance user data section. Copy and paste this code inside there.

  • #!/bin/bash
  • yum update -y
  •  yum install httpd -y
  •  systemctl start httpd
  •  systemctl enable httpd

Tip: Once the instance is launched and you may have to go back and modify this User Data section, stop the instance, click Actions-Instance settings-Edit user data.

Under instance, summary, review, and click launch instance.

Click on the instance ID then wait for the status check to initialize. Copy the public IPv4 DNS and paste it into your browser.

We are getting this error because HTTP port 80 is not open, we will go back to our instance modify security group, and open port 80.

Select your instance and click the instance state dropdown move to security then click modify security group.

Under the associated security group, select the search box and look for the web traffic security group which opens port 80 and 443 select it, then click save.

Now come back to your instance copy its public DNS and paste it into your browser.

Congratulations, we can now access our HTTP web traffic on port 80. This clearly shows how security groups can allow or deny internet traffic.

Again, remember this instance was bootstrapped and installed Apache on launch.

Pull everything down and stay tuned for more.

If you have any questions concerning this article or have an AWS project that requires our assistance, please reach out to us by leaving a comment below or email us at sales@accendnetworks.com

Thank you!