Virtual Private Cloud (VPC) Overview: Empowering Secure and Scalable Cloud Networks Part 1.
With Amazon Virtual Private Cloud (Amazon VPC), you can launch AWS resources in a logically isolated virtual network that you’ve defined.
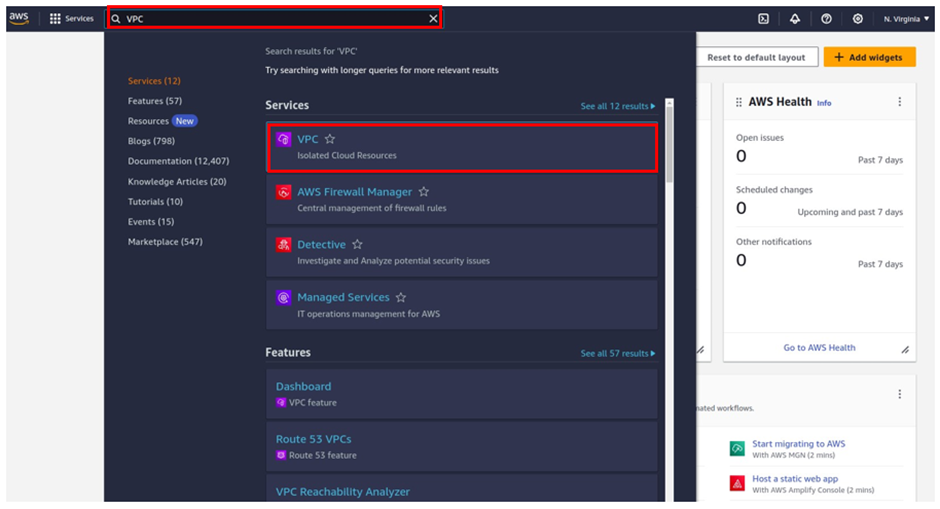
VPC Fundamentals
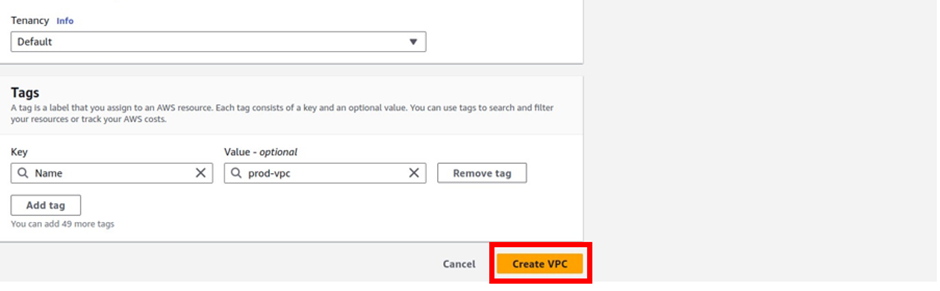
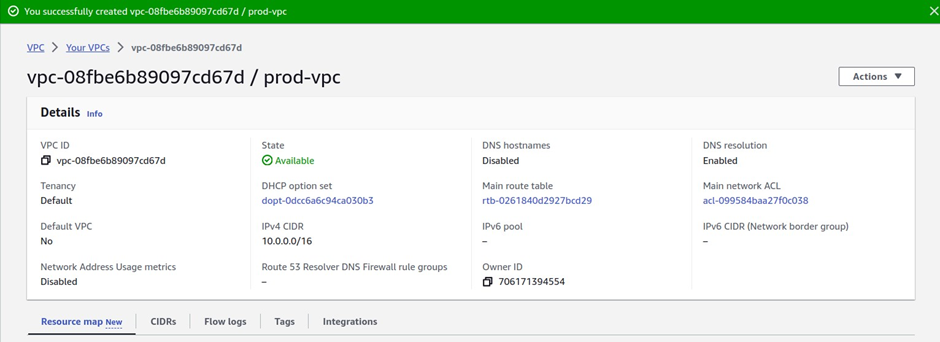
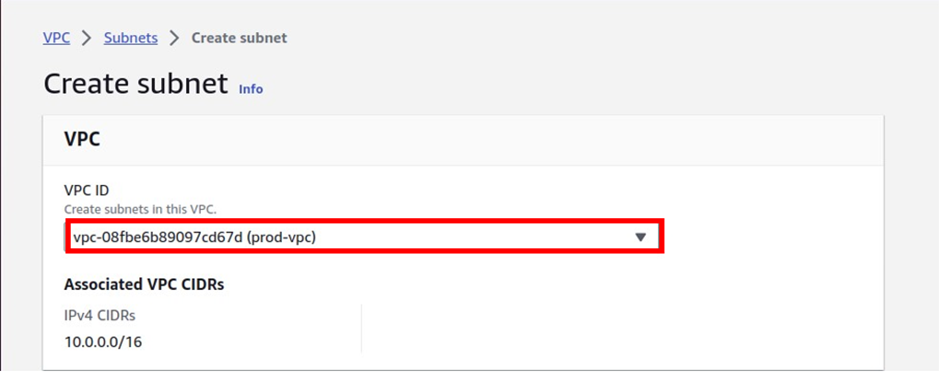
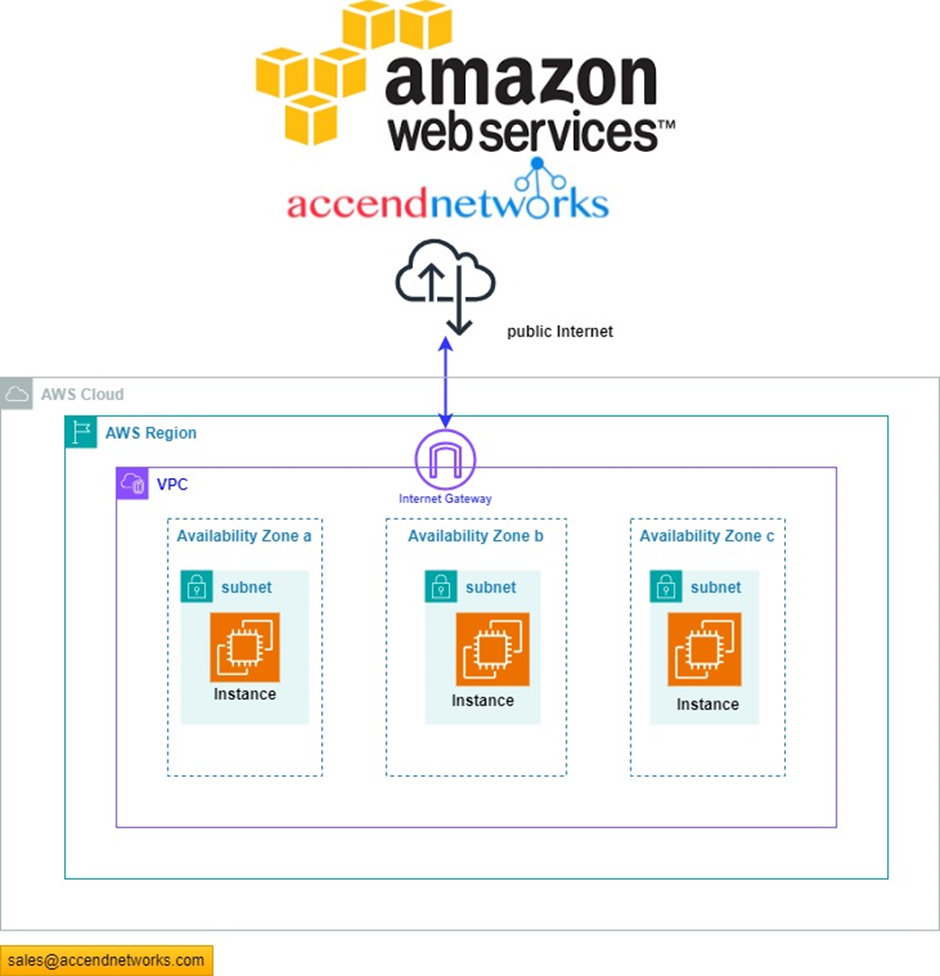
A VPC, virtual private cloud is a virtual network dedicated to your AWS account. It is logically isolated from other virtual networks in the AWS Cloud. You can specify an IP address range for the VPC, add subnets, add gateways, and associate security groups.
Subnets
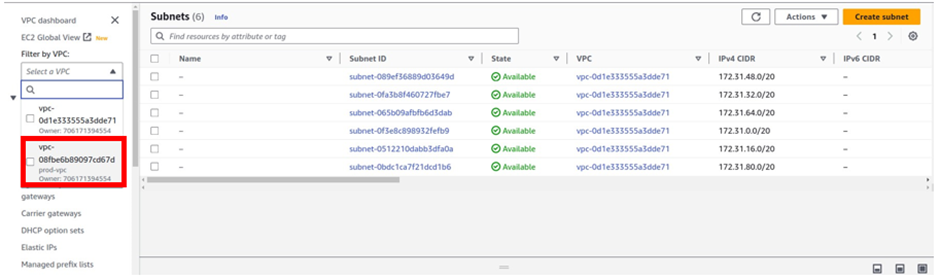
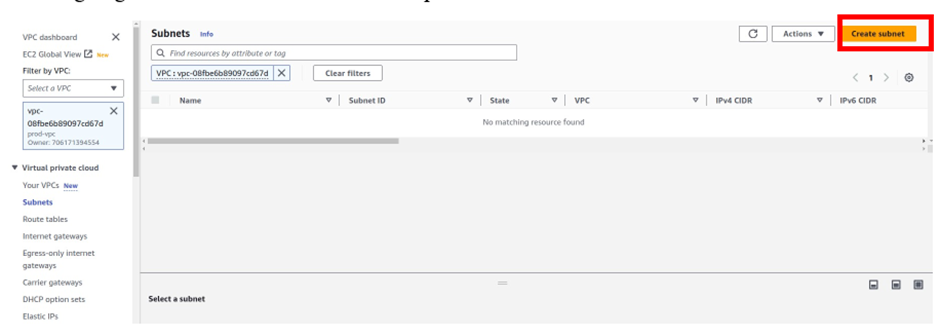
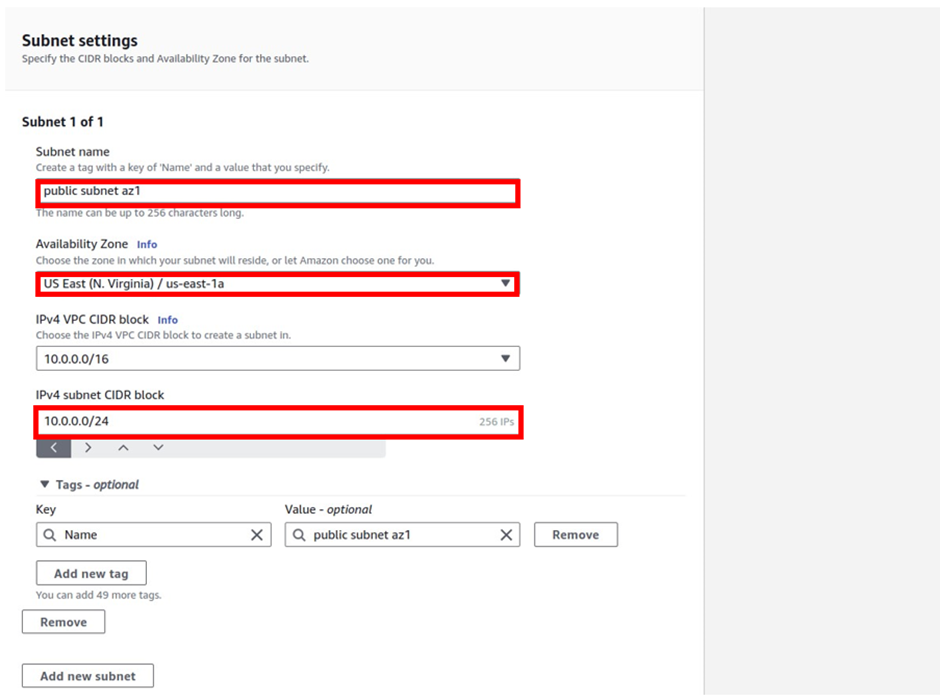
Allow you to partition your network inside your VPC. It’s a range of IP addresses in your VPC. You launch AWS resources, such as Amazon EC2 instances, into your subnets. Subnets are at the Availability Zone level.
You can connect a subnet to the internet, other VPC’s, and your own data Centers, and route traffic to and from your subnets using route tables.
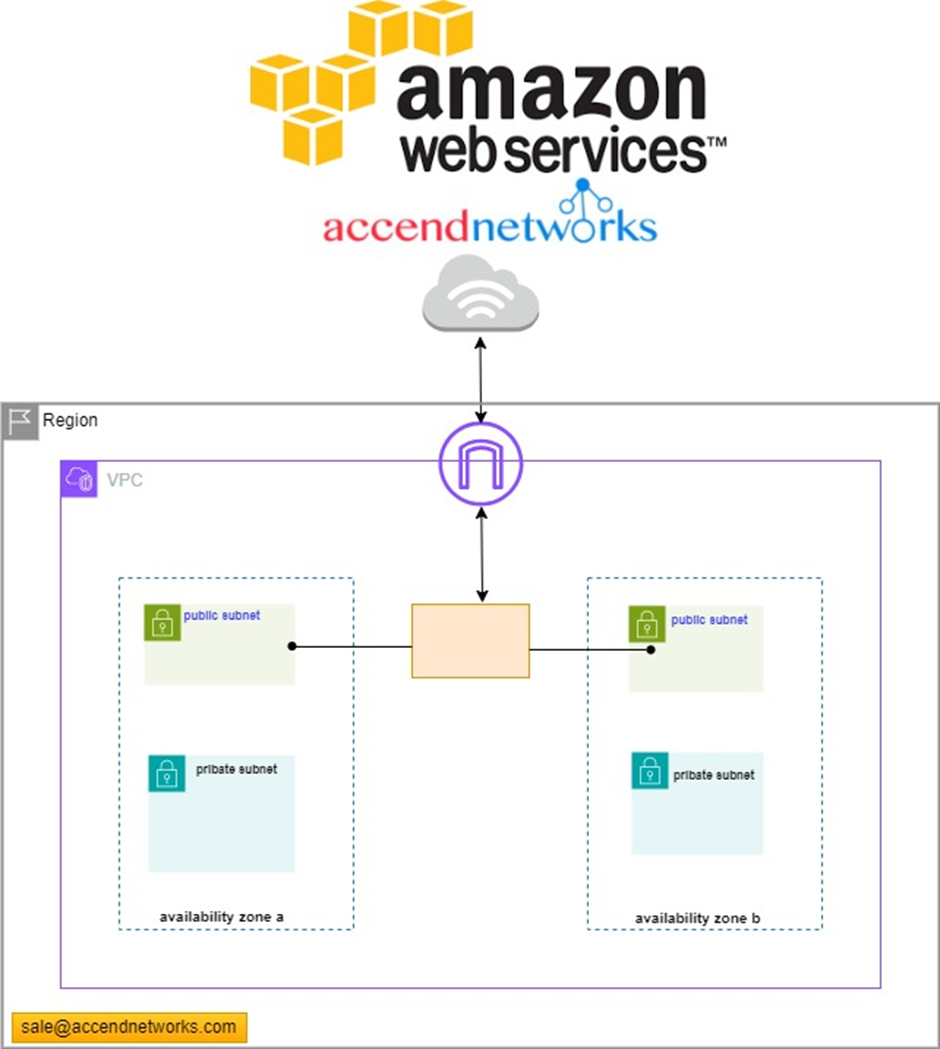
A public subnet is a subnet that is accessible from the internet
A private subnet is a subnet that is not accessible from the interne
To define access to the internet and between subnets, we use Route Tables.
Route tables
A route table contains a set of rules, called routes, that are used to determine where network traffic from your VPC is directed. You can explicitly associate a subnet with a particular route table. Otherwise, the subnet is implicitly associated with the main route table.
Each route in a route table specifies the range of IP addresses where you want the traffic to go (the destination) and the gateway, network interface, or connection through which to send the traffic (the target).
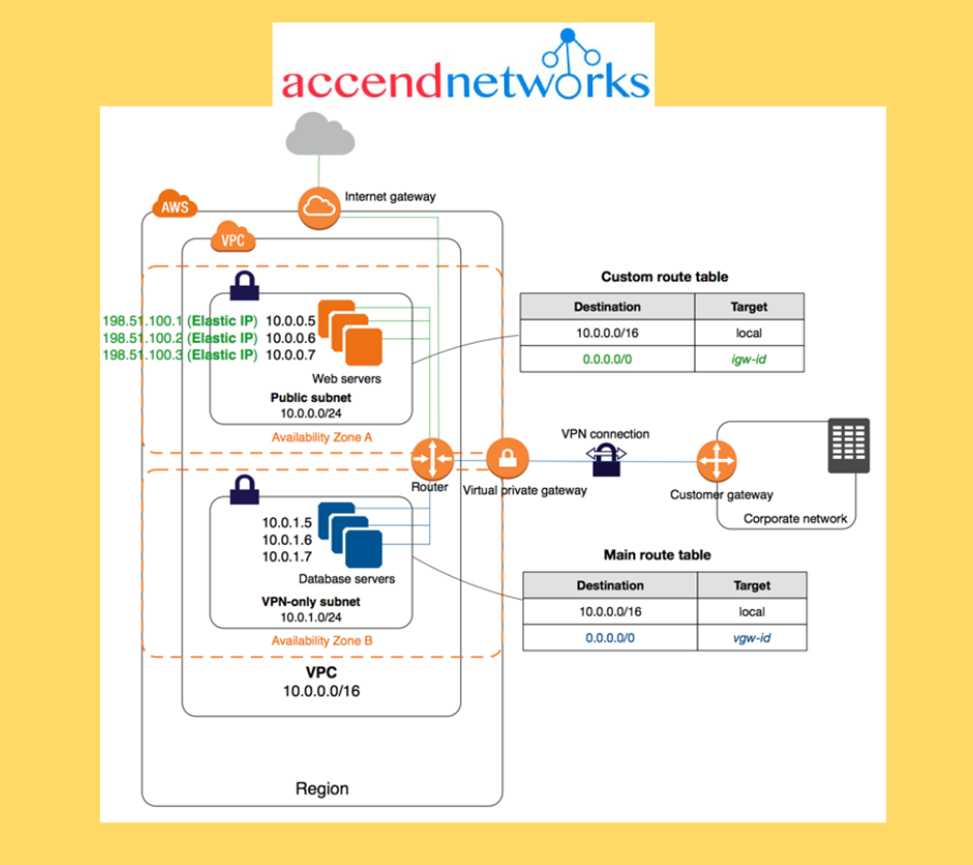
Access the internet
You control how the instances that you launch into a VPC access resource outside the VPC.
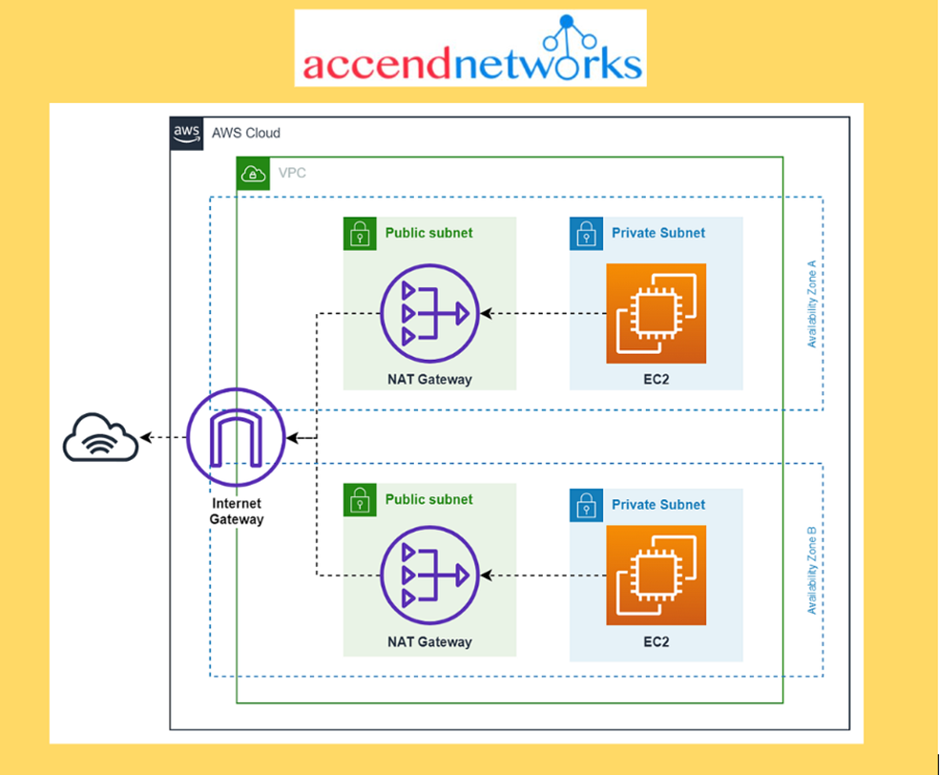
Internet Gateway and NAT Gateways
Internet Gateways help our VPC instances connect to the internet
Public subnet has a route to the internet gateway
NAT Gateways (AWS managed) and NAT Instances (self-managed) allow your instances in your Private Subnets to access the internet while remaining private.
NAT Gateways allow an instance in your VPC to initiate outbound connections to the internet but prevent unsolicited inbound connections from the internet. NAT maps multiple private IPv4 addresses to a single public IPv4 address. You can configure the NAT device with an Elastic IP address and connect it to the internet through an internet gateway. This makes it possible for an instance in a private subnet to connect to the internet through the NAT device, routing traffic from the instance to the internet gateway and any responses to the instance.
A default VPC includes an internet gateway, and each default subnet is a public subnet. Each instance that you launch into a default subnet has a private IPv4 address and a public IPv4 address. These instances can communicate with the internet through the internet gateway. An internet gateway enables your instances to connect to the internet through the Amazon EC2 network edge.
By default, each instance that you launch into a nondefault subnet has a private IPv4 address, but no public IPv4 address, unless you specifically assign one at launch, or you modify the subnet’s public IP address attribute. These instances can communicate with each other, but can’t access the internet.
You can enable internet access for an instance launched into a nondefault subnet by attaching an internet gateway to its VPC.
If you associate an IPv6 CIDR block with your VPC and assign IPv6 addresses to your instances, instances can connect to the internet over IPv6 through an internet gateway. Alternatively, instances can initiate outbound connections to the internet over IPv6 using an egress-only internet gateway.
IPv6 traffic is separate from IPv4 traffic; your route tables must include separate routes for IPv6 traffic.
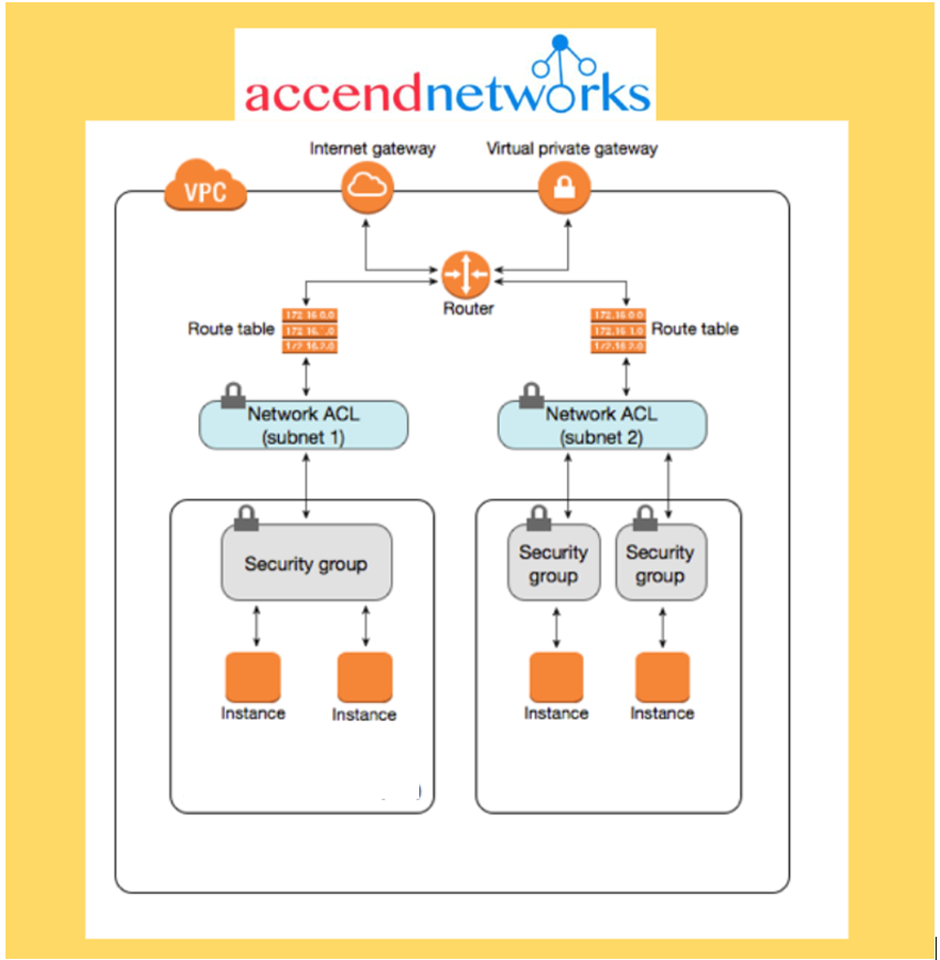
NACL (Network ACL)
A firewall that controls the traffic from and to the subnet (i.e., the first mechanism of defence of our public subnet)
Can have ALLOW and DENY rules
Are attached at the Subnet level
Rules only include IP addresses
To establish internet connectivity inside a subnet:
The network ACLs associated with the subnet must have rules to allow inbound and outbound traffic — The network access control lists (ACLs) that are associated with the subnet must have rules to allow inbound and outbound traffic on port 80 (for HTTP traffic) and port 443 (for HTTPS traffic). This is a necessary condition for Internet Gateway connectivity
Security Groups
A firewall that controls the traffic to and from an Elastic network interface (ENI) or an EC2 Instance (i.e., a second mechanism of defense)
Can only have ALLOW rules
Rules can include IP addresses as well as other security groups.
Egress-Only Internet Gateways
VPC component that allows outbound communication over IPv6 from instances in your VPC to the Internet, and prevents the Internet from initiating an IPv6 connection with your instances.
You cannot associate a security group with an egress-only Internet gateway.
You can use a network ACL to control the traffic to and from the subnet for which the egress-only Internet gateway routes traffic.
VPC Flow Logs
Capture information about network traffic: VPC Flow Logs, Subnet Flow Logs & Elastic Network Interface Flow Logs
DHCP Options Sets
Dynamic Host Configuration Protocol (DHCP) provides a standard for passing configuration information to hosts on a TCP/IP network.
You can assign your own domain name to your instances, and use up to four of your own DNS servers by specifying a special set of DHCP options to use with the VPC.
Creating a VPC automatically creates a set of DHCP options, which are domain-name-servers=AmazonProvidedDNS, and domain-name=domain-name-for-your-region, and associates them with the VPC.
DNS
AWS provides instances launched in a default VPC with public and private DNS hostnames that correspond to the public IPv4 and private IPv4 addresses for the instance.
AWS provides instances launched in a non-default VPC with a private DNS hostname and possibly a public DNS hostname, depending on the DNS attributes you specify for the VPC and if your instance has a public IPv4 address.
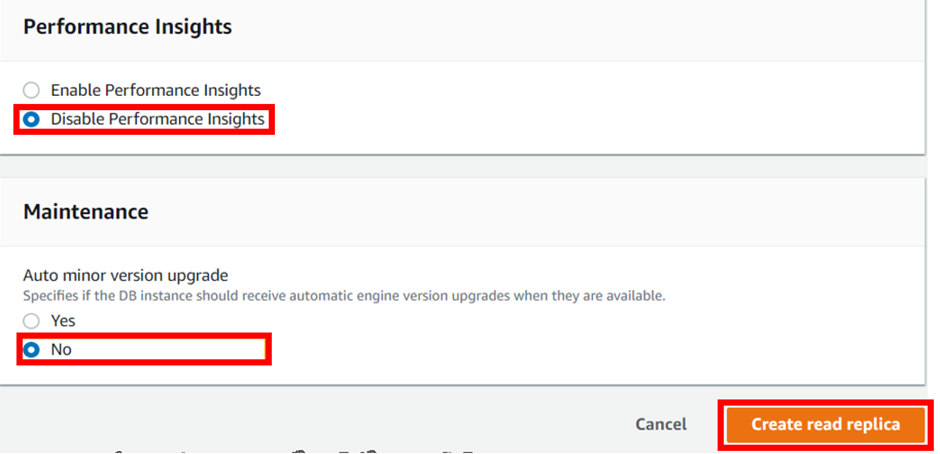
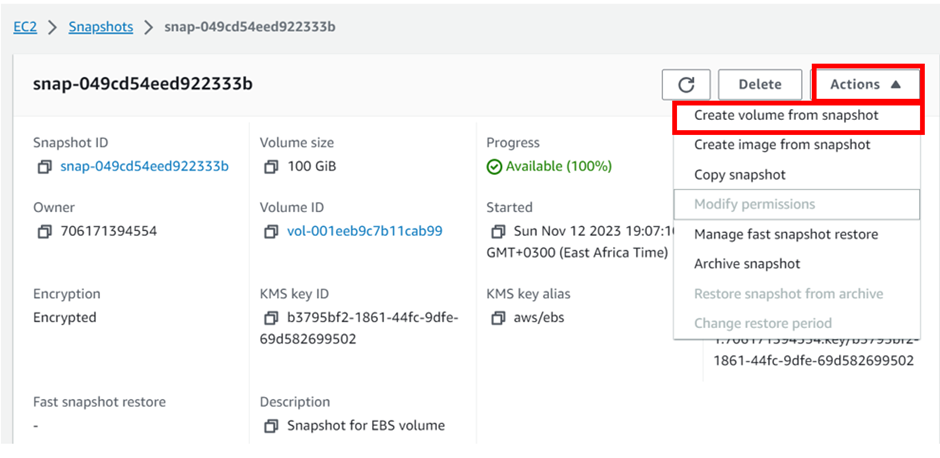
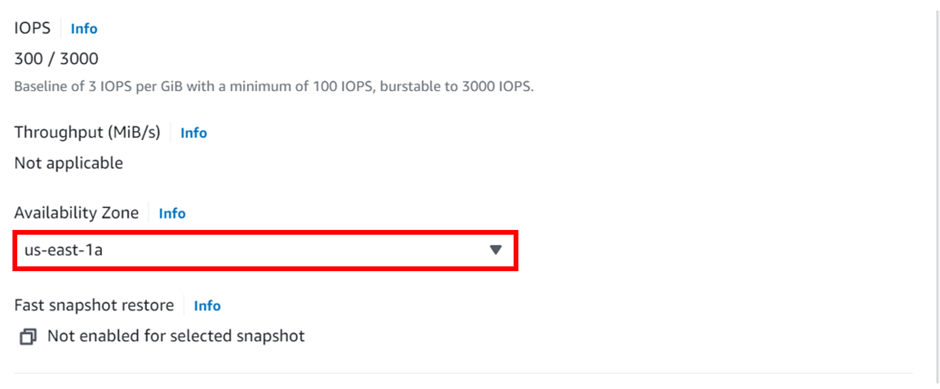
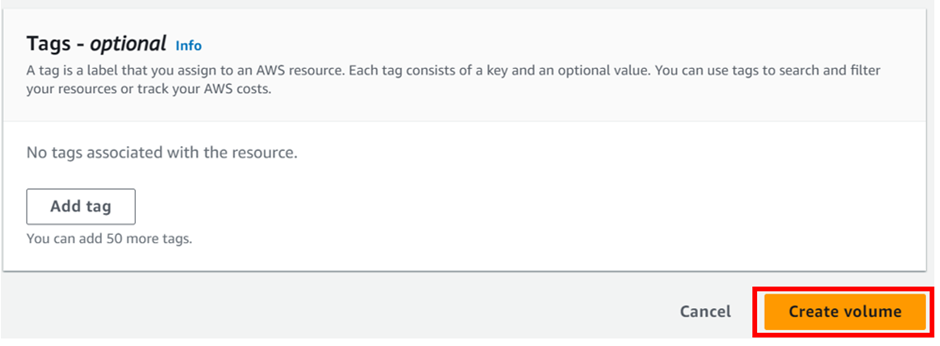
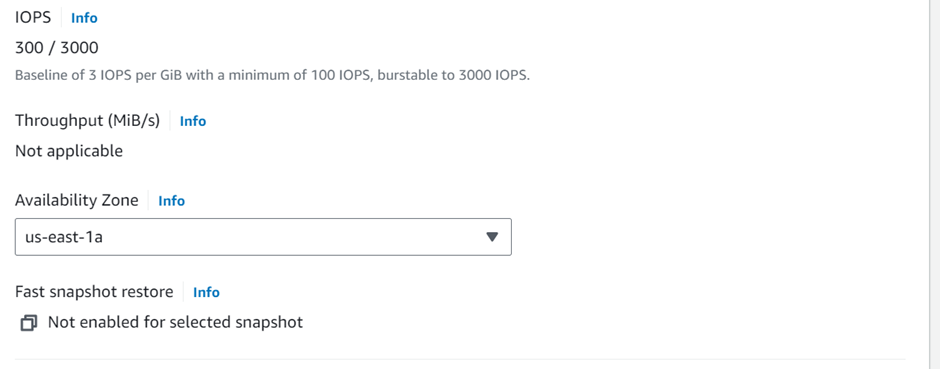
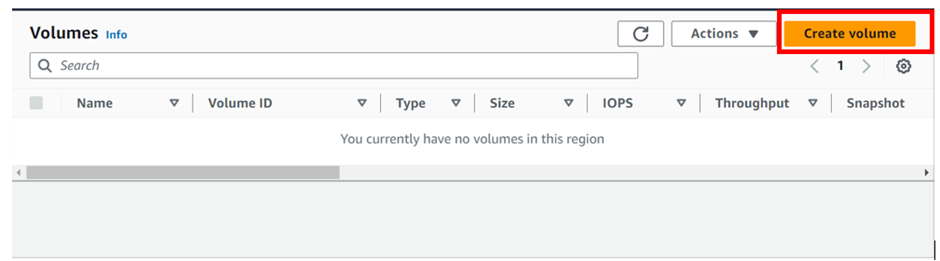
From the Settings, click on “Create Volume.”
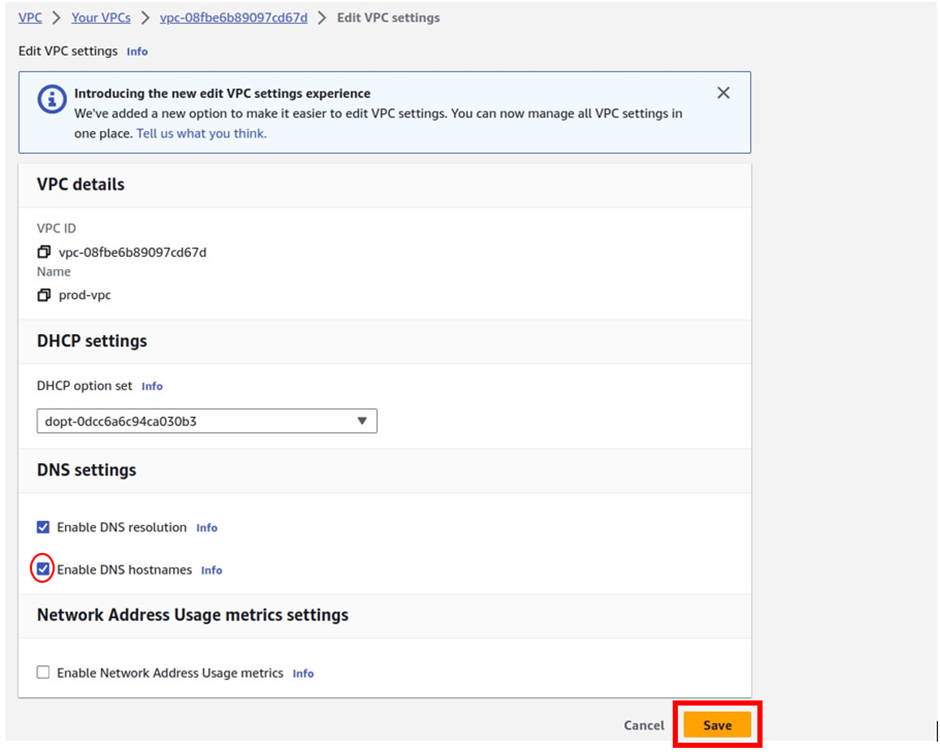
Set VPC attributes enableDnsHostnames and enableDnsSupport to true so that your instances receive a public DNS hostname and the Amazon-provided DNS server can resolve Amazon-provided private DNS hostnames.
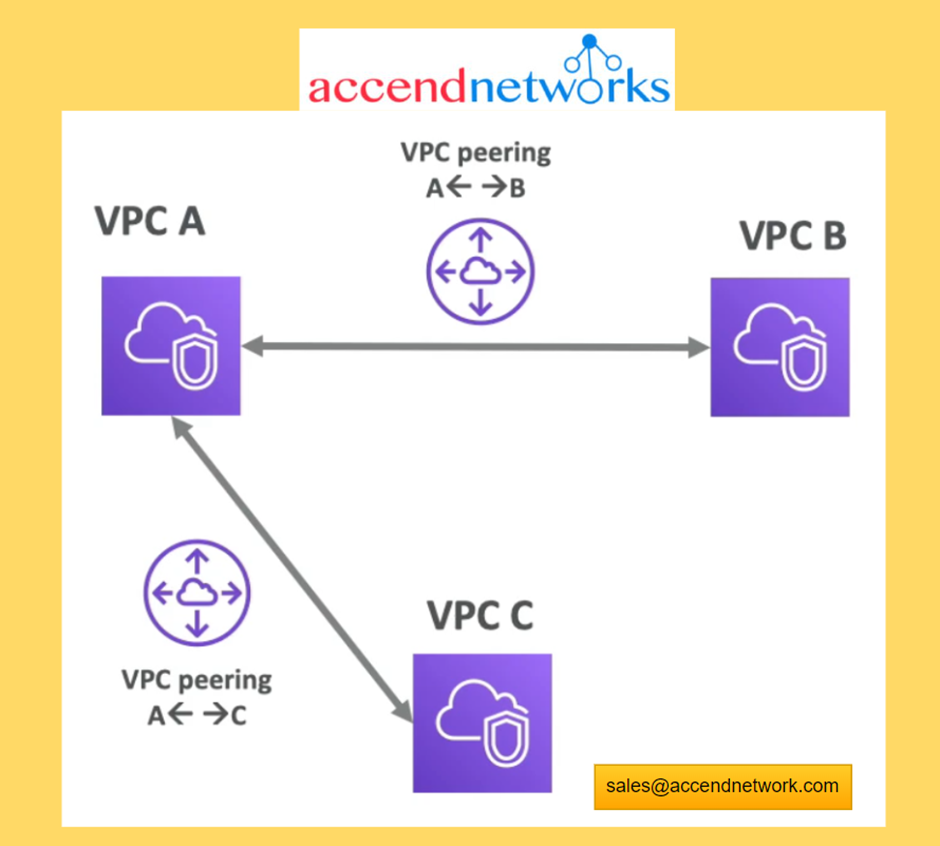
VPC Peering
Connect two VPC’s privately using the AWS network
Make them behave as if the two VPC’s are in the same network.
We do this by setting up a VPC peering connection between them.
The two VPC’s must not have overlapping CIDR (IP address range)
VPC Peering is not transitive. If we have a peering connection between (VPC A and VPC B) and (VPC A and VPC C) this does not mean that VPC C can communicate with VPC B (this means there is no transitivity)
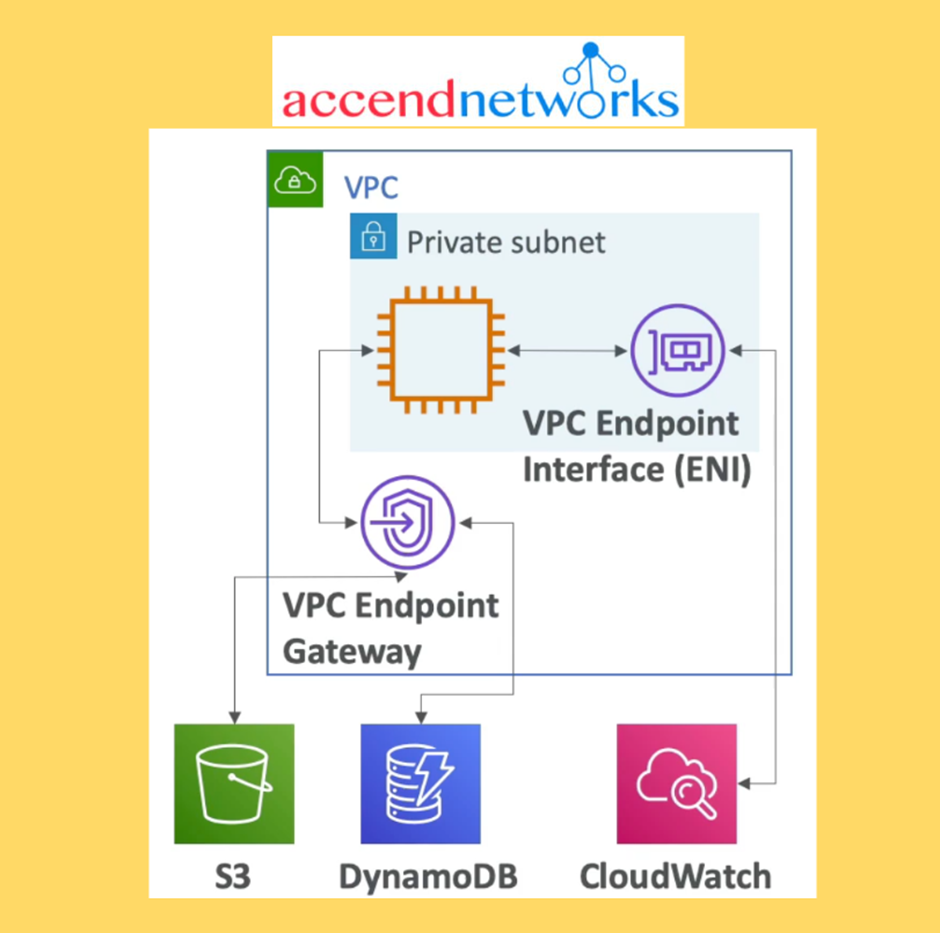
VPC Endpoints
Use when you need private access from within your VPC to an AWS services
Endpoints allow you to connect to AWS services using a private network instead of the public network.
This gives you increased security and lower latency to access AWS services
Use VPC Endpoint Gateway for S3 and DynamoDB. Only these two services have a VPC Gateway Endpoint (remember all the other ones have an Interface endpoint (powered by Private Link — means a private IP).
Use VPC Endpoint Interface for the rest of the services
Site to Site VPN & Direct Connect
Site-to-Site VPN: On-premise VPN to AWS over the public internet. The connection is automatically encrypted
Direct Connect (DX): Establish a private secure and fast physical connection between on-premise and AWS
Stay tuned for more.
If you have any questions concerning this article or have an AWS project that requires our assistance, please reach out to us by leaving a comment below or email us at. sales@accendnetworks.com
Thank you!